By William E. Welsh
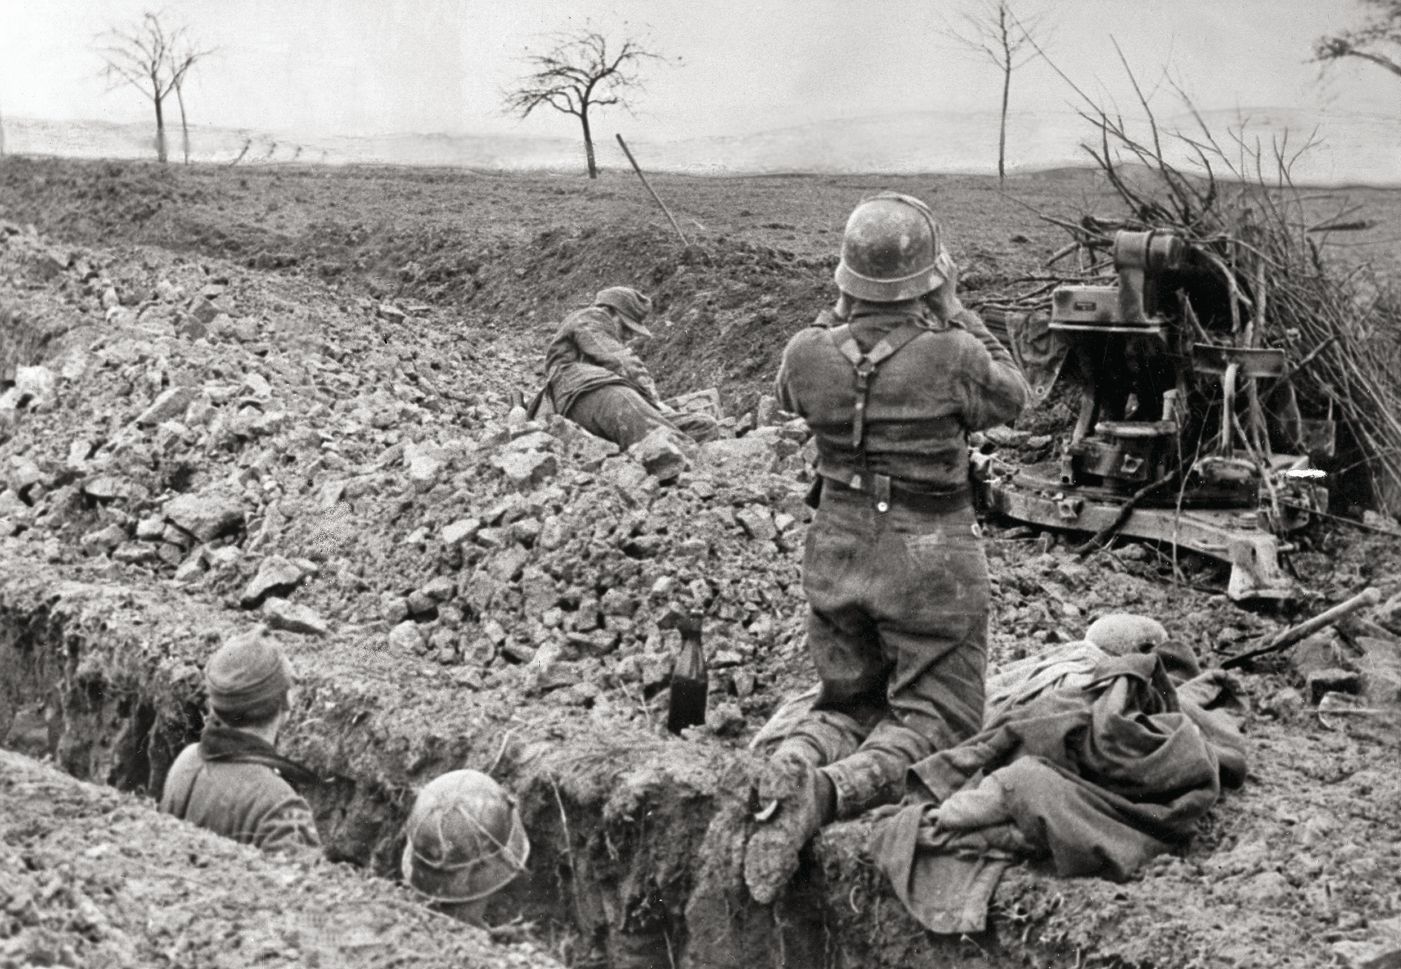
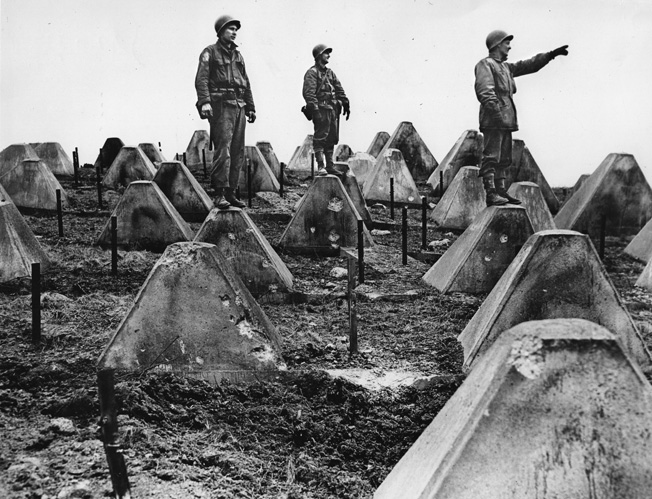
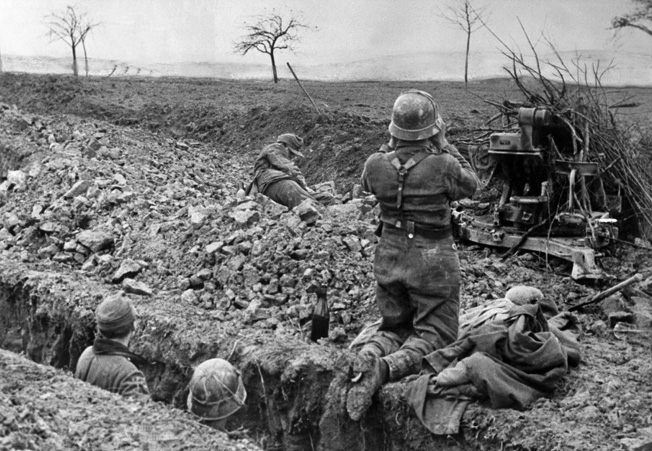
The portion of the Siegfried Line guarding the Saar industrial region of Germany proved a sinister gateway into western Germany for Lt. Gen. George Patton’s Third Army in late 1944. By the time Patton’s troops arrived at the fortified line, the German engineers had improved it to the point that it was the strongest section of the entire 390-mile fortified zone. Advancing from the west in late November, Patton’s troops first encountered antitank ditches and “dragon’s teeth.” The “teeth,” which were concrete foundations containing four or five rows of concrete pimples, deterred tanks and vehicles from accompanying infantry into the maze of pillboxes and bunkers that lay beyond. Patton would not be deterred, however, and the Saar Offensive was set to commence.
Patton’s First Offensive in Lorraine: Disaster at Fort Driant
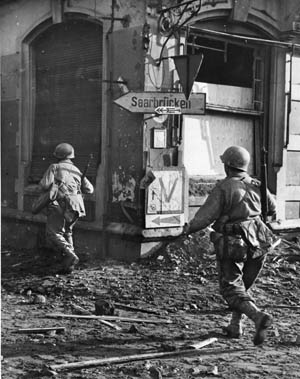
Fearing a French attack through that sector, German leader Adolf Hitler had visited Saarbrücken, one of the cities that would be integrated into what the Germans preferred to call the West Wall, in October 1938 to announce the pending construction of the Aachen-Saar section. Twice in a five-year period, with the initial effort in 1939 and 1940, and then a second effort in 1943 and 1944, when the Germans sensed that a full-scale Allied advance into Germany was inevitable, laborers toiled to make this particular section of the West Wall formidable enough to give the Allies pause before entering it.
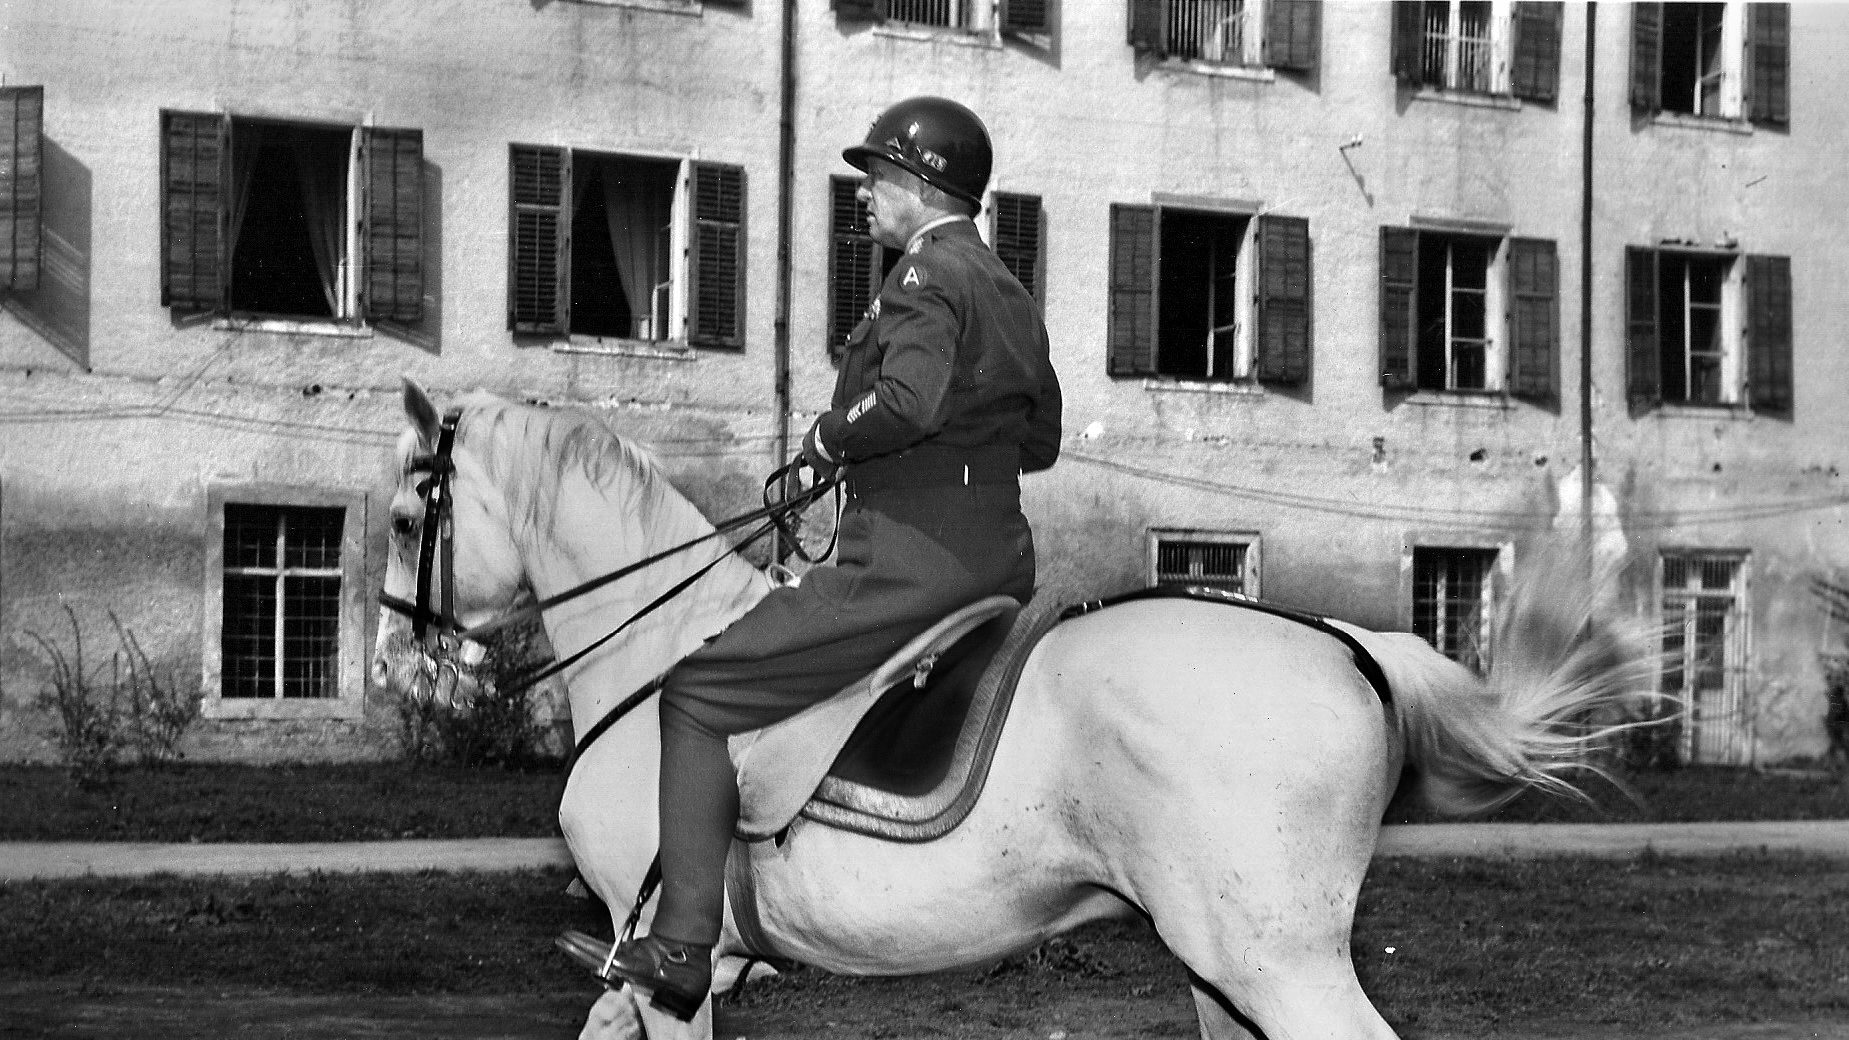
Patton’s 250,000-strong Third Army accepted the challenge with confidence; his troops had arrived in the French province of Lorraine on August 31. For nearly a month, “Old Blood and Guts” struggled to get his troops across the Moselle River. After a five-day lull in which it waited for gasoline shipments, Patton’s army launched its first full-scale offensive into Lorraine on September 5. The offensive’s main objective was to get Third Army’s two corps across the river in force.
Major General Manton Eddy’s XII Corps, on Patton’s right flank, managed to secure a bridgehead east of Nancy after a month of hard fighting. However, Maj. Gen. Walton Walker’s XX Corps found it impossible to establish a sizable bridgehead near Metz, because of the punishing long-range artillery from outlying enemy-occupied forts that disrupted his troops’ attempts.
Owing to a more protracted fuel shortage in October, Patton was forced to undertake small, isolated battles to correct his lines. Never willing to assume a purely defensive stance, Patton received permission from 12th Army Group commander Lt. Gen. Omar Bradley to chip away at the German lines in front of him where he saw fit. When troops from Maj. Gen. Leroy Irwin’s 5th Infantry Division suffered a particularly bloody repulse at Fort Driant during one of these limited attacks, Patton realized he must conduct a large-scale encirclement of Metz in his next full-scale offensive to avoid similar disasters that were bound to occur trying to clear the Metz forts one by one.
Advance on Metz: Patton’s Second Offensive
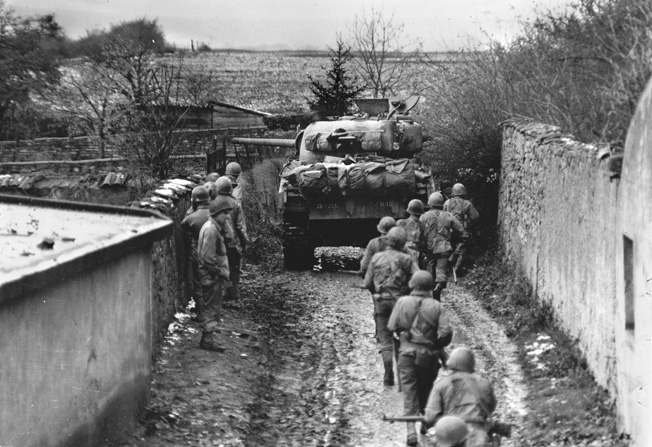
Third Army’s second major offensive in Lorraine began on November 8. At times, it seemed that Patton’s army had moved no faster than a man on crutches throughout the muddy countryside of Lorraine. Heavy rains had restricted the armor to roadways and mud-filled foxholes almost as soon as they were dug, making life miserable for the riflemen. As a result of the latter, non-combat casualties related to trench foot were recorded by the thousands and soldiers suffering from the condition had to be withdrawn from the front lines.
Third Army’s initial objectives for the new offensive were to strangle the German garrison at Metz on the left flank and push the Germans farther back toward the West Wall on the right flank. When Third Army completed its encirclement of Metz on November 19, leaving only mop-up operations inside the pocket, Patton’s corps and division commanders set about reorganizing their units for a final push to the West Wall.

Behind the front line, Patton gave orders for the 5th Infantry Division to besiege five forts inside the pocket whose garrisons refused to surrender. As for his other eight divisions, their new objective was to carve a corridor through the West Wall that would allow Third Army to push on to the Rhine River. It was a lofty objective, considering that the closest of Patton’s units were still more than a hundred miles from the fabled river.
Meanwhile, the German First Army under General of Panzer Troops Otto von Knobelsdorff slowly withdrew toward the West Wall. In the north, as a result of heavy fighting for Metz, the units on First Army’s right flank were highly disorganized. However, they had a shorter distance to retreat to the safety of the West Wall than those in southern Lorraine. Third Army’s reorganization for the second phase of the offensive lasted six days and its troops did not resume their march east on a broad front until November 25.
Much to Patton’s displeasure, Knobelsdorff’s First Army slipped east in good order. “Regrouping is a curse of war and a great boon to the enemy,” the American general said of the situation.
Two months earlier, units belonging to Lt. Gen. Courtney Hodges’s First Army had breached the West Wall in two places: Aachen and just north of Trier. With troops bogged down by the strongly defended pillboxes, American casualties soared. All implications were that Patton’s troops would find the going equally rough.
The Saar Offensive: Patton Invades
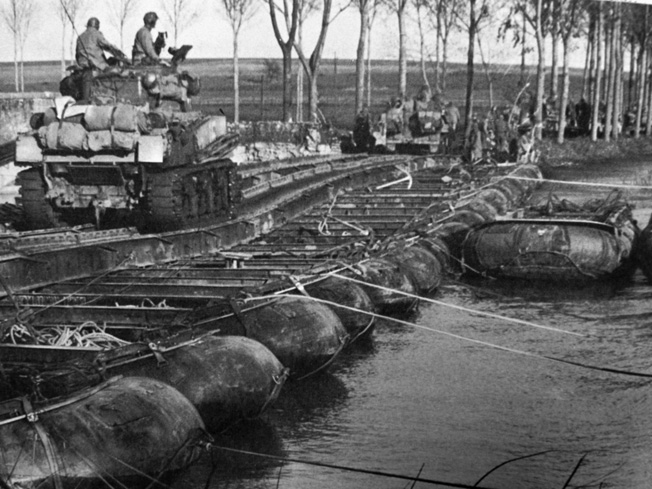
Third Army’s first order of business following the fall of Metz was to get its forces to the Saar River and probe for crossing points along a 30-mile stretch––from Saarburg in the north to Saarbrücken in the south. Once the best crossing points were determined, the army would cross the river in force to establish two bridgeheads, one to support each division.
Because the section of the West Wall protecting the Saar ran from southeast to northwest, Walker’s XX Corps on the left flank was much closer to the fortified zone than Eddy’s XII Corps on the right flank. Indeed, the lead elements of Maj. Gen. William Morris’s 10th Armored Division on XX Corps’ left flank already were facing after the capture of Metz, an east-west extension of the West Wall known as the Orscholz Switch Line (or Siegfried Switch). The switch was designed to prevent an enemy from racing north up through the triangle formed by the junction of the Moselle and Saar Rivers and, in so doing, outflank the double portion of the West Wall farther south.
South of the 10th Armored, Maj. Gen. James Van Fleet’s 90th Infantry Division advanced in XX Corps’ center, while Maj. Gen. Harry Twaddle’s 95th Infantry Division pressed forward on the corps’ right flank. Patton initially hoped that Morris would be able to cross the Saar River at Saarburg, which lay within the Moselle-Saar Triangle. If that effort failed, the main effort would shift south where Twaddle was to hurdle the Saar at the road and rail hub of Saarlautern and then turn north to clear a crossing point for Van Fleet’s division.
Owing to the collapse of the German line around Metz and to the shorter distance to the West Wall in their sector, Walker’s troops faced less resistance from enemy forces in front of them than that experienced by Eddy’s division on the right flank.
For the Saar Offensive, Eddy’s five divisions would probe for crossings of the Saar at two key points. On Eddy’s left flank, abutting XX Corps, the 35th and 80th Infantry Divisions backed by the 6th Armored Division would advance on Sarreguemines, while on Eddy’s right flank, adjacent to Lt. Gen. Jacob Devers’s Sixth Army Group, the 26th Infantry Division and 4th Armored Division would push toward Sarre-Union.
The German First army
Knobelsdorff’s German First Army fell back in front of the weight of Third Army toward the West Wall. Keeping a close eye on Knobelsdorff, and frequently intervening in the direction of First Army’s divisions, was Army Group G commander General of Panzer Troops Hermann Balck. A member of the Nazi Party faithful and a decorated veteran of desperate battles on the Eastern Front, Balck instilled those under him a renewed sense of hope and confidence during the waning of the Third Reich.
After the fall of Metz, Knobelsdorff issued orders for German forces along the Maginot Line––the French fortified position facing Germany––to fall back to the Saar Heights. From there, the Germans might slow the Allied advance just enough to give those units on Knobelsdorff’s right flank sufficient time to entrench themselves in the Wall’s prepared positions.
The German First Army comprised three corps. First Army’s right flank, in the north, was held by General of Infantry Walter Hörnlein’s 82nd Corps. His right flank, within the Siegfried Switch, was anchored by General-Lieutenant Kurt Pflieger’s 416th Division, which had escaped the Metz fighting largely intact. In contrast, Colonel Karl Britzelmayr’s 19th Volksgrenadier Division, which held Hörnlein’s left flank at Merzig, had lost nearly 90 percent of its combat strength in the first half of November and had only 630 men left.
To ensure that the Americans would not punch right through the 19th Volksgrenadier, Balck received permission from Commander in Chief West Field Marshal Gerd von Rundstedt to commit the 21st Panzer and 25th Panzer Grenadier Divisions, both previously part of First Army but by then part of the German Army’s reserve, to the Merzig sector to buttress Britzelmayr’s infantry.
General-Lieutenant of the Waffen-SS Max Simon’s 13th SS Corps headquarters was responsible for First Army’s center at the West Wall above and below the key crossing of Saarlautern. Simon’s command consisted of remnants of General-Major Kurt Mühlen’s 559th Volksgrenadier Division and the 48th Division, both of which had seen hard fighting in early November and together numbered only 360 men after the fall of Metz. They were bundled into a kampfgruppe under Mühlen’s direction at Saarlautern. Simon also had remnants of the decimated 347th Division. Perhaps his strongest unit was General-Major August Wellm’s 36th Volksgrenadier Division. The reduced remnants of the once formidable 17th SS Panzer Grenadier Division held the ground farther south.
The last of the three corps in First Army was General of Infantry Gustav Höhne’s 89th Corps, posted on First Army’s left flank. It comprised the 361st Volksgrenadier Division and General-Lieutenant Wend von Wietersheim’s 11th Panzer Division, a unit that had distinguished itself throughout the fighting in Lorraine.
Probing Attacks on the German Flank
Although the second phase of Patton’s November offensive would not be in full swing until November 25, there were significant actions on the flanks of each army as armored divisions probed the German defenses. On Third Army’s left flank, the 10th Armored Division’s Combat Command A, led by Brig. Gen. Kenneth Althaus, reached the Siegfried Switch on November 20. The Siegfried Switch was manned by two rifle battalions and one machine-gun battalion belonging to Pflieger’s 416th Division.
Like other sections of the West Wall, the Siegfried Switch featured antitank ditches and dragon’s teeth as forward defenses. Behind these obstructions were various strongpoints, ranging from small pillboxes with several firing slits to large, multilevel bunkers. Althaus deployed his command along a six-mile front. On the left was Lt. Col. Miles Standish’s Task Force, and on the right was Lt. Col. Thomas Chamberlain’s task force.
Standish had orders to strike toward Tettingen, while Chamberlain advanced on Orscholz. With field howitzers blazing to pin the Germans in their positions, CCA’s armored columns rolled forward on November 21 against the outerworks of the Siegfried Switch. Both commanders subdivided their commands into two columns for the attack. Chamberlain’s right column, advancing on Orscholz, would have the most success that day. It fought its way to within nearly a mile of Orscholz until a hail of German mortar and artillery fire broke up the attack and forced the Americans to withdraw. Elsewhere, the attackers made no progress. Efforts to bridge the tank ditches or blow up the dragon’s teeth on the first day of fighting were disrupted by intense fire from enemy forces in pillboxes just behind the obstructions.
The two armored task forces regrouped after the first day’s fighting and renewed their attack on November 22 with limited success. The increased tenacity with which the Germans defended their positions on the second day was due in part to the arrival of the 21st Panzer Division.
Three Days of Combat For the 358th
After two days of unsuccessful fighting in which the Americans were able to penetrate the switch only to a distance of a half mile, Morris instructed the 358th Infantry Regiment of Van Fleet’s 90th Infantry Division, on loan to 10th Armored, to attack in the center of the switch the following morning. Colonel C.H. Clarke, the regimental commander, had orders to attack with his three battalions toward the towns of Müzingen and Sinz, which lay on the far side of the switch. Once the towns were in American hands, Morris planned to commit his armor to exploit the breach and race north through the Moselle-Saar Triangle.
On the first day of its attack, the 358th made good progress. A heavy fog that morning gave cover to the advancing Americans but also grounded tactical air support. Clarke sent his 1st and 2nd Battalions along a hogback ridge on the right flank while his 3rd Battalion pushed forward alone on the left flank. Because the town of Tettingen was protected by pillboxes that blocked all avenues of approach, 3rd Battalion skirted it to the east. Elements of the 3rd Battalion then attacked Tettingen from the rear, while other parts advanced on Butzdorf farther north. By day’s end, Clarke and his men were able to report steady progress, and a large number of prisoners from the pillboxes and trenches had been captured.
The following day, Clarke’s riflemen on the right flank ran into heavy resistance outside Oberleuken, a village that had to be secured as part of the advance on Müzingen. From a massive bunker outside Oberleuken, enemy machine guns raked the American ranks. While the 2nd Battalion engaged the Germans in the bunker, the 1st Battalion outflanked the bunker and entered Oberleuken, where the two sides fought house to house. On the left flank, the German infantry, armed with flamethrowers, counterattacked Clarke’s 3rd Battalion.
Despite tenacious resistance, Clarke’s 3rd Battalion was able to enter Butzdorf, a village on the path to Sinz. When German infantry, backed by tanks, counterattacked into Butzdorf, the men of Company K, 3rd Battalion, took cover in the cellars of the village in the late afternoon. Throughout the night, soldiers of the 21st Panzer Division methodically went from house to house using tank and bazooka fire against the entrenched Americans.
On the third day of fighting, the fog cleared and P-47 Thunderbolts shot across the sky, dropping napalm and fragmentation bombs on German staging areas in Müzingen and Sinz. A relief column backed by M4 Sherman tanks extracted 36 survivors of Company K from Butzdorf on the left flank, but by then the Germans had infiltrated behind 3rd Battalion’s lines into the village of Tettingen, and the Americans shelled the Germans with artillery and committed tanks to the battle to cover a general withdrawal on the left flank.
Heavy Casualties of the Third Army
Although Clarke’s 2nd Battalion was able to advance beyond Oberleuken, it suffered heavy casualties attempting to capture high ground south of Müzingen and also had to break off its advance. Clarke’s rifle battalions were able to penetrate the Siegfried Switch more deeply than Morris’s armored infantry, but they failed to clear a corridor that would allow the armor to break out into the Moselle-Saar Triangle.
Third Army suffered heavy losses at the Siegfried Switch. In particular, Clarke’s regiment suffered 60 percent casualties during three days of fighting at that position. Realizing that Morris did not have sufficient infantry resources to sustain a protracted fight at the switch, Patton ordered him to break off the action on November 26. Leaving the 3rd Cavalry Group behind to screen Third Army’s left flank, Morris redirected his armored columns toward the Merzig-Saarlautern section of the West Wall.
Panzer Lehr vs the 4th Armored Division
Eddy’s XII Corps was able to resume its advance east after the capture of Metz more quickly than Walker’s XX Corps because it did not have to mop up pockets of the enemy behind its lines. The Germans in front of Eddy’s corps still held key towns such as Falquemont and Dieuze that had to be secured before a general advance to the West Wall could begin. Once these objectives were captured, Patton told Eddy to rest his infantry while the armor probed enemy defenses for soft spots to exploit.
Although Eddy benefited from having two armored divisions under his command, he did not get along well with 4th Armored Division commander Maj. Gen. John Wood. The well-respected tank leader believed Eddy’s habit of sending the armor ahead of the infantry resulted in higher casualties for his command. Because of this, Wood and Eddy had clashed over the matter on several occasions. It was clear to both Patton and Eddy that something would have to be done to ensure Wood’s compliance with orders.
What that solution would be had not yet been decided when Eddy ordered Wood to capture the key town of Sarre-Union as a staging area for an attack against the West Wall on Third Army’s extreme right flank. When Eddy ordered Wood to drive his tanks northeast toward the objective, the feisty tank commander secured permission from an adjoining unit, Maj. Gen. Wade Haislip’s XV Corps, which lay outside Third Army’s area of operations, to take a more daring route to his objective that would turn the German right flank along the Saar River. Although the move was a sound one, Wood made the request without Eddy’s knowledge.
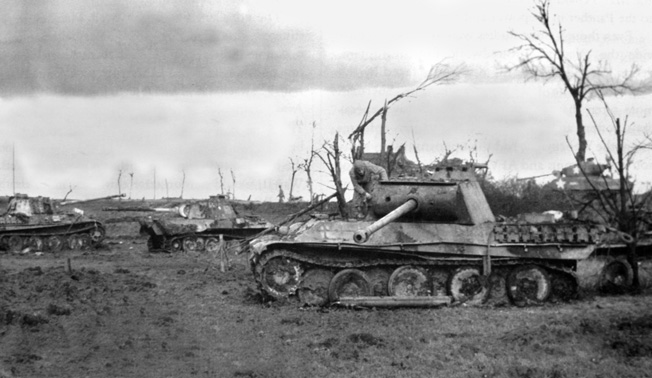
On November 24, the tanks and armored infantry of Wood’s Combat Command B overran the 361st Volksgrenadier Division guarding two key crossings of the Saar River south of Sarre-Union. Not far behind the 361st Division were German tank columns belonging to the veteran Panzer Lehr Division led by General-Lieutenant Fritz Bayerlein. CCB’s tank column clashed with Bayerlein’s panzer grenadiers at the village of Barendorf that afternoon, and it was clear that the following day would produce a major engagement between well-matched opponents.
CCB’s thrust upset Bayerlein’s attack against XV Corps. Rather than being able to strike Haislip’s units with two armored columns, Bayerlein was forced to redirect his western column to face Wood’s tanks and infantry at Barendorf. With a heavy mist concealing his advance on the morning of November 25, Bayerlein’s panzers counterattacked Wood’s CCB. Using the terrain to their advantage, CCB’s tank crews were able to inflict heavy losses on Panzer Lehr, forcing it to assume a defensive position after a long day of fighting.
For four more days the two sides sparred along the east bank of the Saar until Panzer Lehr suffered enough casualties for Balck to pull the division out of line and replace it with the 25th Panzergrenadier Division. By that point, Wood’s CCB had advanced to within about five miles of Sarre-Union.
Taking the Saar Heights
To the north, Twaddle’s 95th Infantry Division crossed into Germany on November 25 and prepared to attack enemy positions on the Saar Heights. The Germans were determined to make the Americans pay a heavy price for capturing the Saar Heights and shifted elements of the 21st Panzer and Panzer Lehr Divisions to the escarpment to greet the Americans with cold steel. The fighting was fierce throughout the day on November 29, with the Germans launching as many as 10 counterattacks against the Americans in an effort to keep them from clearing the heights and reaching the Saar River.
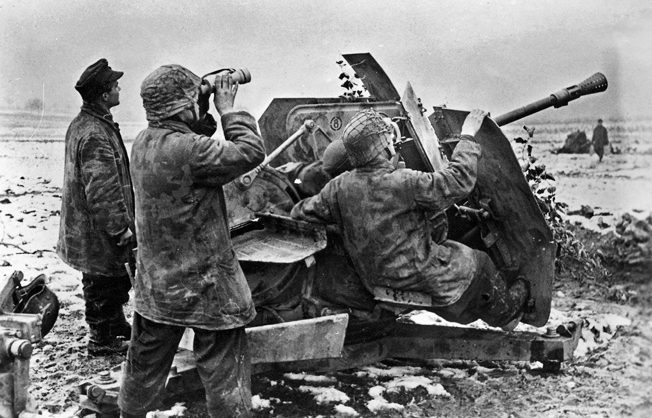
When elements of the 95th’s 377th Infantry Regiment secured the village of St. Barbara on the left flank, they set up a section of 57mm antitank guns on the eastern edge of the village in expectation of a German counterattack. They didn’t have long to wait. A kampfgruppe from the 21st Panzer Division slammed into the gun positions, captured two of the antitank guns, and forced the surviving Americans to seek cover in the village until reinforcements arrived. On the right flank, the 378th Infantry Regiment reached the village of Berus but a counterattack by a kampfgruppe from Panzer Lehr was so ferocious that the Americans fell back more than two miles to the village of Merten.
The fighting for the Saar Heights lasted 48 hours, with the Germans finally breaking off the action on the night of November 30 and pulling back to Saarlautern. To the north, Van Fleet’s 90th Infantry and Morris’s 10th Armored Divisions encountered far less resistance, and by November 30 both had closed up to the Saar.
The Battle For Sarre-Union
As Walker’s infantry in the north reached the Saar, Eddy ordered Maj. Gen. Willard Paul, commanding the 26th Infantry Division, to send his 101st Infantry Regiment to assist Wood’s 4th Armored Division in an all-out assault on Sarre-Union. The plan of attack was for Wood’s Combat Command B to attack from the east while the infantry attacked from the south. Soldiers of the 25th Panzergrenadier Division were entrenched on high ground north and east of the town, which they felt offered a better defensive position than the town itself. From there, the grenadiers would have a perfect staging area for counterattacking the Americans and could draw on the assistance of kampfgruppen from the 11th Panzer and Panzer Lehr Divisions.
On November 30, the 101st Infantry Regiment marched east, leapfrogged the Saar, and took up a position south of the town. The next day, American armor and infantry advanced simultaneously on Sarre-Union. Two rifle companies from the 101st were able to reach the town and take cover in its buildings. Several attempts to storm the heights north of the town were easily repulsed by heavy machine-gun fire and pretargeted mortar barrages. Unfortunately for the infantry, they were unable to receive armor support because Wood’s CCB had become engaged in a tank fight with a kampfgruppe from Panzer Lehr for a key position known as Hill 318 several miles east of the town.
The fighting at Sarre-Union was desultory the following day. But on December 3, a kampfgruppe from Wietersheim’s 11th Panzer Division rumbled toward Sarre-Union from the heights to the north, overrunning a five-gun antitank battery and forcing the American riflemen to take cover in cellars of the town’s buildings. While the riflemen hunkered down, American 105mm howitzers south of town poured more than 400 rounds on the German armor and half-tracks, forcing the Germans to retreat. To ensure that the Americans could hold Sarre-Union against any future counterattacks, Paul inserted a fresh regiment—the 104th—into the town to bolster his position.
General Wood Relieved
Although Patton admired the 4th Armored Division’s headstrong commander for his aggressiveness, he at last agreed with Eddy that Wood’s disruptive behavior could no longer be tolerated. “On the second [of December], it became evident that General Wood had to be sent home for a rest,” Patton wrote in his memoirs. The following day, Patton relieved Wood of his duties in the field and replaced him with Third Army’s chief of staff, Maj. Gen. Hugh J. Gaffey.
The Germans holding First Army’s left flank subsequently retreated north to new positions in the Maginot Line bunkers at Rohrbach-les-Bitche, where they awaited the inevitable follow-up attack by the Americans. Wood’s CCA would bear the brunt of the fighting over the next five days until such point as the entire 4th Armored Division was ordered to the rear to rest and refit. Its place in the line was taken on December 8 by Maj. Gen. R. Allen’s 12th Armored Division, which had been loaned to Patton from Haislip’s XV Corps.
Patton had granted permission for Eddy’s infantry divisions to rest on November 22 before resuming their advance toward the West Wall. Despite heavy fighting on Eddy’s extreme left flank, Maj. Gen. Horace McBride’s 80th Division had still not secured the town of Falquemont, where the two sides had been sparring for 10 days. In 48 hours of heavy fighting beginning November 25, McBride’s men finally secured the towns of Falquemont and St. Avold and cleared Germans from Maginot Line pillboxes. When the Germans inside the pillboxes refused to surrender, tank destroyers were brought forward to fire at point-blank range and kill the defenders.
After the three divisions on Eddy’s left flank—the 35th and 80th Infantry and 6th Armored Divisions—corrected their line, they began a concentrated push toward Sarreguemines. Using their artillery to maximum effect, the infantry drove remnants of the 36 Volksgrenadier and 17th SS Panzer Divisions before them as they pushed toward the West Wall. By December 7, both the 35th Infantry and 6th Armored were in position to attack German forces in Sarreguemines, a key town 10 miles south of the West Wall fortifications.
The following day, two regiments of Maj. Gen. Paul Baade’s 35th Infantry Division (the “Santa Fe” Division) crossed the Saar to establish a bridgehead on its eastern bank. The 320th Infantry Regiment crossed in assault boats, while the 134th used a semi-demolished railroad bridge south of Sarreguemines to effect its crossing.
A counterattack that afternoon by a kampfgruppe from Wietersheim’s 11th Panzer Division was smashed in 15 minutes by guns from nine field artillery battalions before it could inflict any substantial losses on Baade’s infantry.
Fighting For Habkirchen
To Baade’s south, Paul’s 26th Infantry Division fought its way through the Maginot Line where the Germans had retreated following the fall of Sarre-Union. As Paul’s 104th Infantry emerged from the Maginot Line on December 10, it tied in with Allen’s 12th Armored, which had forced the Germans from Rohrbach-les-Bitche to the east. By this time, Eddy’s infantry and Allen’s armor had crossed the border and were fighting the Germans on their own soil.
The American drive was marked by fits and starts. Once across the Saar, the advance of Eddy’s infantry divisions was slowed considerably in the following days by German artillery in superb positions on the east bank of the Blies River, a right tributary of the Saar, which constituted yet another barrier in Eddy’s march to the West Wall.
The intensity of the fighting on Third Army’s right flank was best exemplified by a grinding, three-day battle that Baade’s 35th Division fought trying to establish a bridgehead at the town of Habkirchen on the east bank of the Blies. When Baade’s engineers succeeded in laying a Bailey bridge across the Blies at that location on December 15, the division’s armored support was finally able to drive the Germans from the town.
By mid-December, the 26th Infantry had suffered so many losses that Eddy decided to send it to the rear to rest, refit, and absorb replacements. Taking the place of the 26th was Maj. Gen. Frank Cullin’s fresh 87th Infantry Division, which had moved up the front line from Metz. Cullin’s regiments would eventually reach the outerworks of the West Wall on December 16.
High Rate of Attrition For Patton’s Infantry
A problem that would plague Third Army throughout its attempts to penetrate the West Wall in December was the shockingly high rate of attrition in trained riflemen it was suffering. Because the riflemen bore the brunt of the fortress fighting at Metz and continued to do so at the West Wall, casualties soared in the infantry ranks. Many of Walker’s infantry battalions were at 55 percent combat strength by early December, and Eddy’s infantry was no better off.
Patton reported that Third Army was short 11,000 riflemen by the time he reached the outerworks of the West Wall in the Merzig-Saarlautern section. To compensate, Patton twice drafted 5 percent of the manpower from his corps and divisional staffs to serve as replacement riflemen for the front lines. The December 6 and December 15 drafts produced about 6,500 new riflemen; however, they were of poor quality because they lacked sufficient training. These troops were parceled out to the 26th Infantry Division of Eddy’s XII Corps, and also to the 90th and 95th Infantry Divisions of Walker’s XX Corps.
Taking the Bridge at Saarlautern
Third Army’s most determined attempt to breach the West Wall occurred on Walker’s right flank. By the end of November, Twaddle’s 95th Division had cleared German resistance from the Saar Heights and stood poised to descend into the Saar Valley where its commander planned to send his men into the sprawling city of Saarlautern.
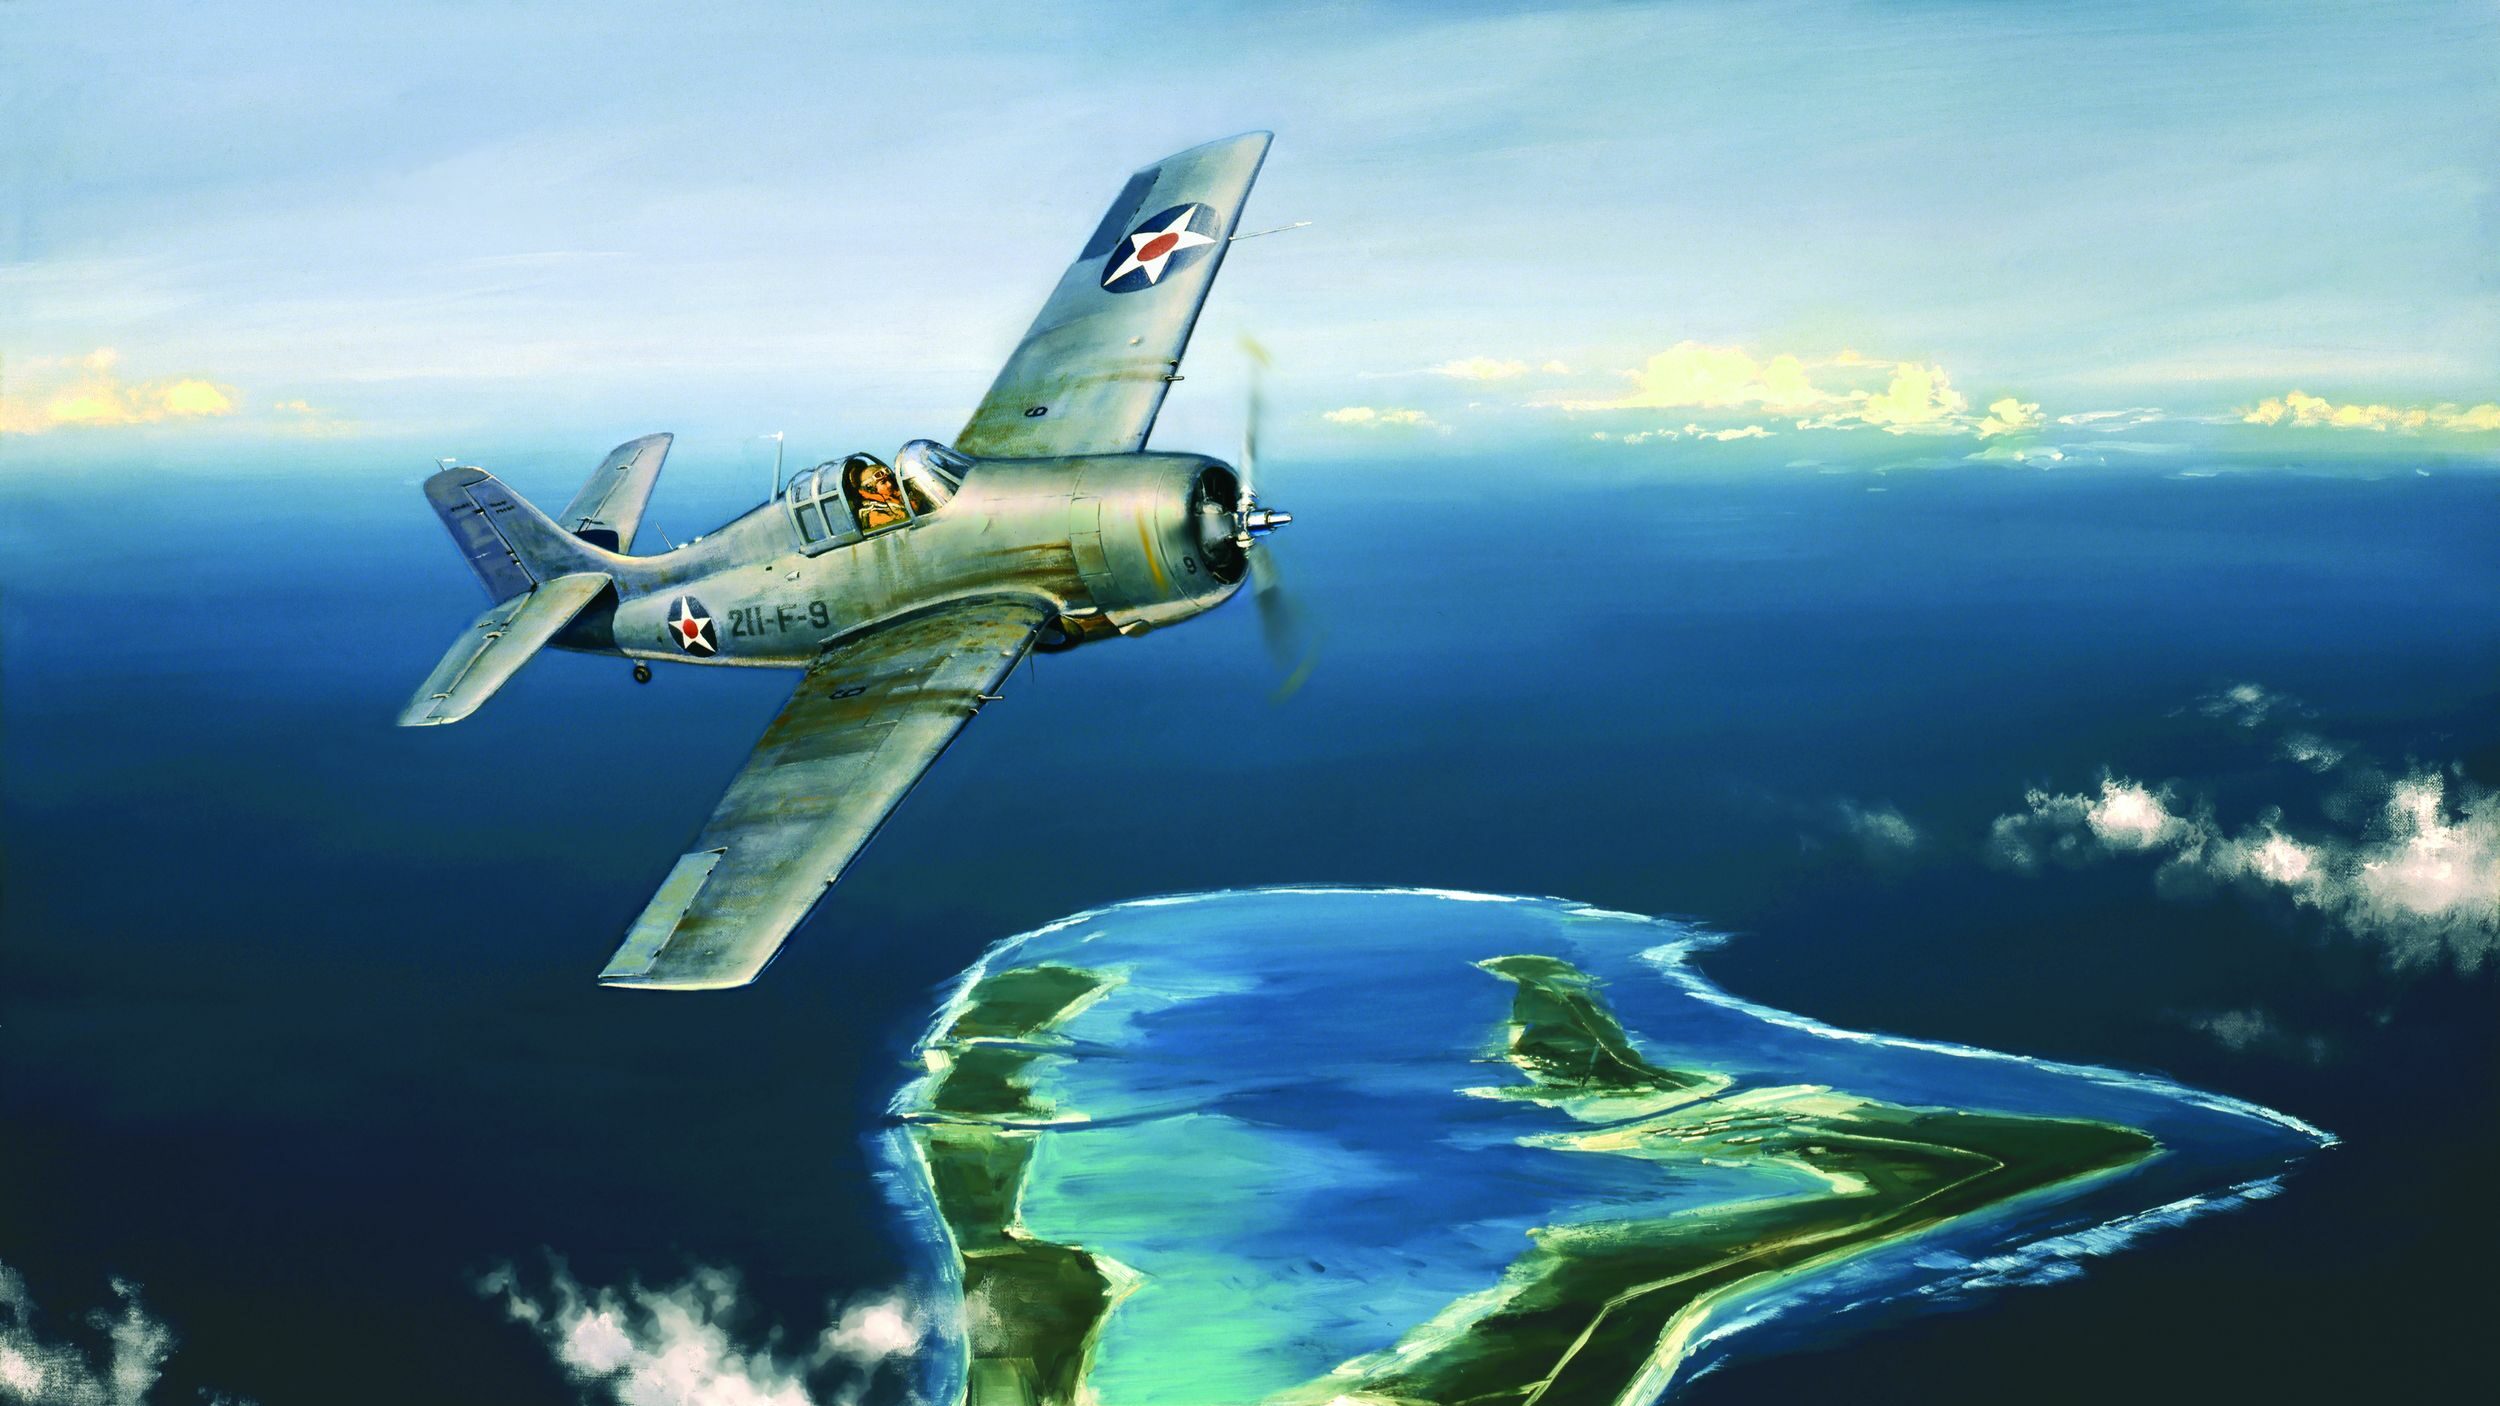
Fortunately for Twaddle’s men, the western portion of Saarlautern lay outside the West Wall fortifications. This meant that they would be able to clear the city’s west side and establish themselves a base from which to try to push their way into the eastern edge of the town, which the Germans had incorporated into the fortified zone, and also to launch attacks against other nearby suburbs also integrated into the West Wall. Twaddle’s 378th and 379th Regiments reached the Saar River on December 1 and scouted potential crossings. While they scouted the river, wave upon wave of B-24 Liberators pounded German defenses on the eastern side of town.
The following day, an American reconnaissance plane found an intact bridge over the Saar and radioed the information to the ground commanders. Twaddle immediately ordered Colonel Robert Bacon to send a battalion of his 379th Regiment across the river in assault boats to seize the far end of the bridge. As this was taking place, another battalion fought its way to the close end of the structure and captured it. As soon as the bridge was in American hands, Bacon sent a company of tank destroyers across the bridge to expand the bridgehead and brace for an inevitable counterattack.
In a desperate attempt to damage the bridge and prevent further crossings, the Germans loaded several tanks with explosives and rolled them toward the bridge. These efforts failed and the Americans were able to clear the Germans from two nearby bunkers overlooking the bridge.
The German Defenders Reorganize
The outerworks of the West Wall that Twaddle’s division encountered at Saarlautern consisted of mines and multiple rows of barbed wire, in some places to a depth of a mile, and pillboxes clustered together to provide mutual fire support. South of the city, the outerworks were flush against the Saar, but in the vicinity of the captured bridge the fortified zone began about three-quarters of a mile back from the river.
Five miles behind the river was a second fortified line to which the Germans might withdraw if the first line was breached. Although the West Wall had substantial limitations—poor communications infrastructure, shortage of anti-aircraft guns, and small mounts that could not handle guns larger than 75mm—these shortcomings were offset by the frequent fog and low clouds that made it difficult for the Americans to conduct aerial reconnaissance and provide regular air support.
On December 3, Twaddle continued to funnel more infantry battalions into the narrow bridgehead he had established in western Saarlautern. He also ordered the 3rd Battalion, 378th Infantry to cross the Saar below the main city and begin attacking German positions in Ensdorf, a suburb of Saarlautern.
Following a lull in the fighting, the Germans counterattacked the Saarlautern bridgehead with a meager force of two infantry companies and a handful of tanks the following day. The attack was easily repulsed with the assistance of tank destroyers inside the bridgehead and heavy guns on the opposite bank of the Saar. Enraged that the Americans had gained a foothold in Saarlautern, Balck sacked Knobelsdorff the same day, replacing him with General of Infantry Hans Obsterfelder, who was deemed a better defensive tactician than his predecessor.
As for Balck, he was in the midst of a protracted struggle with Rundstedt for control of key armor and artillery assets being used by First Army to prevent Patton from breaking through the West Wall. At the beginning of December, Rundstedt had ordered Balck to transfer Panzer Lehr, 11th Panzer Division, and 401st and 404th Volksartillerie Corps to Army Group B defending the Ruhr industrial area. The two commanders eventually reached a compromise on December 5 in which Balck agreed to transfer Panzer Lehr and the 401st to Army Group B, but retain the 11th Panzer and 404th for First Army’s defense of the West Wall in the Saar sector.
The Fortifications of Saarlautern
Twaddle’s men quickly became bogged down in Saarlautern. As they pushed their way toward the eastern suburbs of the city, the infantry battalions ran into thick clusters of pillboxes. Progress under these circumstances was measured not in fractions of miles advanced, but rather in a small number of pillboxes cleared each day.
The task facing Twaddle’s 94th Division was a substantial one. The Germans had fortified all three eastern suburbs of the city: Ensdorf to the south, Fraulautern to the east, and Saarlautern-Roden to the north. The divisional commander sent one of his regiments into each of the three suburbs. By December 7, Twaddle had managed to get two armored battalions—the 778th Tank Battalion and the 607th Tank Destroyer Battalion—across the Saar to support the infantry in the bridgehead on the east bank.
The pillboxes, which were the central feature of the West Wall defenses, were placed to cover key roads and were also constructed in empty spaces between buildings or homes in urban areas. The typical pillbox was manned by a machine-gun team, which received supporting fire from riflemen stationed nearby. Patton’s men used everything they had––including bazookas, flamethrowers, and demolition charges––to knock out the crews inside the pillboxes.
The Germans launched frequent counterattacks and also infiltrated behind American lines into pillboxes already cleared. Patton’s men quickly learned to weld shut the doors to prevent the enemy from reoccupying the pillboxes. Although the German units in the Saarlautern sector conducted piecemeal attacks against the Americans, they nevertheless retained their morale and only small numbers surrendered.
The 378th Infantry would have the most difficult time of the 95th’s regiments. Each time the engineers attempted to throw a pontoon bridge across the Saar opposite Ensdorf, German artillery destroyed it before vehicles and supplies could be brought across. Nevertheless, the riflemen were able to work their way beyond the barbed wire and begin clearing the suburb one block at a time. To the north of Ensdorf, the 377th Infantry was able to clear and secure half of Fraulautern after three days of intense fighting once the tanks and tank destroyers reached the east bank on December 7. Despite such success, however, the Germans were able to hold the shoreline along the Saar between Fraulautern and Ensdorf, thereby prohibiting the linking of the Saarlautern and Ensdorf bridgeheads.
With the 95th engaged in brutal urban fighting for control of Saarlautern’s suburbs, Patton toured the main city on December 14 to see firsthand the nature of the fighting at the West Wall. The general noted on his tour that the houses in the city were constructed at their base with thick concrete that enabled the Germans to easily transform them into strongpoints. “Nearly all of the houses I inspected on either side of the river in Saarlautern were actually forts,” Patton wrote in his memoirs.
A Mile-Long Front
North of Fraulautern, the 379th fought desperately to secure a foothold in Saarlautern-Roden, managing to clear about a half of that suburb before the 379th and the 377th were relieved by elements of Irwin’s 5th Infantry Division moving up to the front lines on December 17. Patton chose to leave the 378th in place at Ensdorf until it could secure a pontoon bridge that would make relieving the regiment a more practical undertaking. After more than two weeks of hard fighting in Saarlautern and its suburbs, Twaddle’s division reported capturing nearly 150 pillboxes and 1,250 defended buildings.
A short distance north of Saarlautern, Van Fleet’s 90th Infantry Division was making preparations as early as December 2 to cross the Saar near the towns of Pachten and Dillingen. Pachten bordered the Saar on its east bank, and Dillingen was located a short distance to the southeast.
Walker’s original plans for establishing a bridgehead for his corps on the east bank of the Saar called for Twaddle’s division to swing north and clear the east bank of the Saar so that Van Fleet’s division could cross unopposed, but the strength and depth of the West Wall outerworks above and below Saarlautern made it impossible for a rapid advance in either direction.
While the 95th Division to the south was expanding the Saarlautern bridgehead in preparation for an attack on the city’s three suburbs, Van Fleet on December 6 began sending across elements of his 357th and 358th Infantry Regiments to establish their own bridgehead on the east side of the Saar. On the right flank, elements of the 358th managed to slip past several pillboxes guarding the approaches to Pachten and reached the western end of the town.
On the left, the 357th attacked toward the Huttenwald, a forested ridge, in a move designed to block enemy forces moving south to reinforce Pachten and Dillingen. Engineers toiled through the night to build pontoon bridges, but the muddy conditions prevented them from anchoring the structures on the banks.
Fearing an American breakthrough, Balck planned to reinforce the southern end of the Merzig-Saarlautern section of the West Wall with the 719th Infantry Division, a fresh division just moved in from Holland, and elements of the 11th Panzer Division to contain Van Fleet’s bridgehead on the east bank of the Saar. The 719th, although not a first-rate division, had a large complement of organic artillery and was backed by elements of Wietersheim’s 11th Panzer Division.
On the second day of Van Fleet’s offensive, elements of the 719th backed by a small number of Panzer Mark IVs counterattacked the 3rd Battalion, 358th Infantry in Pachten, slowing the regiment’s advance. While Van Fleet’s long-range guns pounded the Germans in the town, the 1st Battalion, 358th Infantry crossed the Saar opposite Dillingen and began assaulting enemy positions there. By the end of the second day, the 90th Division’s front stretched for more than a mile—from Dillingen in the south to the Huttenwald in the north. To maintain the expanding front, Van Fleet was forced to commit his reserve regiment, the 359th, to the expanding battle.
Putting Pressure on the 358th at Pachten
The cold, wet spell that had plagued Third Army throughout its time in Lorraine continued as the Americans tried valiantly to break through German positions at the West Wall. Van Fleet’s riflemen shivered day and night in foxholes and slit trenches half-filled with water on the east bank of the Saar as they beat back one counterattack after another by German units determined to throw them back across the river.
On Van Fleet’s exposed left flank, about 600 soldiers from the vanguard of the 719th Division, backed by a dozen tanks, crashed into the front lines of the 357th Regiment on December 8. American artillery firing from the safety of the west bank eventually broke up the attack, but not before a platoon from the 357th had been overrun and annihilated.
On the southern end of the bridgehead, a kampfgruppe from 21st Panzer attacked the forward positions of the 358th Infantry at Pachten, putting pressure on both ends of Van Fleet’s battle line.
For the next several days the situation grew increasingly grim for Van Fleet’s division, despite the commitment of his reserve regiment. During the early hours of December 9, the 359th landed in assault boats on the east bank and turned south to throw its weight against Germans occupying the salient that divided the two isolated bridgeheads established by the forces already engaged.
Unknown to the Americans, additional elements of the German 719th Division were being fed into the Huttenwald, and the 719th began setting up dozens of long-range guns to hammer the Americans on the east bank of the Saar. By midday, the Germans were pouring heavy artillery and mortar fire into the ranks of both the 357th and 359th from the high ground of the Huttenwald. As if that weren’t bad enough, German troops in two large concrete bunkers inside the salient dividing Van Fleet’s two bridgeheads continued to hold out, despite repeated attempts by soldiers of the 359th Infantry to neutralize them.
Making the situation even more miserable, the weather deteriorated on December 10. The precipitation alternated between rain and snow, precluding any possibility of air support to the troops inside Van Fleet’s beleaguered bridgeheads. With all of the 719th Infantry now having arrived at the battlefront, the Germans began attacking along the entire length of the American line. Unlike the Americans, who had only established footbridges and had to ferry across vehicles and antitank guns, the German infantry had at their disposal nearly 100 artillery pieces of various caliber and also armored support.
The Americans weathered strong attacks throughout the day, and on the following day Van Fleet ordered his regiments to pull back from exposed positions. On December 12, Van Fleet’s troops finally were able to open a corridor linking the northern and southern bridgeheads at Pachten-Dillingen when riflemen from the 359th cleared and captured one of the bunkers that had proved so resistant to American artillery fire and talked the defenders of five adjacent pillboxes into surrendering.
That same day, the 90th Division’s engineers were able to ferry across a company of tanks and a company of tank destroyers to strengthen the 357th Infantry and enable it to engage the Germans on more equal terms.
Planning a New Offensive
The initiative in the Pachten-Dillingen sector swung back to the Americans on December 15. On that date, the 358th and 359th Infantry Regiments launched a coordinated attack against Dillingen following a bombardment with phosphorus rounds from 4.2-inch chemical mortars designed to burn the enemy out. With the support of some of the tanks and tank destroyers transferred from the left flank, the American infantry was able to break the German main line around the city and begin the slow work of isolating and destroying individual pillboxes. German resistance in the sector waned considerably when Balck received orders to transfer more units, the 404th Volksartillerie and the 21st Panzer Division, to other parts of the Western Front.
When it became evident in early December that Walker’s infantry had little prospect of rapid success in the Merzig-Saarlautern section of the West Wall, Patton began to consider alternate tactics. The cornerstone of his new plan was a massive aerial bombardment that would soften up the enemy for a fresh offensive slated for December 19.
To plot the air strikes, Patton met with Maj. Gen. Hoyt S. Vandenberg, commander of the IX Air Force, on December 6. A sense of urgency surrounded the planning for the new offensive because Patton feared his resources might be transferred to British Field Marshal Bernard Montgomery’s 21st Army Group for another attempt to cross the Rhine in the north. “While my attack was going forward by short leaps, it was not very brilliant, and I felt that if I failed to break through after the air blitz, I would have to go on the defensive and lose several divisions,” Patton noted in his memoirs.
“What the Hell, We’ll Still be Killing Krauts.”
The plans for a new offensive that would capitalize on air strikes to help breach the West Wall in the Saar were shelved permanently when the Germans struck the thinly defended VIII Corps sector of Lt. Gen. William Simpson’s Ninth Army, which was adjacent to Third Army’s left flank, in the Ardennes on the morning of December 16. It would become known in the West as the Battle of the Bulge.
Three weeks earlier, Patton had fretted that the static front held by Maj. Gen. Troy Middleton’s VIII Corps was an open invitation to the Germans to attack. “The First Army is making a terrible mistake in leaving the VIII Corps static, as it is highly probable the Germans are building up east of them,” Patton wrote in his diary on November 25.
It took a commander with a keen mind like Patton’s to foresee threats to adjacent forces, and the prescient Patton had detailed his staff four days before the German attack to sketch plans for a counterattack north by Third Army should the Germans punch through Middleton’s line. These plans would prove invaluable to the Allies in countering the German thrust through the lightly defended Ardennes in the second half of December.
In response to the German attack into the Ardennes on December 16, Bradley’s 12th Army Group chief of staff, Maj. Gen. Leven Allen, phoned Patton that night and conveyed orders for Patton to send Morris’s 10th Armored Division north from its position opposite Merzig to help contain the breakthrough. “I protested very strongly,” Patton wrote. He told Allen that Third Army had paid a high price for its gains in the Merzig-Saarlautern sector and that withdrawing key forces would be tantamount to relinquishing the initiative to the Germans. Nevertheless, he complied with the order.
Within 48 hours of the German attack, Patton drove north to Luxembourg to confer in person with Bradley about how to strike back at German forces in the Ardennes. The commander of the 12th Army Group bluntly told Patton that he would have to transfer half of his command north as soon as practical. Finally appreciating the severity of the situation and resigned to going on the defensive in Lorraine, Patton said, “What the hell, we’ll still be killing Krauts.”
The End of the Third Army’s Saar Offensive
Having already drawn up plans for just such a situation, Patton told Bradley that in addition to the 10th Armored, he could have three more divisions––the 4th Armored, 26th Infantry, and 80th Infantry––all moving north within the next 24 hours. Rather than place them under the command of Eddy and his war-weary staff, Patton planned to put them under the direction of Maj. Gen. John Milliken and his III Corps headquarters staff, which had joined Third Army in October but had not yet played an active role in the fighting in Lorraine.
On December 19, Eisenhower arrived to consult with Bradley and Patton on the situation. Eisenhower wanted Patton to commit six divisions, but Patton said that he would lose the element of surprise if he waited for two more divisions to reach the point of attack. Patton stated that he could counterattack as soon as December 22 if he were allowed to do so with the smaller force of four divisions. Ike understood the logic, and Patton proceeded to Luxembourg to establish a new headquarters from which to direct his forces.
The withdrawal of the bulk of Eddy’s XII Corps from the West Wall in the Saarbrücken sector necessitated a redrawing of the boundary between Bradley’s 12th Army Group and Devers’s Sixth Army Group. Eisenhower and the two army group commanders involved agreed that Walker’s XX Corps would remain for a time in the Merzig-Saarlautern sector, but Devers would extend his army group’s northern boundary to a point midway between Saarlautern and Saarbrücken. Rather than leave Third Army overextended, Walker’s troops abandoned their bridgeheads in the vicinity of Saarlautern and withdrew to the safety of the west bank. With those developments, Third Army’s involvement in the Saar Offensive drew to a close.
What Caused the Third Army’s Sluggishness in Lorraine?
A number of factors contributed to Third Army’s protracted battle in Lorraine. One factor was that Patton had, from the outset, misjudged the enemy’s morale, which remained strong despite obvious shortcomings in manpower, training, and war-fighting equipment.
Another factor was Patton’s persistence in spreading out his forces—both in trying to cross the Moselle River in September and also in trying to punch through the West Wall in December—in hopes of finding a hole or weak spot in the enemy line. Instead, he should have concentrated his divisions in one powerful column to overwhelm the Germans in a specific location. Still another factor was the acute shortage of riflemen as Third Army’s infantry had to carry the weight of the battle on its shoulders both in reducing the Metz forts and also in attempting to clear the outerworks of the West Wall.
One factor completely beyond Patton’s control was the dismal weather. Exceptionally heavy rains over the three and a half months that Third Army fought in Lorraine produced flooded rivers, soggy terrain, and record numbers of trench foot cases among the infantry in their wet, freezing foxholes. Largely restricted to roads, the armor was unable to exploit opportunities that arose.
Lorraine was certainly not the high point of Patton’s career, for he relished the swift advance and despised costly set-piece battles. The proof is in the numbers. It took Patton’s troops more than three months to advance 60 miles at the cost of 50,000 troops.
Nevertheless, during the static slugfest, Patton’s Third Army wore down the enemy, which suffered 180,000 casualties trying to prevent one of the most aggressive Allied commanders from achieving a breakthrough on the southern end of the Western Front. Unable to maneuver around the enemy’s main force, Patton’s Third Army had no choice but to trade punches with the German First Army until the German counterattack in the Ardennes put an end to the fighting in Lorraine.
This is Part Three of a Three Part look at Patton’s Lorraine Campaign. Click here for parts One and Two.
Good article learned new facts about the fighting by Patton
Very good article.
Is there a part Four ?
About Allied activity in that region of Germany?
I was a member of 5th infantry division from Utah beach to Czechoslovakia. I am 101 years old.