By David H. Lippman
“So this is the Eastern Fleet,” ran Vice Admiral Sir James Fownes Somerville’s signal. “Never mind. Many a good tune is played on an old fiddle.”
It was March 31, 1942, and good humor was almost Britain’s only defense against Japan’s seemingly inexorable advances in the Pacific Rim. Since Japan had attacked Pearl Harbor on December 7, 1941, her forces had overrun Hong Kong, Malaya, Singapore, the Dutch East Indies, and Burma. Now the Imperial Japanese Navy and Army were heating up for an assault on India, the jewel in the British imperial crown.
The Japanese had confounded Western observers and experts with their superb aircraft, offensive spirit, and coordinated tactics, which sent Britain’s most modern battleship, HMS Prince of Wales, to the bottom of the ocean three days into the war and captured Singapore after 70 days of victorious fighting. Now they beat upon the gates of India.
The Battle-Tested Japanese Fleet Against an Aging Royal Navy
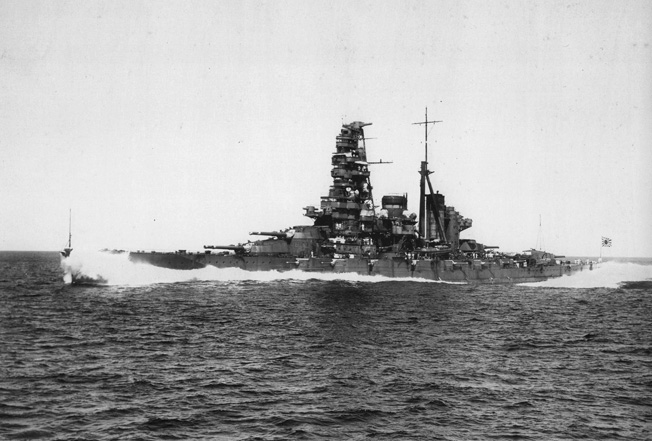
Roaring up from an air raid that had destroyed the north Australian port city of Darwin was Vice Admiral Chuichi Nagumo’s First Air Fleet of five tough carriers, all veterans of Pearl Harbor—only the Kaga was missing, having suffered the indignity of grounding—with roughly 300 planes, four battleships, three cruisers, and 11 destroyers. The Nagumo task force was to stage a massive raid on the British Indian Ocean convoy routes, disrupt the flow of supplies in the Bay of Bengal, and neutralize the British Eastern Fleet. Nagumo was backed by Vice Admiral Jisaburo Ozawa’s separate task force, which consisted of the light carrier Ryujo, seven cruisers, and 11 destroyers, assigned to strike convoys in the area.
Nagumo’s task force was a veteran outfit, and its pilots had scored victories at Pearl Harbor, Wake, Darwin, and the Dutch East Indies. Against this the British had to send in a second-string team. On paper, the British Eastern Fleet was a tough outfit: three carriers, five battleships, seven cruisers, and 14 destroyers, based out of Ceylon. Closer inspection showed serious flaws in the fleet.
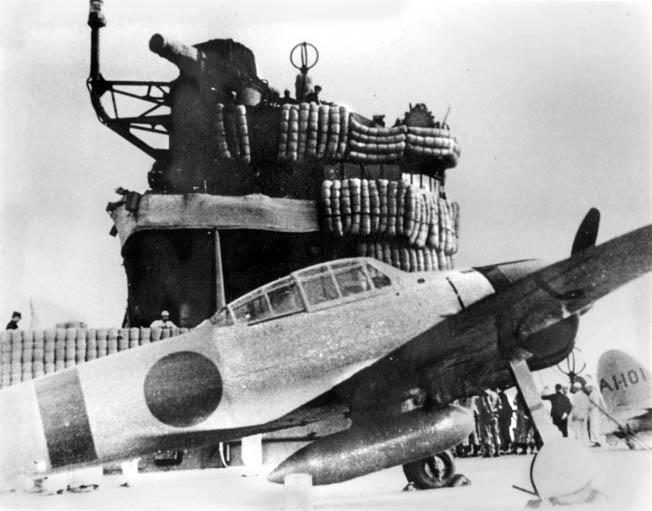
Of the three carriers, two were new—HMS Formidable and HMS Indomitable. Neither carrier was fully worked up and they were operating obsolete aircraft compared to the Japanese and their nimble Zero fighter. Between them, they had 45 Fairey Albacore torpedo bombers and 33 fighters, the latter consisting of 12 Grumman F4F Martlets (the export version of the American Wildcat), 12 Fairey Fulmars, and nine Hawker Sea Hurricanes.
The third carrier, HMS Hermes, was one of Britain’s oldest, completed in 1923, and could not keep up with the other two. She carried only 15 obsolete aircraft.
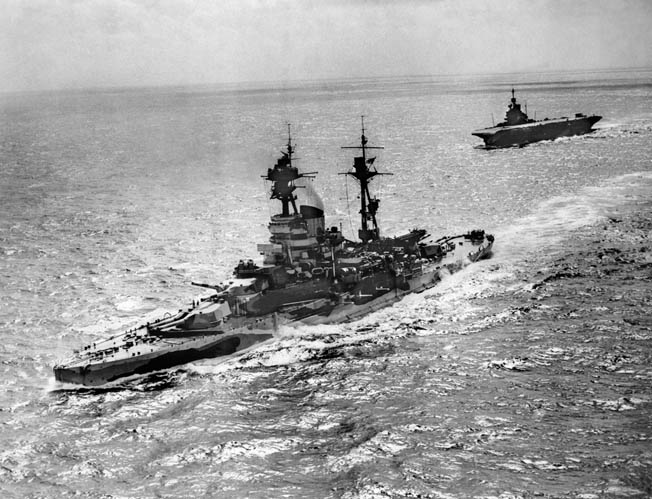
Four of the five battleships were of the R class: Revenge, Ramillies, Royal Sovereign, and Resolution, all World War I veterans, were slow and weak compared to their Japanese opponents. The only British battleship that could match the Japanese was the modernized HMS Warspite, which had fought at Jutland. Not even the British cruisers were the equal of the Japanese—four of them had been laid down during World War I.
Air defense was another problem: the British had three squadrons of Hawker Hurricanes and three more of Fulmars to defend Ceylon. Both types were weaker than the Japanese Zero. The two-seat Fulmar was hopeless and the Hurricane outmaneuvered at low altitudes. The only bombers available were a squadron of Bristol Blenheims, but there were two detachments of long-range Consolidated PBY Catalina flying boats for reconnaissance work, one of them the Royal Canadian Air Force’s 413 Squadron.
The only British advantage was that their torpedo bomber squadrons had been trained in night attacks, but even there the British had problems. Their Fairey Swordfish torpedo bomber was a biplane that looked like a throwback to World War I.
Somerville’s Secret Port T
All these weaknesses landed on the desk of Vice Admiral Somerville, a veteran sea dog whose achievements included the pursuit and destruction of the German battleship Bismarck in 1941. With Britain unable to send out any ships to reinforce the patchwork and ancient Eastern Fleet, the best they could do was provide solid leadership in the form of Somerville.
Faced with outdated ships and an all-conquering enemy, Somerville chose to split this fleet into a fast division with the two modern carriers and Warspite and a slow division with the four old battleships and Hermes.
Somerville knew he could not win a “fire-away Flanagan” sea battle against the Japanese, so he hoped to hit the Japanese with his night bombers, crippling their ships, and mopping up the survivors by day. But his primary goal was to preserve his small and incoherent fleet. As long as his ships existed, the Japanese could not risk an amphibious assault on the coast of India.
So to conceal the Eastern Fleet, Somerville created a secret base at Addu Atoll in the Maldive Islands. Here, at the secret Port T—a “Scapa Flow with palm trees”—Somerville concealed his supplies and support vessels.
Next, Somerville’s intelligence services let him down. With no Japanese ships spotted by radio intercepts or prowling Catalinas, Somerville ordered his fast division to return to Addu Atoll to refuel and take on fresh water —the big ships were nearly out of water and the small ships nearly out of fuel. When the Japanese did not attack Ceylon on April 1, Somerville made the faulty assessment that no assault on the island was imminent.
He sent his slow ships to Ceylon for their turn at the fueling hoses. The heavy cruisers Dorsetshire and Cornwall were sent to Colombo, while the carrier Hermes and destroyer Vampire were sent to Trincomalee.

The dispersion of the ships turned out to be a mistake. The Japanese were coming. On April 4, Royal Canadian Air Force Squadron Leader L.J. Birchall sighted Nagumo’s fleet 360 miles southeast of Ceylon at 4 pm. As the radio operator tapped out the report, Birchall flew his Catalina into cloud cover to avoid Japanese Zero fighter patrols. His radio signals were picked up by the Japanese, who shot down Birchall’s plane and captured the crew. They were retrieved and beaten, then sent to a prison camp for the duration of the war, surviving it.
For spotting the Japanese fleet, Birchall was given the nickname “Savior of Ceylon.”
Japanese Raid on Colombo
Somerville was in a bad tactical position. The fast division (Force A) was refueling and the slow division (Force B) was scattered—Hermes at Ceylon with two cruisers, the battleships at Addu Atoll.
Worse, the sighting report did not describe the enemy force’s strength. But Somerville correctly guessed the intruders were Nagumo’s carriers coming up from south of Java and not a full-scale amphibious assault force.
At 7 am on April 5, the fully fueled Force A set sail from Addu Atoll, joined by Force B’s battleships. But being 600 miles from Ceylon, it had no chance of intercepting the Japanese.
At Ceylon (now Sri Lanka), the British alerted their defenses. RAF Catalinas roared out to find the Japanese carriers. The Catalinas made contact with the enemy but were unable to report their strength. One Catalina was shot down, and the others were driven off. It was obvious the Japanese were out there with carriers, but precisely where the attack would come from remained a mystery to the British.
The mystery was solved at 8 am on Easter Sunday, April 5, when the Japanese struck Colombo, hoping to find the Royal Navy’s Eastern Fleet tied up in port like the Americans were at Pearl Harbor. Leading the Japanese attack was Commander Mitsuo Fuchida, who had also led the attack on Pearl Harbor. The Japanese sent in 91 planes: 70 dive bombers and 21 fighters.
However, the Japanese did not find the British fleet at anchor. Somerville had taken the precaution of dispersing the warships and merchant vessels gathered in Ceylon’s two main harbors of Colombo and Trincomalee. Apart from a few coasters and cargo carriers, the only ships to remain behind were the destroyer Tenedos, the armed merchant cruiser Hector, the depot ship Lucia, and the submarine Trusty. The latter was being floated out of dry dock to avoid presenting enemy dive bombers with a sitting target.
Ceylon’s defense lay in the hands of the Royal Artillery’s antiaircraft gunners and the small contingent of RAF and Fleet Air Arm Hurricane and Fulmar fighters.
The Japanese swarmed in on Ceylon, their 30 fighters easily defeating the British defenders. The British lost 15 Hurricanes and four Fulmars, while the Japanese lost seven fighters. The Japanese were surprised by the tenacity of the Hurricane, whose wooden frame could absorb armor-piercing bullets.
The Japanese bombers raked Colombo, but with so few ships in harbor little damage was done. The Tenedos and Hector were both sunk and the Lucia was damaged, and six Swordfish attempting to land at the main airbase were bounced and shot down. The explosions and fires were impressive, but the damage was minimal. The British had flown the coop.
Two Cruisers Discovered
On returning to the carrier Akagi, Fuchida stomped up to the flag bridge to report to Nagumo and urge that scout planes be launched to find the British ships that had fled the harbor. Nagumo did not need any prompting. He sent out search planes to find the missing ships.
Two of them had left already. The cruisers Dorsetshire and Cornwall, sisters of the British County class, had sailed from Colombo the previous evening at 10 pm, heading southwest at 23 knots. The senior officer was Dorsetshire’s Captain Augustus Agar, who held a Victoria Cross for torpedoing a Russian cruiser during the Royal Navy’s short-lived intervention against the Bolsheviks back in 1919. His orders were to rendezvous with Somerville’s Force A. After studying his orders and the big map in the chart room, Agar ordered his cruisers to crank up their speed to 26 knots, then to 28 when the Japanese were reported to be 150 miles east of his position.
At 11:30 am on the 5th, lookouts on Dorsetshire spotted a seaplane from the Japanese cruiser Tone hovering watchfully on the eastern horizon. Agar maintained radio silence until noon, then reported he was being shadowed. The message never got to Colombo or to Somerville.
The Japanese were less worried about radio silence. The Tone’s plane reported its find to Nagumo, and the Japanese admiral acted speedily. He sent 80 dive bombers under Pearl Harbor veteran Lt. Cmdr. Takashige Egusa after the British ships. The bombers were originally scheduled to make a second attack on Colombo, but Nagumo wanted those cruisers sunk.
“It Was Like Turning a hand, it Was So Easy.”
Egusa’s planes were picked up on Dorsetshire’s radar at 1 pm, and Agar radioed Somerville the news. Somerville’s big ships were only 70 miles away from Dorsetshire and Cornwall, but Agar’s message arrived on Somerville’s flagship, the Warspite, in mutilated form, and nearly an hour passed before its origin was established.
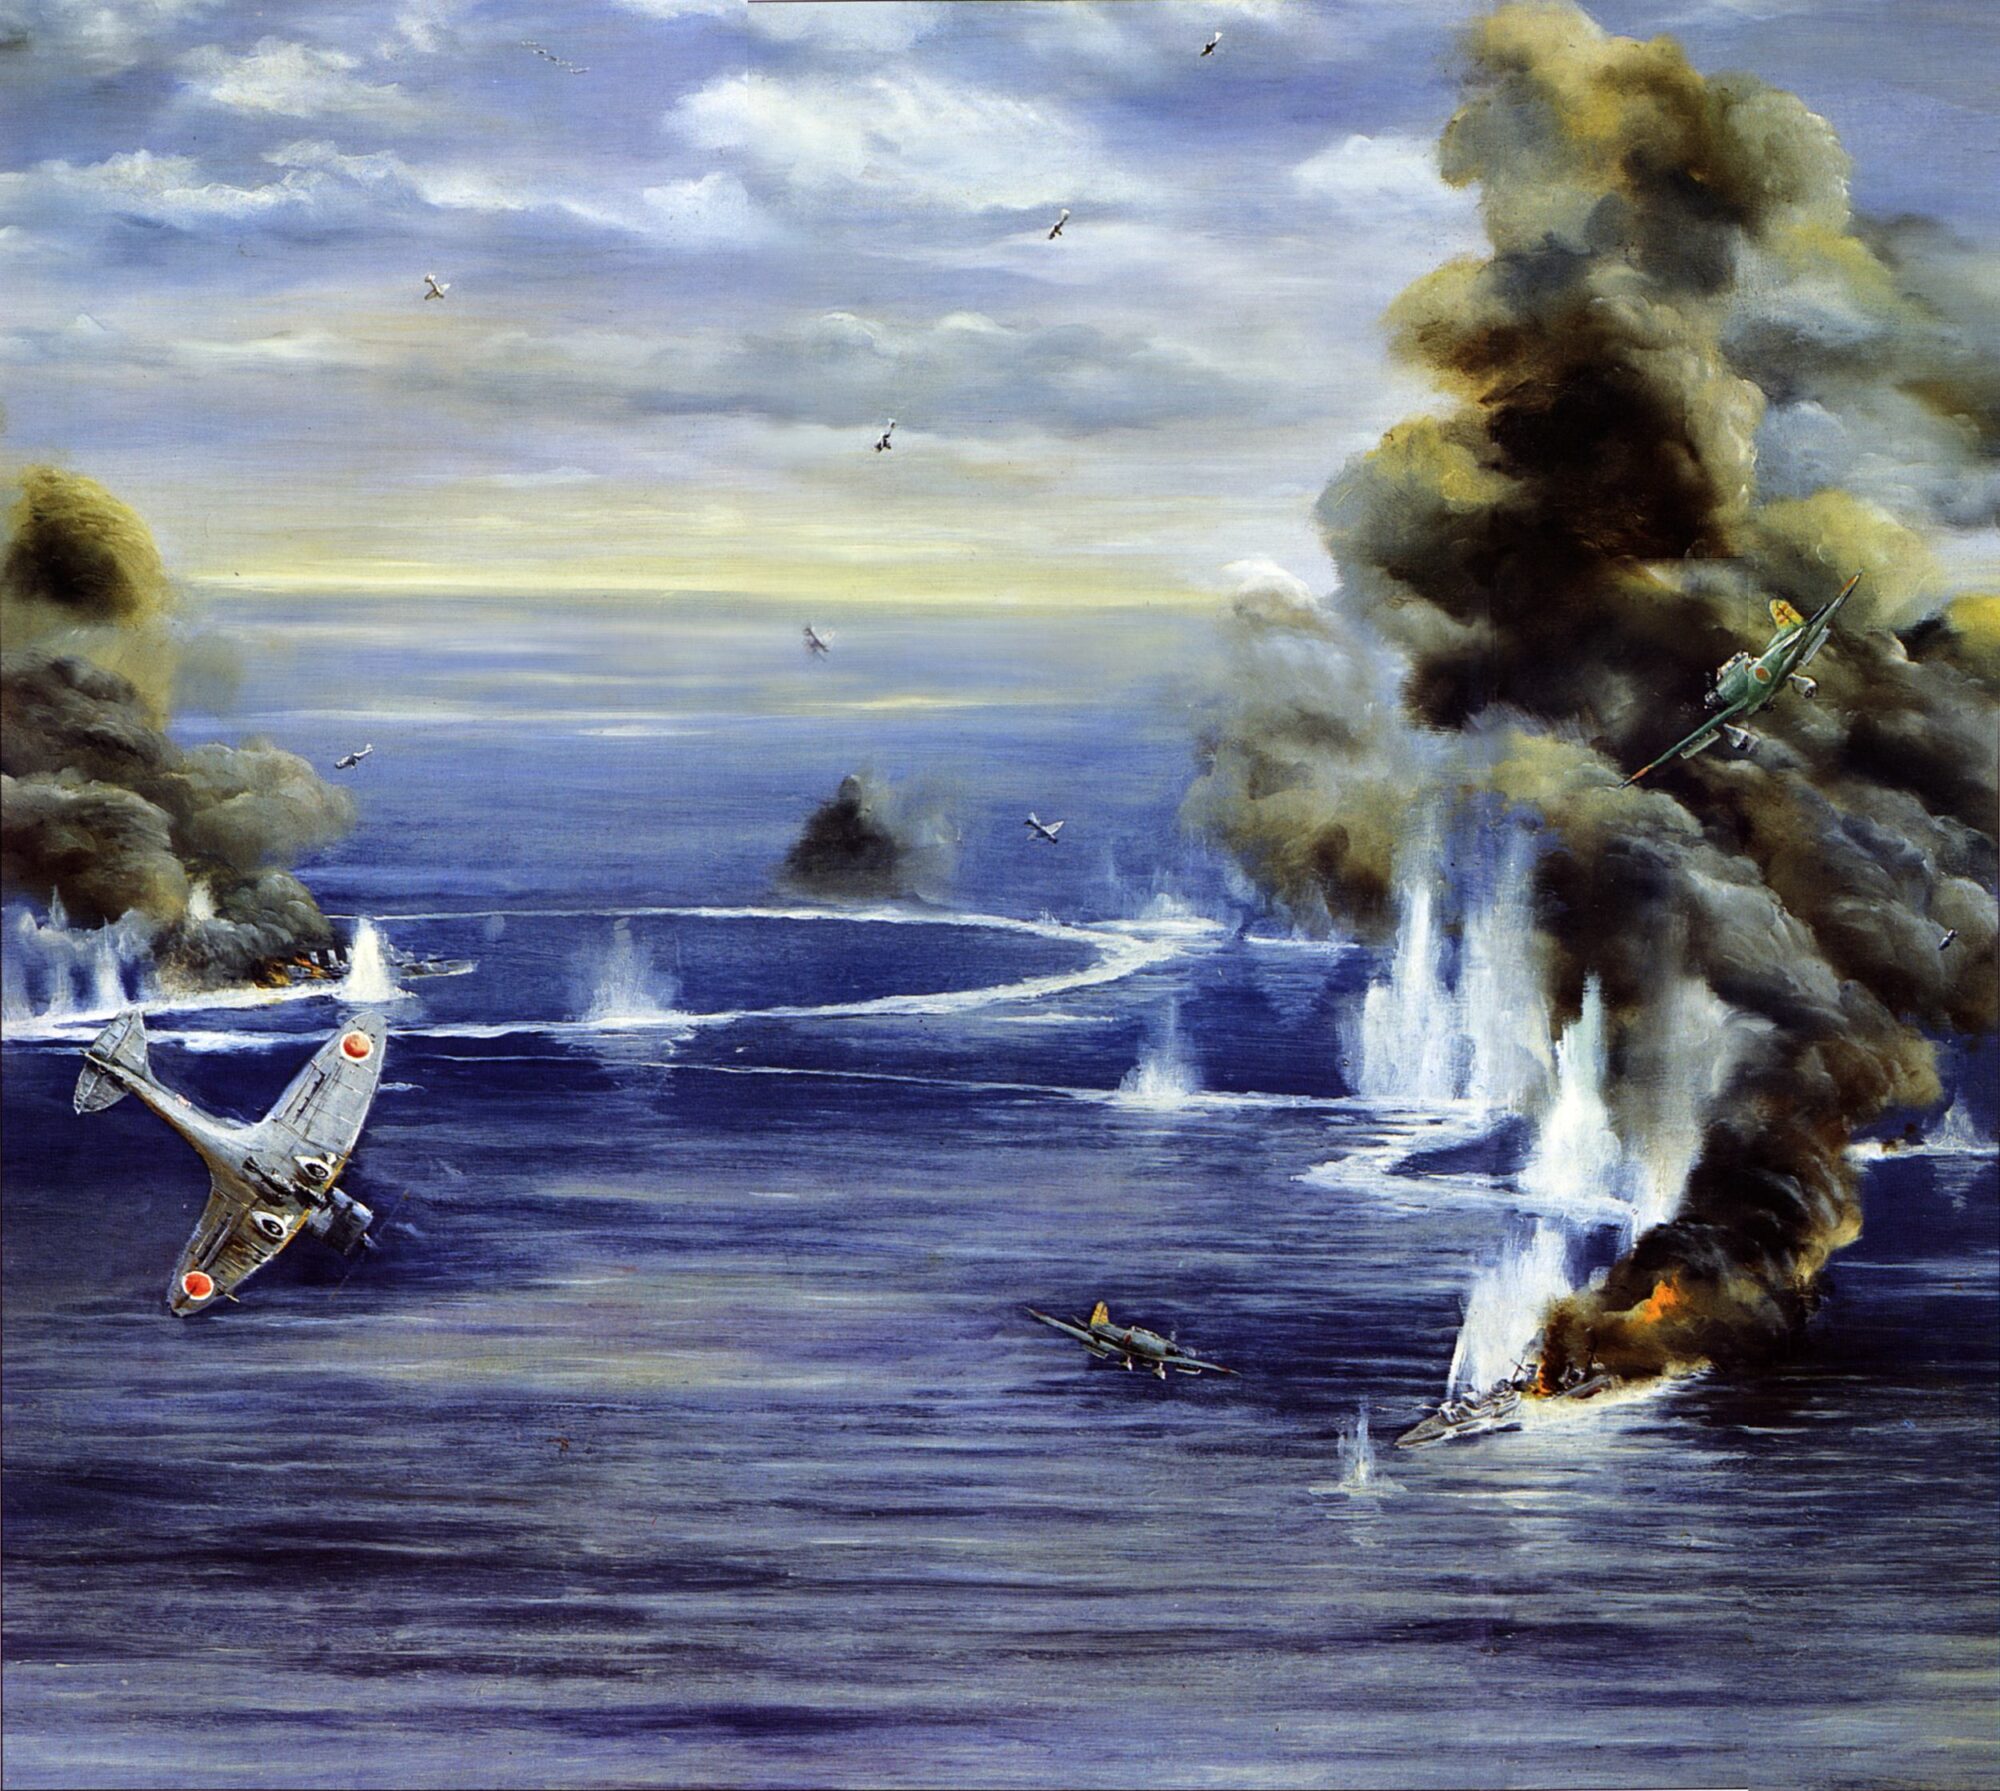
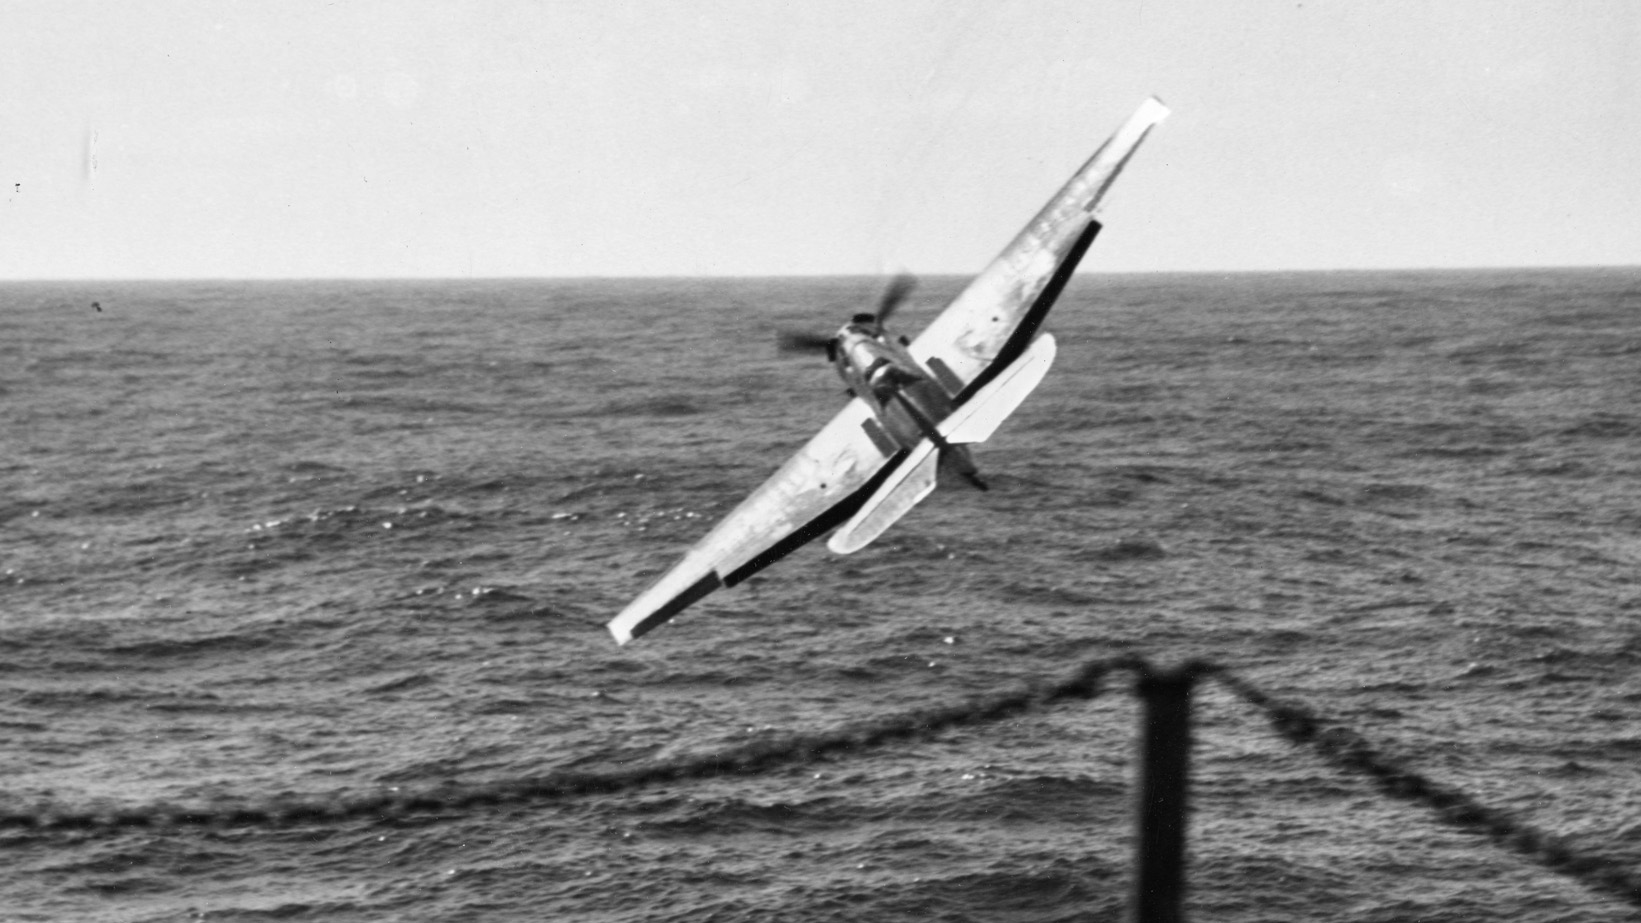
In the meantime, the Japanese swooped in on the two heavy cruisers. “They came diving at us out of the sun in waves of three,” Agar recalled. “The first made straight for Cornwall, scoring a hit aft … within seconds of being sighted. The next three came straight at us. We could see the bombs falling, black and shiny, blunt-nosed 1,000-pounders. I ordered the helm to be put over 25 degrees … but in spite of this the first one scored a hit near the catapult and started a fire. The next one fell close to the bridge, the blast throwing us to the deck … [and it] knocked out of action the main wireless office [which] stopped further reports getting through to the C-in-C.”
In minutes, Dorsetshire’s guns were out of action. A third bomb exploded in the cruiser’s magazine, and the warship began to sink by the stern. Within eight minutes of the attack commencing, HMS Dorsetshire sank, leaving behind life rafts, whalers, and wreckage. Agar was one of 500 men to escape, and he quickly organized the survivors so that everyone, including himself, took carefully regulated turns in the water so that their shipmates could enjoy rest periods in the boats.
Meanwhile, other bombers slammed down on Cornwall. For 20 minutes, the second cruiser fought back, until Captain P.C.W. Manwaring gave the order to abandon ship. Cornwall’s stern rose high into the air, and she slid to the bottom with her colors flying.
Fuchida’s assessment of the one-sided engagement was harsh: “The surface vessels did not have a chance against our striking force. It was like turning a hand, it was so easy.”
When Fuchida reported on the victory to Nagumo, the dour old admiral swelled with pride. But the surrounding surface line officers were discomfited, almost angry. They did not like the idea of the naval air arm being so powerful. The First Air Fleet had just sunk two powerful men-of-war in motion, not trapped and immobile like the ships in Pearl Harbor. The advocates of surface ship supremacy had no alibi left. Fuchida said, “Sea power had changed and a new era had begun. This was the victory of naval air power.”
For a day and a half, the survivors of both ships floated in the water until the light cruiser HMS Enterprise and the destroyers Paladin and Panther arrived to start picking them up. Out of 1,546 officers and crew from the two ships, some 1,122 officers and men were saved from the drink.
Somerville’s Game of Hide-and-Seek
Somerville knew he could not fight the Japanese in daylight, so he turned south to avoid the enemy. For the next few hours, Somerville played hide-and-seek with the Japanese, struggling to avoid their reconnaissance planes. He worried that the Japanese might learn the location of his secret base at Addu Atoll.
Actually, the Japanese had not. Nagumo was circling to the east of Ceylon, a clear 500 miles away, figuring out his next move.
Warspite and the carrier group hooked up with the R-class battleships at dawn on April 6, and Somerville approached Addu Atoll carefully, preparing for a night attack on the Japanese enemy he presumed was near his base. As the tactical situation clarified, it was clear Nagumo was nowhere near the secret base, and Somerville’s ships anchored there on April 8.
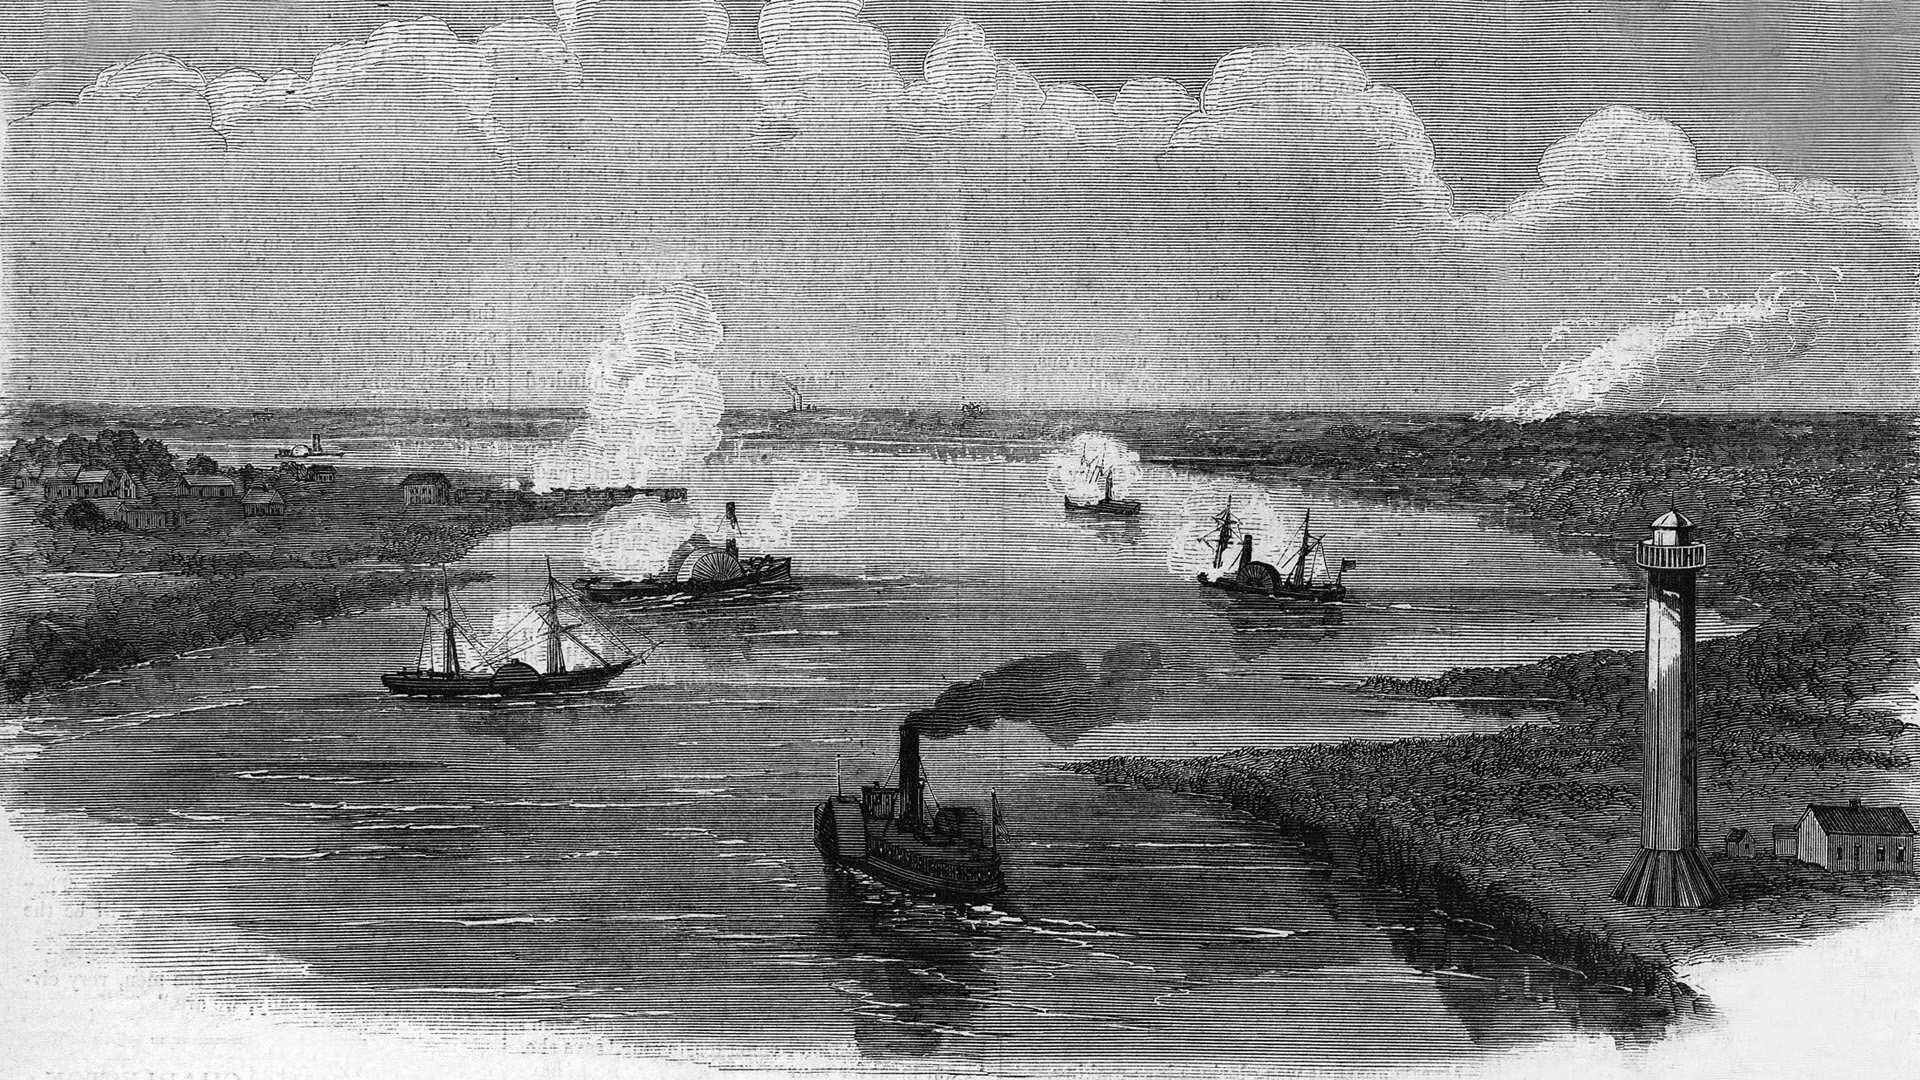
Meanwhile, the second Japanese sword, Ozawa’s raiding force of five heavy cruisers and the light carrier Ryujo, struck at British merchant shipping in the Bay of Bengal. Ozawa split his force into three groups at dusk on Easter Sunday and hurled them at merchant ships headed for Calcutta.
In 48 hours, Ozawa’s ships sank 20 merchantmen, including the 7,726-ton Dardanus, the 5,281-ton Gandera, and the 7,621-ton Autolycus. In all, Ozawa’s cruisers sank 93,000 tons of valuable British shipping between April 5 and 7. The effects of the two days were massive. Calcutta’s port was at a standstill for three weeks in the aftermath of the attack.
Somerville was helpless in the face of this awesome display of modern naval power—his ships were too far from the scene, Nagumo’s carriers were between him and Ozawa, and his ships were outmatched and outclassed by Nagumo’s carriers and battleships.
“Get Out of Danger at the Earliest Moment.”
It was a hopeless situation, and the best Somerville could do was bluff and preserve his dwindling fleet. He decided to send the four R-class battleships to Mombasa in Kenya to protect the vital shipping lanes off East Africa, while Warspite and the two fleet carriers would base themselves in Bombay, where they would be out of reach of Nagumo’s carriers but still capable of intervening southward. This meant the Royal Navy was abdicating control of the eastern Indian Ocean to the Japanese—a harsh choice for any veteran sailor.
But the Admiralty approved Somerville’s move, signaling that the battle fleet must “get out of danger at the earliest moment.”
Within 24 hours of Somerville’s decision, Nagumo struck again, having refueled at sea from his tankers. His new target was Ceylon’s other port, Trincomalee. Nagumo sent in 91 bombers and 38 fighters, led by Fuchida himself, to attack the port.
Once again the British Catalinas reported the incoming airstrike, and the British had time to scatter shipping in the harbor and prepare for attack. Some 17 RAF Hurricanes and six Fleet Air Arm Fulmars attacked and soon found themselves overwhelmed by the 38 more nimble Zero fighters. Eight of the Hurricanes and one Fulmar were shot down, and the Japanese swooped in efficiently.
In a welter of explosions and screeching dive bombers, the Japanese scored hits on the British harbor buildings and other shore installations. They also hit the monitor Erebus and the merchant ship Sagaing, 7,958 tons.
The RAF tried a counterattack. The last nine Blenheim bombers of No. 11 Squadron roared off to hit Nagumo’s ships, but they stood no chance against the Japanese Zero fighters and only four returned to base, all damaged.
While Fuchida’s planes formed back up over Trincomalee and returned to their carriers, at 7:55 am a floatplane from the battleship Haruna spotted the biggest prize of the raid, the carrier Hermes and her escort, the Australian destroyer HMAS Vampire, some 65 miles to the south, about five miles offshore, returning to Trincomalee and fighter protection. Along with them was the hospital ship Vita, heading south.
Nagumo’s Second Wave
Though Fuchida’s strike was heading home with all its ordnance expended, Nagumo had a second wave readying on his flight decks for an attack on Trincomalee. Now Nagumo changed the plan. Instead of making a second attack on Ceylon, Commander Egusa’s 85 dive bombers and nine fighters would hammer the British carrier. The planes launched at 9:45 am.
At 10:35 am, Egusa’s bombers arrived over the Hermes. They ignored the clearly marked hospital ship and swooped down on the carrier. It had been intended to provide the carrier with fighter cover—she had only Swordfish and Albacore torpedo bombers embarked—but a communications failure meant that the orders did not arrive at RAF Ratmalana in sufficient time to scramble the few fighters available.
The attack was almost a massacre. The first wave of bombers scored hits on Hermes, and within minutes she was struck by more than 40 bombs. She sank 20 minutes later, and one of her antiaircraft guns was still firing defiantly as she rolled over and vanished beneath the surface. Her skipper, Captain Richard Onslow, went down with the ship along with 18 officers and 288 men.
Meanwhile, 16 Japanese dive bombers pounded the equally hapless Vampire. Two near-misses shook the ship badly, and then she was stopped by a direct hit in the boiler room. Four hits followed in quick succession, and Commander W.T.A. Moran, Vampire’s captain, ordered the crew to abandon ship. Floats and rafts were launched when another hit broke the ship’s back. The Japanese estimated 13 direct hits on Vampire with 16 bombs.
Vampire’s bow sank quickly, and the stern, which floated for some time, followed at 11:20 am after a heavy explosion, most likely from the magazine. Commander Moran, last seen standing on his destroyer’s bridge, went down with Vampire along with seven ratings: Chief Stoker R.E. Lord, Stoker Petty Officer J.V.A. Carey, Petty Officer R.A.H. McDonald, Stoker Petty Officer L.A. Gyss, Stoker G.H. Williams, Stoker J.H. Hill, and Signalman A.S. Shaw, Royal Navy.
Fuchida Leads the Zeros’ Pursuit
Meanwhile, Fuchida’s group was quickly recovered and turned around to join Egusa’s group. Maintenance crews loaded Fuchida’s level bombers with torpedoes. Leaving his torpedo bombers behind on the carriers, Fuchida led a group of Zeros in pursuit of Egusa in case he needed help coping with any fighters.
When Fuchida arrived, Hermes was already sinking. He noticed Lieutenant Shokei Yamada, who led the Akagi’s dive bombers, gesticulating urgently, so Fuchida flew alongside his plane. Yamada pointed at his nose, then downward, and smiled. Fuchida followed the finger and found the Vampire sinking. Fuchida understood. Yamada had his heart set on bombing the carrier, and rather than waste his bomb, had dropped it on the destroyer instead.
The two warships accounted for four enemy aircraft in the attack, but it was a hopeless situation. Fortunately for all in the water, the hospital ship Vita was standing by and she moved in to start picking up survivors. Vita herself accounted for 590 survivors, while others were picked up by local craft or, incredibly, swam five miles to shore.
With Hermes and Vampire sunk quickly, other Japanese planes in the strike package hunted the nearby area for other targets. They found the tanker British Sergeant some 15 miles to the north. Six dive bombers left her sinking, and she foundered off Elephant Point, where her crew landed in boats.
Nine other Japanese dive bombers found the corvette Hollyhock escorting the merchant ship Athelstone 30 miles south of Batticaloa Light. The Japanese jumped both ships and sank them quickly. All of Athelstone’s crew survived, but 53 of Hollyhock’s, including the commanding officer, did not.
The Japanese had one more small punch to throw at the British. The carrier Ryujo launched airstrikes on Vizagatapan and Cocanada in India, which did little physical damage but frightened the Indian command, setting off an invasion scare that took months to die down.
“He Who Controls the Air Controls the Sea- and the World”
With that, the Indian Ocean raid was over. It had been a massive victory for the Japanese, and Fuchida himself saw it as a great victory for air power. “He who controls the air controls the sea—and the world,” he wrote later. “Conventional navy vessels do not have a chance against air power. It is sad to see them sink so helplessly.”
At the same time, Fuchida was saddened to see the vaunted Royal Navy collapsing so easily before him. “This is the end of the British Empire and British sea power,” he mused. “What a pity—an era of world history lay dying before my eyes.”
As soon as Fuchida’s planes landed on their carriers’ decks, Nagumo turned his vast task force home to Japan to prepare for the next operations—the attacks on the Coral Sea and Midway. Nagumo decided to retire for four reasons: he had exterminated the greater part of the British surface power in the Bay of Bengal; half the British air strength in Ceylon was destroyed; India could not be regarded as a dangerous source of attack in the absence of heavy bombing squadrons there; and the British were showing no inclination to fight.

Back in London, Prime Minister Winston Churchill had no choice but to support his admiral in the face of Parliamentary criticism. On April 13, Churchill told the House of Commons, “Without giving the enemy useful information, I cannot make any statement about the strength of the forces at Admiral Somerville’s disposal, or of the reasons which led him to make the dispositions of his fleet for which he was responsible. Nothing in these dispositions, or the consequences which followed upon them, have in any way weakened the confidence of the Admiralty in his judgment.”
Privately, Churchill was angry and complained to the Admiralty, “No satisfactory explanation has ever been given by the officer concerned [Somerville] of the imprudent dispersion of his forces in the early days of April.”
Somerville, typically, took the responsibility. He blamed the British losses on a “wrong appreciation on my part,” namely that he had concluded wrongly that the Colombo raid had been postponed or canceled and that he had underestimated the sheer size of the attack Nagumo was about to launch.
A Flawed and Pointless Victory
It all looked glorious to the Japanese propaganda machine. For a mere 47 planes the Japanese had sunk two heavy cruisers, a carrier, a destroyer, and a corvette and punched out nearly 93,000 tons of merchant shipping. But the victory was a flawed and pointless one.
Certainly the Japanese had again demonstrated that a navy that lacked air cover was helpless against enemy airpower. But that point had been demonstrated at Pearl Harbor, and at the sinkings of the Bismarck in the Atlantic and the Prince of Wales and Repulse off Malaya. The British had tried to avoid such a one-sided clash and for the most part had succeeded. Despite Nagumo’s best efforts, the British Eastern Fleet was still intact and still in business.
The Eastern Fleet proved it was still capable on May 5, when its ships supported the invasion of Vichy French Madagascar, the first successful Allied invasion of the war.
But the Eastern Fleet still had a long way to go. It needed more modern ships, better coordination with ground-based aviation, and more aircraft.
The Japanese never returned to the Indian Ocean to follow up on their success and never challenged the Eastern Fleet again. Despite the victory, the Japanese could not mount an amphibious end run around the British defenses in Burma, let alone an amphibious assault on India’s shores.
Nor were the Japanese raids on the British bases at Trincomalee and Colombo particularly successful. Despite their best efforts, the British continued to use the bases.
Most important, the Japanese Indian Ocean raid took their big carriers and their highly trained pilots away from their primary target, the U.S. Navy. While Nagumo’s ships raided the Indian Ocean, the Americans had time to rebuild from Pearl Harbor and buttress their strength for the next rounds. By the time the Japanese returned to the Pacific, they would have only two carriers available for the Coral Sea operation, which ended badly for Japan. The time spent in the Indian Ocean could have been used more profitably in the Pacific.
In the end, Nagumo’s raid on the Indian Ocean used a hammer to crack an eggshell. The British losses were embarrassing and humiliating, but minor in the long run—two cruisers and an old aircraft carrier—and the British knew they needed a more powerful, faster, and well-balanced fleet to take on the Japanese.
Once again Nagumo’s task force had swatted down the emperor’s enemies without suffering a scratch of paint on its warships’ hides. The 47 planes lost were a pittance. The easy victory added to Japan’s arrogance, which would be brought down in a welter of destruction two months hence, at Coral Sea and Midway.

A very insightful and informing telling of the story of the Japanese Raid into the Indian Ocean. One thing I would ask, is what British – Australian forces guarded Australia – New Zealand at this time? And was there a threat against those nations, or could those forces have been re-deployed to the Indian Ocean?
Hi, Mark, glad you enjoyed the article.
The Royal Australian Navy and the Royal New Zealand Navy were indeed guarding their home countries. HMAS Australia and HMAS Canberra were in a task force, operating with the US Pacific Fleet in the approaching Battle of the Coral Sea.
At the time, there was certainly a threat to both nations: Japan had invaded the northern Solomons (Rabaul, Guadalcanal, New Georgia), and Papua, the northern half of Papua-New Guinea, and occupied the western half, part of the Dutch East Indies, now Indonesia. The Japanese were taking dead aim at cutting Australia off from the United States, so neither nation had serious forces to spare for the Indian Ocean.
I hope that helps.
I would also note that that units of the Dutch and Australian fleets fought with units of the American fleet at the defeat in Java Sea in Feb 1942. Allied forces at that time were spread very thin in the area compared to Japanese assets. It was only at Coral Sear and Midway that things began to improve for the allies.