By David A. Norris
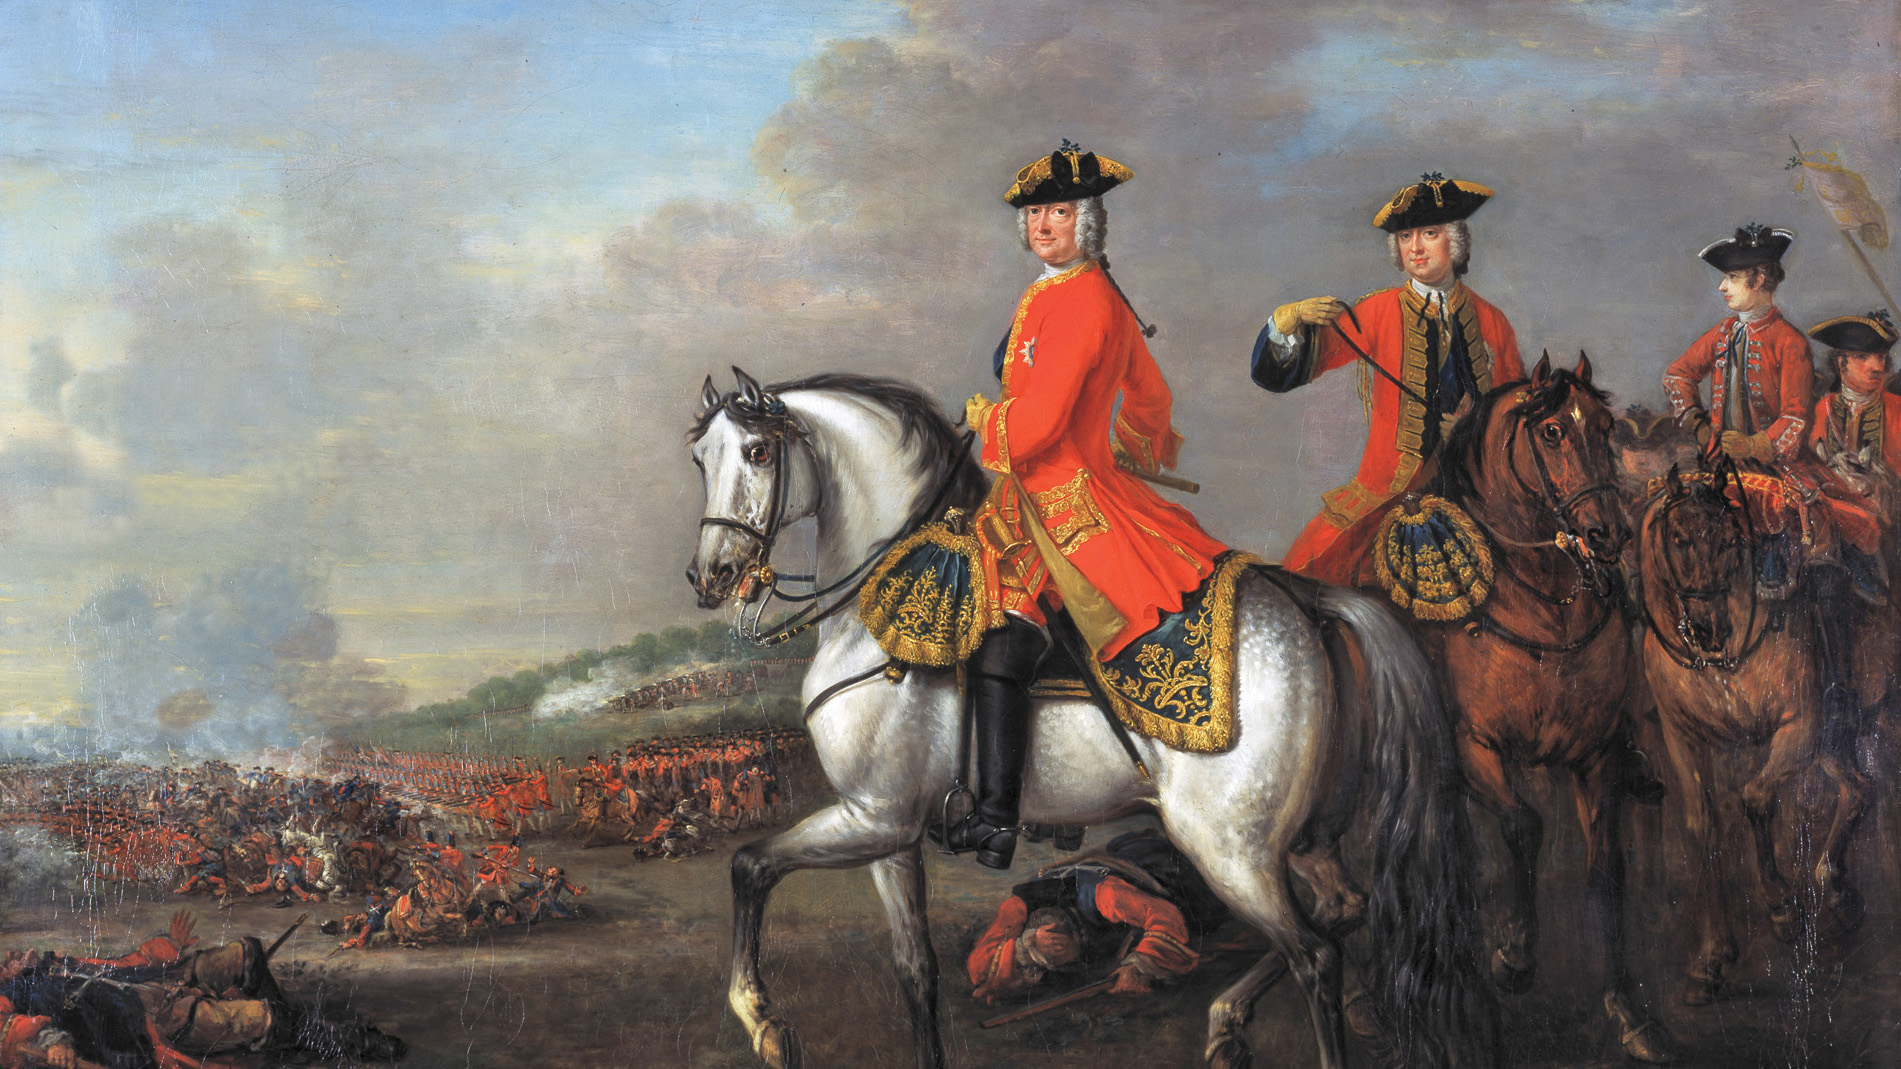
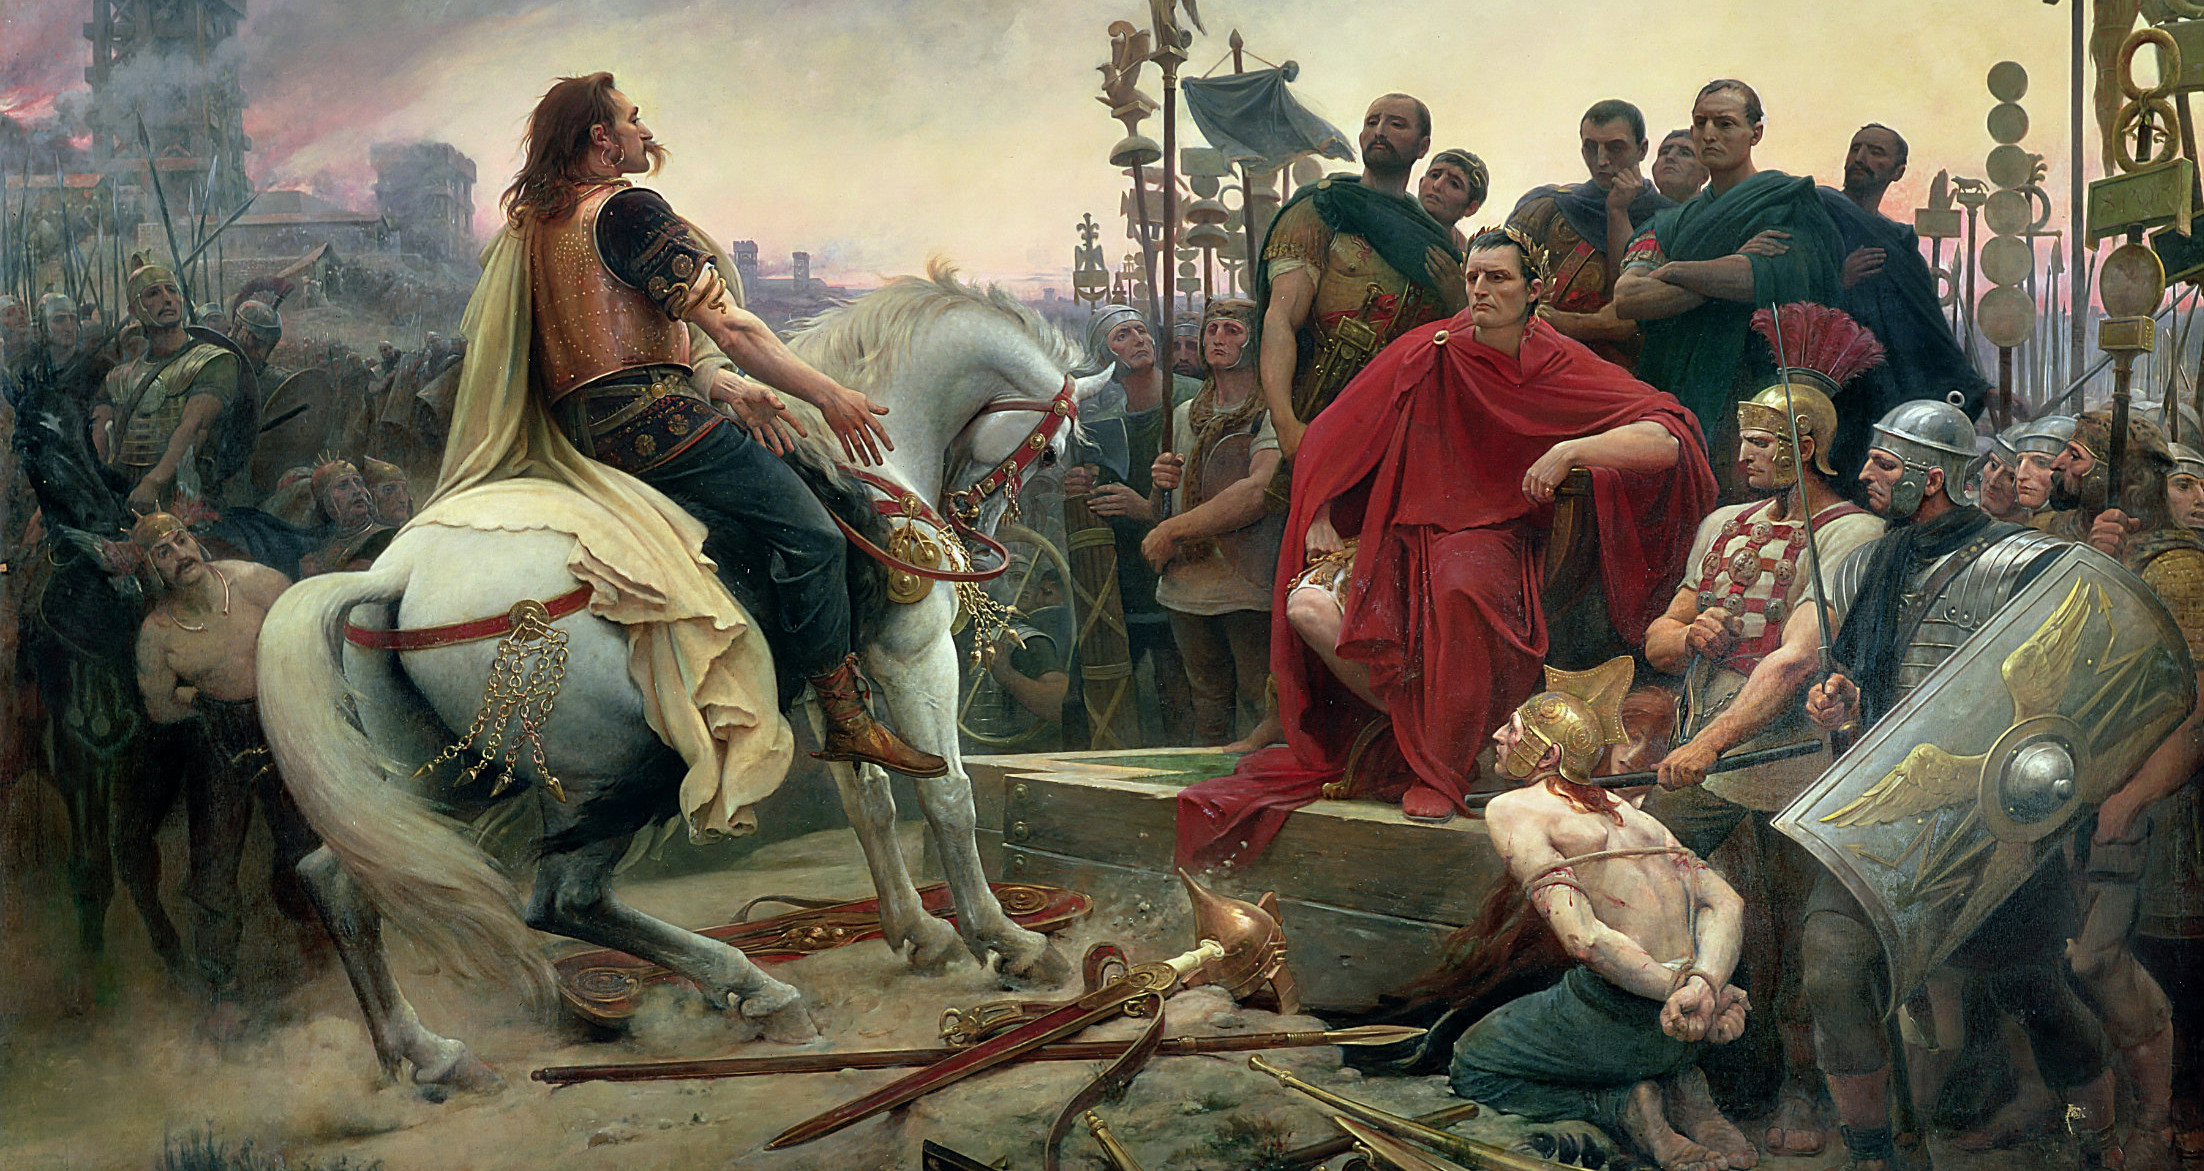
It sounds like it might have been a scene from the Middle Ages. A king of England with sword in hand led his forces against their longtime enemies, the French. But amid the ranks of warriors and their bright banners on this battlefield, there were no helmeted knights or sturdy archers. The knights in this king’s army wore red coats and powdered hair rather than chain mail and helmets. Instead of the clanging of swords on shields, there was the sputtering of muskets as they flashed against a background of booming artillery and thick sulfurous smoke. This was a modern battle of the Age of Enlightenment. The Battle of Dettingen, fought June 27, 1743, would be remembered as the last time a British monarch personally led soldiers into battle.
In the early 1700s, Charles VI was both the elected Holy Roman Emperor and the hereditary Hapsburg ruler of Austria and Hungary. Charles faced the same problem that bedeviled Henry VIII nearly two centuries before in England. He lacked a male heir for his inherited dominions. The emperor’s solution was an accord called the Pragmatic Sanction. Drafted in 1713, the document stated that Charles’s eldest daughter would inherit his Hapsburg lands in the absence of a male heir. Years of diplomacy persuaded most of the major powers of Europe to accept the succession agreement. In 1717, the solution became a real possibility when Charles VI’s wife, Empress Elizabeth, gave birth to a female heir, Maria Theresa.
The deaths of two rulers in 1740 toppled Europe into another war. King Frederick William I of Prussia died on May 31, bringing his ambitious son Frederick II, who eventually became known as Frederick the Great, to the throne. The old king was an efficient ruler who built what had been the second-rate army of a small power into one of the Continent’s most formidable military forces.
Frederick II saw his chance for more power and territory when he learned of the October 20 death of Emperor Charles VI. Maria Theresa inherited numerous titles, including Queen of Hungary and Archduchess of Austria, along with an unwieldy empire with a run-down army. Prussia immediately demanded that Austria cede the disputed territory of Silesia. Frederick II repudiated his father’s agreement to the Pragmatic Sanction, and his successful invasion of Silesia grew into a wider European conflict, the War of the Austrian Succession.
France joined the side of the rising power of Prussia. Charles Albert, ruler of Bavaria and soon to be chosen as the next Holy Roman Emperor, also repudiated the Pragmatic Sanction in hope of gaining new territories.
Opposing the Franco-Prussian forces was a new collection of allies led by Austria and Great Britain. Besides holding the British throne, George II’s status as the Elector of Hanover made him the hereditary monarch of that northern German state. Hanover’s role in continental politics brought George II and the British Army into the war. Amid the complex jumble of international conflict, Britain and France were technically not at war with each other, but were only fighting on the side of their respective allies.
Because they were upholding the Pragmatic Sanction, the alliance was called the Pragmatic Army. For this ad hoc alliance or confederation opposing France, contemporary accounts also refer to the Pragmatic troops as allies or confederates.
Pragmatic was hardly an apt word for the uneasy international coalition. Vienna was far from London, and central European concerns seemed far distant from English life. Not a few of George II’s subjects felt that their army was sent across the English Channel to fight for the king’s Hanoverian dominions rather than for their own country. King George added to English displeasure by wearing a bright yellow sash, a symbol of Hanover, rather than a comparable English sash. A Hanoverian official at the British court, Thomas Eberhard Von Ilten, wrote later that year that the English “rancour to the French holds … but second place” to their dislike of their Hanoverian allies.
In May 1740, the Austrians, British, and their German allies marched from their base in Flanders. Their aim was to invade Bavaria, preventing that country’s forces from linking with the French. John Dalrymple, Second Earl of Stair, commanded the British contingent; Leopold, Duc D’Aremberg, commanded the Austrians; and von Ilten was in charge of the Hanoverians.
Stair was 70 years old and a longtime soldier and diplomat. Born in Edinburgh in 1673, young Stair was eight when he accidentally shot and killed his elder brother. His parents sent him away to the Netherlands for schooling. Stair made a career of the army, first seeing service at the Battle of Steenkerke in 1692. He commanded regiments and brigades in many actions and spent years on diplomatic missions, but had never before commanded an army.
When the army reached Frankfurt, friction developed between Stair and D’Aremberg. Stair decided to push on deeper into Bavaria, moving to Aschaffenburg, a town on the Main River. The Main divided Bavaria from Hesse, a German state allied with Britain. D’Aremberg quarreled with Stair, believing that the army could not obtain enough supplies if it moved so far up the Main. Intending to cross to the south side of the river, Stair was overruled by the king and ordered to remain at Aschaffenburg.
George II hastened to join the army, reaching Stair’s forces on June 19. It was not his first time in the field. As a young man the king served with the Hanoverian cavalry at the 1708 Battle of Oudenarde in Flanders. With the king was a young major general, his son William Augustus, Duke of Cumberland. George II’s secretary of state, John Carteret, the Earl of Granville, also accompanied the king to Germany for the Dettingen campaign.
Barely noticed among the high officers and commanders with the king was a young volunteer aide to Colonel Scipio Duroure, commander of Duroure’s Regiment. This was the future major general, Ensign James Wolfe, to whom great fame would come on the day he died during his victory at the Battle of Quebec in 1759. In 1743, Wolfe was already halfway through his short life at the age of 16.
Even when joined by D’Aremberg and more Austrians, there were only about 28,000 men with the Pragmatic forces. An army of 60,000 French troops in Bavaria had been moving toward them since May. This force was commanded by Adrien Maurice, Duc de Noailles. Born in 1678, Noailles first saw action in the 1693 Siege of Rosas in Spain during the War of the Grand Alliance. The duke’s wife, Francoise d’Aubigne, was a niece of Madame de Maintenon, who was the mistress and later the secret wife of Louis XIV.
A good strategist and planner, Noailles deftly outmaneuvered the enemy troops. Most of the duke’s army was massed opposite Aschaffenburg, where the higher southern bank gave him the advantage in artillery. Having failed to gain a foothold on the Hessian side of the Main, French guns prevented the allies from getting any supplies from that bank of the river. Noailles also blocked the enemy from obtaining supplies from upriver, and his cavalry forded the Main and raided allied foraging parties and supply wagons.

George II’s orders to remain at Aschaffenburg were ensnaring his army in a trap. Matters became much worse when the French took Seligenstadt, a short distance downriver, and built two pontoon bridges. Noailles then had easy access to both sides of the river and could cut off the allies from their supply base at Hanau.
The French commander had a streak of chivalrous generosity in him. Several British soldiers, captured by the cavalry raiders, were stripped of their uniforms and possessions. Noailles ordered their clothing given back. Their possessions were already lost and scattered, so the duke gave each of the redcoats a gold coin and ordered their release. Similar kind treatment was given a captured English sutler who was taken by the French cavalry.
Only a dozen miles from their supply base at Hanau, the Pragmatic Army was running out of supplies. Horses began to starve on their scant rations of unripe wheat. The soldiers were little better off, subsisting on sour wine and a dwindling supply of unappetizing, government-purchased “ammunition bread.” Despite orders against looting, the Pragmatic troops plundered the countryside and villages on their side of the river, and the French burned villages on the Hessian bank. Both armies drank from the river, and by agreement the opposing soldiers did not fire at each other when merely picking up water.
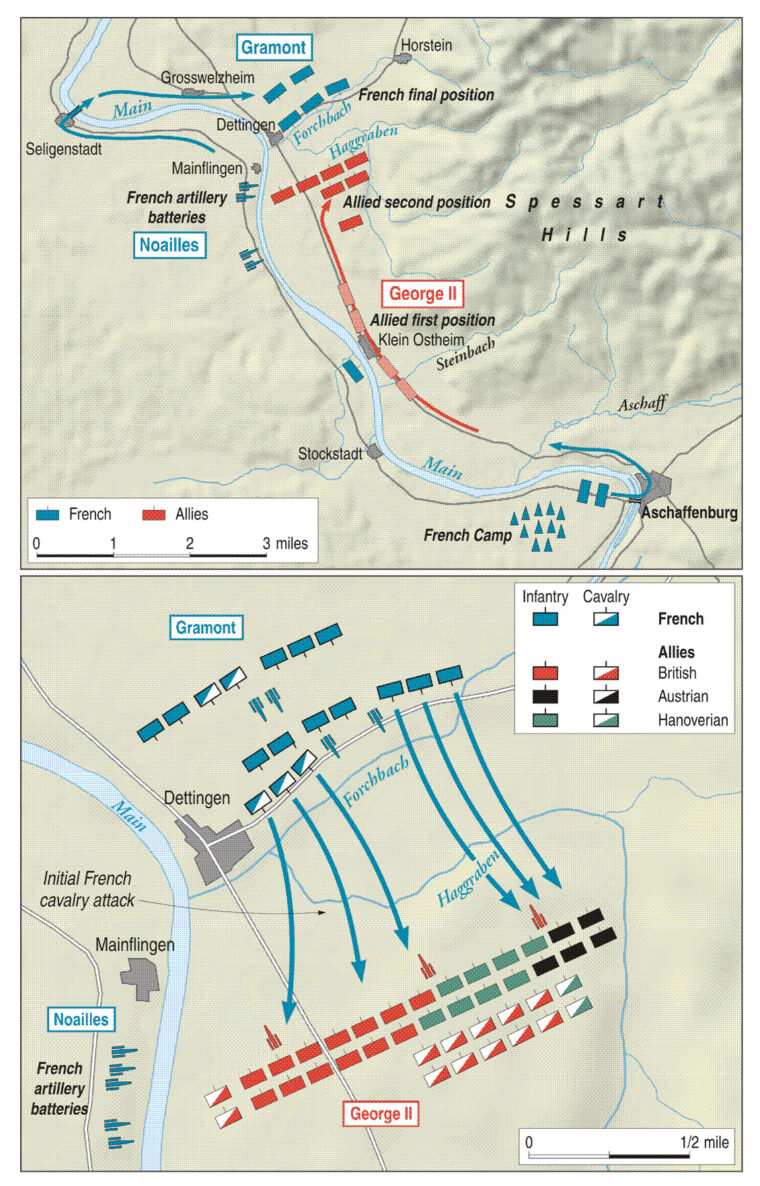
Deep in enemy territory and running out of bread, King George ordered the army to withdraw to Hanau, where there were an additional 12,000 Hessian and Hanoverian troops as well as fresh supplies. The decision to break camp and march out immediately was made on the night of June 26. The march had only one possible route, downriver along the river road which ran through a narrow plain between the Main on the south and the wooded Spessart Hills to the north.
Noailles’s intelligence services were much more efficient than those of the Pragmatic commanders, so he knew that the enemy was running out of supplies and would have to withdraw. The French commander also knew the only feasible route to Hanau would force the allies to march along the only road running along the Bavarian bank of the Main. Several French batteries were already positioned south of the river, and the retreating army would be within easy range of the guns.
Noailles learned that the allied army was in motion at 1 am on June 27. To cut off the enemy the French commander sent Louis Antoine Armand, Duc de Gramont, with 28,000 men to block the allies. Gramont was Noailles’s nephew. Born in 1689, he was only 11 years younger than his uncle, and his military experience went back to his commission as an ensign in 1705.
Gramont’s men filed across the two Seligenstadt bridges. About one mile upriver of the bridges was the village of Dettingen (now Karlstein am Main). There the Forchbach, a stream rising in the Spessart Hills, emptied into the river. Gramont’s men held high ground on the west side of the stream. The Forchbach’s only crossing was the bridge on the river road at Dettingen. Nearly all of the French line was protected from attack by low, boggy ground. They needed only to wait for the rest of their army to close in.
The Pragmatic Army left its camp about 4 am. In the advance were the British and Austrian cavalry. In anticipation of the French getting behind the column, the rear was held by the British Guards and top German and Austrian regiments. In the early light of day, they could see more French infantry marching south of the river, heading to cross at the Aschaffenburg Bridge. Noailles was setting in place the final piece of his mousetrap, which he was about to spring on the king of England.
At 7 am on June 27, 1743, the Pragmatic Army reached Klein Ostheim, a village on a bend in the river about 21/2 miles from its camp, where it was forced to squeeze through on a single road. The cavalry rode through first and halted to wait for the rest of the force to pass the village. It was perhaps an hour later when cavalry patrols spotted Gramont’s forces blocking the way ahead of them. Only then did the Pragmatic commanders realize that they had blundered into a trap.
The battle opened badly for the allies. When the French infantry bound for Aschaffenburg cleared the batteries south of the Main, the French 18-pounder guns opened fire. Disorganized after filing through the bottleneck of Klein Ostheim, the wagons and draft animals of the allied baggage train were massed in the open ground west of the village. As French shot crashed among the wagons and animals, drivers sought cover in nearby woods while local inhabitants plundered the wagons during the confusion.
The baggage train had been in the middle of the column, leaving the allied artillery far in the rear. Amid the chaos, it took considerable time to get the guns moved forward to reply to the French. For more than one hour, the Pragmatic infantry was exposed to artillery fire. “Our men … did not like the long bullets … for indeed they swept off Ranks and Files,” wrote an officer in the Welsh Fusiliers. (The game of long bullets was a blend of football and bowling; usually played in streets or roads, one team threw a cannon ball, which the other team tried to prevent from rolling across a goal.) To the relief of the fusiliers and other foot soldiers, the British guns at last reached the scene and went into action.
Between Klein Ostheim and Dettingen was a wood edged with swamps on each side. British and Austrian cavalry followed by foot regiments formed in front of the woods to face Gramont. Under von Ilten’s orders, most of the Hanoverian cavalry and some infantry, including the three Foot Guards battalions of the British army, had been left in the rear to deflect a French move from Aschaffenburg. Damaging or destroying the bridge would have made the allied rear much safer, but the span was left untouched.
By that point, fortune was running with Noailles. He wrote later that everything portended “a happy day” for his army. Gramont needed only to sit safely behind his entrenchments. When the attack from Aschaffenburg began, the Pragmatic Army would be pressed from in front and behind, hemmed in on its flanks by the Spessart Hills and the river. But Gramont drastically changed the course of the battle by ordering his troops out of their safe positions. His reasons for this unwise course of action are unknown. He may simply have become overconfident and tried to take advantage of the disorganization of the enemy before it could regroup. “Gramont somehow thought that most of the enemy had gotten past him and that he faced only the rear guard, which he could easily handle,” wrote Voltaire in The Age of Louis XV.
Whatever his motivations, Gramont sent his troops across the ravine of the Forchbach to form line of battle on the open ground in front the stream. Across the Main, Noailles watched in dismay as his careful plans dissolved. Volunteer aide George Townshend, later to serve under Wolfe at Quebec, was happy to see Gramont marching ahead of the stream and its protective swamps, “leaving all the advantageous features of the ground in his rear.” Across the river, the French artillery fell silent for fear of mowing down their comrades.
The advancing French foot and cavalry faced two lines of Pragmatic troops, with their front line anchored on the left near the river by Johnson’s Regiment. British regiments at the time of Dettingen were usually referred to by their commander’s names rather than the numerical designations that became standard a few years later. The left and center of the two lines were held mostly by the British with Austrian foot and horse soldiers deployed on their right.
Lieutenant Colonel Sir Andrew Agnew, commanding the Royal Scots Fusiliers, was determined that his men eat before battle. His worried officers saw French troops slowly advancing toward them. “The loons will never [have] the impudence to attack the Scots Fusiliers!” Agnew scoffed. Occasional musket shots landed among the soldiers as they ate. While Agnew picked at some meat, a bullet knocked the bone out of his hand. At that point he got up from the dinner table to issue orders.
As the French advanced in three lines, their right was led by the Maison du Roi (the king’s household), which comprised the top cavalry and infantry units of the French army and was the French equivalent of the crack English Household Cavalry. The allied left, which faced them, was commanded by Lt. Gen. Jasper Clayton. An officer since 1695, Clayton had served well in Flanders, Spain, Canada, and Scotland. Seeing the French cavalry, Clayton sent for the King’s Dragoons and placed them between the river and Johnson’s Regiment. The dragoons were commanded by Humphrey Bland, who served as their colonel and who also was a recently appointed brigadier.
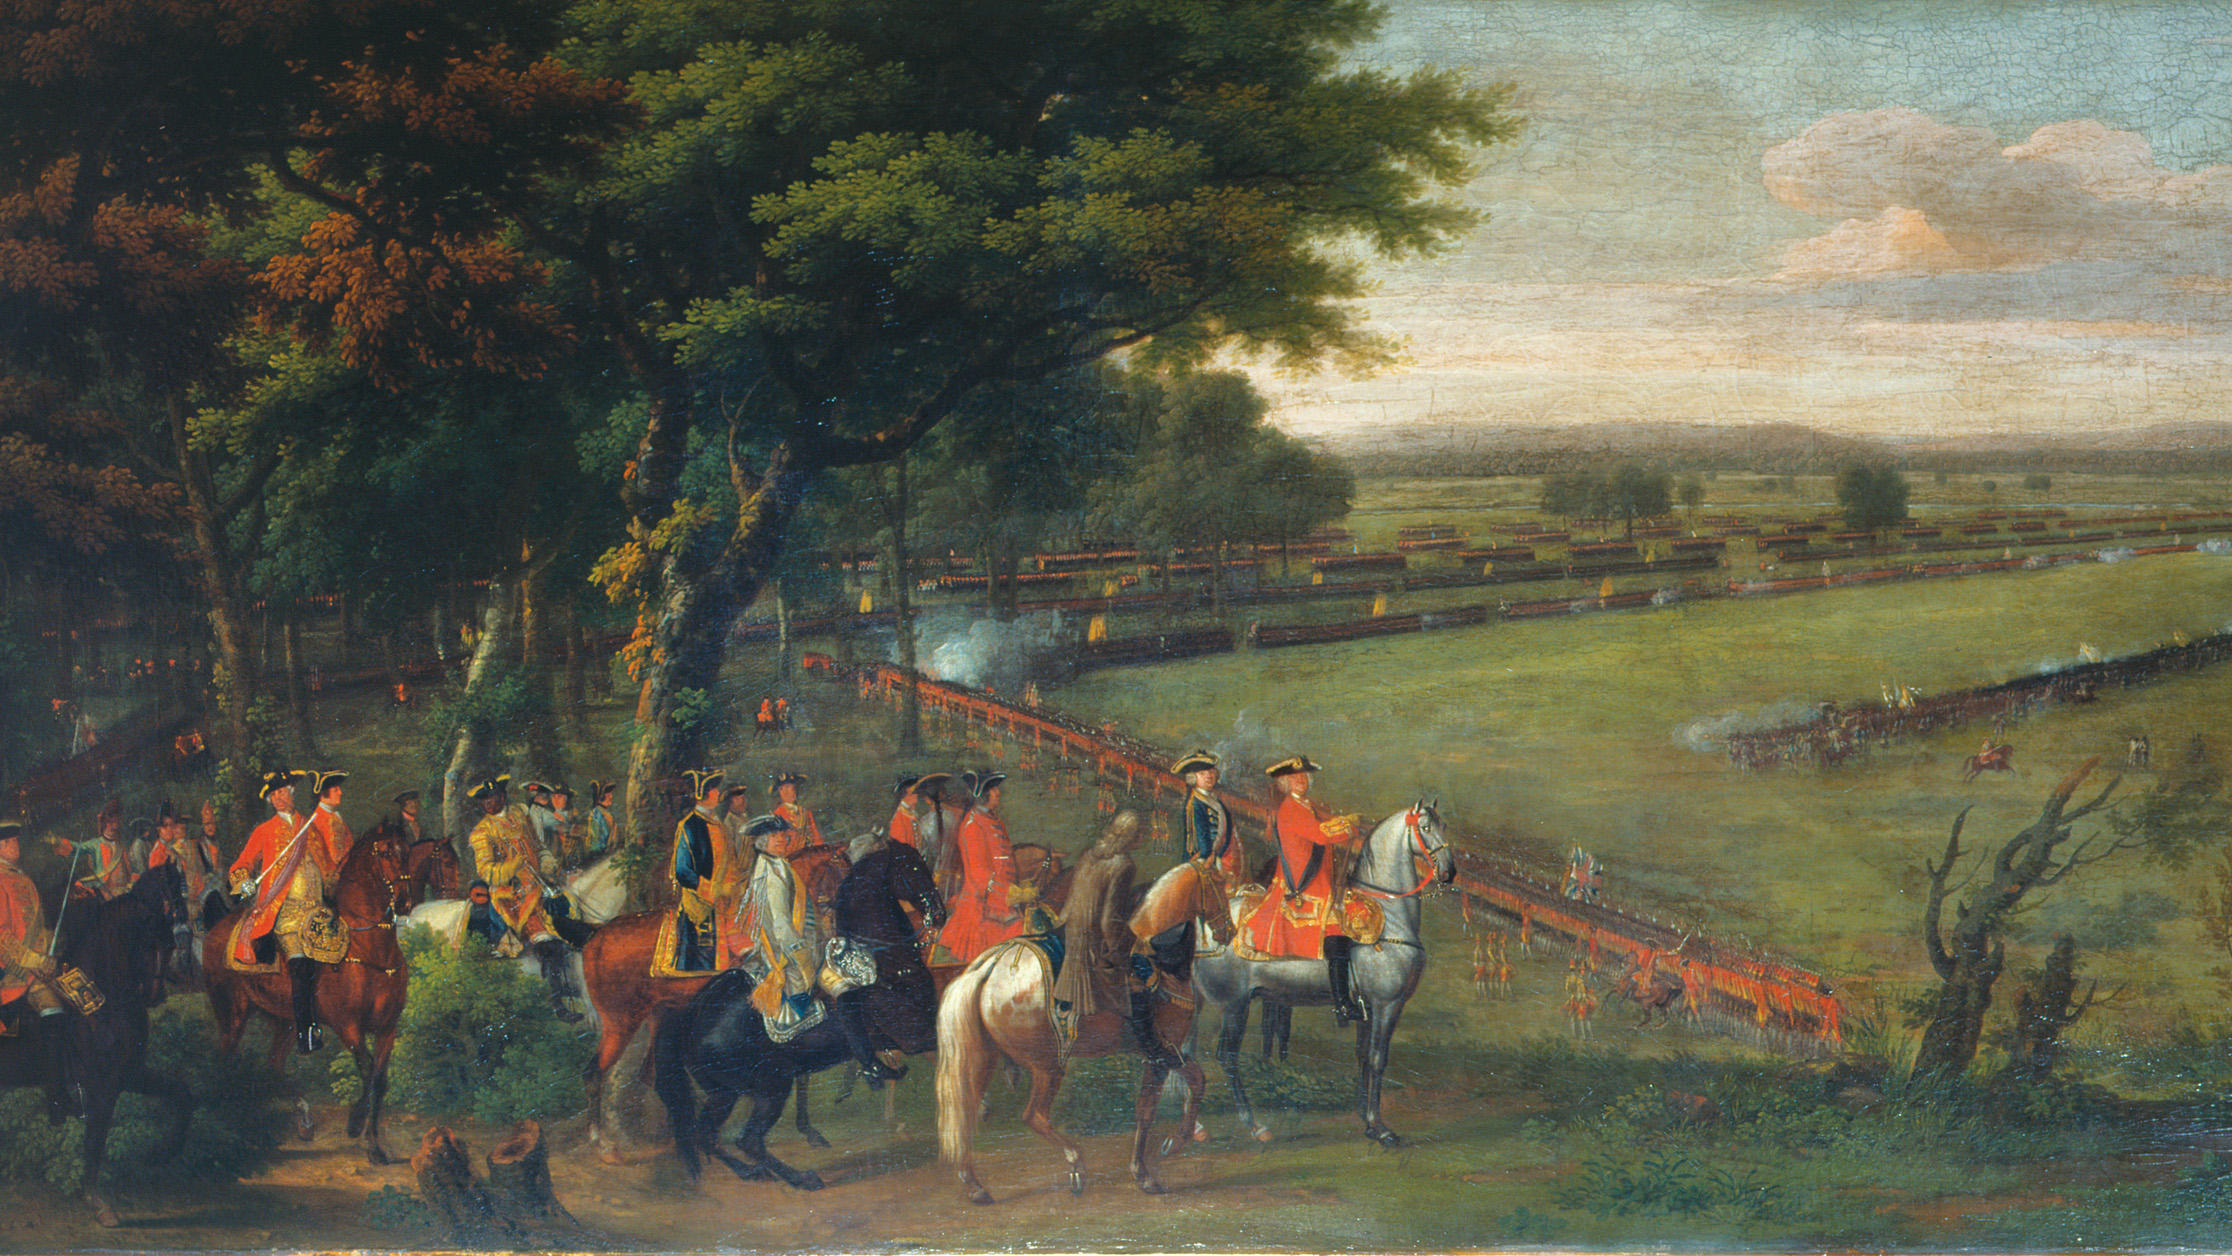
Both armies advanced. George II was seen on horseback, waving his sword and encouraging his men onward with his characteristic German accent. Although encouraged by the sight of their king sharing their dangers, the redcoats slogged through swampy ground slowly and in bad order. Their officers ordered the troops to pause and dress their ranks into tighter formations.
Some of the redcoats gave a cheer, but it sounded ragged and wavering amid the tumult. Other men, anxious because of the French cavalry, started firing their muskets without orders. As the irregular musket fire flashed up and down the line, the king’s horse panicked. “With purple face and eyes starting out of his head,” the king pulled at the reins but could not stop the horse. Before he was thrown out of the saddle, Ensign Cyrus Trapaud of Howard’s Regiment (known as “the Buffs” for the color of their jacket facings) caught the fleeing horse. Dismounting, the king stationed himself near the right of the line. Quite calm, the monarch came up with one of the most quoted lines of the battle: “Now if my horse will run away my legs will not.” One of several officers promoted by the king after the battle, Trapaud became a full general before his death in 1801.
Aware of his limitations as a military tactician, the king nevertheless well understood his role as a symbol of national and military leadership. D’Aremberg pleaded with the king to remove himself from the battlefield, lest he end up a casualty or a prisoner. The monarch refused, saying, “What do you think I came here for? To be a poltroon?” George II stayed on the field for the rest of the battle. D’Aremberg himself was seriously wounded after his warning to the stubborn king.
The king’s son, the Duke of Cumberland, also found himself on a runaway horse. The horse was possibly spooked when Austrian troops fired on Cumberland’s unit by mistake. Out of control, the mount tore away into the French lines before the duke could get it under control. Costing the French a very important prisoner, the duke managed to get back to the allied lines, although in need of treatment for a severe leg wound.
The Gardes-Françaises, part of the Maison du Roi and known to their English enemies as the French Guard, pushed forward from Gramont’s right center. By the time the French Guards were within musket range, the British troops were no longer disorganized, but calm and steady. Lord Stair hushed the scattered spontaneous cheers of some of his men. “Now one and all together when I give the signal,” he ordered. Their united roar, with a series of steady volleys of musketry, was enough to send the French Guards reeling in disorder. Clayton was heard to remark to other officers that “they might ever depend on the English foot.”
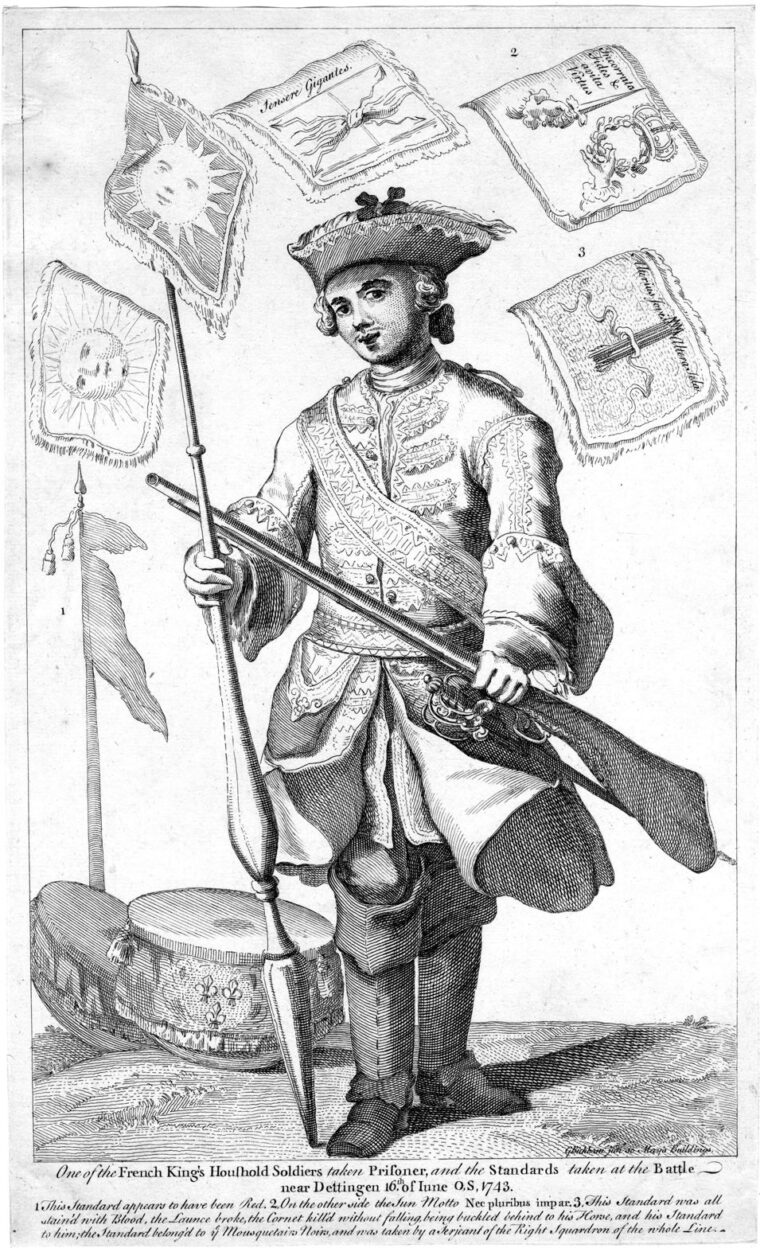
As the Gardes-Françaises fell back, the Maison du Roi’s cavalry moved against the British left. Among the horse units of the Maison du Roi were two companies of musketeers. They were known as the Mousquetaires Gris and the Mousquetaires Noirs (the Gray Musketeers and the Black Musketeers), as they were mounted on either gray or black horses. Part of the king’s personal guard, the musketeers relied on cavalry weapons rather than their namesake muskets.
As Clayton ordered Johnson’s Regiment and the neighboring Scots and Welsh Fusiliers to prepare for the attack, two of Bland’s squadrons charged into the French cavalry. Giving and taking heavy losses, Bland’s troopers cut their way out and rode back to their lines.
With the English dragoons withdrawn, the French horsemen charged the three foot regiments in their front. Each rider held two pistols with sabers hanging from their wrists. They fired their pistols at the redcoats, hurled the empty weapons at their enemies, and then wielded their swords.
Agnew of the Scots Fusiliers saw that the riders about to crash into his line were protected with helmets and iron curaisses, which were buckled to the French saddles. Bayonets would be useless against the metal armor, so Agnew ordered his men to open their formation and let the cuirassiers gallop through. He anticipated that the French horsemen would halt and turn around when they came to the main infantry line. Just as Agnew thought, the cuirassiers wheeled around to pass back through the Scots Fusiliers. With orders to aim for the horses, but not to fire until they were at close range, the fusiliers held their fire until it tore into the cavalry with maximum effect.
The Maison du Roi cavalry was thrown back with heavy losses. Riding with them, Philippe, the Comte de Noailles (the army commander’s son) had two horses shot from under him. His brother Louis de Noailles, Duc d’Ayen, was wounded and thrown from his horse.
In a calmer moment after the battle, King George teased Agnew, “So, Sir Andrew, I hear you let the French get in among us.” The fusilier commander answered, “Yes, please your Majesty, but they [did not want] back again!”
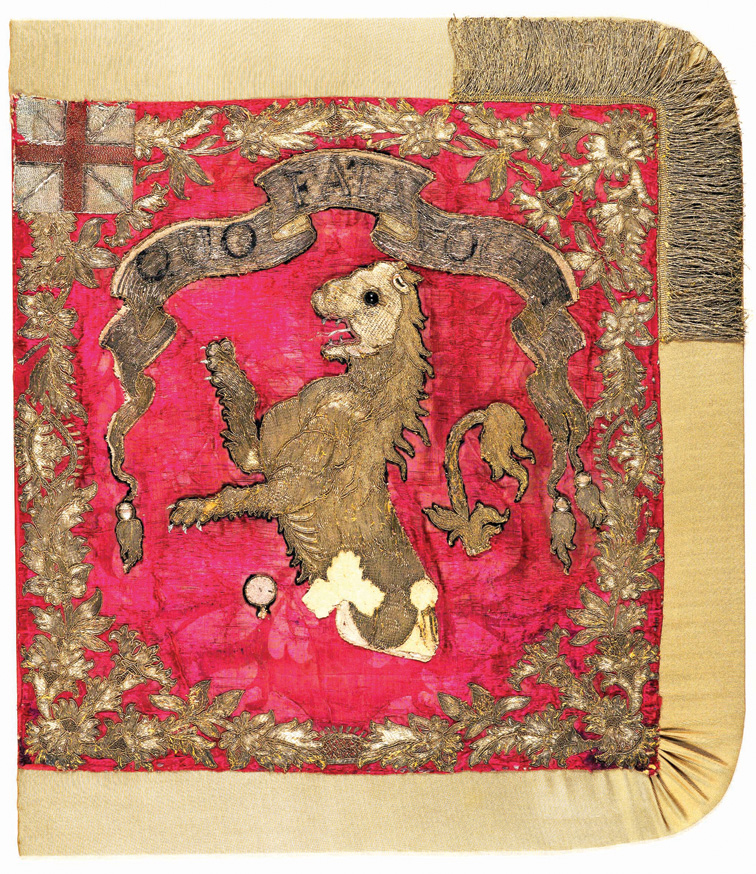
On the allied left, supporting French infantry fired into Bland’s men, but they charged twice more into the opposing horse troops. By this time, three-fourths of the dragoons and their horses were casualties and only two officers were left unwounded. Of their three flags, two were ripped and shredded to bits by enemy fire and their staffs splintered. Their third standard slipped from the grasp of a wounded cornet.
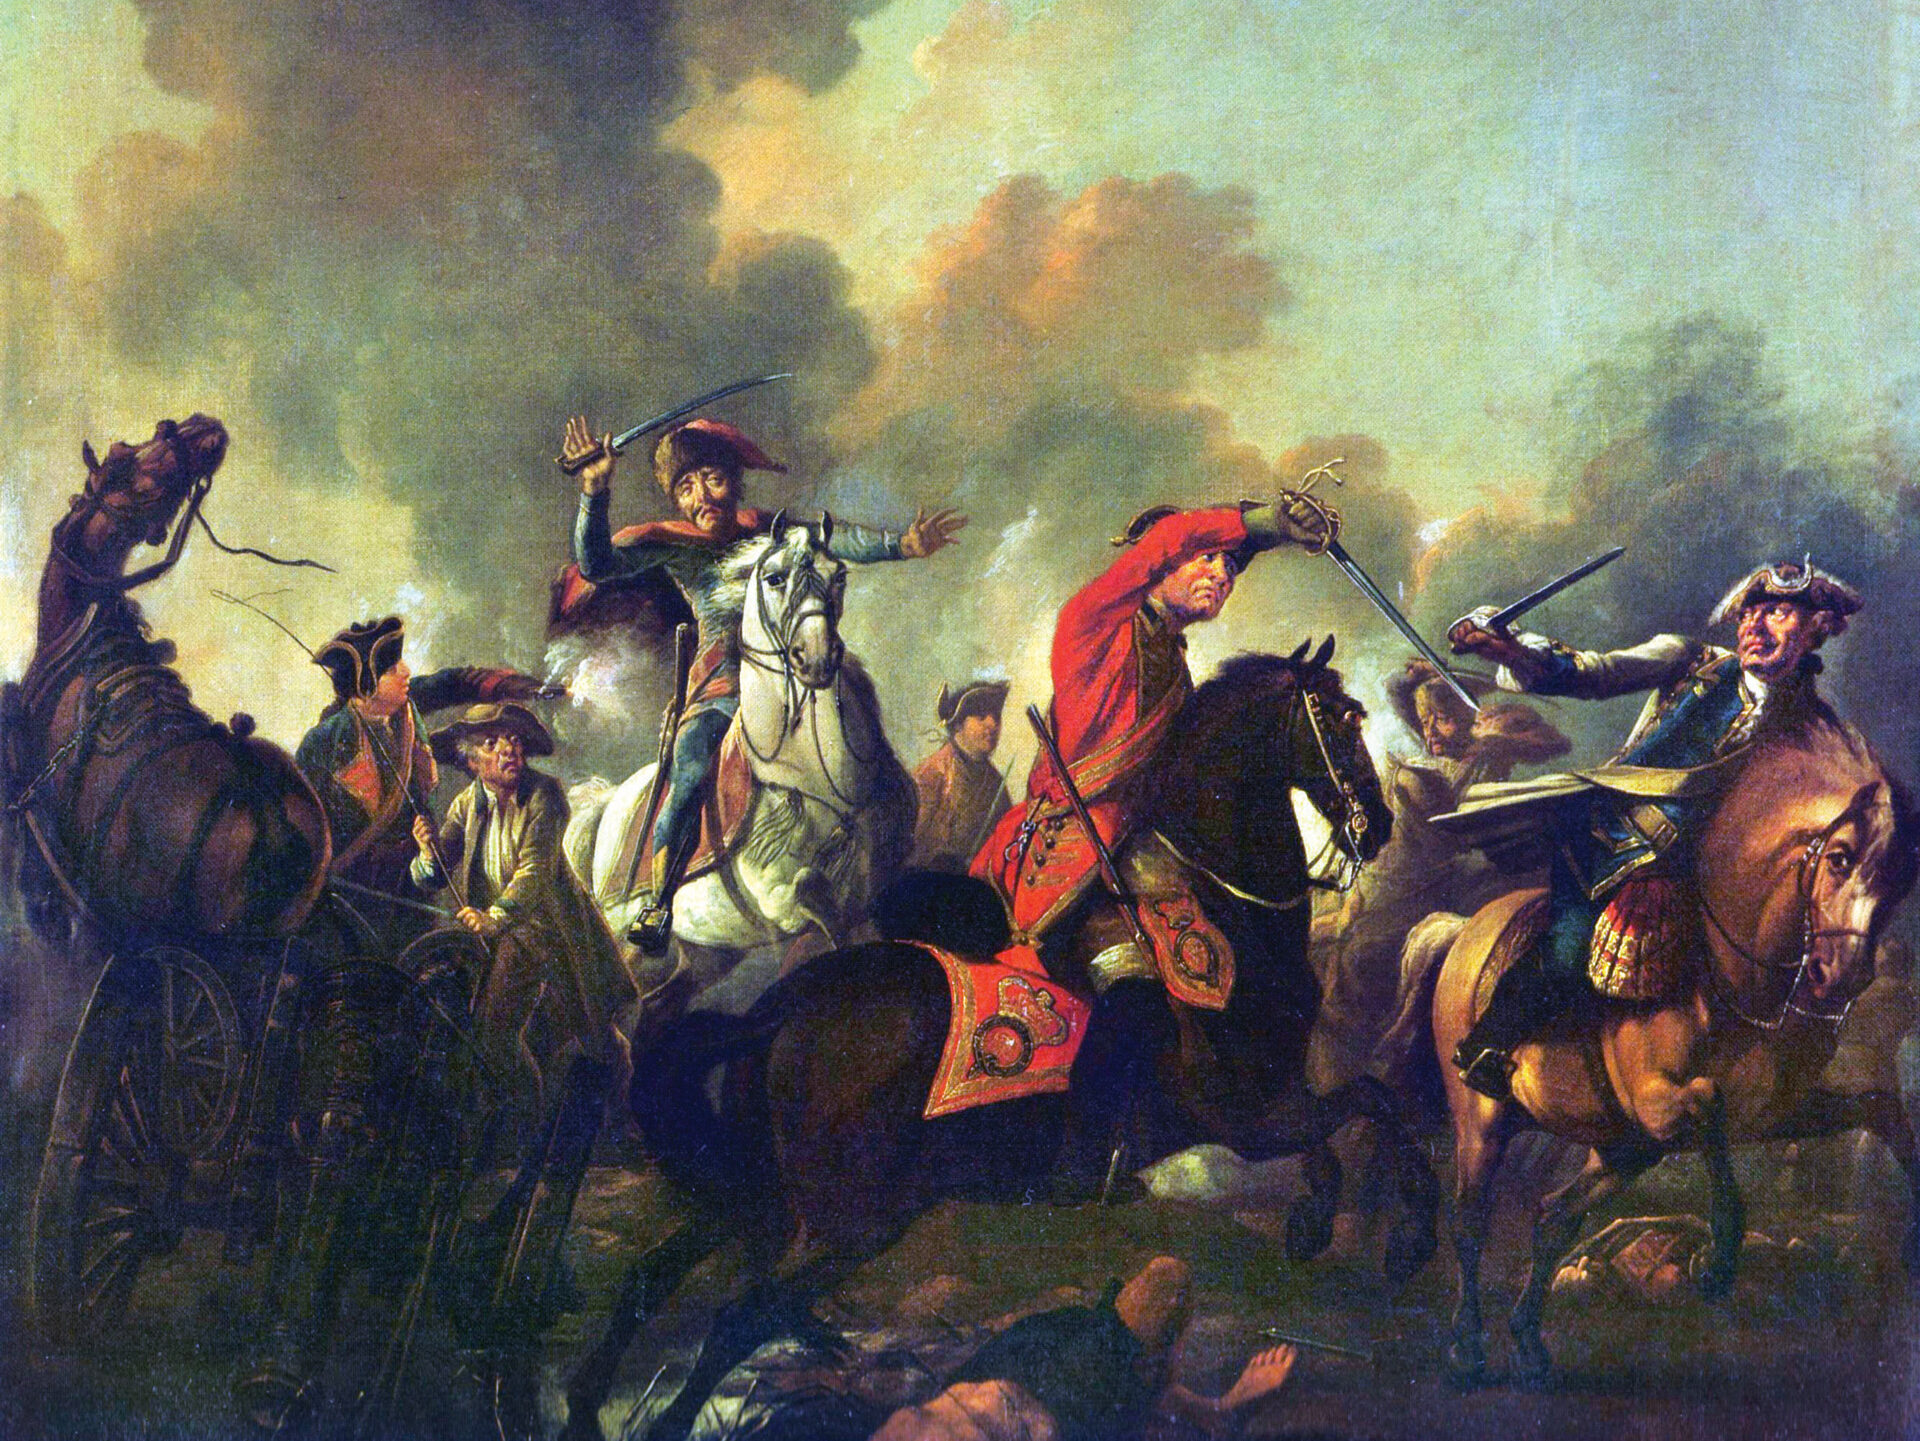
Seeing the standard of Bland’s Dragoons in danger of capture, Trooper Thomas Brown rode to retrieve it. When Brown was dismounting to pick up the standard, a French horseman swung his saber, cutting off two fingers of Brown’s bridle hand. Brown’s horse panicked and broke into a run, bearing itself and its rider straight into the French lines. Trying to get control of his horse, Brown spotted the French cavalryman holding the captured standard. With his saber, Brown killed the enemy soldier and took back his regiment’s standard. Clamping the banner between his leg and the saddle, Brown spurred his horse for friendly lines. Galloping through a gauntlet of French horsemen, Brown took eight saber cuts on his head and neck and two musket balls in his back. Three more balls tore through his hat.
King George learned of Brown’s gallant ride while the battle was still going on. For his exploit, the king dubbed Brown a knight banneret. This rank, dating back to the Middle Ages, was usually conferred by the monarch on a battlefield. King George bestowed the rank on several other high officers that day, making the last such honors ever bestowed.
Cornet Henry Richardson of Ligonier’s Regiment also saved a regimental standard. Richardson hacked his way through a barrier of French cavalry, taking saber cuts and bullet wounds. In honor of his valor, when the regiment received new standards the one he saved was presented to him. “The Dettingen Standard” was an old-style horse regiment flag, square in shape and edged with fringe.
Wolfe was riding one of Duroure’s mounts when a musket ball struck the horse in a hind leg. Wolfe was thrown from the saddle and watched the horse run away. The young volunteer aide performed his duties for the rest of the day in “a pair of heavy boots,” which were painfully unsuitable for spending a day on foot. With the runaway mount went Wolfe’s horse “furniture” and pistols, which had cost the lad 10 ducats.
Although he interfered with grand strategy, unlike many a monarch King George left his more qualified generals to direct the course of the battle. He issued some commands on a limited scale, such as directing the positioning of a Hanoverian battery. But the king well understood that he was far more important as a symbol of Great Britain than a military planner. While giving up on riding his fine but skittish white horse, King George was readily visible during the battle. It was said he wore the same red coat he had worn as a young volunteer at Oudenarde.
All day, the foreign-born king of England shouted encouragement to his men, amusing them with his German accent. Seeing a steadfast regiment holding their own in the action, the king called out to them, “Bravo, Buffs!” Because of the buff facings of their uniforms, the monarch had mistaken them for Howard’s Regiment. A soldier shouted back, “Sir, we are the Thirty-first, not the Old Buffs.” King George II corrected himself with his reply, “Then, bravo, Young Buffs!” The king’s spontaneous reply gave the regiment a lasting nickname.
Many of the French troops made valiant charges that day. But at a higher level the attacks were poorly coordinated and were thrown back one by one without a chance to change the course of the battle.
One such attack near the end of the battle was made by the Black Musketeers. They charged to right of the allied line engaging Hawley’s Regiment, also known as the Royal Dragoons, or the Royals. Austrian and British infantry poured their fire into the musketeers. A British officer estimated that barely “four score” or 400 of Black Musketeers survived the charge. Among those left behind was a cornet, a young officer entrusted with the musketeers’ flag. Although he was stone dead, the cornet was upright in the saddle, having been buckled to his horse. The bloodstained banner and its broken staff were taken by the Royals.
After breaking this charge, the allied infantry moved toward the French foot, which began to break. The cavalry of the Maison du Roi held on as the infantry ran for the river. Heavily pressed in front by the British dragoons, the French cavalry collapsed when the Scots Greys tore into their flank. The Scots Greys took a banner of the Maison du Roi, a disaster that had not happened before to the elite cavalry of the royal household.
Later, amid the debris scattered among the dead on the battlefield were found many cuirasses once worn by the French cavalry. An officer of the Welsh Fusiliers considered collecting a few of the discarded breastplates and backplates as curiosities. Deciding that they were too heavy to drag with him during a campaign, he left the trophies on the ground.
With the repulse of his finest cavalry, Noailles’s carefully set mousetrap was knocked to pieces. His infantry fled across the Main on the pontoon bridges while the cavalry splashed through fords. In his report to the king, the duke placed part of the blame for the catastrophe on his infantry, which contained a large proportion of militia and new recruits. One of the bridges collapsed, throwing men into the water. The Marquis de Puysegur watched his men flee, crying out, “Sauve qui peut” (Every man for himself). The marquis reportedly killed several of his own men trying to slow their rout.
One of the last shots fired at Dettingen fatally struck Clayton. Highest in rank of the allied soldiers killed in the battle, Clayton was much admired by his fellow officers. This respect did not save him from being among those dead and wounded whose bodies were stripped of all valuables.
Lieutenant Ned Draper of Honeywood’s Cavalry fell mortally wounded by a bullet that struck him in the back and passed entirely through his body. Draper lived a little while after he was hit. In a final bit of bravado, he joked that if he lived to get back to England he would tell everyone that instead of the bullet hitting him in the back and coming out the front he “never would own but that the ball went the reverse way.”
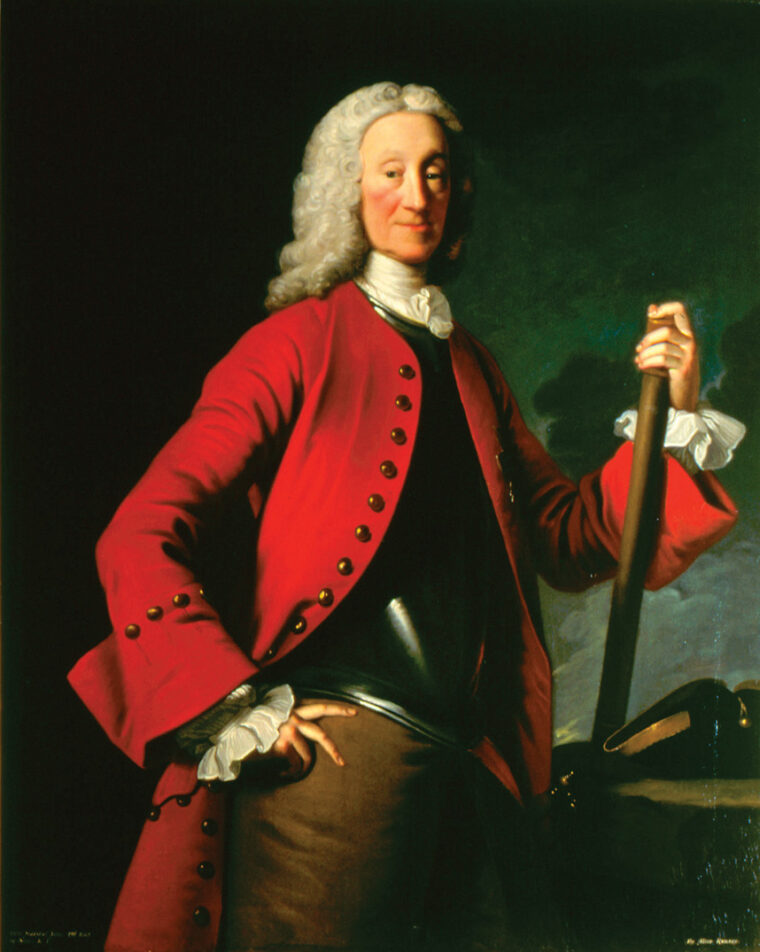
Major Philip Honeywood of Bland’s Dragoons (the major was the nephew of another Philip Honeywood, the commander of Honeywood’s Regiment), was nearly among the slain. Wounded and thought to be dead, he was robbed while he lay insensible on the field for several hours. An Austrian soldier found him, but instead of rescuing the major he stabbed him twice with his bayonet. The Austrian was aiming his musket at Honeywood before the major found the strength to gasp that he was “Anglois.” Honeywood survived his wounds and lived to serve in Parliament and have Sir Joshua Reynolds paint his portrait.
The French collapse meant that the Hanoverians and the Foot Guards were not needed. Stationed in the rear, they missed the battle. Some officers and men of the Foot Guards were disappointed or angry at losing their share of the victory. Lt. Col. Charles Russell told his wife in a letter, “As a soldier and a man of honour I must tell you that the brigade of Guards had the misfortune not to be in the battle.” Von Ilten pointed out that he had “preserved” them. When that remark about preservation got to the troops, they nicknamed the Hanoverian commander “the Confectioner General.”
Four hours had turned potential disaster for the Pragmatic Army into a notable victory. Although Lord Stair insisted that the cavalry be sent after the enemy, the Austrian and Hanoverian commanders objected. The winning army did not follow up its advantage and let Gramont’s shattered regiments run away.
On the other hand, Marshal Noailles still had more than 30,000 men in hand south of the river that had not been thrown into battle. The untouched portions of his forces even then outnumbered the allies. Unable to adjust to his reversal of fortune, the French commander never rallied his troops or made any offensive moves against the enemy during the following days.
Individually, some of the redcoats did manage to follow up on the victory. Lord Carteret was on the battlefield in his carriage when a British soldier ran up to him. “Here, my lord,” said the redcoat, “do hold this watch for me; I have just killed a French officer and taken it, and I will go take another.”
The Duke of Cumberland, who had been wounded in the fighting, was brought back to his tent. He was tended by John Ranby, who was the sergeant-surgeon, the medical officer whose primary duty was to attend the king on the battlefield. Examining his royal patient, Ranby found that the duke had been struck in the calf by a piece of grapeshot leaving a hole “that might have very well admitted a large Hen-Egg.” But when bearers also brought in other wounded officers, including a French musketeer named Girardot, the duke ordered his surgeon to tend to the wounded musketeer first.
Ranby drew 20 ounces of blood from the wounded duke, who endured an excruciating 15-mile trip by carriage with the army. Besides bleeding the patients, the sergeant-surgeon’s treatment included probing shot wounds with a finger and doses of “bark” (cinchona bark, from which quinine was extracted). With, or perhaps despite, Ranby’s help, the duke survived, although the leg wound troubled him for the rest of his life.
Victorious or not, the Pragmatic Army was still running out of food. The allied force did not linger, but continued its march to Hanau. It departed so quickly that it left two cannons behind for the French. After the army pulled out, looters roamed through the battlefield robbing and murdering many of the wounded. Heavy rains fell throughout the night. The French reported that about 600 of the wounded were still alive when they took them into custody the next day. Those who survived owed their deliverance to Noailles, who ordered medical care for the wounded prisoners.
At Dettingen, the French lost about 5,000 killed, wounded, or missing. Ninety-three horse or foot officers of the Maison du Roi were killed or wounded. The Regiment de Chartres lost six officers and 60 men dead, and 17 officers and 110 men wounded. The Duc de Rochechouart, one of the four First Gentlemen of the Chamber, who were companions and confidants of Louis XV, was among the dead. Vincent-Dominique-Régis, Comte de Boufflers, was only 13 years old but followed his father on the battlefield. Voltaire wrote that the young count’s leg was shattered by a cannon shot. He was conscious during the amputation of his leg and died soon after.
Combined losses for the Pragmatic Army were only about half those of the French, fewer than 2,400 men, including 755 dead. About 420 horses were reported killed with about 200 more wounded or lost. The British lost 265 dead and 561 wounded.
Heaviest hit were Bland’s Dragoons. That unit lost an officer and 41 men dead, and six officers and 100 men wounded. About 140 of their horses were killed, including one shot from under Bland. Inspecting the British cavalry some days after his last battle, George II paused in front of one unit. It seemed to be such a small regiment that the king was puzzled and demanded to know where the men were. “Please your majesty,” said Bland, “it is my regiment, and I believe the rest of it is at Dettingen.”
Three days after the battle, Wolfe got backThree days after the battle, Wolfe got back the horse that had thrown him and run away during the battle. Safe and recovering from its bullet wound, the horse was found without Wolfe’s pistols and 10 ducats’ worth of equipment. During the action, the young volunteer impressed his superiors enough that Wolfe was made regimental acting adjutant and soon after received his commission as lieutenant. Wolfe was on his way to everlasting fame as a military commander during the victory at Quebec.
Just as the allies did not pursue Gramont, Noailles never rallied his forces to make an effective pursuit of the Pragmatic Army. King George and his army safely reached Hanau on June 28. Stair’s plans to give battle again were overruled by the king. Frustrated, Stair resigned, requesting of the king, “‘Leave to return to my plough without any mark of your displeasure.” Several high British officers also resigned in sympathy with Stair or due to irritation with the king’s favoritism toward his Hanoverian officers. Although the allies had wasted the opportunity generated by their victory, the French army soon withdrew from Germany.
Noailles wrote King Louis XV that the defeat was due to “the enemy’s discipline, and to their officers’ strict obedience and subordination to commands.” The duke went on ruefully that “these qualities are unknown among our own troops.” Gramont was blamed for throwing away the battle but still commanded troops at the Battle of Fontenoy in 1745. At Fontenoy, Gramont was killed early in the battle, a clash that the French won over an army commanded by the Duke of Cumberland.
Stair later spoke to Voltaire about Dettingen; the two men had been friends since Stair’s diplomatic service back in the 1720s. “You committed one mistake,” said Stair, “and we committed two. Yours was … not having patience to wait, and ours was, exposing ourselves to Destruction, and then not making proper use of our victory.”
When news of Dettingen reached London, the English public was ecstatic. Few were strategists enough to mourn the failure to pursue the broken French army at the end of the battle. Instead, the nation was thrilled with stories of individual soldiers such as Trooper Brown and Cornet Richardson.
From the tales of George II’s conduct on the field, the English were surprised by a new admiration for their normally rather unlikable king. Dettingen marked a historic occasion in the changing world of modern warfare. Never again would the ruler of Great Britain dub new knights banneret on the field of battle. The future King George IV was a midshipman aboard the ship of the line Prince George at the Battle of Cape St. Vincent in 1780. King George VI served as a sub-lieutenant aboard the battleship HMS Collingwood during the Battle of Jutland in 1916. However, in both cases their military service happened long before either king came to the throne. Dettingen marked the last time a monarch of England or Great Britain led troops in battle.


It has been said that if more of our top politicians had been required to be present on the battlefield, there would be fewer wars.
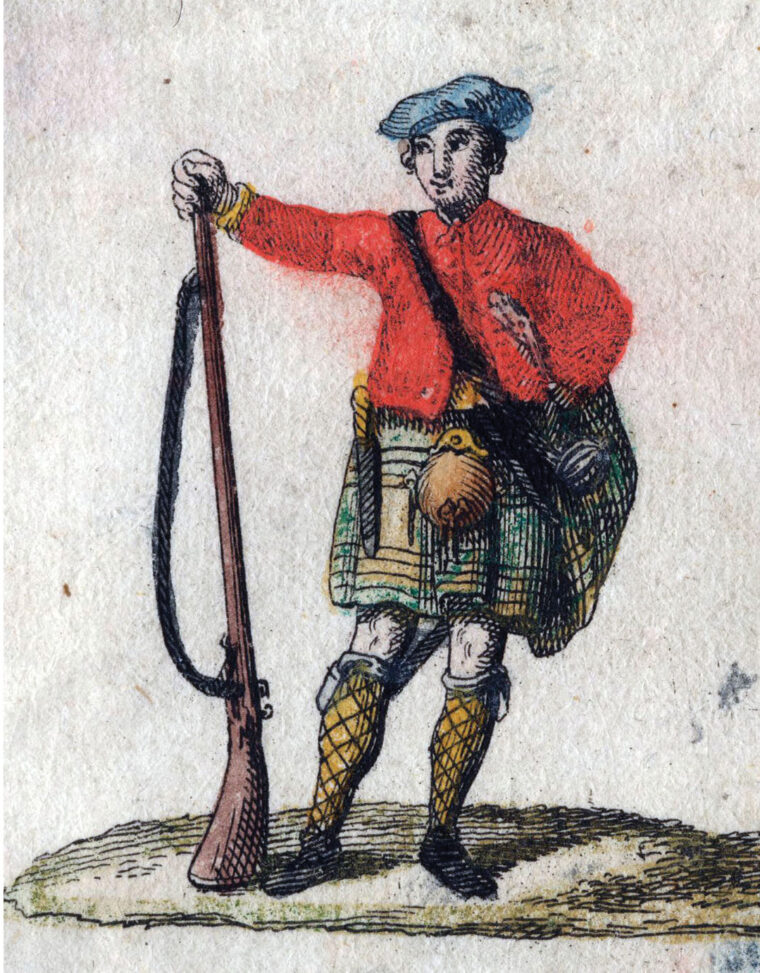
…some confusing information in this – George was not the King of England – he was the King of BRITAIN – that’s why the soldiers were in the British Army and some of them wore Scottish kilts. Other soldiers were Welsh and Irish…