By Nathan N. Prefer
It had been a difficult year for the United States Navy.
Beginning with the surprise attack on Pearl Harbor on December 7, 1941, defeat after defeat had plagued the efforts of the American Navy to recover its balance and strike back against the rampaging Japanese. There had been the disastrous Battle of the Java Sea, then the near annihilation of the Navy’s Asiatic Fleet, the loss of the Philippines, and the Japanese overrunning of Southeast Asia.
America’s few efforts at striking back—naval raids on Wake Island and the Marshall Islands and the Doolittle Raid on Tokyo—had done nothing to alter the balance of power in the Pacific.
Nor were things any better in the Atlantic. Transatlantic convoys were regularly being attacked and sunk by German submarines; American citizens could watch the destruction of their own shipping just offshore along the eastern seaboard and in the Caribbean.
But by May 1942, things had begun to improve, largely the result of two separate developments: First, the Japanese were by now overconfident and decided to extend their original line of conquest even further, into the Coral Sea in the South Pacific, to further isolate Australia. Second, the U.S. Navy’s intelligence and code-breaking organizations had made some important inroads in gathering and interpreting radio intercepts. As a result, Fleet Admiral Chester W. Nimitz, commanding the U.S. Navy’s Pacific Fleet, decided to forcefully oppose the coming Japanese effort to seize Tulagi and Port Moresby in the Solomon Islands.
Nimitz sent what remained of the U. S. Pacific Fleet to intercept the new Japanese thrust in the Coral Sea. The resulting Battle of the Coral Sea (May 3-8, 1942) has been called a draw by some historians, but the fact remains that the Japanese advance was halted. Und`eterred, the Japanese now decided to renew their advance by land in New Guinea and by seizing additional islands in the South Pacific.
The Japanese leadership, led by the famed Admiral Isokoru Yamamoto, architect of the Japanese success to date, also decided to force what they had sought since the war’s beginning: what they called a “decisive battle.” They would strike at Midway Island, hoping to draw the U.S. Pacific Fleet into a battle in which the Americans would be convincingly defeated.
But the Battle of Midway was an undeniable defeat for the Japanese, with a loss of four fleet aircraft carriers and many of the experienced pilots aboard those ships.
Concerned that enemy air bases on Tulagi and other southern Solomon Islands would threaten their lines of communication with Australia, the American Joint Chiefs of Staff authorized Admiral Nimitz to undertake an offensive in that area. Along with the defeat at Midway, they hoped that this would allow the U.S. to seize the initiative from the enemy. As a result, the 1st Marine Division landed on Tulagi and Guadalcanal on August 7, 1942.
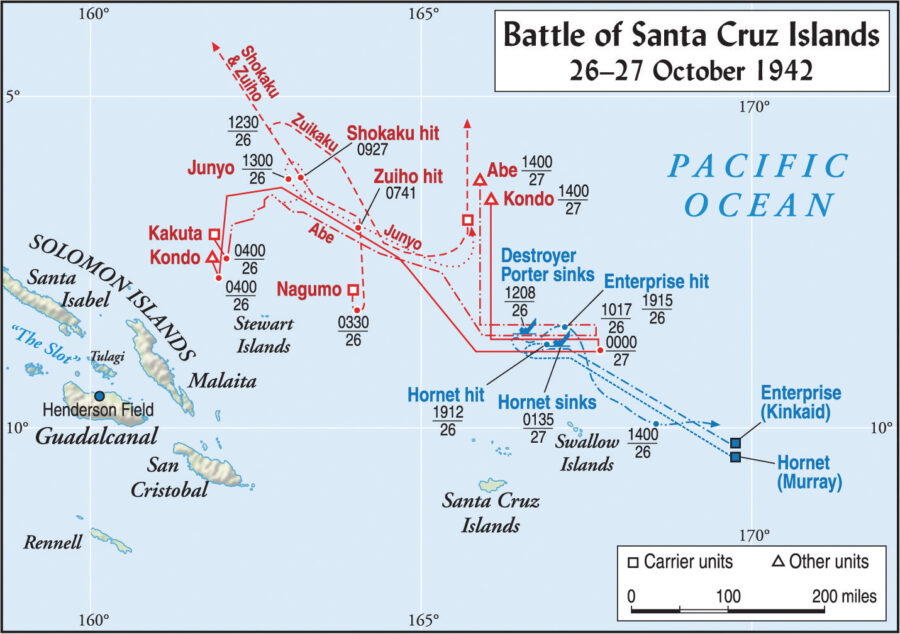
The Guadalcanal Campaign lasted for more than six months and included no fewer than six named naval battles, along with innumerable naval skirmishes. One of the most important of these was known as the Battle of the Santa Cruz Islands, which took place October 26-27, 1942.
Earlier major battles, at Savo Island (August 9, 1942), Eastern Solomons (August 24, 1942), and Cape Esperance (October 11-12, 1942), had either been defeats for the Americans or indecisive.
The next naval battle would take its name from the nearest land mass. The Santa Cruz Islands are just north of the New Hebrides and east of the southern Solomon Islands. They consist of four volcanic islands, heavily infested with malaria-carrying mosquitos. The natives were even more primitive than those of the Solomons.
Coincidentally, both sides were undergoing reorganizations at the time of the Santa Cruz battle. Admiral Nimitz had been unhappy with the performance of his commander in the South Pacific, Vice Adm. Robert Ghormley, and had only just replaced him with Vice Adm. William F. Halsey on October 18, 1942. Known for his aggressive nature, Admiral Halsey had frustratingly spent the last few months recuperating from an attack of dermatitis and had only recently returned to duty. He would later command the Third Fleet in the western Pacific.
Command of the carrier group had also recently changed, with Vice Adm. Frank “Jack” Fletcher rotating back to the United States and being replaced with Rear Adm. Thomas C. Kinkaid, a veteran of Coral Sea and Midway. Although himself a non-aviator, he had experience commanding carrier task forces and would later command the Seventh Fleet under General Douglas MacArthur.
The Japanese Navy was still under Yamamoto’s command. For the coming battle he had assigned his most experienced commander, Vice Adm. Chuichi Nagumo. Although also a non-aviator, Nagumo had commanded the attack at Pearl Harbor, the Indian Ocean raids, and Midway, where he lost the four carriers under his command.
His chief of staff at the Battle of the Santa Cruz Islands was Rear Adm. Kusaka Ryunosuke, who had long experience in aviation but was also not an aviator himself.
The Imperial Japanese Navy had begun the war with some of the best naval aviators of the day, with the aircraft and ships to match. In the early months of the war, losses had been negligible, and a wealth of experience was gained by the Japanese.
But, beginning with the Battle of the Coral Sea, losses began to mount. The loss of nearly the entire flight crews of the two large aircraft carriers in the Coral Sea rendered them unfit to participate in the Battle of Midway.
Then the Guadalcanal campaign had turned into one of attrition, forcing a reorganization. All the fleet carriers were now grouped into what was termed the Third Fleet; battleships, heavy cruisers, and destroyers were grouped as the Second Fleet. The Second Fleet would act as a vanguard for the Third Fleet, sailing at least 100 miles in advance to protect the essential Third Fleet carriers.
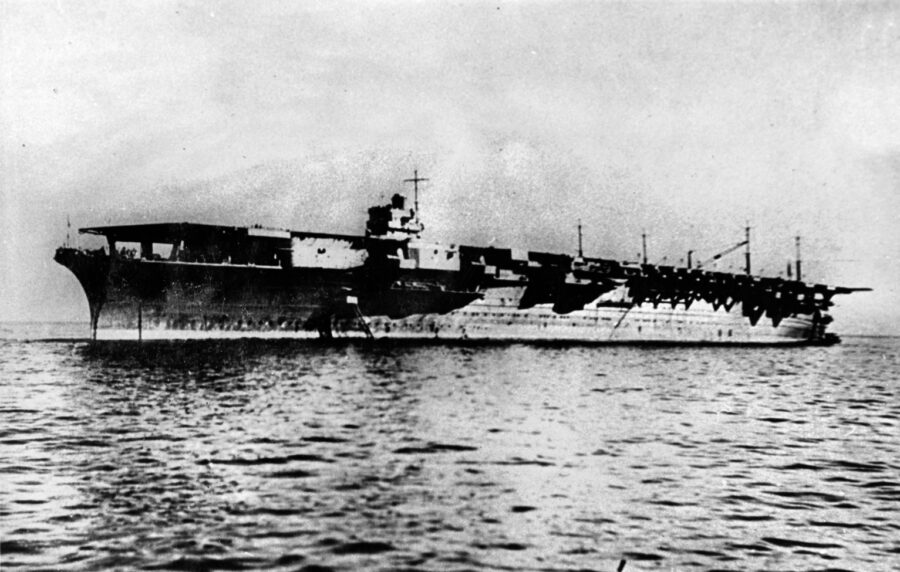
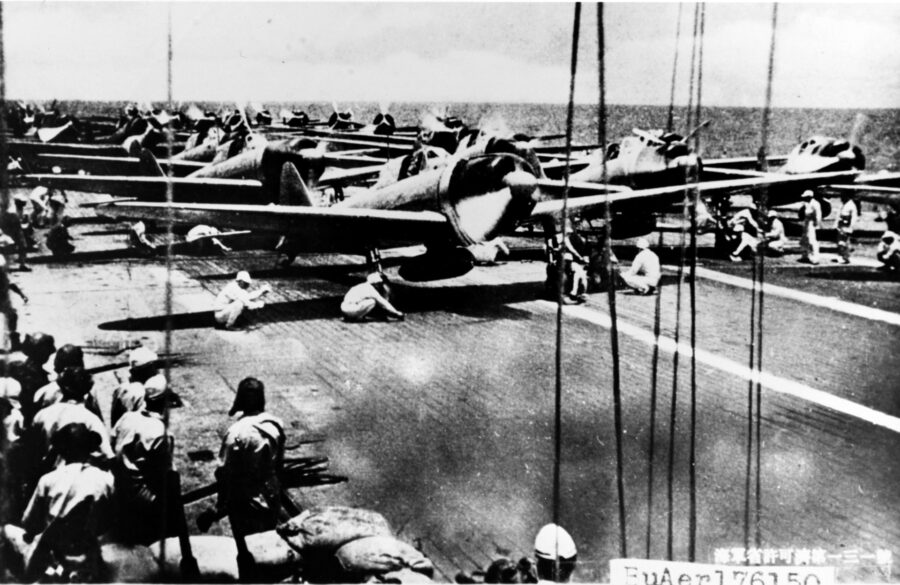
At the Battle of the Santa Cruz Islands, the Third Fleet consisted of two divisions—the First Carrier Division, directly under Admiral Nagumo, which included fleet carriers IJN Shokaku (flag) (Captain Masafumi Arima), the IJN Zuikaku (Captain Tameteru Notomo), and the light carrier Zuiho (Captain Sueo Obayashi). The group was protected by a heavy cruiser and eight destroyers.
Carrier Division Two was under the command of Rear Adm. Kakuji Kakuta, a veteran of the Aleutians invasion, aboard the IJN Junyo (flag) (Captain Tametsugu Okada) and included three battleships, four heavy cruisers, a light cruiser, and nine destroyers. A fifth carrier had suffered mechanical troubles and had been detached from the attack force. Together the four Japanese aircraft carriers carried just under 200 attack aircraft.
The Americans also were altering their plans. Under Admiral Fletcher, the plans had been defensive. They were to prevent an attack on the Marines on Guadalcanal by Japanese naval forces. As such, Fletcher had kept his forces east of the Santa Cruz Islands.
But Admiral Halsey, as befitting his nickname “Bull,” decided to go on the offensive. He and his staff developed a plan to use their two aircraft carriers and two battleships to search aggressively for the Japanese while remaining within range to protect the Guadalcanal beachhead.
The grouping was under the command of Rear Adm. Kinkaid and known as Task Force 61. It included the USS Enterprise (CV-6) (Captain Osborne B. Hardison) and escorts, known as Task Force 16, directly under Kinkaid’s command, and Task Force 17 under the command of Rear Adm. George D. Murray, consisting of the USS Hornet (CV-8) (Captain Charles P. Mason) along with battleships USS South Dakota and USS Washington. There were also four heavy cruisers, five light cruisers, and 20 destroyers.
The two American carriers had about 140 attack aircraft between them. Halsey was taking a huge risk, since his two aircraft carriers were the only two American carriers left in the Pacific. Further, without knowing either how many enemy carriers were in the South Pacific or where they were located, he planned an aggressive sweep north of the Santa Cruz Islands to strike at Japanese-held islands in the Solomons.
Admiral Yamamoto had his own plans, which included a large naval sweep against Guadalcanal to eliminate the Marines holding the island. This was to be in support of the Japanese 17th Army’s decisive attack against that beachhead. His task force then was to await word from the 17th Army that the airfield had been captured, after which it was to sweep into the area and destroy any American naval forces either supporting the Marines or trying to evacuate them.
While awaiting the news of the airfield’s capture, the task force would sail north of Guadalcanal and west of the Santa Cruz Islands. But after two failed attempts, Yamamoto lost patience. Instead of waiting for the army to defeat the Marines, he decided instead to conduct a combined sea and air assault to weaken the Marines so that the Japanese army could overcome them.
First, on October 11, he sent off two seaplane tenders carrying heavy ground equipment. These were supported by three heavy cruisers and two destroyers, which were to bombard Henderson Field on Guadalcanal on October 12. He also ordered intensive air attacks on Guadalcanal beginning that day. Finally, the fleet would soon sail to Guadalcanal to add its weight to the bombardment.
But, once again, things did not go as planned. An American task force, TF 64, under the command of Rear Adm. Norman Scott, turned back the cruiser bombardment force at the Battle of Cape Esperance. The enemy commander, Rear Adm. Aritomo Goto, was killed, and the Japanese lost a heavy cruiser and a destroyer against the loss of the American destroyer USS Duncan (Lt. Cdr. Edmund B. Taylor). The only bright side for the Japanese was that the reinforcement convoy landed its reinforcements unscathed.
From that moment forward, the Battle for Guadalcanal intensified. The Americans landed the reinforcing U.S. Army’s 164th Infantry Regiment, escorted by the Hornet, on October 13. The Japanese countered by bombarding the island with battleships on October 13-14.
A Japanese reinforcement convoy reached the island on the night of October 14-15, landing its troops successfully despite losing three transports to air attacks. Then two heavy Japanese cruisers again bombarded the island. Air attacks were constant by both sides. It was at this point that Ghormley advised Nimitz of his doubts about holding the island. Soon afterwards, Halsey and Kinkaid assumed their new commands.
The Japanese 17th Army launched its largest attack on October 24 and was soon reporting to Yamamoto that it had seized Henderson Field on Guadalcanal. In reality, however, it had not, and the Japanese Navy’s attempt to fly over that airfield soon proved the fallacy of the initial report.
In the meantime, Nagumo’s forces began moving towards Guadalcanal, still unsure of the enemy’s position or strength. The news that the airfield was still in American hands caused them to reverse course.
American search planes soon located and reported on the Japanese forces; all three carriers had been spotted and reported to Admiral Kinkaid. A glance at the charts showed that the two groups were some 375 miles apart, out of range of American aircraft. As Kinkaid and his staff were deciding what to do, a message came from Halsey with orders to “Strike, Repeat, Strike.”
Orders were one thing, but how to strike a force that is out of range is another. Not only were the Japanese out of range, but the winds were blowing against the Americans, making launching aircraft more difficult. To launch aircraft, Kinkaid would have to turn away from the enemy, increasing the distance.
Deciding to launch anyway, Kinkaid sent out a search group late in the afternoon with orders to go only 150 miles, then return to avoid a night landing. But the strike leader chose to go out to 200 miles and then extend another 80 miles, forcing a return in darkness and causing a loss of a fighter, four dive bombers, and three torpedo planes in landing accidents.
The night of October 24-25 was crucial for both sides and would result in the Battle of the Santa Cruz Islands the following day. Still under orders from Halsey to move north, Kinkaid sailed towards the Japanese fleet, dangerously close to Japanese island air bases.
Kinkaid designated the Hornet’s Air Group 8 (Commander Walter F. Rodee) as the attack force for the coming battle, while the Enterprise’s Air Group 10 (Commander Richard K. Gaines) would handle all search and combat air patrol duties. Patrol aircraft flying from Espiritu Santo also continued to search for the Japanese and report on their course, position, and speed.
Meanwhile, the Japanese marked time, with the Advance Force (Rear Adm. Hiroaki Abe) some 60 miles ahead of the main body. Finally, a frustrated Yamamoto gave up waiting for the Imperial Japanese Army to deliver Guadalcanal, and, since his ships had been at sea for some time and fuel was now becoming an issue, he ordered Nagumo to close the island and deliver a knockout punch once and for all with his aircraft and guns.
With his three carriers and 194 aircraft, Nagumo outnumbered Kinkaid in every important respect, but the Japanese still did not know how many American carriers were nearby or exactly where they were.
It was the patrol aircraft flying from Espiritu Santo that began the largest carrier battle of the Guadalcanal Campaign. These PBYs discovered Nagumo’s fleet some 300 miles northwest of Task Force 61 shortly after midnight on October 25-26, 1942.
One PBY attacked a destroyer unsuccessfully, so Nagumo knew he had been spotted. Another PBY attacked the Zuikaku with bombs but also missed. Concerned about an American ambush, especially after his Midway experience, Nagumo then turned his fleet north and ordered that all aircraft be stripped of fuel and armament; 14 aircraft were sent out to search the area for American forces. Then the Japanese reversed course and turned south once again.
While the Japanese were searching for them, the Americans turned to the southeast to launch aircraft. A combat air patrol and several search planes went aloft. Unfortunately, it took nearly five hours before the report of the PBY sighting of the Japanese fleet reached Admiral Kinkaid. When the report finally reached him, Kinkaid had already dispatched 16 of his scout dive bombers on a search mission, which left him short of strike aircraft.
An hour later Air Group 10’s search planes sighted the Japanese Advance Force 170 miles to the west and reported to Kinkaid. Admiral Abe immediately altered course to the northwest, but not before two of the dive bombers under Lieutenant Vivian W. Welch attacked the heavy cruiser Tone but missed. Other Dauntless dive bombers also attacked but scored no hits. Moments later other scouts reported on the three Japanese aircraft carriers, placing them 200 miles northwest of TF 61.
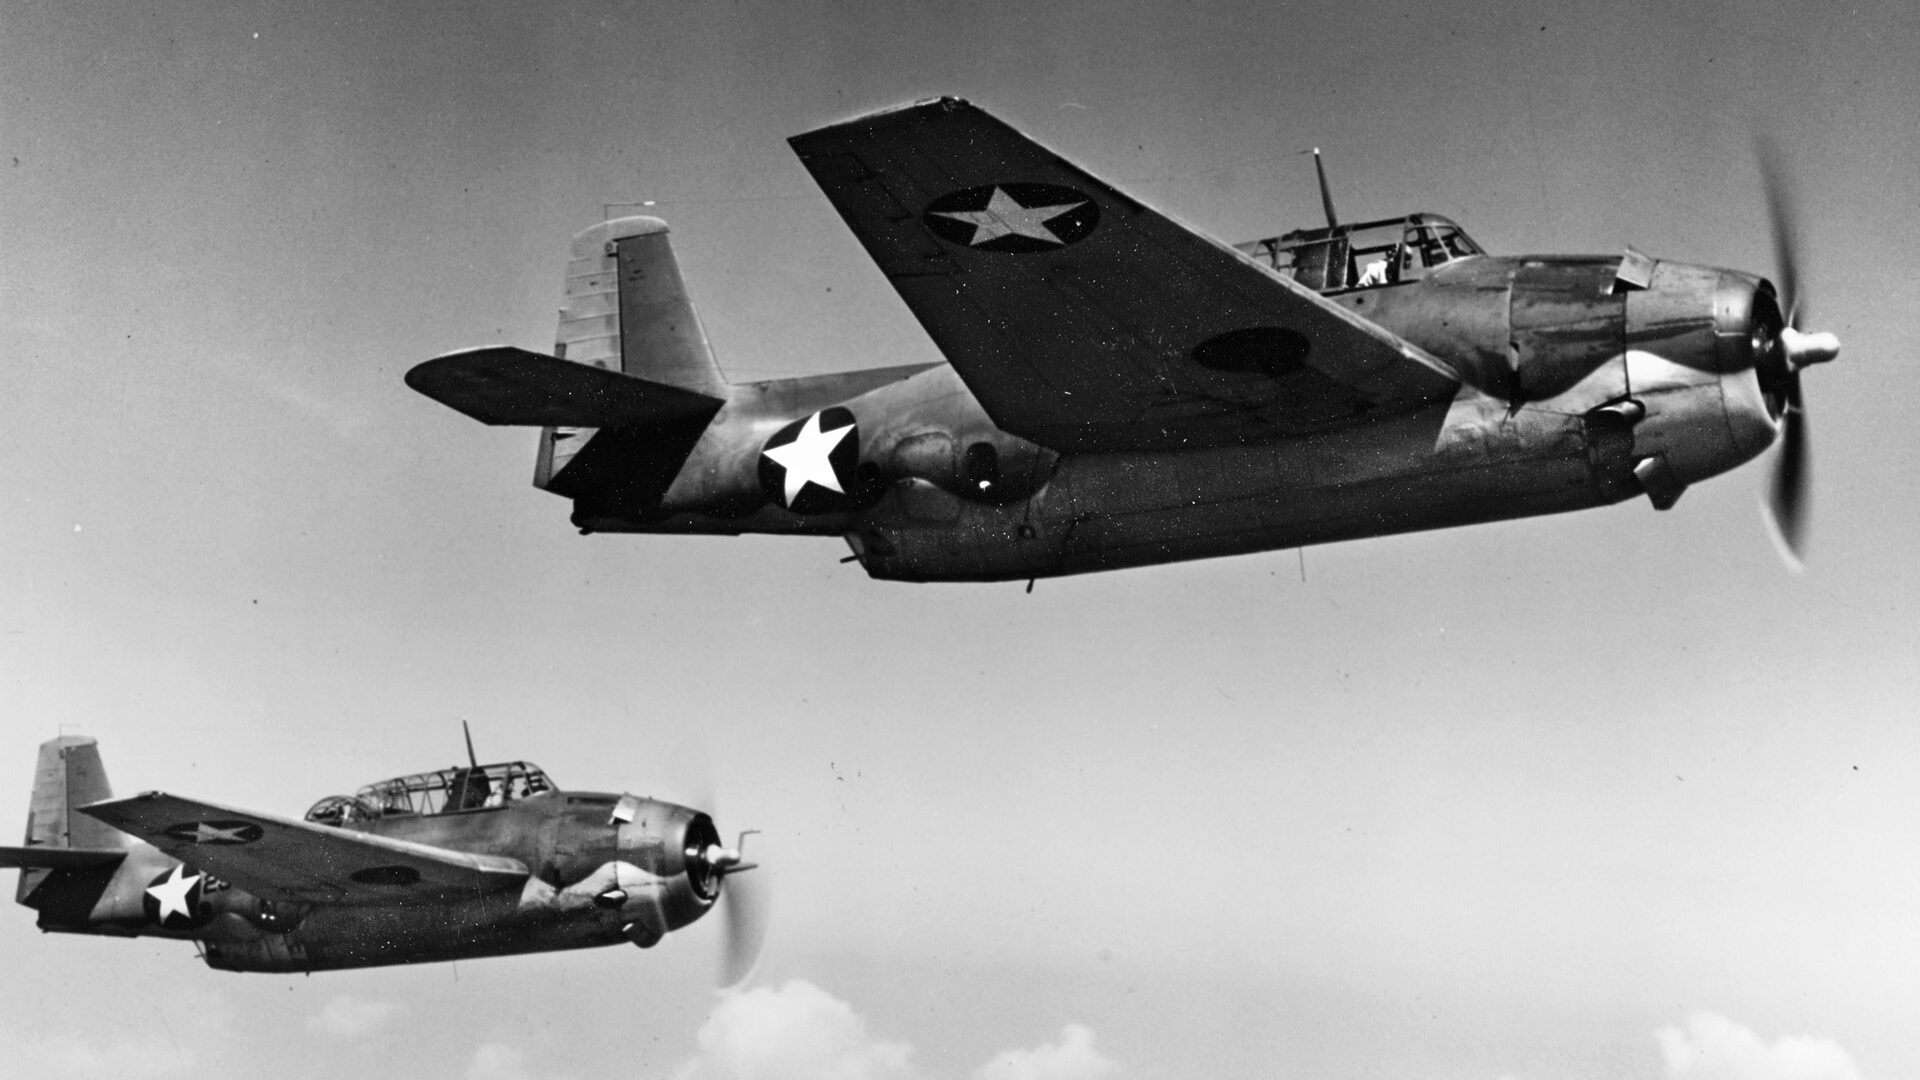
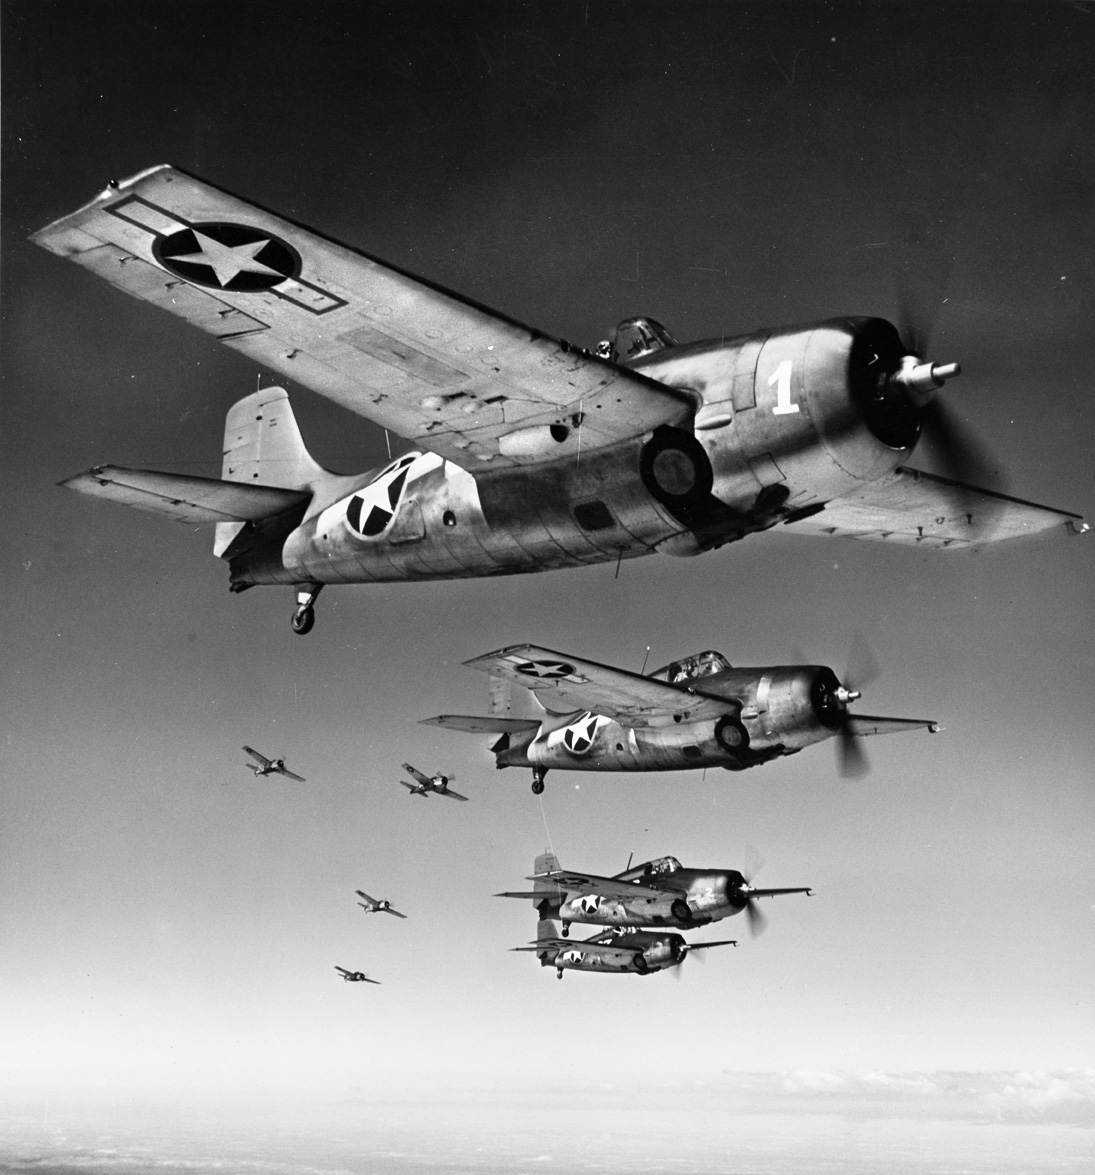
Kinkaid ordered an immediate strike from both of his carriers. They were at the edge of their strike range, and swift reaction was necessary to attack before they were out of reach. Hornet quickly launched dive bombers and torpedo planes, protected by seven fighters. Moments later a second strike of dive bombers and Avengers armed with bombs instead of torpedoes went aloft. Enterprise followed with eight torpedo planes, three dive bombers and eight fighters. Although Kinkaid had ordered that the three attack groups strike together, this was ignored, and each struck out on their own.
Admiral Nagumo had also been alerted to the Americans’ location by one of his scout planes and ordered an immediate launch. Locating the enemy at 210 miles away to the east-southeast, he sent Lt. Cmdr. Shigeharu Murata of the Shokaku with four fighters, 21 bombers, and a scout to keep in contact with the Americans. IJN Zuiho added nine fighters and another scout to the attack force. In total, Murata led 21 fighters, 21 bombers, and 22 attack planes against Task Force 61.
Barely had Nagumo’s first attack wave cleared the decks than a second was brought up and prepared for launch. As the Japanese prepared the second launch, two Dauntless dive bombers from the original scouting group appeared undetected by Japanese radar or Combat Air Patrol and attacked the light carrier Zuiho, hitting her with a single 500-pound bomb aft and taking her out of the air battle.
Both American pilots, Lieutenant Stockton B. Strong and Ensign Charles B. Irvine, despite being chased for miles by the Combat Air Patrol, escaped unharmed. Nagumo was forced to detach the crippled Zuiho to the Japanese base at Truk for repairs.
This sudden unexpected and successful American attack further unnerved Nagumo, who ordered frenzied efforts to get the second strike launched before the Americans struck again. Both the Shokaku and Zuikaku launched independent attacks as soon as possible. Meanwhile, the Japanese command prepared for a possible surface engagement, ordering the Advance Force to increase speed and head for the American fleet.
In the air the two opposing attack groups passed each other on the way to their respective targets. Hornet’s fighters radioed a warning back to their carrier about the incoming Japanese attack force; Japanese fighters did the same. Then the fighters from the Zuiho decided to attack the Americans flying against their carrier.
Hitting the Americans from behind and from out of the sun, fighters from Air Group 10 shot down two Avengers. A fight between the Japanese Zeros and four F4F-4 Wildcats ensued. The fighting cost four Zeros and three Wildcats, but the American strike force continued its mission. Other aircraft were damaged and had to return to base. The Japanese fighter commander’s decision was soon to cost Commander Murata’s strike force considerable losses.
The Hornet-launched Americans were spotted by Japanese radar at 78 miles distance. Immediately the 20 Japanese fighters on Combat Air Patrol were directed against this incoming threat.
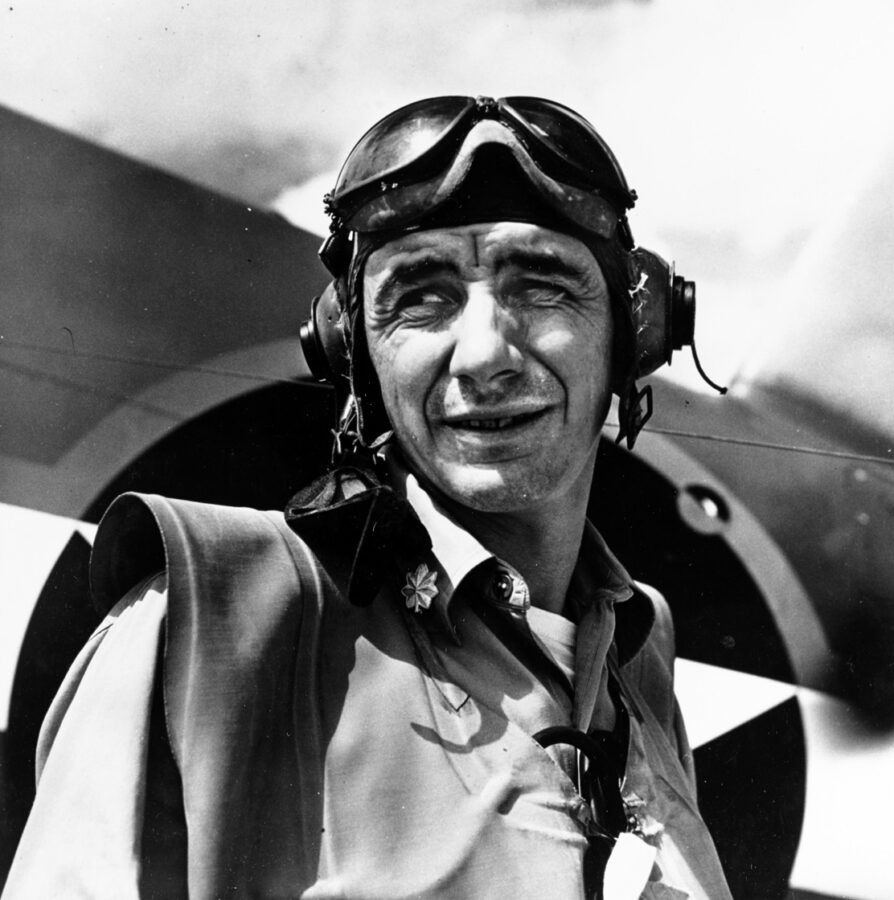
Passing over the IJN’s Advance Force and ignoring them, the leading bombing squadron continued. With his fighters stripped away by the Zeros, Lt. Cmdr. William J. “Gus” Widhelm (who had earned the Navy Cross during the Battle of Midway) led the remaining SBD-3 bombers of VS-8 into the attack.
After radioing the enemy’s position (a transmission that was jammed), Widhelm was shot down (he and his rear gunner were rescued), and Lieutenant James E. Vose took command. Their target was the Shokaku, which was turning wildly below to avoid their attack. Although the first few 1,000-pound bombs missed, the next few, perhaps as many as six, struck the carrier. Instantly, bright gouts of fire and smoke began blossoming upward.
Hornet’s VS-8 had hit the Shokaku near the island on the starboard side, with other bombs striking the center and aft elevators. The flight deck had buckled, and the elevators were destroyed, making flight operations impossible. A large fire began, which took five hours to extinguish. About 130 of the ship’s personnel had been killed.
However, there was no damage to the hull, and the ship could still sail, if not launch or recover aircraft. Of the 15 Dauntlesses that made this attack, all but two returned to their carrier.
The other Hornet’s strike group missed the main Japanese force and attacked the Advance Force instead. Escorted by seven of Lt. Cmdr. Henry G. Sanchez’s Fighter Squadron 72 (VF-72), they attacked the cruisers of the Advance Force and hit heavy cruiser Chikuma with two 1000-pound bombs, damaging her severely.
Hornet’s second strike also missed the main body and hit the Advance Force, again selecting the unlucky Chikuma as the target, but only one 500-pound bomb hit was confirmed. The cruiser lost 192 killed and 95 wounded from all this unwanted attention. Two more American attack groups also failed to find the main body, and instead attacked the Advance Force, but caused no additional damage.
Out of the 75 American planes sent into the attack, not counting the scouts, only 10 managed to damage one Japanese carrier; the failure of the leaders to attack as a single group was largely responsible for this poor showing.
The Japanese did better. Lt. Cmdr. John Griffin commanded the fighter protection over Task Force 61 and had 37 fighters at his command. He placed them over each carrier at 10,000 feet, to conserve oxygen and fuel. This would later prove to be a serious error. The incoming strike was detected by the USS Northampton’s (Captain Willard A. Kitts, Jr.) radar at 70 miles distance and the report passed on to the carriers, but apparently never reached Commander Griffin on the Enterprise.
Commander Murata’s strike first encountered Hornet and picked her as their target. At that moment, TF 16 and Enterprise were covered by a rain squall. Commander Murata had 12 Zeros and 41 attack aircraft which he directed against Murray’s TF 17. By the time the American fighters were directed against the attacking Japanese and rose to meet them, the enemy had already begun his attack.
Using the “anvil formation,” in which the torpedo planes attacked from both sides of the target, making it difficult to avoid one without running into the other, Lieutenant Sadamu Takahashi began the attack on Hornet.
Meanwhile, IJN dive bombers drove through the clouds and placed a 500-pound bomb in the center of Hornet’s flight deck. Another bomb hit near the bridge and holed the flight deck. A third struck and exploded below deck, causing extensive casualties. Of the seven dive bombers that attacked, three hits were scored, and four planes survived the attack.
Lieutenant Takahashi’s attack was upset when TF 17 changed course to the northeast. Now forced to make a difficult stern attack, the torpedo planes went in anyway. Commander Murata was shot down, and the first three aircraft missed. Then a torpedo hit Hornet just below the bridge. A second torpedo hit in the engineering spaces, knocking out the engine rooms and causing flooding. Power was quickly lost.
Hornet stopped dead in the water and began to list to starboard. Now three more torpedo planes came in; the first was shot down, the others missed. Five more came in, and the first three missed, while the final two decided to attack the cruiser Pensacola (Captain Frank L. Lowe) but missed. Of the 11 torpedo planes, only two had hit Hornet, and five had been shot down.
The next attack group was intercepted by fighters from Lt. Cmdr. James H. Flatley, Jr.’s Fighter Squadron 10 (VF-10) off the Enterprise. They disrupted the attack on Hornet, shooting down two, one of which performed a suicide dive onto Hornet, catching a wing on the ship’s smokestack and bouncing through the flight deck. The resulting fire took two hours to extinguish.
A third attack group was turned away by the Enterprise’s fighters before they could close with TF 17. But two damaged Japanese aircraft remained on the scene. One, smoking, suddenly appeared and tried to bomb Northampton, but missed. He then turned to Hornet, intent on a suicide dive, and crashed into the ship’s port side. Moments later a second Japanese plane tried a suicide dive but hit the water only feet from the hull.
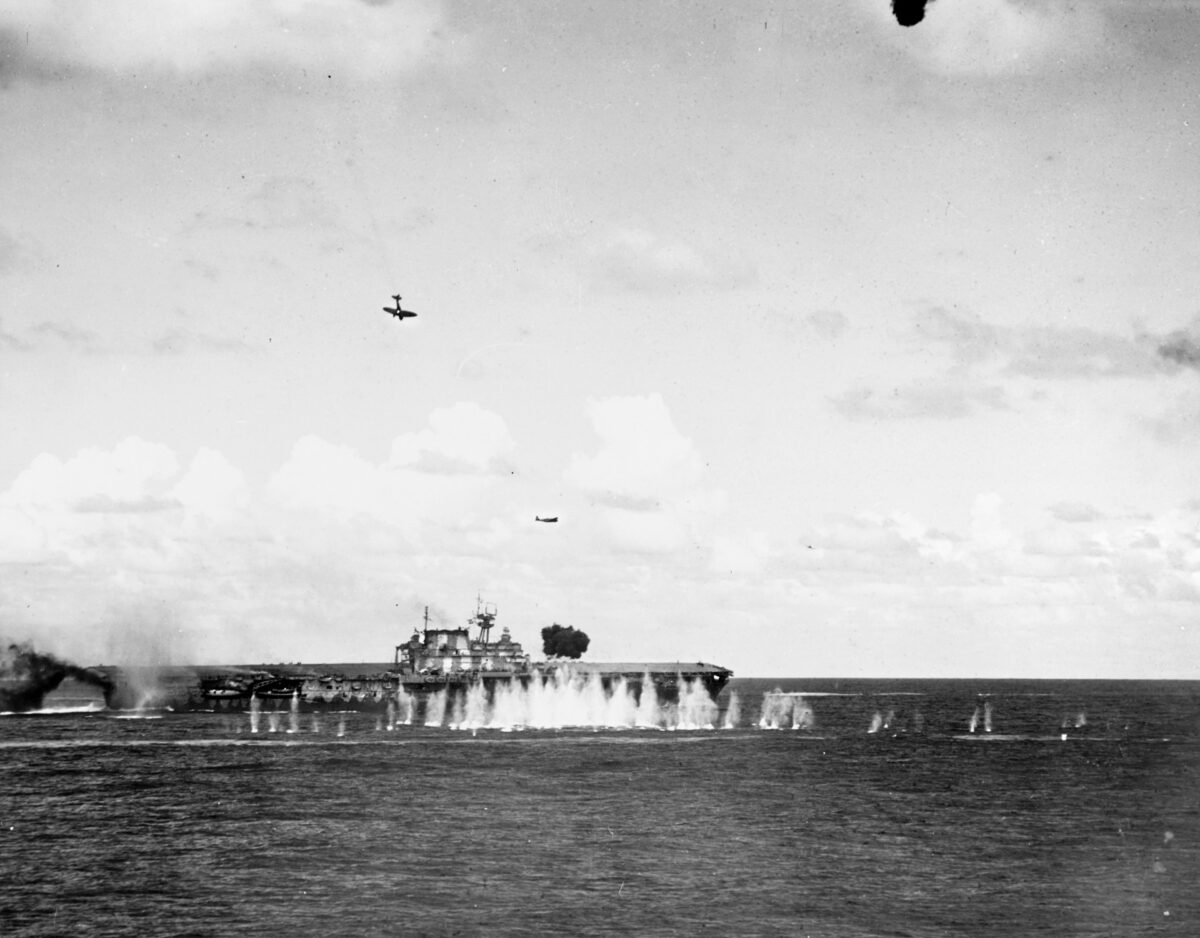
Altogether Hornet had suffered two torpedo hits, three bomb hits, and two suicide crashes. She was powerless, unable to land or launch aircraft, and was listing to starboard. But the attack had cost Japan dearly; of the 53 attacking Japanese aircraft, only 15 survived to return to their carriers. The Americans lost six fighters, of which two pilots were rescued.
From radio intercepts, the Japanese knew that Hornet was severely damaged, and the Enterprise—America’s last functioning carrier in the entire Pacific—was still in the area. The second attack was therefore directed against Enterprise.
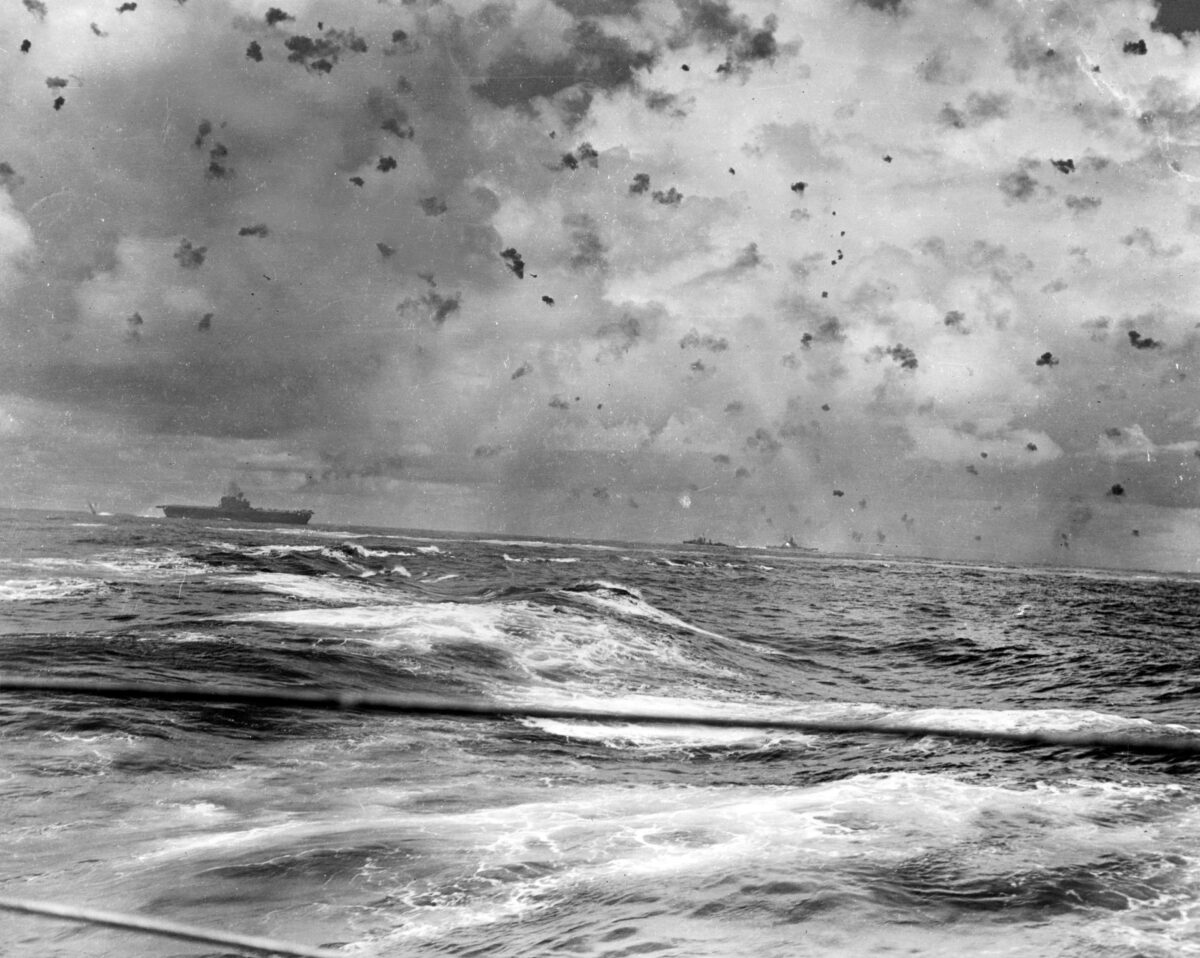
Admiral Kinkaid sought the shelter of rain squalls, common in the area, but the 24 Japanese aircraft of the second strike found them anyway. The South Dakota’s (Captain Thomas L. Gatch) radar picked up Lt. Cmdr. Mamoru Seki’s approach at 55 miles distance. Spotting the wounded Hornet and quickly seeing that she was seriously damaged, he went on to spot TF 16 some 20 miles further. Admiral Kinkaid turned away, and planes about to be launched on deck were hurried into the air.
Seki’s group attacked out of the sun, and only one was shot down by American fighters before they began their dives on Enterprise. American antiaircraft fire was more effective. Seki and three others were shot down, and only one 550-pound bomb penetrated the carrier in the middle of its flight deck. Damage was slight since the bomb went through the flight deck and exploded off the port bow.
A second bomb hit near the forward elevator, blowing one Dauntless overboard; six others were jettisoned to avoid a fire. A third bomb was a near miss that opened some underwater seams and caused additional planes to be towed overboard. Ten of the 19 attacking Japanese planes had been shot down. Enterprise had lost 44 men killed and 10 aircraft destroyed.
Lieutenant Shigeichiro Imajuku led the Zuikaku’s strike, leading his torpedo planes against Enterprise and being shot down for his efforts. None of his following planes hit Enterprise and two of them turned off to attack the battleship South Dakota. They missed, but one severely damaged aircraft made a suicide dive on the destroyer USS Smith (Lt. Cmdr. Hunter Wood, Jr.) and seriously damaged that ship.
With steering control lost, Wood raced to the aft steering room and conned his ship from there. He moved up to the bow of South Dakota, whose bow wave soon extinguished the flames aboard the Smith. The destroyer lost 28 dead and 23 wounded.
Just when Captain Hardison thought Enterprise was out of danger and began to recover planes, Lieutenant Maseo Yamaguchi and 18 strike aircraft from IJN Junyo arrived. Attacking unexpectedly out of the clouds, the strike managed only a near miss on Enterprise, losing eight of their own in the attack.
Stragglers from this group attacked South Dakota, landing one bomb on the armored cover of the number-one turret and wounding Captain Gatch slightly with a shell splinter. One man died and 50 others were wounded. Another straggler struck Captain James E. Maher’s antiaircraft cruiser San Juan, which temporarily lost steering control and veered through the formation, guns still firing at the Japanese planes overhead. Steering control was resumed after a few discomfiting minutes.
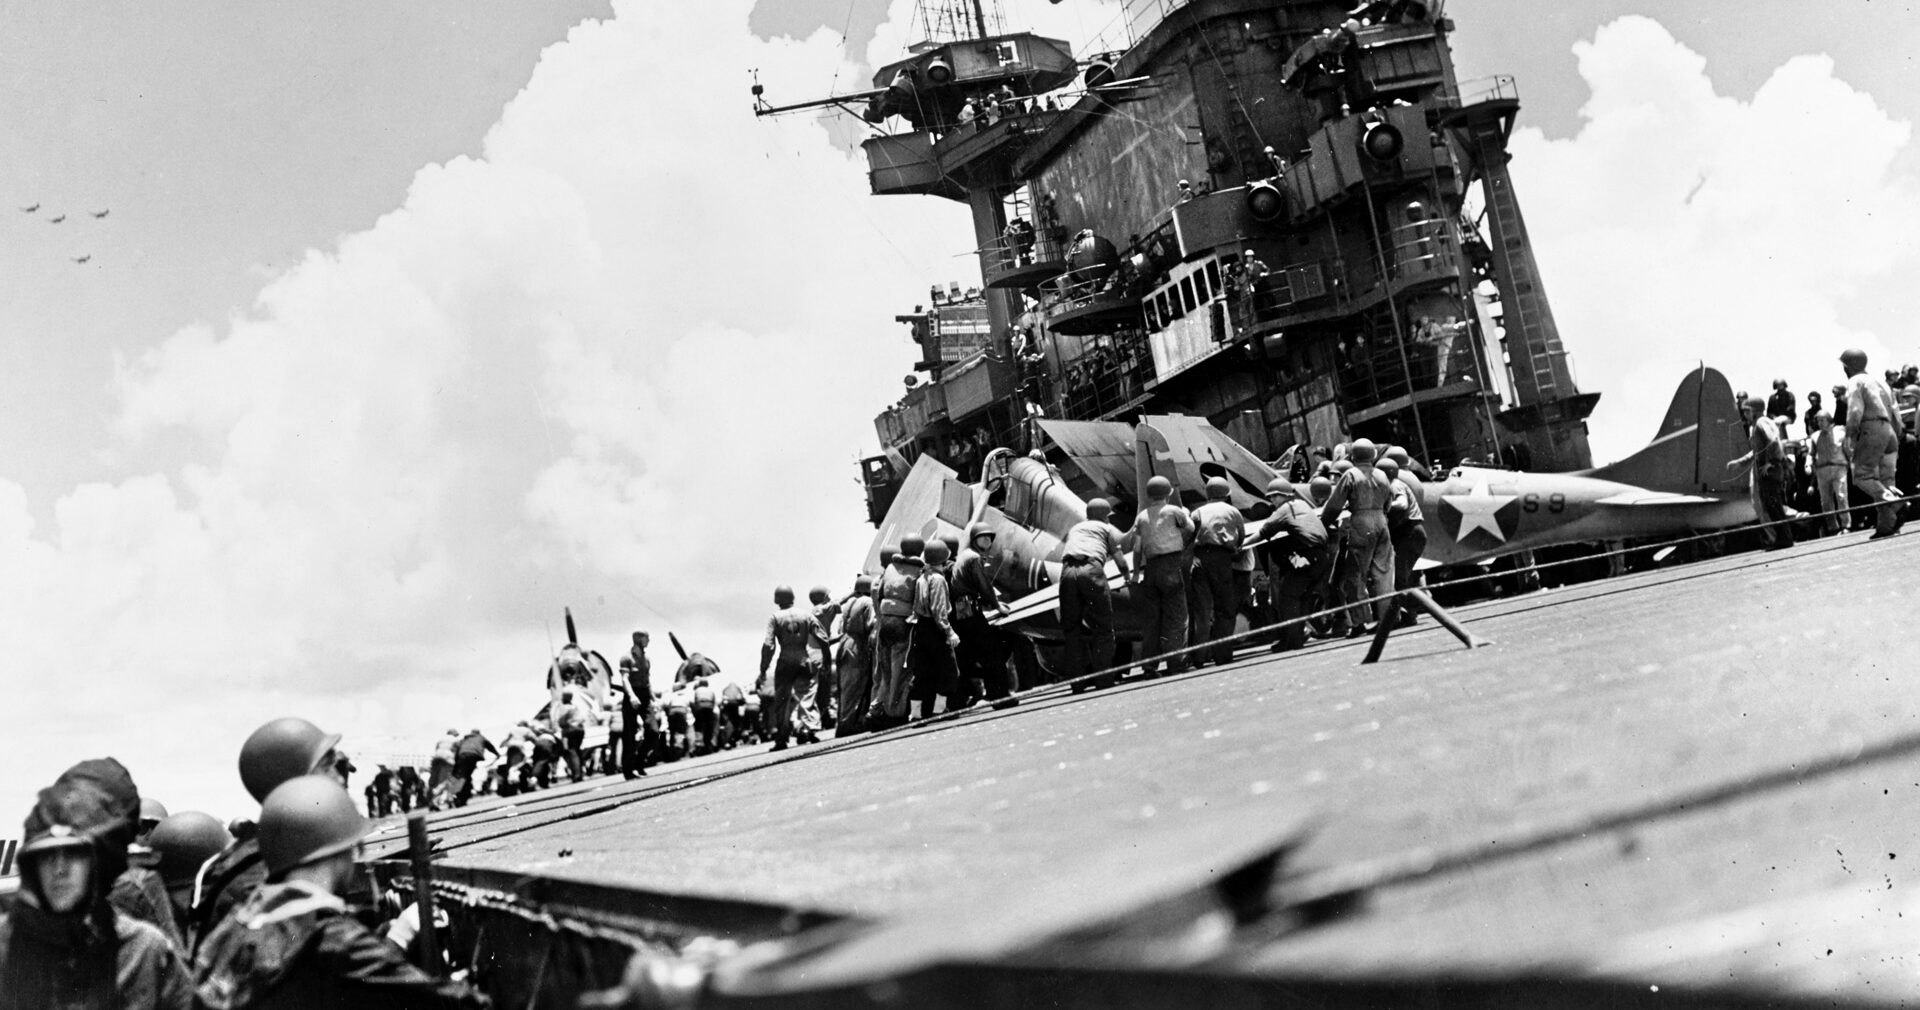
Enterprise recovered as many aircraft as she could, sending the surplus off to Espiritu Santo. Meanwhile, Hornet was fighting for her life. The Northampton tried to tow her to safety, but the tow rope repeatedly broke. Finally, at three knots, the cruiser managed to pull the carrier away from the battlefield; wounded were treated and gathered on the fantail. Captain Mason soon had all the wounded transferred to the destroyers USS Russell (Lt. Cmdr. Glenn R. Hartwig) and USS Hughes (Lt. Cmdr. Donald J. Ramsey).
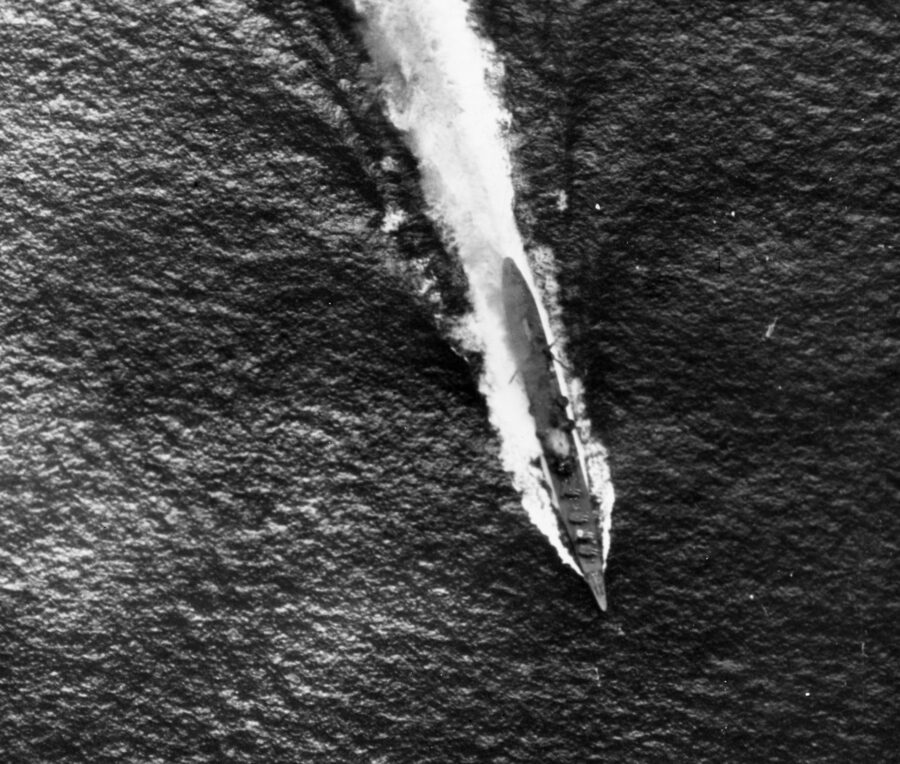
But the Japanese were not yet finished. A mixed strike force from the Junyo and Shokaku arrived and attacked Hornet and Northampton. Casting off the tow, Captain Kitts dodged the torpedoes successfully, but Captain Mason had no propulsion and could not dodge incoming torpedoes. Strangely, only one struck the carrier. That one was enough, however, flooding her engine room and increasing her list to 14 degrees to starboard. Mason ordered his crew to abandon ship.
Even as the crew was in the process of abandoning ship, more enemy planes appeared. The machine guns from Hornet fired, the bombers missed, and no Japanese planes were shot down. And yet an additional small flight from Junyo came over the stricken ship, landing one bomb on the empty hanger deck and starting a small fire.
But by that time Hornet had been abandoned. Her losses were 111 killed and 108 wounded. While rescuing downed aircrew, the USS Porter (Lt. Cmdr. David G. Roberts) was hit by an errant torpedo jettisoned by an Avenger pilot trying to land. All but the 15 men killed in the blast were rescued by the USS Shaw (Lt. Cmdr. Wilbur G. Jones), which then sank the floundering Porter with gunfire.
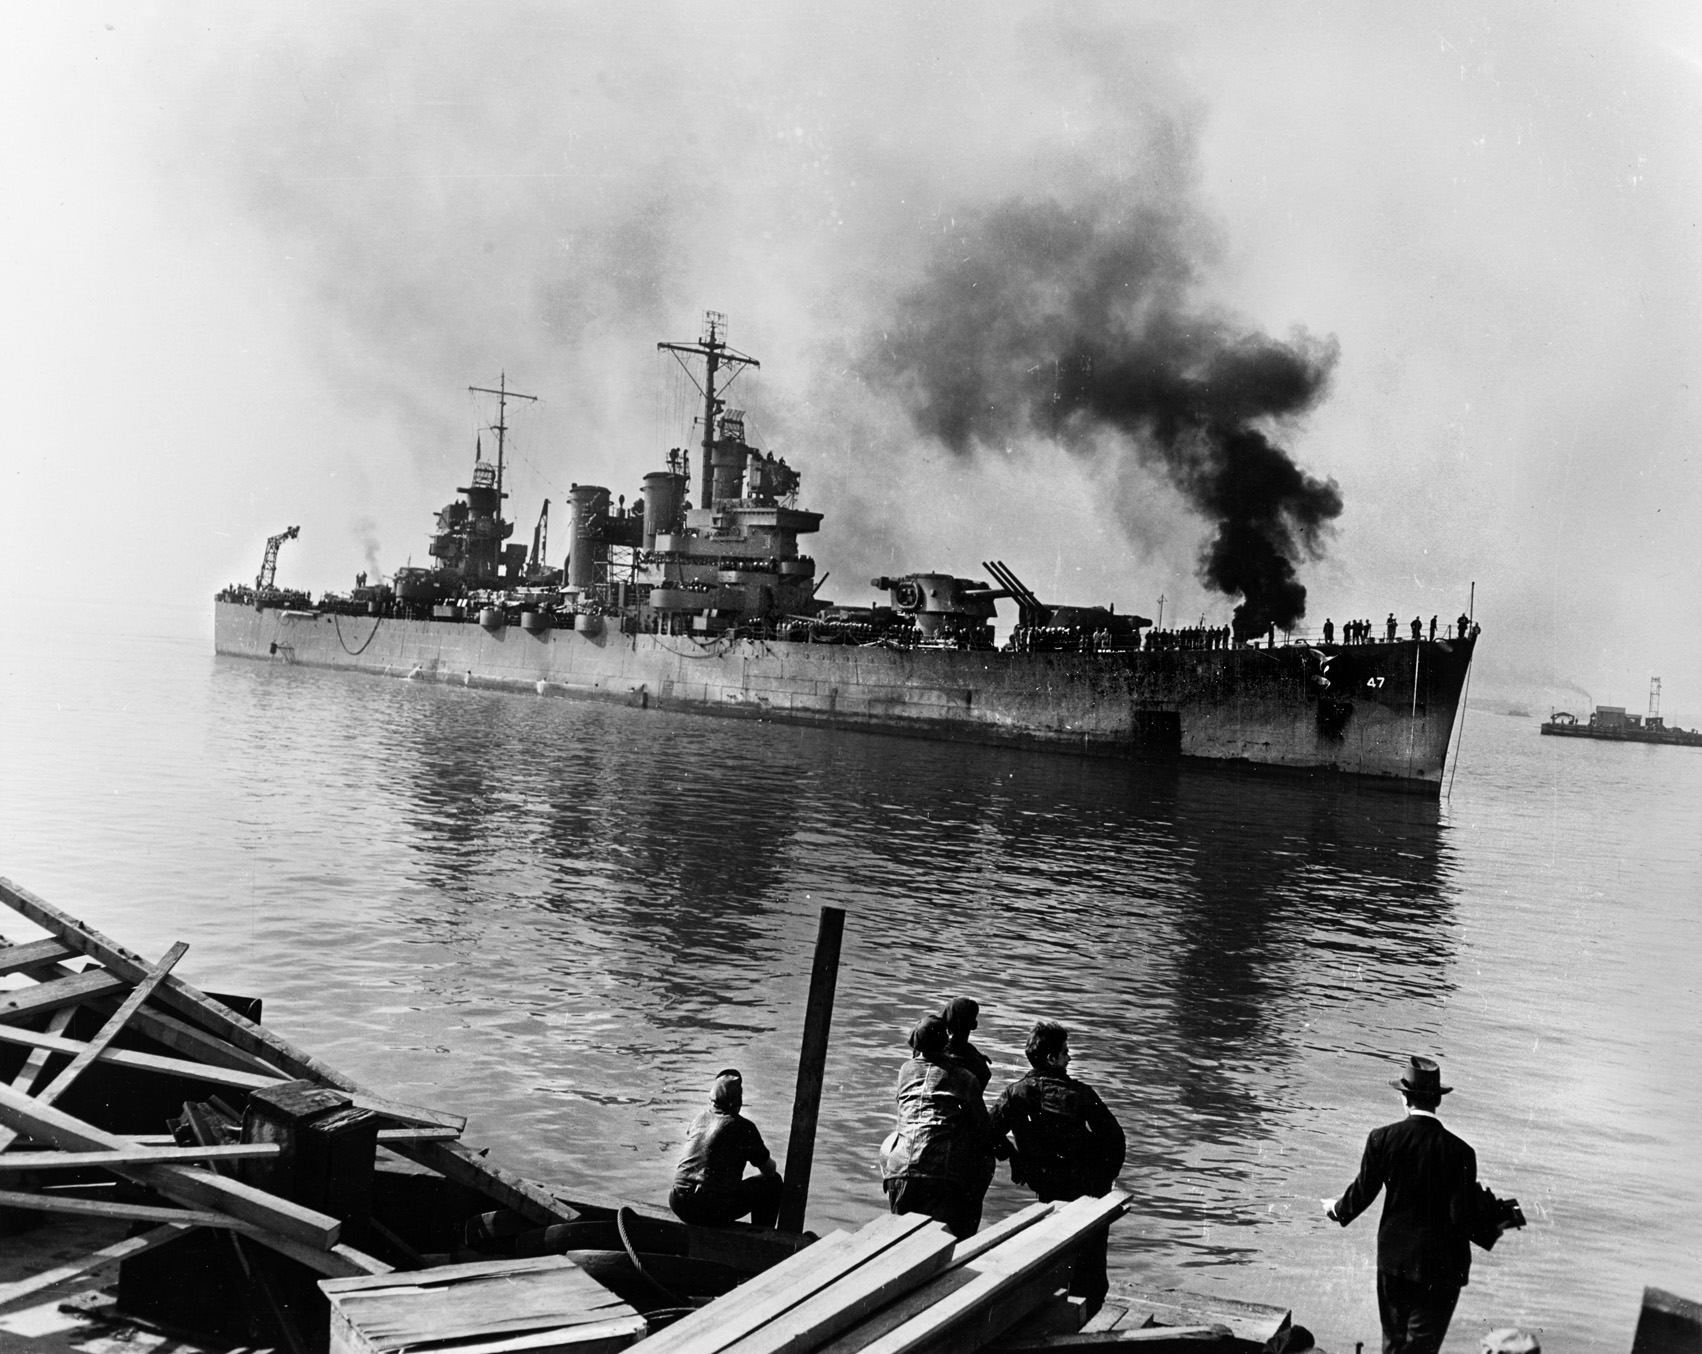
Admiral Kinkaid had no choice but to scuttle Hornet. The famous ship that had brought Jimmy Doolittle’s B-25 bombers to within 600 miles of Japan in April 1942 lay helpless in the sea, listing dangerously and with little hope of being towed out of the battle zone safely.
Kinkaid also had to be concerned with the rest of Task Force 64’s safety, for the odds were now greater than when the battle had begun. The destroyer USS Mustin (Lt. Cmdr. Wallis F. Peterson) was ordered to sink the carrier. After firing eight torpedoes without an explosion—a sad comment on the state of American torpedo technology at this stage of the war—the USS Anderson (Lt. Cmdr. Richard A. Guthrie) took over, getting six hits our of eight torpedoes. Still, the valiant ship refused to sink.
Both destroyers fired over 400 rounds of 5-inch ammunition at the carrier, but still she floated, although now flames roared throughout the ship. By this time both Mustin and Anderson were receiving the unwanted attention of Japanese scout planes overhead. Convinced Hornet was finished, the two destroyers fled the scene, less than 40 minutes before the Japanese advance force arrived.
Part of the Advance Force chased the Mustin and Anderson away, while the Japanese destroyers Makigumo and Akigumo finished off Hornet with “Long Lance” torpedoes. At 1:35 am, on October 27, Hornet finally plunged beneath the waves in 17,500 feet of water, carrying 140 of her 2,200 sailors with her. (Hornet was found by an expedition in January 2019.) The Battle of the Santa Cruz Islands was over.
The battle was counted as a Japanese victory, but only barely. The IJN lost the use of two carriers for the better part of the following year while Shokaku and Zuiho, as well as Chikuma, underwent extensive repairs. The Zuikaku was also returned to Japan to acquire and train replacements for her decimated air group. This virtually eliminated Japanese carrier air power from the coming major Battle of Guadalcanal (November 12-15, 1942).
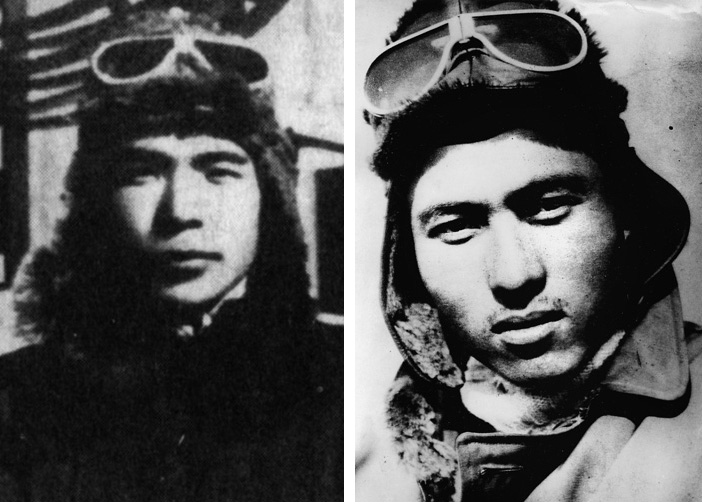
More importantly, the loss of skilled and experienced flight leaders such as Lt. Cmdr. Murata, Lieutenants Maseo Yamaguchi, Shigeichiro Imajuku, Mamoru Seki, Sadamu Takahashi, and others, would, when taken with the losses suffered at Coral Sea and Midway, seriously damage the Japanese naval air force’s ability to prosecute the war in the coming years.
The loss of 68 pilots and 77 aircrew—more than at Midway—would also have a negative impact on future operations. These losses included two of three dive-bomber leaders, three torpedo squadron leaders, and most section leaders.
The Japanese spent a great deal of time and effort in training aircrew, and these losses soon forced the reductions in training hours and experience that would result in the “Marianas Turkey Shoot” in June of 1944. Half of the aircraft (99 of 203) that attacked were destroyed, and these could be replaced, but only at the expense of other pressing military needs.
This battle was the fourth carrier-versus-carrier battle in four months. Besides the ship losses, the Americans lost 81 planes, but only 25 in combat; the others were aboard Hornet or were ditched operationally. Twenty aircrew had been lost, with another four captured. They still suffered from poor fighter direction, in part because of poor communications equipment. New VHF (Very High Frequency) radios that were about to appear would rectify that issue.
Attack coordination remained unsolved. The established procedure of each carrier being the center of its own task force, thus dividing up antiaircraft fire, was soon abandoned in favor of placing all carriers in the center of a massive task-force organization.
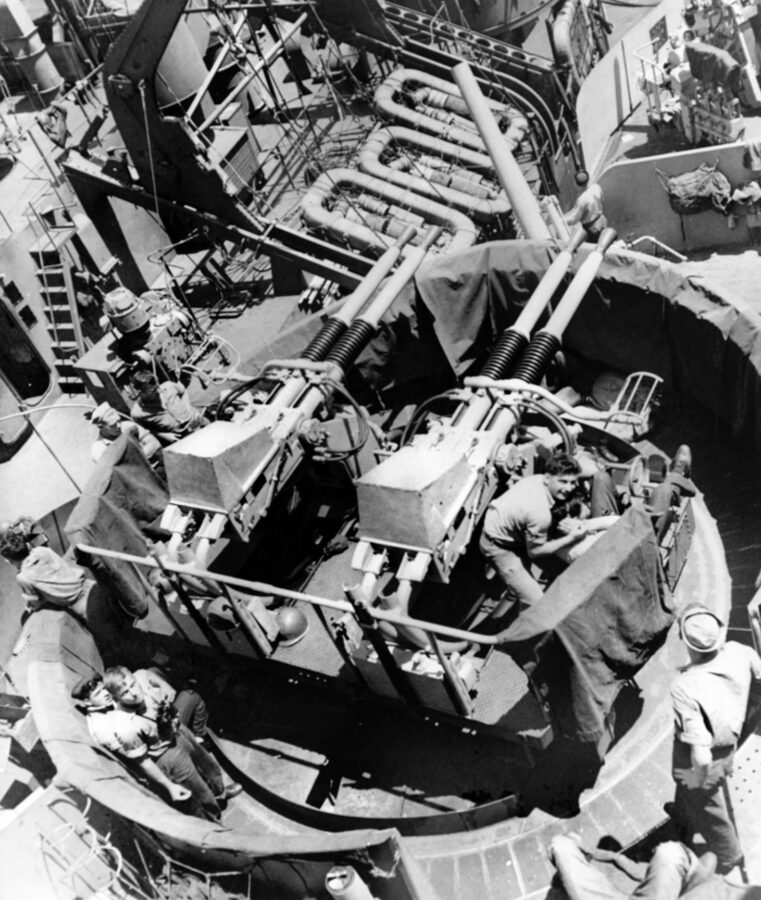
The new Bofors 40-mm antiaircraft gun proved its value at Santa Cruz. As Admiral Kinkaid later remarked, “There cannot be too many 40mm and 20mm guns on any type of ship. They knock down planes.”
Improvement was still needed in torpedo attacks and long-range searches. Recommendations that the Combat Air Patrol be stationed at least 20 miles out from the carriers, and that they be placed above the incoming attackers, would soon be implemented.
The Japanese claimed that they had sunk three carriers, one battleship, one cruiser, one destroyer, and one unidentified warship. In fact, they had sunk only Hornet and Porter while damaging several others—mostly minor damage that was quickly repaired locally.
In turn, the Japanese had lost three ships heavily damaged, including the Shokaku and Zuiho, both of whom had to return to Japan for repairs, as did the cruiser Chikuma. These losses halved their naval air strength in the coming epic Battle of Guadalcanal.
They also lost Admiral Nagumo, who had disappointed Admiral Yamamoto for the last time. He was relieved and sent to a shore base for the duration of the war.
As mentioned, Admiral Kinkaid went on to liberate the Aleutian Islands seized by the Japanese during the Midway Operation, and then command the Seventh Fleet until the end of the war. Admiral Halsey rose to command the Third Fleet and became one of America’s leading military figures. Rear Admiral Murray would become Vice Adm. Murray in command of Air Force, Pacific Fleet.
And Admiral Chester Nimitz, after receiving the reports of the battle, changed his outlook, remarking that, “The general situation at Guadalcanal is not unfavorable.”
Join The Conversation
Comments
View All Comments