By William E. Welsh
The narrow barge drifted slowly along the Thames River on a muggy summer day in July 1258. King Henry III had chosen to dine on the water that day, but his outing was cut short by the approach of a sudden storm. The sky darkened, thunder pealed, and a pelting rain fell. The king ordered the crew to dock at the residence of William Kirkham, Bishop of Durham.
Lodging with the bishop was Simon V de Montfort, Earl of Leicester, who was the king’s brother-in-law and one of the realms most powerful magnates. Upon learning that Henry was in the bishop’s garden, Montfort came out to greet him. Noting the king’s frightened look, Montfort asked him what he feared since the storm was over.
“I fear thunder and lightning beyond measure,” replied Henry. “But by God’s head, I fear you more than all of the thunder and lightning in the world.” Montfort assured the king that he was his faithful friend. “You should fear your enemies, who destroy you and speak falsely,” said Montfort, referring to Henry’s half brothers, the sons of Hugh of Lusignan and Henry’s mother, Isabella of Angouleme, through her second marriage.
The month before, a group of disaffected English barons led by Montfort, who were angry at the king for the way he squandered royal funds on outlandish international schemes, forced Henry to agree to a series of reforms known as the Provisions of Oxford that limited his power. The king chafed at the idea, and he spent the following years searching for a way out of them. Henry was right to fear Montfort, for the earl was willing to go to war if necessary to compel his brother-in-law to adhere to the provisions.
Six years later the Second Baron’s War began. It pitted royalists such as Henry, Prince Edward, and their allies against Montfort and his allies. At stake was whether Henry III would continue to follow the reforms embodied in the provisions or be free of them. The war would last three years.
Montfort was the youngest son of Simon IV de Montfort, who achieved great fame leading the Albigensian Crusade against the Cathar religious sect in southwestern France. Young Simon V was only 10 years old when his father was killed at the Siege of Toulouse in 1218. For a time, Simon IV was the Earl of Leicester, having inherited the earldom through his mother, Amicia, the daughter of Robert of Beaumont, the third Earl of Leicester. But the claim lapsed while Simon IV was crusading in Languedoc, and King John of England transferred the claim to Ranulf of Chester in 1215.

Nevertheless, Simon V intended to get back the earldom. At the age of 19, Simon transferred any claims he might eventually have to the Montfort lands in France to his older brother Amaury in exchange for the family’s claim to the Earldom of Leicester. Simon departed in 1229 for London where he was favorably received by King Henry III. Henry subsequently hired Simon to be one of his household knights.
Three years later, while Montfort was campaigning in France with Henry, he was befriended by 60-year-old Ranulf. Ranulf had no male heirs; therefore, he recommended to Henry that the king restore the earldom to Simon. Henry agreed, and in 1231 Montfort became the sixth Earl of Leicester.
Henry III had no shortage of faults. He was weak willed, a poor military commander, and prone to dishonesty. After an 11-year regency, he assumed full control of England in 1227 at a time when the French monarchy was slowly but steadily gnawing away at the continental possessions of the Angevin empire. Following his marriage to Eleanor of Provence in 1236, Henry appointed some of his in-laws from Savoy to key positions in the royal court that came with lands that made them wealthy.
Henry repeated the same mistake in the 1250s with his Lusignan half brothers from Poitou. The English barons greatly resented the patronage that Henry bestowed on the Savoyards and Poitevins at their expense.
Montfort wed Henry’s sister Eleanor in January 1238. Eleanor’s first husband, William Marshal, Earl of Pembroke, had died in 1219. Montfort benefitted greatly from the marriage. When Thomas Beauchamp, Earl of Warwick, died in 1242 without an heir, Henry presented his brother-in-law with Kenilworth Castle in Warwickshire. Three years later, Henry gave Simon Warwickshire, Derbyshire, and several key properties in southeast England. Montfort’s good fortune was a result not only of his being Henry’s brother-in-law, but also being one of Henry’s most able military captains. Earl Simon fought with Henry in France in 1230 and 1242. He also led a group of crusaders in 1240 to the Outremer during the Barons’ Crusade.
Henry appointed Simon to serve as Seneschal of Gascony in 1248 for a term of seven years. Montfort faced the daunting task of keeping the local lords from feuding and preventing aggression by the kings of Aragon and Navarre. Montfort ruled with a heavy hand. When a Gascon lord committed an offense that disturbed the peace, Montfort’s troops destroyed the offender’s property as punishment. Some of the Gascons went to England to complain directly to Henry. Rather than backing Montfort, Henry was frequently sympathetic to their complaints. Three years before his term as seneschal was set to expire, Henry recalled Montfort to England.
During the 1250s, the English barons became increasingly frustrated with Henry for allowing his foreign relatives to dominate his court, and also for a scheme to put his second son, Edmund, on the throne of the wealthy Kingdom of Sicily. In discussions with Pope Innocent IV in 1254, which continued under his successor, Pope Alexander IV, Henry agreed to pay the Papacy a vast sum to secure the throne of Sicily for Edmund. Although the scheme never came to fruition, Henry wasted considerable funds on the enterprise. Henry made these investments at a time when the English crown was already overextended financially by having to raise armies to crush rebellions in Gascony and Wales.
Furious with the English king for his financial mismanagement, Earl Simon and a half dozen other barons compelled Henry to accept a set of reforms known as the Provisions of Oxford. The reform-minded barons drafted the provisions in June 1258 in Oxford. Henry, who by then was bankrupt, signed the agreement. The provisions established a 15-member Privy Council to advise the king on the administration of his royal assets, ministerial appointments, and other matters. The provisions also required that Henry expel from England all of his foreign advisers.
Not surprisingly, Henry greatly disliked the restrictions on his authority. He therefore asked Pope Alexander to excuse him from the provisions. On April 14, 1261, Pope Alexander issued a papal bull annulling the provisions. When a papal envoy arrived in England with the bull the following month, Henry undertook steps to regain complete control over England. But the sheriffs and bailiffs throughout England saw the provisions as a way for them to protest in parliament excessive taxation and unfair patronage; for that reason, they were unwilling to return to the status quo.
By 1263 England was divided between those who supported Earl Simon and those who supported King Henry. Montfort, who by then had become Henry’s enemy, had changed greatly from the person he was when he arrived in England more than three decades earlier. Although he sincerely believed in the reforms he had crafted to ensure fair rule by the king, Montfort had become greedy and power hungry. The reason for his greed was that he wanted to be able to pass land on to his four sons.
A significant number of the barons who came to a session of parliament in October 1263 refused to bow to Henry’s wishes that he be allowed to appoint his own advisers. Shortly afterward, Henry summoned a number of barons to Windsor and told them he intended to adhere to the provisions. At that point, Earl Simon and King Henry approached French King Louis IX to arbitrate the matter. The French king issued his ruling in January 1264. Not surprisingly, Louis ruled in Henry’s favor, thereby freeing the English king from the provisions.
The previous year, Earl Simon had traveled widely throughout southeast England building support for the reform effort. As a result, on the eve of the war he not only had a strong base in the East Midlands but also in southeast England.
The first act of the war was an effort by Henry’s brother, Richard of Cornwall, to secure Gloucester for the royalists before Earl Simon’s sons occupied it. Cornwall succeeded and Prince Edward, who was in France at the time, returned to England and arrived at Gloucester Castle on March 5 to take command of the royalist forces on the Welsh border. With southwest England firmly in royalist hands, Edward joined his father at Oxford. A baronial army under Peter de Montfort (a relative of Earl Simon) and Simon the Younger (Earl Simon’s second son) fell back on the baronial stronghold at Northampton. Meanwhile, Earl Simon marched to London to secure the capital city for the baronial cause.
On April 3, King Henry unfurled his standard in Oxford, signaling he was at war with the barons. The royalists initially benefitted from interior lines. The two main baronial armies were positioned at Northampton and London. The main royalist army was between them at Oxford. First blood was shed on April 5 when King Henry defeated a baronial army at Northampton. The royalist army “ravaged the manors of the barons in all directions with fire and sword,” wrote chronicler Matthew of Paris. Henry’s army continued north to Leicester and Nottingham, both of which were secured by mid-April. The royalists bypassed Kenilworth Castle, choosing to avoid a protracted siege against its garrison, which was led by Earl Simon’s eldest son, Henry Montfort.
Earl Simon marched east from London and on April 17 laid siege to strategically important Rochester Castle on the Medway River, which was held by a royalist garrison under John de Warenne, Earl of Surrey and Sussex. Montfort’s army was joined by another large force of rebels that arrived from Tonbridge under Gilbert de Clare, Earl of Gloucester, who was Montfort’s most powerful ally during the 1264 campaign. While de Clare deployed his troops south of the castle, Montfort’s troops on the north bank of the Medway sent fireships against the castle on the night of April 18. Simultaneously, de Clare’s men fought their way into the castle. Rather than surrender, de Warenne and his men retreated to the strong keep in the hope that Henry would march to their rescue.
When Henry learned that the main baronial army was besieging Rochester Castle, he promptly marched south. By doing so, he played into Montfort’s hands—the earl wanted to engage the royalist army in southeast England on ground of his choosing. While Henry was marching south, Earl Simon countermarched to London to raise additional forces. Earl Simon left a skeleton force behind at Rochester Castle to keep de Warenne penned inside the keep, but when the main royalist army arrived it easily defeated that meager force. In no mood for mercy, Henry ordered the execution of the rebels captured at Rochester.
During the next two weeks King Henry’s royalist army marched through Kent as a show of force before entering East Sussex. Rather than allowing himself to be blockaded inside London, the Earl of Leicester departed the great city on March 6. For the next week Earl Simon remained largely stationary in East Sussex waiting for a good opportunity to attack the royalist army.
King Henry’s army bivouacked in the royalist town of Lewes on May 10. The town of Lewes included a castle, which belonged to de Warenne, and the Cluniac Priory of St. Pancras. Prince Edward moved into the castle, and King Henry took up quarters at the priory.
Lewes is situated southeast of an escarpment known as the Downs. Both the castle and 20-acre priory were located on the western outskirts of Lewes about one mile from Mount Harry, as the southern end of the escarpment was known. The castle was situated on the northwest corner of the town, and the priory on its southwest corner. The Ouse River flows past the town on its east side on its way to the English Channel. A wide bend in the Ouse protected the royalist position from an attack from the east, and extensive marshland protected it from attack from the south.
The day after the royalist host arrived in Lewes, the baronial army marched into Fletching, a half day’s march north of Lewes. The morning of May 12, Montfort sent an offer of reconciliation to Henry. The message stated that the barons would immediately end their revolt and pay 30,000 pounds in reparations for property damage if the king would replace his foreign advisers with English ones. King Henry replied that he had no intention of negotiating with the rebellious barons.
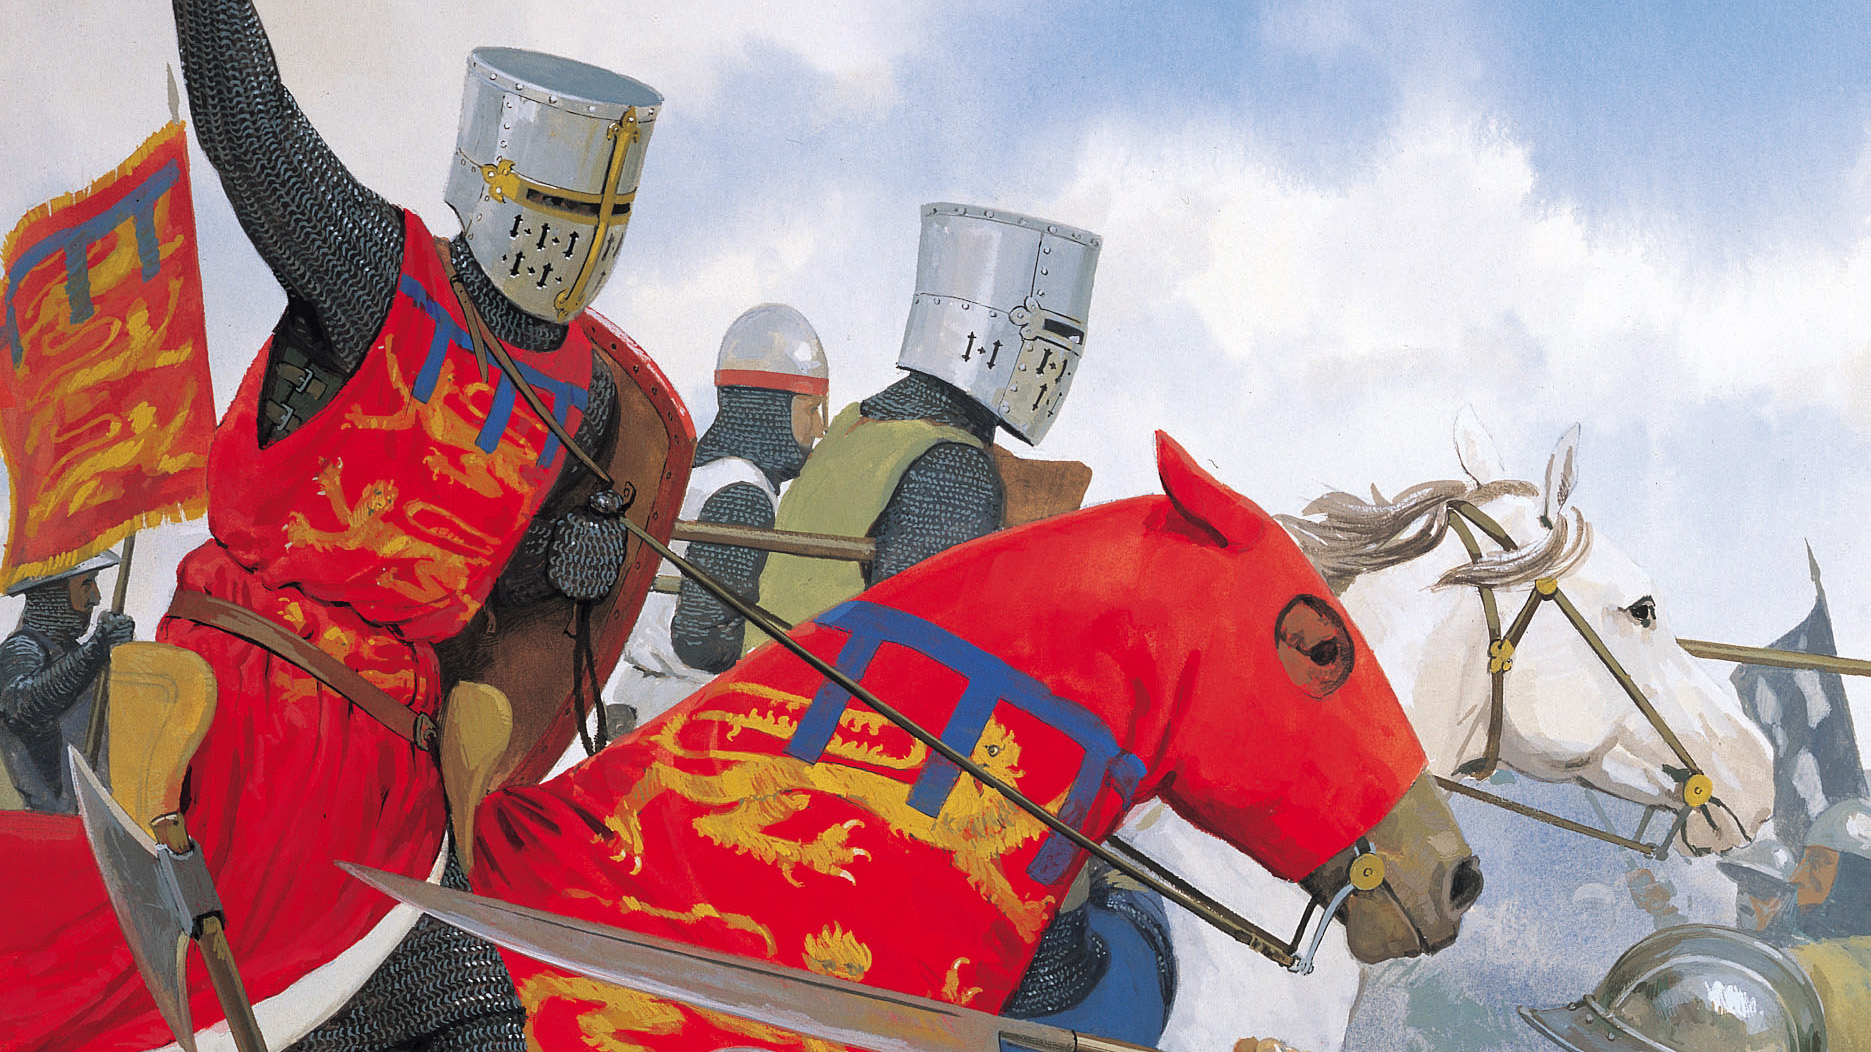
On the night of May 13, Montfort led his army two miles west into the Downs and then turned south toward Lewes. The baronial army arrived undetected on Mount Harry at dawn. A royalist foraging party spotted the baronial army and alerted the rest of the army. Royalist trumpets blared, calling troops to arms. To help his men identify friend from foe, Earl Simon had ordered his troops to sew a white cross on the front and back of their tunics, similar to that worn by crusaders.
Earl Simon had approximately 4,000 infantry and 500 cavalry. He organized his troops in four divisions for the battle. The right division was commanded by his sons: Henry, Simon the Younger, and Guy. The baronial center was led by de Clare, who was aided by John FitzJohn and William Munchensay. The baronial left was led by Nicholas of Seagrave. Earl Simon commanded a rearguard stationed behind the center.
The baronial army’s right and center had contingents of Welsh troops armed with spears or bows. The weakest part of the baronial army was Seagrave’s division, which was composed of green foot soldiers from London. A line of horsemen that included Seagrave, Henry of Hastings, John Giffard, Hervey de Borham, and their mounted men-at-arms was deployed in front of the untried Londoners. Earl Simon deployed his left and center on Mount Harry and his right on the level ground of Houndean Bottom.
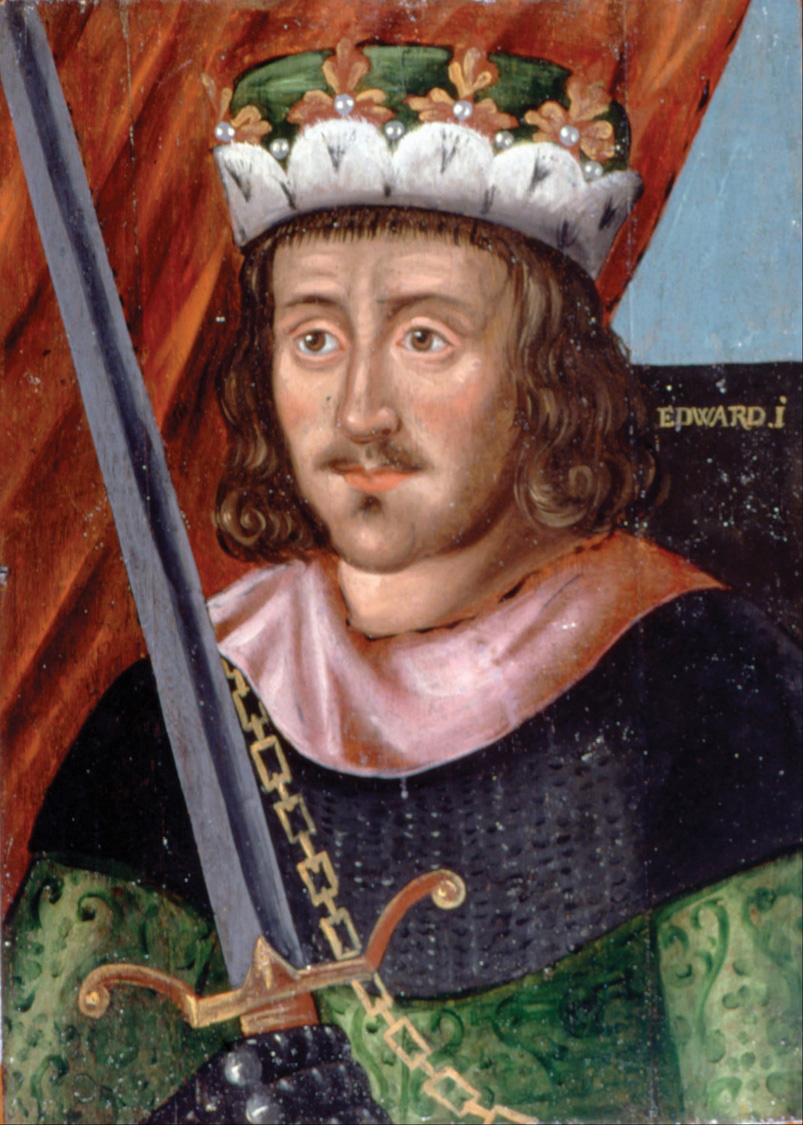
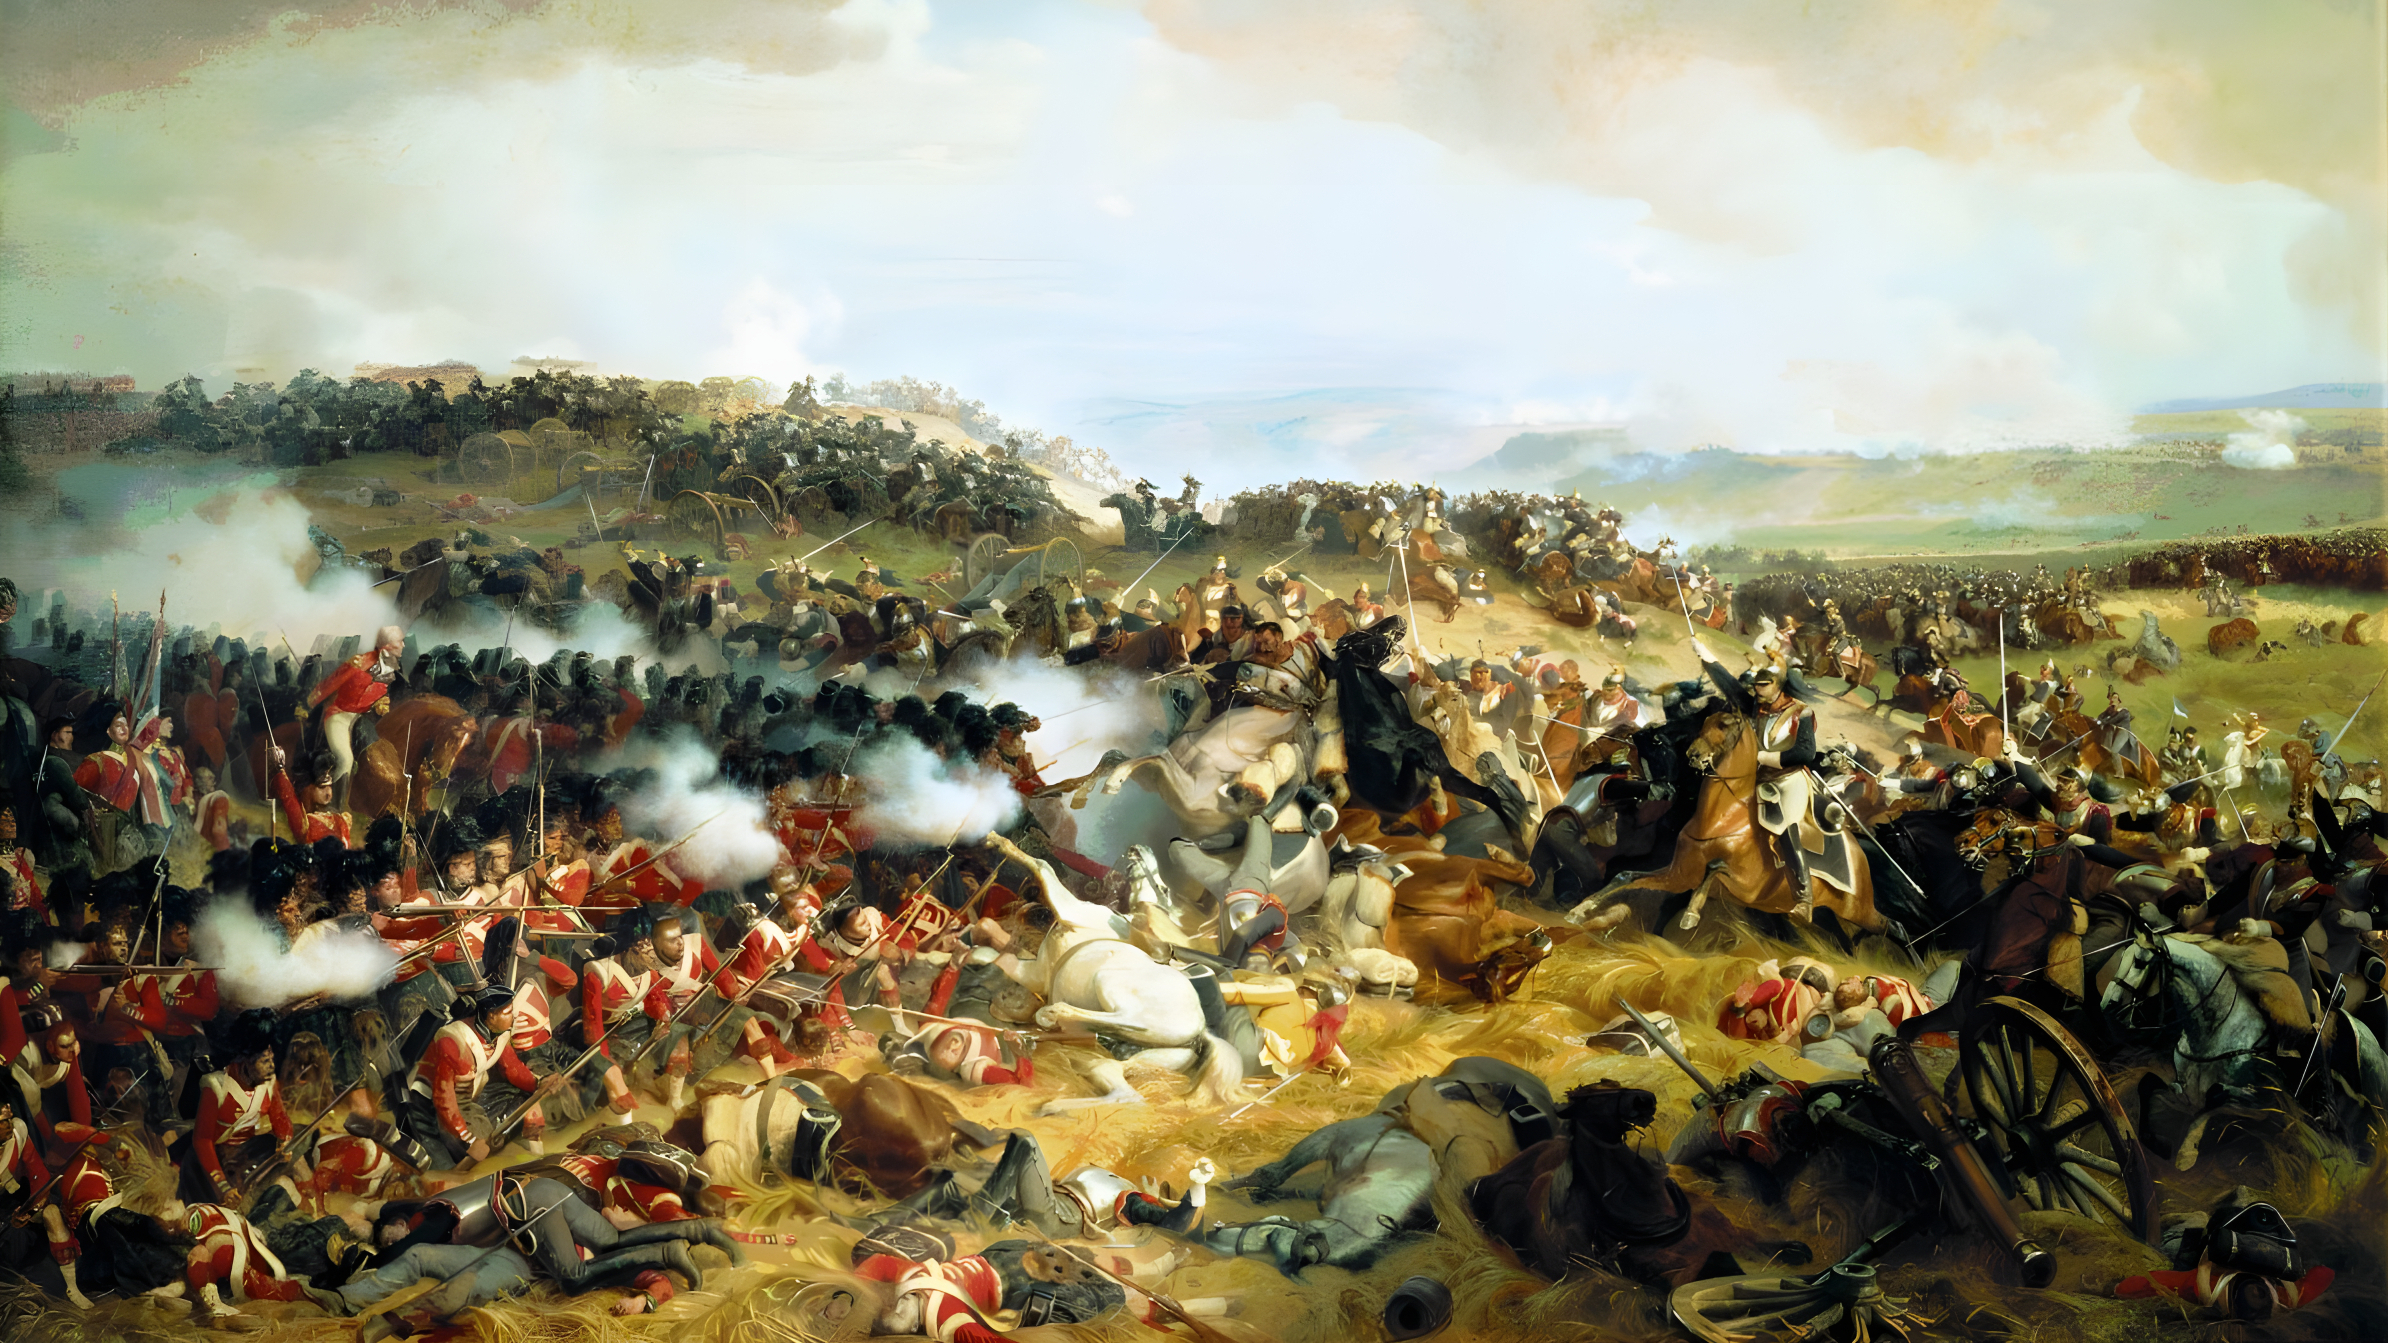
King Henry had assigned the right division to Prince Edward. The prince had with him a large number of mounted troops. Among the nobles fighting in Edward’s battle were his uncles, Guy de Lusignan and William de Valence, and marcher lord Roger Mortimer. The royalist center was commanded by Cornwall. Fighting under Cornwall were his son Henry and Scottish barons Robert de Bruce, John Baliol, and John Comyn. As for the royalist left, it was led by Henry, who was assisted by Humphrey Bohun IV, Earl of Hereford. Bohun’s son, Humphrey Bohun V, would fight that day on the baronial right with Earl Simon’s sons. Altogether, King Henry had approximately 7,000 infantry and 1,500 cavalry.
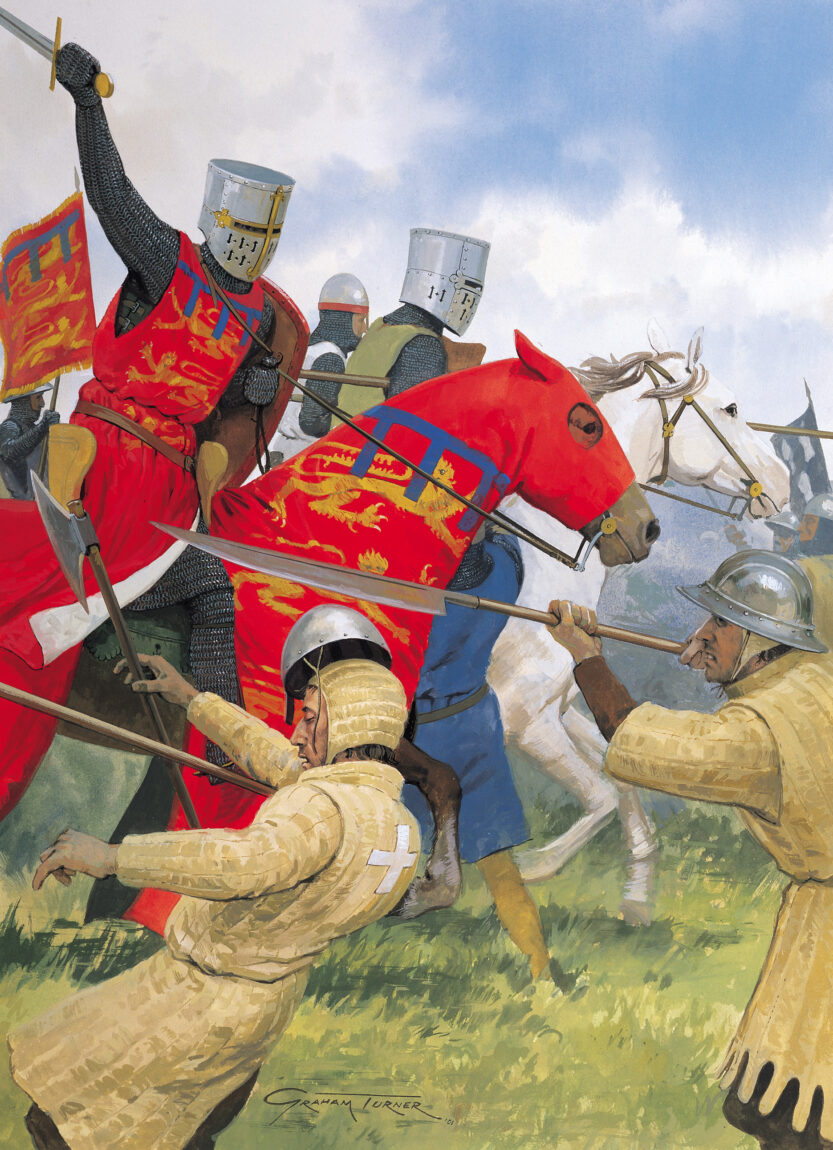
At 9:30 am, the baronial army began a slow advance down the southern slope of Mount Harry. Prince Edward’s battle was the first to respond. His mailed cavalrymen had covered three quarters of a kilometer of ground at a walk. When they were within 150 meters of the enemy, they began to trot with couched lances. Edward’s cavalry easily shattered the thin line of cavalry opposing it. Even before the two lines made contact, the Londoners at the back of Seagrave’s battle, who were intimidated by the large number of mounted men attacking them, had begun to flee the battlefield. They were quickly followed by the foot soldiers in the front ranks of Seagrave’s battle.
“Edward with his division rushed on the enemy with such impetuosity that he forced them to retreat,” wrote Paris, adding, “Edward … pursued them for the distance of four miles, and made a dreadful slaughter of them; but by his absence, he much weakened the king’s forces.” Rather than regrouping to attack de Clare’s exposed left flank, Edward’s horsemen pursued the fleeing Londoners, running them down with their lances or slashing them with their swords. Besides those that were cut down as they fled, a large number drowned trying to ford the Ouse River.
De Clare waited for the royalists to come to him in the hope that they would tire themselves attacking uphill. The remainder of the royalists, with the cavalry leading the attack, advanced at about 10:30 am against the baronial divisions led by de Clare and the Montfort sons. The mounted knights and men-at-arms on both sides conducted the bulk of the fighting with the infantry in a support role.
As for King Henry, what he lacked as a strategist he made up for in combat. “The king was much beaten with swords and maces, and [had] two horses killed under him, so that he escaped with difficulty,” states a contemporary account of the battle.
The main fight began at around 11 am and lasted one hour. After about 30 minutes, it became apparent to Earl Simon, who was watching the fight from atop Mount Harry, that de Clare’s troops had outfought those of Cornwall. Some of Cornwall’s men had begun to retreat toward the town. Exhausted and convinced that they could not carry the hill and drive off the rebels, these men took it upon themselves to quit the fight.
At that point, Montfort committed his reserve to the fight. The fresh baronial troops easily overwhelmed the thin line of royalists in the center. Seeing the center give way, Henry and his captains tried to disengage and fall back to the town. Montfort’s sons on the right side of the field ordered their men to pursue the retreating enemy. To buy enough time for King Henry’s household troops to escort the king to safety, the royalists made a determined stand just north of the road to Brighton near the town’s jail. While his troops held off the right division of the baronial army, the king gained the safety of the priory.
Henry’s brother was not as fortunate. Finding himself cut off from the town during the confused retreat of his division, Cornwall took refuge in a windmill not far from where Henry’s division made its stand. A large number of foot soldiers who had participated in the pursuit of Cornwall’s division gathered around the windmill. They jeered and taunted the haughty earl. “Come out, you bad miller!” the men shouted. After a short time, Cornwall emerged and was taken prisoner.
Aware that Prince Edward was rampaging nearby, Earl Simon reformed his troops outside of the town in case the prince decided to renew the battle. The prince returned with a portion of his division to find that the bulk of the royalist army had been driven from the field. Edward’s captains strongly advised him not to make an unsupported attack against Montfort’s army. They promptly quit the field to drive home their point.
Edward decided to find his father. The prince and his household troops rode around the baronial army to the castle. Not finding King Henry there, they rode to the priory where they found him unharmed.
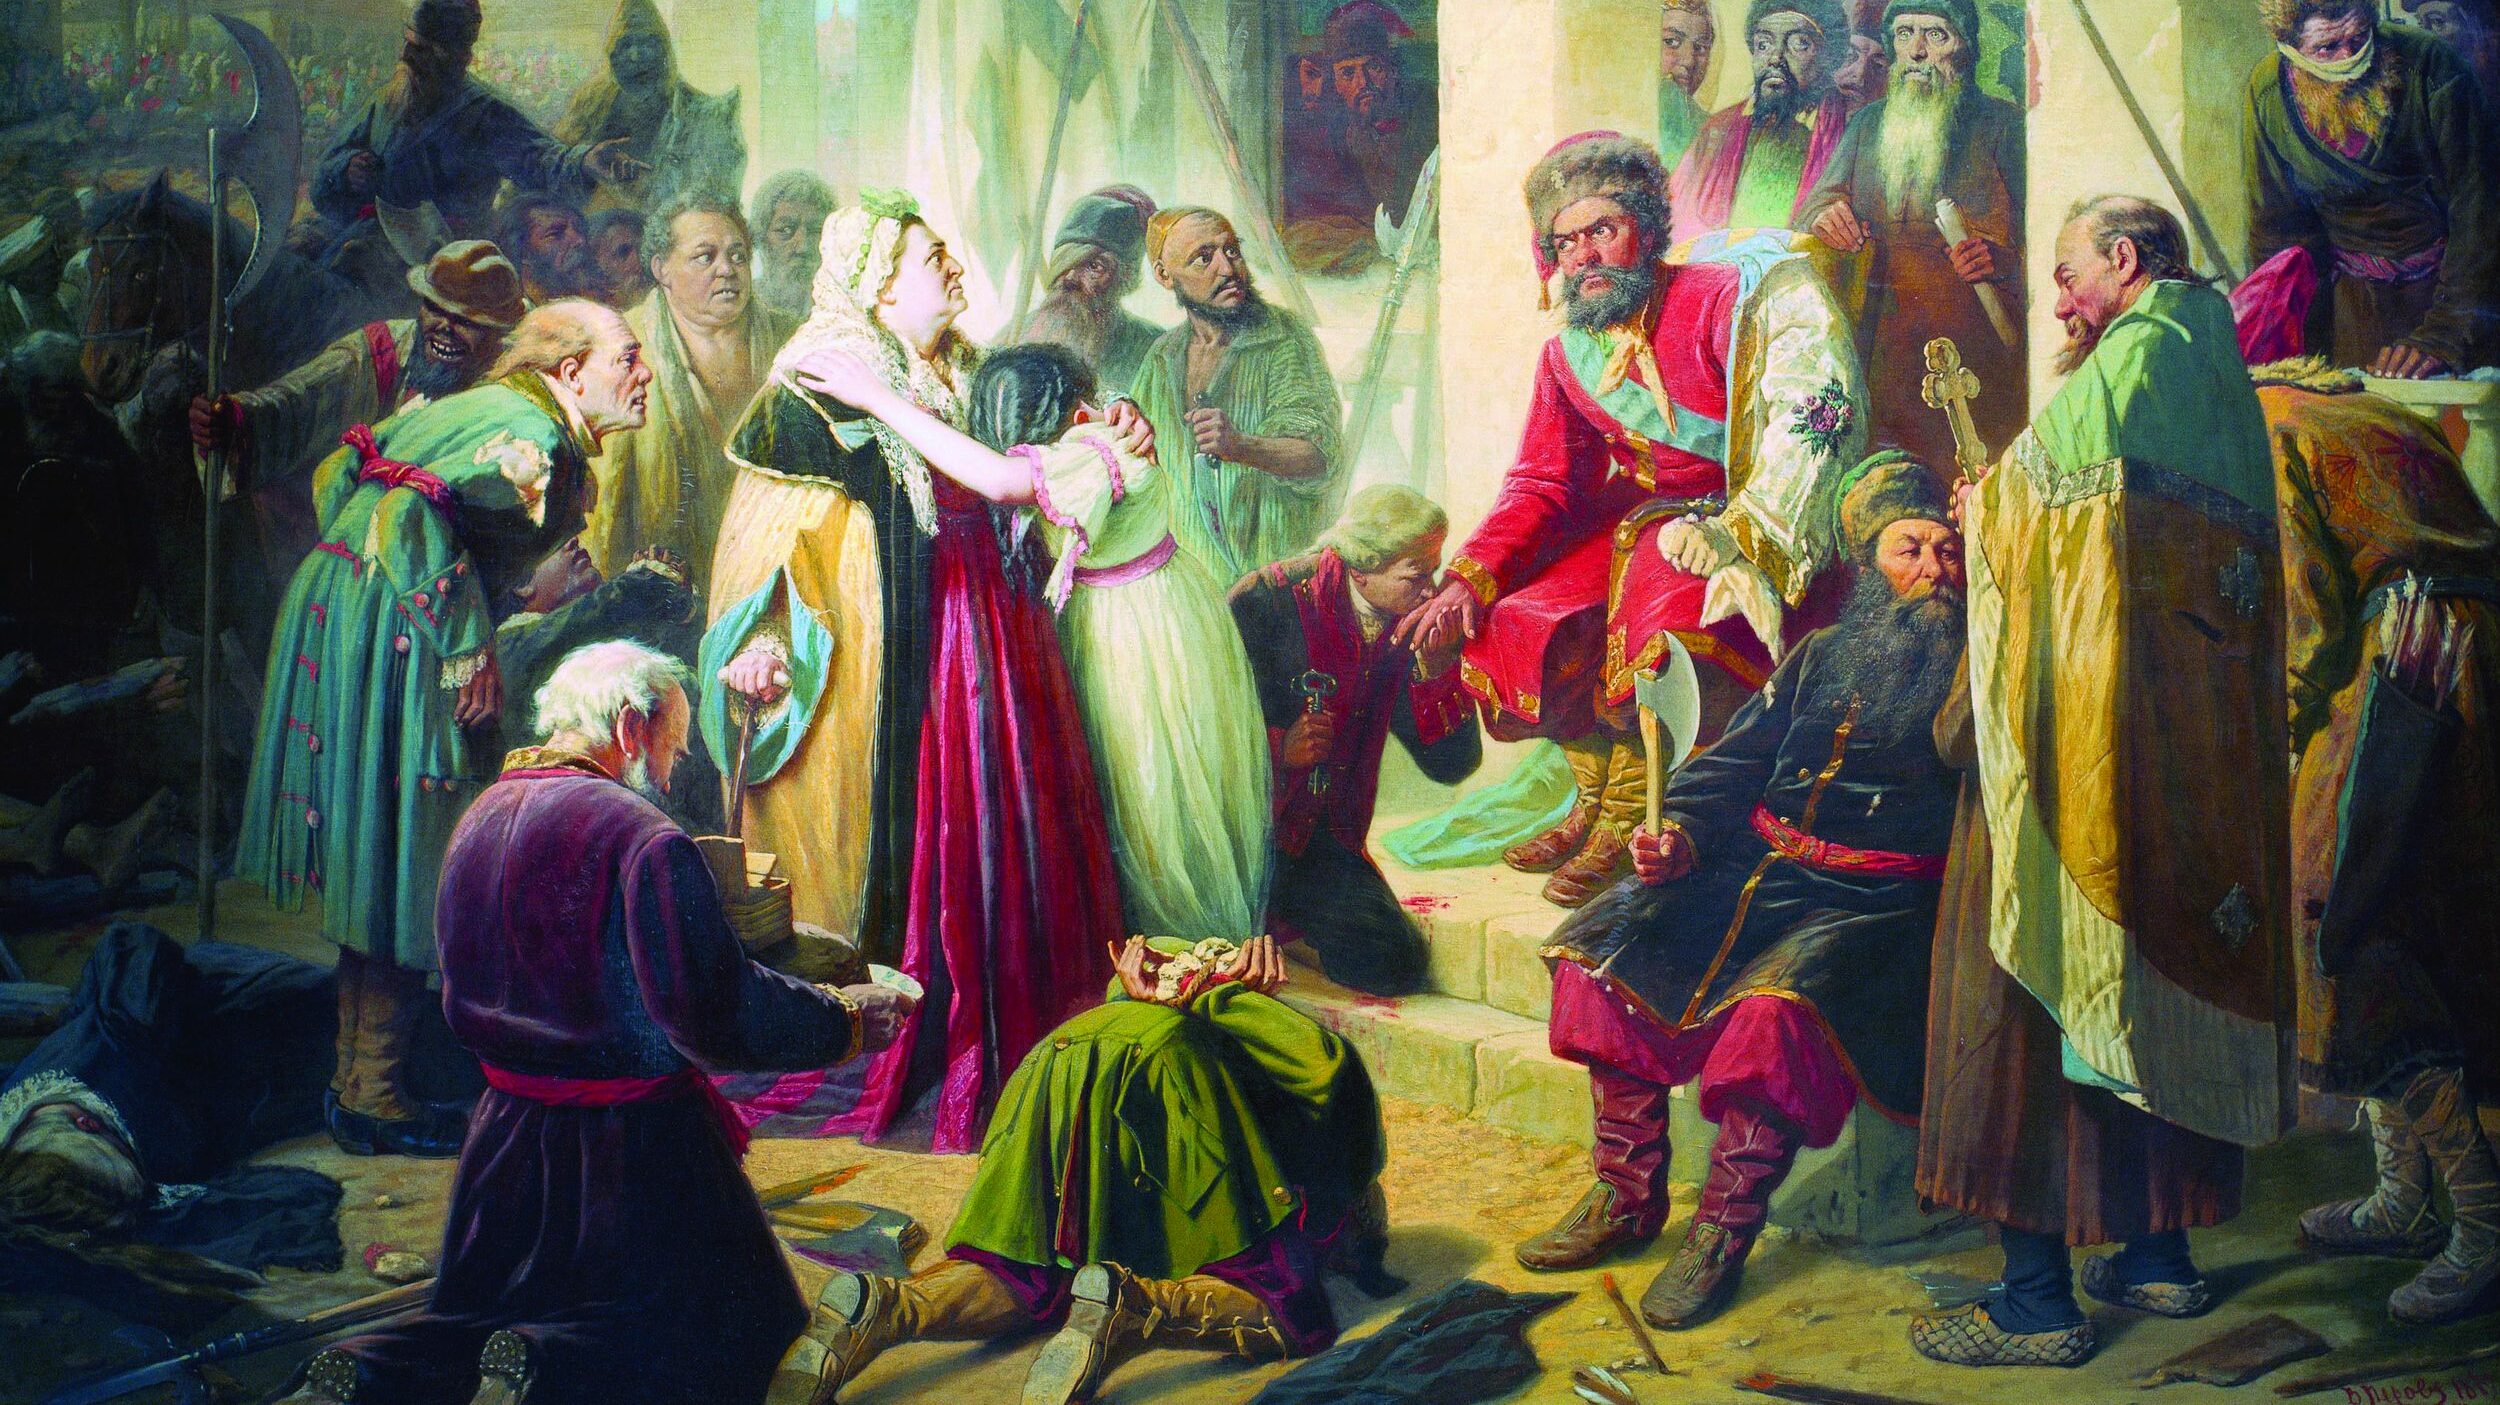
The baronial army had a number of key prisoners, including Cornwall, Bohun, and John FitzAlan, Earl of Arundel. The following morning, Earl Simon requested and received the surrender of the royalist army. Earl Simon took into custody Henry, Prince Edward, Cornwall, and Cornwall’s son Henry, but freed all of the captured royalist barons. The decision to allow the barons their freedom was a risky one. Perhaps the most dangerous of these was Mortimer. He had a deep-seated hatred of Earl Simon because the earl was an ally of Welsh King Llywelyn ap Gruffydd, with whom Mortimer had long been at war.
Earl Simon compelled Henry to sign an agreement known as the Mise of Lewes, which restored the Provisions of Oxford. King Henry’s half brothers and Queen Eleanor went into self-imposed exile in France rather than submit to Montfort.

Earl Simon called an immediate session of parliament, which met in June. During the session, he announced that the realm would not be ruled by a 15-member Privy Council but instead by a council of three consisting of himself, de Clare, and Stephen Bersted, Bishop of Chichester. To give his interim government a degree of legitimacy, Montfort asked French King Louis IX to arbitrate a new reform agreement known as the Peace of Canterbury. Drafted in August, the new agreement drafted put limitations on King Henry’s authority, if and when he was restored to power, and also on that of his successor. King Louis, as expected, declined to approve such unprecedented restrictions of royal authority.
Montfort’s tenuous reign was under constant threat of attack by Welsh marcher lords loyal to King Henry, as well as Henry’s relatives who were in exile in France. In October, Prince Edward’s knights rose up in southwest England, and the marcher lords rebelled in November. To crush these uprisings, Earl Simon enlisted the assistance of Llywelyn. Outnumbered and overwhelmed, the rebellious royalist barons and knights were forced to relinquish their gains.
Following the Mise of Lewes, Earl Simon began systematically accumulating wealth to pass on to his four sons. He did this by whittling away at Prince Edward’s appanage. To his already substantial holdings, Earl Simon added the towns of Bristol, Chester, and Newcastle. De Clare increasingly became annoyed with Earl Simon and his two oldest sons, Henry and Simon the Younger. In de Clare’s eyes, the sons were as deceitful and rapacious as their father. What is more, de Clare also found himself having to defend his holdings in the Welsh marches against attacks by Llywelyn.
In May 1265, Earl Simon traveled with his closest supporters to Gloucester to attempt to reconcile his differences with de Clare. On May 12, the two earls agreed to submit their disagreements to arbitration. Earl Simon did not seem to realize it at the time, but he already had lost de Clare’s support. Indeed, at that point in time de Clare was actively participating in the planning of a major rebellion aimed at removing Earl Simon from English politics. The rebellion would involve a coordinated uprising by Edward’s retinue, the marcher lords, and King Henry’s half brothers. The latter were already planning to land in Pembroke.
Already having defeated two rebellions since the Battle of Lewes, in the spring of 1265 Earl Simon kept a tight hold on southwest England from his base in Gloucester while Simon the Younger held down London and southeast England. Earl Simon had the royal prisoners with him at Gloucester. When the fire of rebellion appeared to flame anew in the Welsh marches, Earl Simon switched his base to Hereford to be closer to the Welsh marches where he could monitor the activities of de Clare, Bohun, and Mortimer. On May 28, Prince Edward escaped with the assistance of sympathizers within Earl Simon’s army. Edward rode hard for Wigmore, which was Mortimer’s base.
When de Clare switched sides, the balance of power in southwestern England and Wales shifted to the royalists. Earl Simon spent the next two months trying to evade Prince Edward and the marcher lords. In mid-June, Earl Simon met with Llywelyn at Glasbury where he received a small number of Welsh troops to assist him. In the meantime, Edward secured the town of Gloucester, and by the end of the month he had forced the baronial garrison in the castle to surrender. At that point, Earl Simon was trapped in Wales. He believed his best move would be to escape by boat, so he fought his way toward Newport. As ships were being prepared for his departure from Newport on July 4, a squadron of royalist vessels from Gloucester arrived and sunk Earl Simon’s ships.
Earl Simon was not about to give up. He countermarched and reached Hereford on July 17. The previous month, the earl had instructed Simon the Younger to march from southeastern England to rendezvous with him in southwestern England. Taking his time when he should have been conducting forced marches, Simon the Younger arrived at Kenilworth on July 31. About that time, he received orders from his father to rendezvous with him on August 4 at Evesham in Worcestershire.

To prevent reinforcements from reaching a beleaguered Earl Simon, Prince Edward decided to strike a crippling blow against Simon the Younger’s army at Kenilworth. Edward would conduct a cavalry raid to kidnap the leaders of the baronial army at Kenilworth. The raid was made possible by information from a traitor in Simon the Younger’s army. The informant told Edward the exact location of where each commander was billeted in the town.
On the night of August 1, Edward marched out of Worcester with his entire force. To confuse any observers, he ordered his foot to continue north toward Shrewsbury while his cavalry turned east toward Kenilworth. Riding with Prince Edward on the raid were de Clare, de Valence, and Mortimer. When the raiders reached the outskirts of Kenilworth, they divided into small groups, each of which was tasked with capturing specific targets.
The raid went off without a hitch. The royalists rode off with Robert de Vere, Richard de Grey, Hugh de Neville, and others. However, they failed to capture Simon the Younger, who made a successful dash to the castle before he could be apprehended. The raiders rendezvoused with their foot companies and returned to Worcester.
The following night Earl Simon forded the Severn River at Clevelode undetected by the royalists and bivouacked at Kempsey. He had King Henry with him. From a messenger, the earl learned of Edward’s successful raid on Kenilworth. His understanding was that Simon the Younger would still be able to rendezvous with him the following day as planned. The following night, Earl Simon resumed his march. To reach Evesham, the Montfortians crossed the Avon where it turned south at Peshore and then crossed it again via the Evesham Bridge to enter the town.
While Evesham may have been a good rendezvous point, it did not offer good ground for maneuver during a battle. The town was located in a loop of the Avon and therefore was surrounded on three sides by the river. An 8th-century Benedictine abbey and the town itself were situated at the southern end of the loop near the Evesham Bridge. Just north of the town was a large swath of cultivated land and north of the farm fields was a low ridge known as Green Hill. Three roads entered the town from the north. The Worcester road entered the town from the northwest, the Alcester Road cut through the ridge from the north, and the Stratford Road traversed the ridge from the northeast.
Prince Edward had his army moving south from Worcester toward Evesham before daylight. As part of a plan to prevent Earl Simon’s army from escaping the village by retreating across the Evesham Bridge, Montfort’s division turned off the Worcester road toward Peshore, crossed the Avon, and took up a blocking position in a forested tract near the Evesham Bridge. Prince Edward and de Clare’s division continued on the north bank of the Avon past Evesham, crossed the Avon, and entered the village of Cleeve Prior as part of a reconnaissance meant to prevent Simon the Younger’s army from reinforcing Earl Simon. Even though he must have been aware of the stakes, Simon the Younger did not get his army on the road early enough to join his father before it was too late. Seeing no sign of Simon the Younger’s army, the royalists countermarched to Green Hill. De Clare’s division deployed on the west side of the ridge, and Edward’s filed into position on the east side. Without the addition of his son’s army, Earl Simon was outnumbered nearly four to one in horse and three to one in foot. He had 350 cavalry and 3,500 foot compared to Edward’s 1,300 cavalry and 10,000 foot.
Earl Simon’s lookout atop the abbey tower informed him that the enemy had not only occupied Green Hill but also was present on the south bank of the Avon. Realizing he was trapped and would have to cut his way out, Simon urged his captains—his son Henry, Hugh Despenser, and Ralph Bassett—to try to escape either by riding across the Evesham Bridge before that route was sealed off or by fording the Avon. None of the knights accepted the offer. At that point, Earl Simon ordered his cavalry to deploy for an attack against the royalist center on Green Hill. The earl’s cavalry formed itself into a column with the infantry behind it led by Humphrey V de Bohun. The earl and his retinue, including John FitzJohn, Giles d’Argentan, Fulk of Deane, Harry of Hastings, and Peter de Montfort, were at the center of the attacking force. As they began their advance at 7:30 am, Earl Simon spotted de Clare’s banner atop the ridge. “That red dog will devour us today,” said the earl.
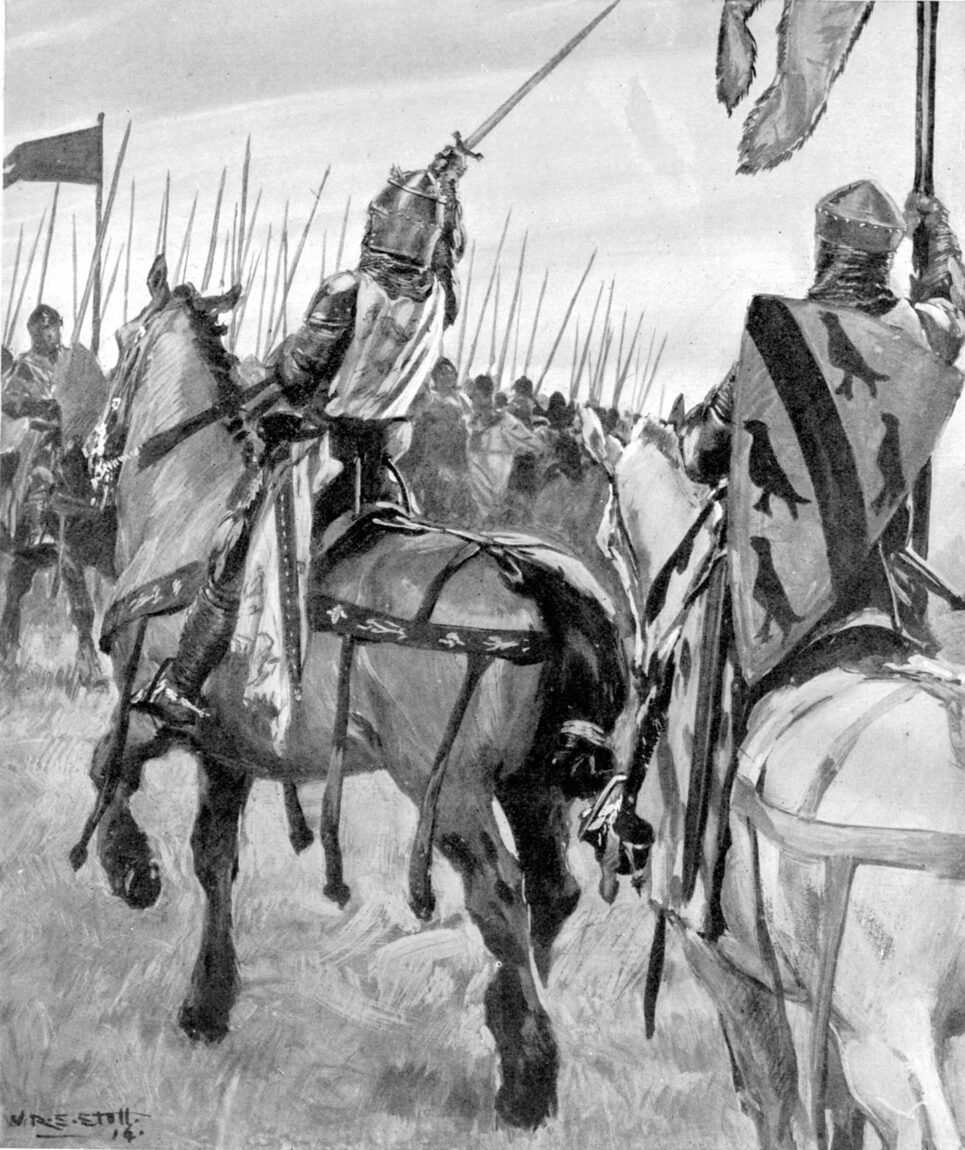
Leading the charge was Earl Simon’s eldest son, Henry. When Earl Simon’s horse column came to within several hundred meters of the enemy force, they increased their pace to a slow canter. Edward and de Clare had not placed their men on the crest of the ridge but rather on the actual crest. Therefore, Earl’s Simon’s horsemen rode onto the top of the ridge before they made contact with the enemy. The front of the Montfortian column bristled with couched lances. Near the front of the column was Earl Simon’s unfurled banner featuring a red lion rampant against a white background. The Montfortian cavalry rode straight for the seam between the two royalist divisions atop Green Hill. If it could tear through the enemy along that seam, a portion of Earl Simon’s army might escape and gain temporary sanctuary at Kenilworth.
A desperate fight ensued in the center of the royalist line as Earl Simon’s men tried to punch through it. Shouts from both sides meant to awe the enemy mingled with screams of agony as the unlucky on each side experienced horrible wounds or death. Some of the royalist cavalry rode south to cut off the Montfortian cavalry from its infantry, many of whom already believed they were doomed and had fled in all directions. Many of the foot soldiers in Earl Simon’s army were slain by Mortimer’s men, who had rushed over the Evesham Bridge to join the fight.
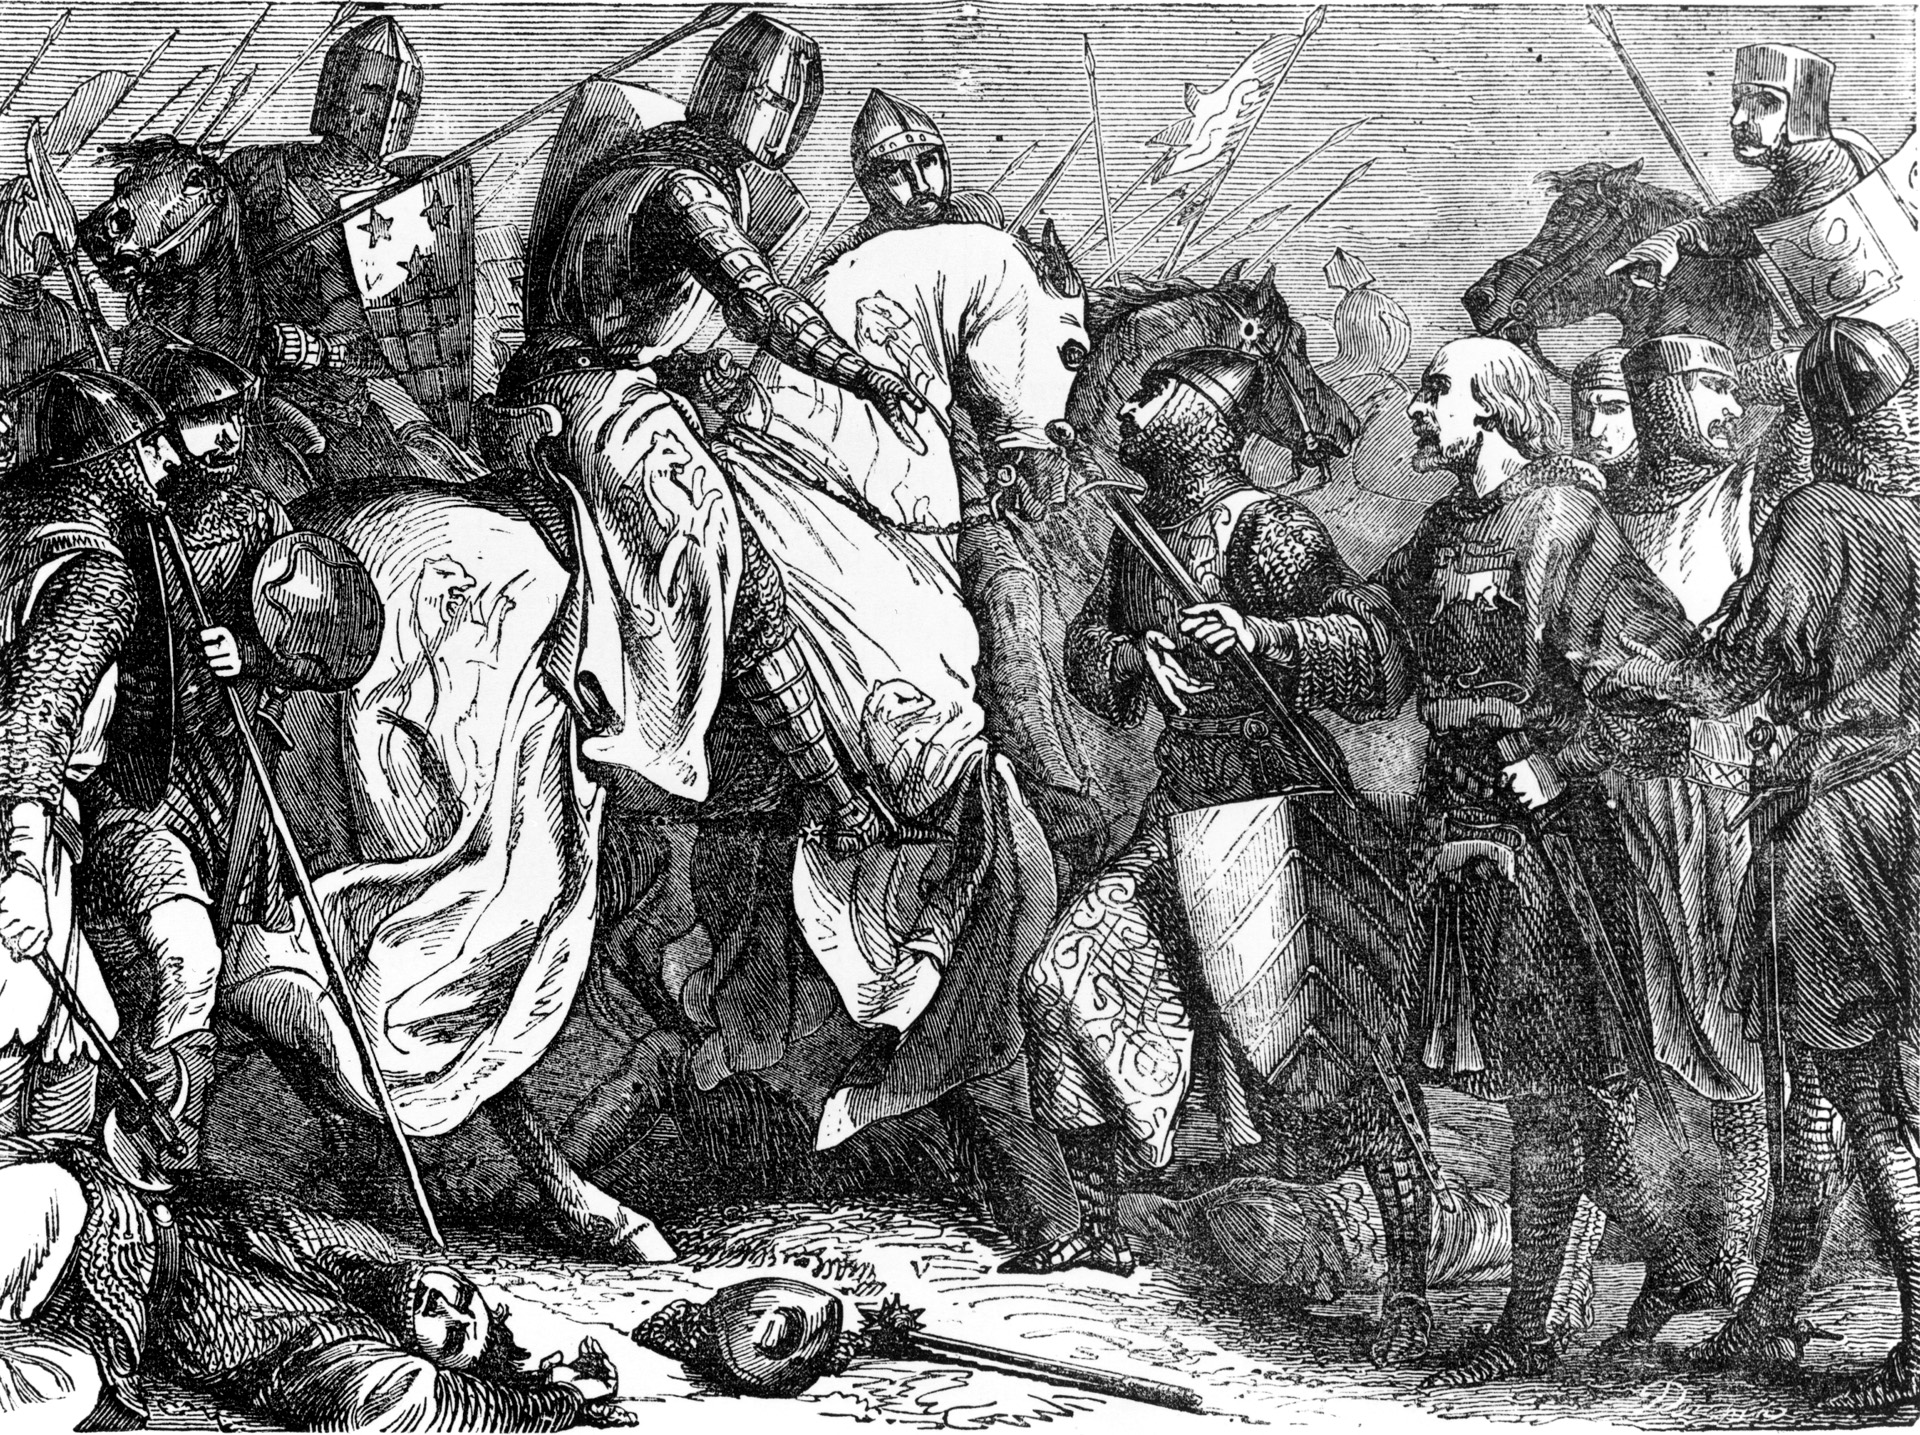
The royalist army was fiercely loyal to Prince Edward and fought with great determination to snuff out once and for all Earl Simon and his followers. As for de Clare’s men, they wanted revenge against the earl for stirring up the Welsh, who had attacked their lord’s lands. It soon became apparent that the Montfortians could not break through the hard-fighting royalists. In the opening stage of the fight, Henry de Montfort had been slain. After a short time most of the rebel horsemen, including the earl, had been unhorsed. A steady clatter was heard as the knights and men-at-arms fought on foot with swords, maces, and battle axes. When Earl Simon learned of his son’s fate, he said to those near him, “Then it is time for us to die.” The earl’s loyal followers formed a tight circle around their liege lord in an effort to protect him as long as possible.
King Henry had been forced against his will to ride into battle along with the Montfortian cavalry. Because he would not fight against his son’s troops, he was knocked off his horse early in the fight by a royalist horseman who had no way of knowing he had struck the king since Henry was wearing full harness. Lying on the ground, a royalist soldier fighting on foot prepared to finish him off when the king shouted, “Save me! Save me! I am Henry of Winchester!” Hearing the plea, Adam de Mohaut, one of Edward’s men, advanced on the king and removed his helmet. Edward observed the event and rushed over to help safely extract his father from the melee.
In the interim, the royalist men-at-arms supported by royalist foot soldiers wielding spears and billhooks bludgeoned and hacked their way closer to Earl Simon. The earl had no intention of surrendering or being captured. He would go down fighting. He eventually was surrounded by a dozen men intent on killing him. He fought off one attacker after another with his sword, but one enemy soldier crept up on him from behind and thrust a dagger through his mail. The earl fell to his knees. Seeing that he was severely wounded, several men-at-arms hacked him to death with their swords. “Thank God!” the earl said before he expired.
With great hatred, the enemy stripped him of his harness and clothing. One of the men-at-arms, William Maltravers, one of Mortimer’s men, beheaded the fallen earl and others assisted him in further mutilating the earl’s body. This was a spontaneous act and was a direct result of the intense hatred the men of the Welsh marches held for the earl. Edward had not ordered it. Actually, the prince had hoped to capture Earl Simon. About 20 of Earl Simon’s household knights and key allies had died fighting with him, including Peter de Montfort, Hugh Despenser, Ralph Basset, and Guy de Baliol. Another 16 knights were captured. Among the prisoners were Henry of Hastings, David of Uffington, and Humphrey V de Bohun.
Simon the Younger had begun his march from Kenilworth with his customary lack of urgency on the morning of August 4. He egregiously allowed his men to stop and eat a meal when he should have been conducting a forced march to ensure he linked up with his father before Prince Edward was in the vicinity. In the early afternoon, Simon the Younger’s vanguard encountered frantic survivors from Earl Simon’s army that told of their defeat at the hands of Prince Edward and the marcher lords. Simon the Younger ordered an immediate countermarch to the temporary safety of Kenilworth.
The dead from the Montfortian army blanketed Green Hill and the streets of the town, as well as the fields along the Alcester and Stratford roads leading away from the battlefield to the north and northeast, respectively. In a gesture respectful of their tenacious foe, King Henry and Prince Edward granted permission to the monks of the Evesham Abbey to collect and inter the remains of Earl Simon and his knights. They were laid to rest the day after the battle under the choir in the abbey’s church.
The leading bishops of the realm facilitated an agreement known as the Dictum of Kenilworth between the remaining supporters of Earl Simon and the royal government in October 1266. During the conflict, the rebellious barons had been disinherited, and the agreement allowed them to get their lands back provided they pledge their allegiance to the crown and paid substantial fines. The Statute of Marlborough, which was passed into law in 1267, contained a number of the legislative and administrative reforms embodied in the Provisions of Oxford. The Statute of Marlborough gave the sheriffs a small voice through parliament on political matters and taxation where they previously had no say at all.
As for Simon de Montfort, despite the wishes of the English monarchy, his greed in his final years was forgotten or purposely ignored by the commoners. They regarded him as a martyr. Many of his admirers made a point of making a pilgrimage to his burial site in Evesham to honor him.
Join The Conversation
Comments
View All Comments