
By Michael Cobb
Military miniatures are an extension of the toy soldiers many of us had when we were children. But they are distinguished from the ones we grew up with in that they are painted and detailed to an incredibly high degree. Collectors, painters, and modelers of military miniatures are found all over Europe, but there are not as many of these hobbyists in the United States and Canada. I grew up as a modeler of cars, planes, tanks, and any other plastic kits I could get my hands on. My first job, which I got when I was 14 years old, was in a local hobby shop, and to this day my passion for modeling is as strong as ever.
My first experience with military miniatures came after I got out of the service and wanted to start building again. The house we lived in at the time did not have sufficient room to build or display models. I discussed this with a hobby shop owner I knew, and he showed me the miniatures that were on display in his shop.
The little figures were small enough to fit in the tight space I had. He recommended a local shop that specialized in miniature figures. After my first visit to that shop I was hooked. The staff assisted me in obtaining my first figures from England. I began visiting the shop every time a new shipment arrived to help the staff unpack. This way, I was assured first pick of what arrived.
The miniatures arrived unpainted and came with little or no information on what the uniforms were or how to paint them. I have always been interested in history, and I eventually earned a history degree. Using my historical research skills, I have purchased and gathered books and other material that constitute my personal reference library on uniforms and the soldiers who wore them.
Since most of the figures came from English sculptors and manufacturers, I found that most of the early subject matter available was limited to British soldiers. I spent most of my Saturdays at the local hobby shop seeking not only the new figures, but also specialty books that describe how to paint them. From those weekly visits I soon developed a set of friends that share my interest in the hobby.
Sadly, most of the traditional brick-and-mortar hobby shops are gone now, which leaves the Internet and model shows as the best ways to find new project ideas. Most of the current figures come from European manufacturers and are found on websites located around the world.
Soon after I began visiting that local hobby shop, I joined a local miniatures club and I have now been a member for more than 40 years. We still have one the most active figure clubs, the Military Miniature Society of Illinois (www.MMSIChicago.com), in the United States.
The club schedules speakers at monthly meetings, holds weekend modeling workshops, and sponsors an annual show that attracts collectors and modelers from all over the United States. The MMSI Chicago Show is in its 39th year. This October it will display the work of more than 100 modelers.
I view the collected displays annually and marvel at the quality and variety of the work, which seems to improve every year. The many friends and mentors I have in the club and others I have met at miniature shows give me constant encouragement and teach me new ways to paint and detail my miniatures. Since I am now an accomplished miniature painter, I also try to encourage and mentor others in the hobby. One wonderful aspect of this hobby is the willingness of the best painters and modelers to share their techniques. It is this open interchange that makes it so enjoyable.
I prefer to buy commercially cast figure kits and then paint and detail them to a high standard rather than sculpt figures of my own, as do many of my friends. These kits are available from many small manufacturers, mostly in Europe, and they cover every subject imaginable. They are cast in white metal or resin, and they are available in several sizes.
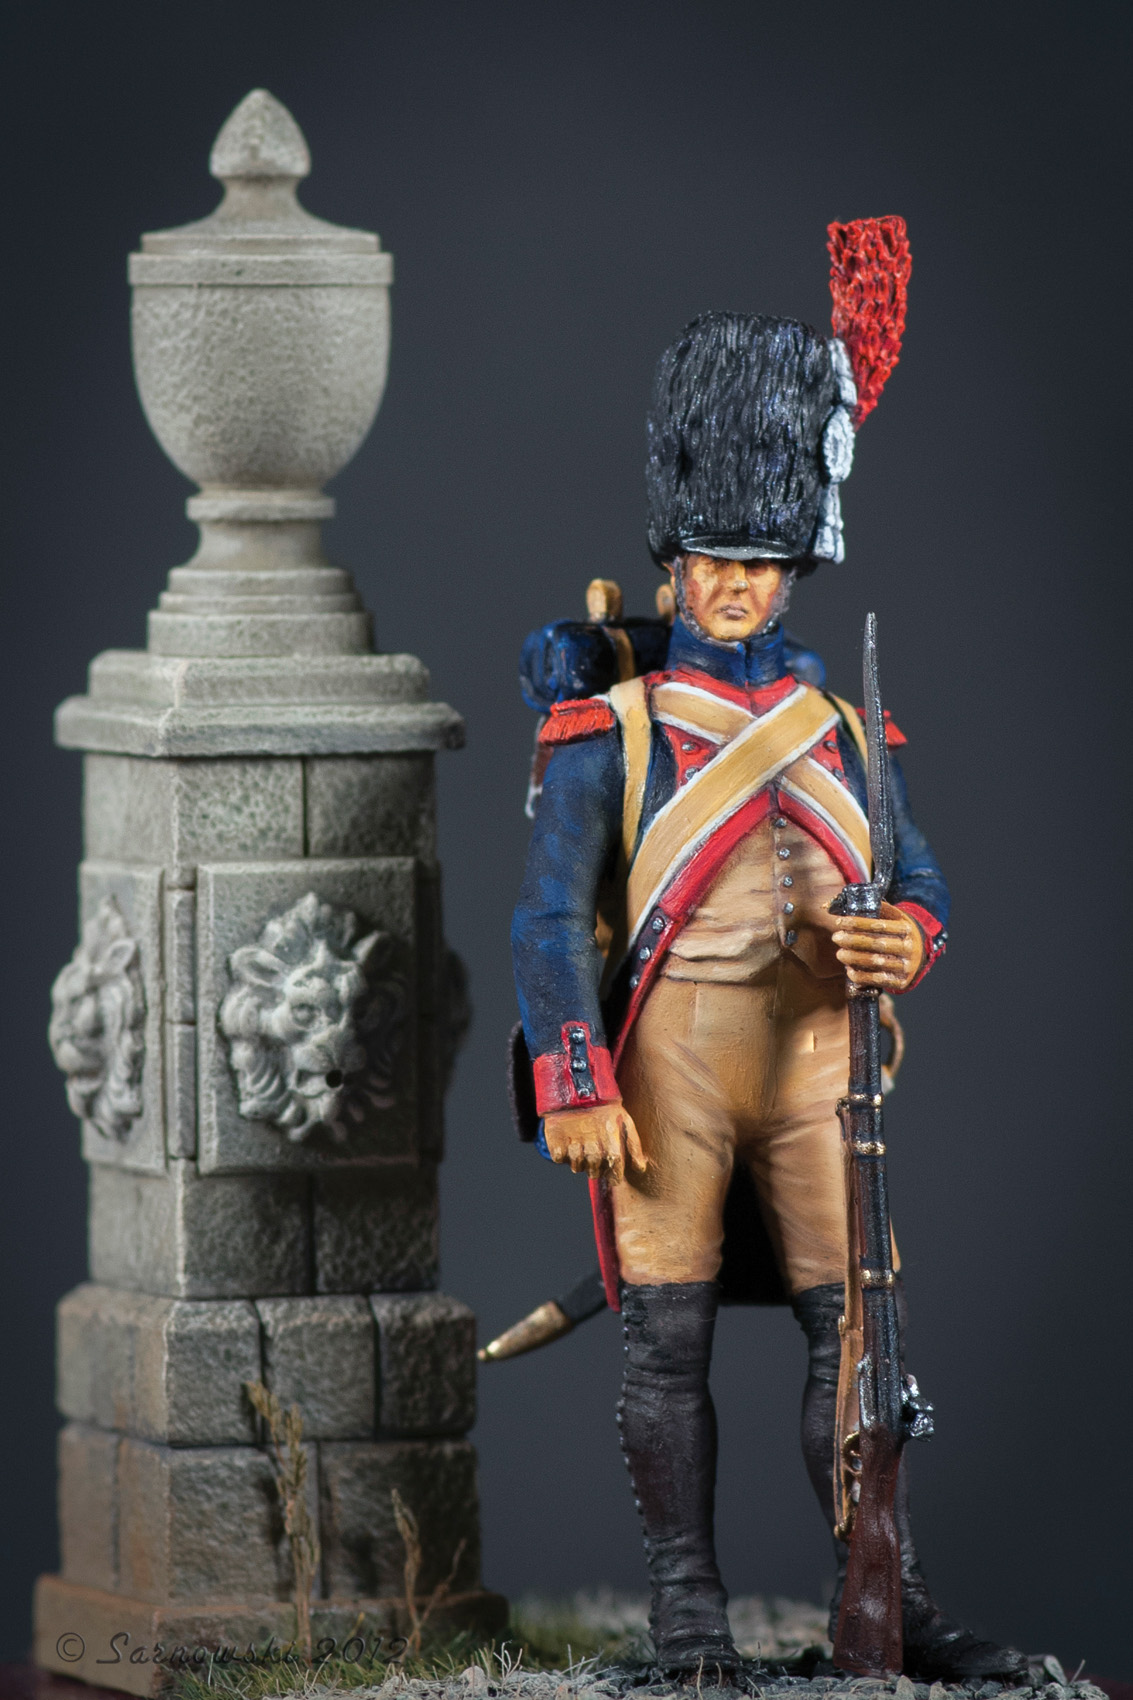
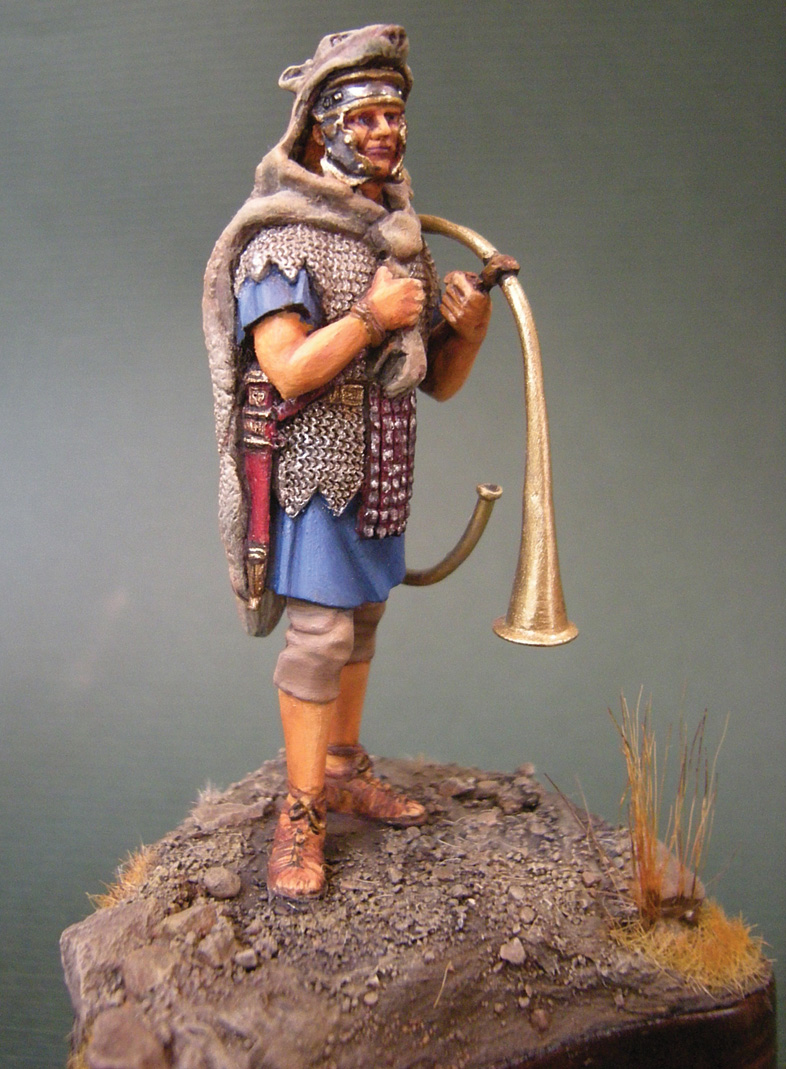
The most common size available is 54 mm, which means that the figure is about two and one-half inches tall from his feet to his eyes, but there are other sizes available with figures that might be as tall as 120mm or 180mm. There are Roman, Napoleonic, Victorian, World War I, World War II, and modern armies. In addition, there now are many fantasy armies to choose from, too.
I am a traditionalist of sorts, as I prefer the 54 mm figures. These figures were the most common size and are roughly equal to 1/32 scale, but larger figures and busts have recently become more popular. The rise in popularity is likely due to the improved casting techniques and materials now available.
The figures I started with were cast in soft white metal with a high lead content. Some wags used to say that the early British figures were cast from lead water pipes reclaimed from the London Blitz. These figures were soft and malleable and could be easily modified into slightly different poses by bending an arm or leg. Today’s figures are cast from better metal or resin and offer much finer detail and so many variations that I don’t often find the need to modify them, preferring to research and paint each new subject to the highest standard I can. I most often paint individual figures and occasionally small groups or vignettes.
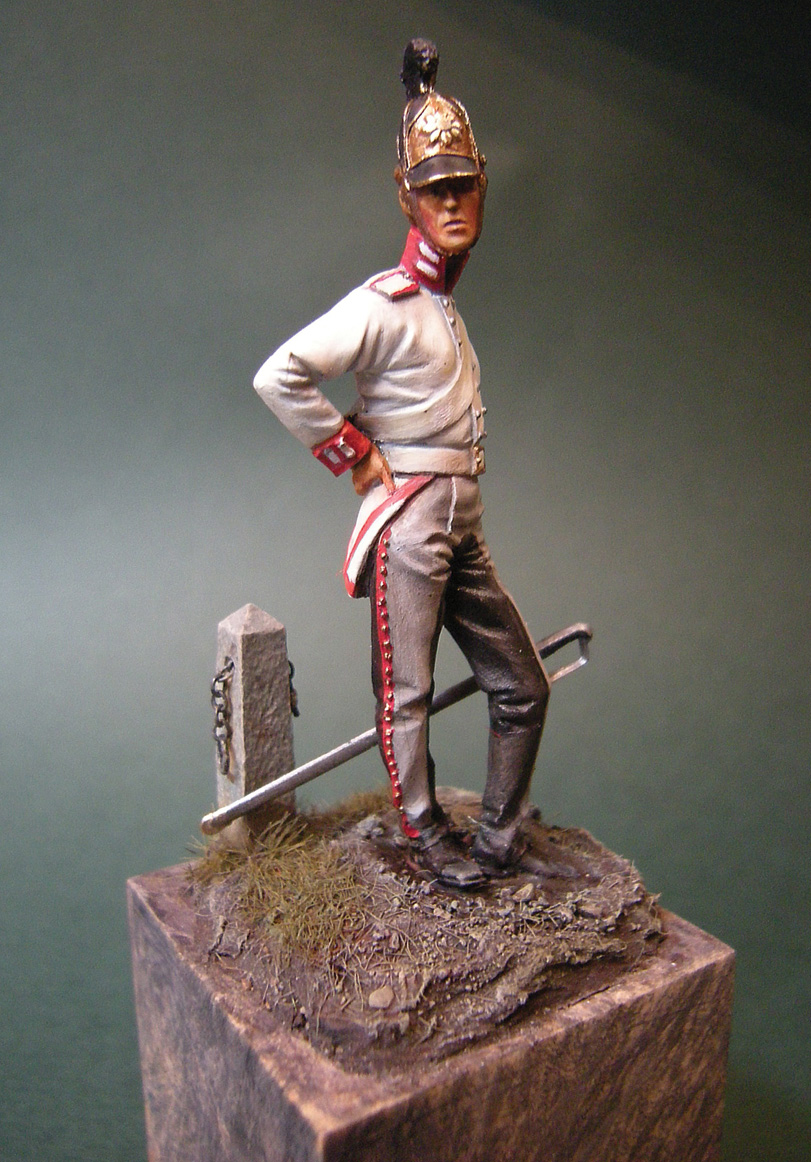
My first interest was in the British Indian armies of the Victorian era, as I was drawn to their colorful uniforms and striped turbans. I do not specialize in any period anymore, but instead try to choose subjects that interest me or provide some particular painting challenge. For example, I wanted to see what it was like to paint pink and thus chose an officer of Frederick the Great’s army with pink trousers and vest. I had to experiment and work to develop an effective pallet, but it was a learning experience that turned out a quite colorful figure.
Fantasy figures often offer color challenges since there is no set uniform or color scheme, and I will add one of these to my collection when I need new color inspiration. I have begun to experiment with new colors and have added metallic powders to the paint for new effects. I often seek out these new challenges in color or technique in the figure subjects I choose.
I enjoy the painting process and have tried to keep it my focus. I am somewhat of an old-school painter, preferring to paint with artist oils rather than the newer acrylic paints that have come into fashion. My introduction to oil paint was when one of our local modelers, Sheperd Paine, who eventually became a successful professional modeler, began to offer painting classes. Shep began his classes with five tubes of paint: red, blue, yellow, black, and white. His idea was that learning about colors and how to mix them was a necessary foundation in teaching people how to paint.
This constituted my introduction to color mixing and fostered a continuing interest in color and paint characteristics. This interest in color has been something that has grown over the years; it is one of the reasons I enjoy painting so much. Color theory and the ability to mix color has been a big help for me because oil paints do not really offer any premixed paint in the colors required for most projects.
I have a small drawer of paint tubes that has expanded from Shep’s first five colors and now form my pallet. Many of these new tubes are really crutches or shortcuts that I use to speed the painting process since I do not have to mix all colors from the five basics. Nevertheless, the range of colors that I use is still relatively small. I use the finest quality artist’s red sable brushes because these brushes have the finest, longest lasting points and are ideal for painting the fine detail these models need to be successful. Contrary to popular belief, these brushes are bigger than a few hairs but have very fine points.
I prefer using oil paints as the drying time is slow and allows for “wet blending,” which is the use of a good brush dampened with a little painting medium. Carefully dragging the brush over the edge of two tones of paint blends them into a smooth and seamless color transition.
This blending takes some practice but is what separates the best figures from the average ones. Some acrylic painters feel the long drying time required for oil paint is a disadvantage as it may take a couple of days drying before you can move on, but I usually have another figure standing by that is already dry and ready for more work.
Acrylic paints dry quickly. Acrylic painters achieve blending by layering slightly different tones over each other until they achieve a smooth, blended tone. For me, the slower drying time required by oil paint is not a problem since I normally am not working to a deadline. I also feel that oil paints offer more color vibrancy than acrylic paint, but this is a topic of much debate between devotees of the two mediums. I always find interesting discussions on the relative merits of each medium when viewing figures painted in them at the various shows. It offers a never ending series of conversations on the subject.
Before I start to paint, I like to research the details of the uniform I am going to paint and the history of its wearer. Most of today’s commercially produced figure kits come with some basic reference on the figure’s uniform, although it never seems to be enough information for me and is frequently in another language. The language difficulty is now easily satisfied through one of the many online translation programs, although most never seem to give the little details that I want to make the figure as accurate as possible. Details specifying the color of the belt or the badges on the cap never seem to be included, and those missing details often compel me to go to the library so that I can be sure every detail is correct.
Over the years I have amassed a large library of material describing soldiers, their uniforms and equipment and the campaigns of various historical periods. I also do an Internet search when I do not have printed reference material. I try to make each figure as accurate as possible, changing small details when necessary, such as adding a better sword or firearm from another kit or company. I also make my own straps and belts from lead foil wine bottle wraps. Furthermore, I always take time to learn a little about the campaign or history of each figure.
After the research is done, I clean the casting of any flaws or mold lines. It takes a lot of time and patience to do a good job, as any seam lines you miss now will detract from a good paint job. I then proceed to the assembly, as most figure kits are made in several parts, perhaps with separate arms, heads, weapons, and equipment. A little epoxy or super glue puts each part securely in place. Once assembled, I fasten the figure to a temporary painting base that gives me something to hold while I am working. I spray a coat of primer and then add some base colors to the various parts of the uniform and figure.
Once that is done, I can begin painting. The basic process for painting suggests that one starts with a base color and then add darker tones to the shadows and lighter tones to the highlights of the folds and creases in the uniform, while also adding appropriate shadows and highlights to emphasize the figure’s anatomy. While painting the uniform, more attention is paid to emphasizing the shape of pockets, belts, pouches, epaulettes, cuffs, and special uniform details.
The real secret is to blend the three basic tones seamlessly. This takes a smooth, light touch, a soft brush, and a little painting medium. Small miniatures need to have the highlights and shadows exaggerated to bring them to life. Looking at a 54mm figure is rather like viewing a real person at a distance of 6 to 10 feet. Adding and blending just enough highlights and shadows and smooth color blending add the artist’s touch.
I usually try to paint each figure as the person would dress. I start with the pants and then move on to the uniform jacket and various accouterments. I will then add the flesh of the face and hands. Painting the face and hands takes patience, as first you need to add the eyes with the whites, pupils and iris. Be sure that both eyes are looking the same way and are not cross-eyed. Well done eyes can make or break a good figure, and remember that the face of a 54mm figure is about the size of the fingernail on your small finger.
Once the eyes are in, I move on to shaping the face by adding shadow to the sides of the nose, temples, and around the eyes, chin, and mouth. Adding highlights to the nose, cheeks, eyebrows, lips, and ears then brings it all together. The hands come next with shaping of the fingers with shadow and highlights, special attention being paid to the knuckles and fingertips. Any additional detail of belts and buttons are usually added last.
Some painters say that they prefer to do the face first as they feel that they need to see the little person inside first. Whatever works best for you. Each of these steps requires some drying time with oil paint. If painting a new color is started before the last color has dried, you can wind of blending two colors into something unwanted. This generally means that completing a figure is accomplished in several small painting sessions over several days or weeks. After the figure’s flesh and uniform are complete and have dried, I give it an overall spray of dulling agent to dull any sheen left in the oil paint. This also helps unify the color tones on the figure. After applying the matte spray I finish by adding the appropriate amount of gloss or sheen to leatherwork along with any metallic colors necessary for buttons, badges, and metal work. These last little details help to add life to the figure, and attention here helps make everything come together.
After finishing the uniform and adding these last little details, I mount the figure to a finished wooden display base. Now, one last is step needed. I add some groundwork to complete the scene for the figure. I might add a bit of grass or stone, or perhaps a bit of trench work for a World War I figure. Each base is different and should help create an appropriate scene. A good friend once described this as the frame for your picture. I have always tried to pay special attention to the bases and groundwork. Setting the correct scene is very important to me. I have become known for this in our group, and I frequently chide others who do not pay as much attention to this part of their modeling.
Once I have completed my figures, I take them to a club meeting or model show so I can share the effort. This is an important step for me before I put them in display cases that I have built into my basement walls. Over the years I have accumulated many painted figures. I keep most of my favorites, but I also tend to give them to my friends as gifts when I find a special subject that means something to them.
In addition, I frequently offer my figures to our club for sale at auctions that help raise funds. There are often bidders at the auctions who are collectors rather than modelers. I know that there is a small group of collectors who prefer to collect rather than paint. Some of these collectors seek out the best painters and commission new work or purchase their latest work at shows.
Some of the best modelers also have had their work added to famous collections and museums. I sometimes trade my work to other painters in exchange for theirs and have built a small collection from painterswho are friends. I value my collection by the hours of enjoyment it has brought and the lifelong friends I have made. I could not have made a better investment.
Would you like to know more about military miniatures? If you are ever in the Chicago area, we would be happy to welcome you to our small group of painters, modelers, and collectors. We have members who are collectors, history buffs, painters, and modelers, and some who are just interested bystanders.
Our website has details of our meetings and annual show in October, modeling and painting tips and contact information. Check us out and see what military miniatures are all about.

Works of art!