By Allyn Vannoy
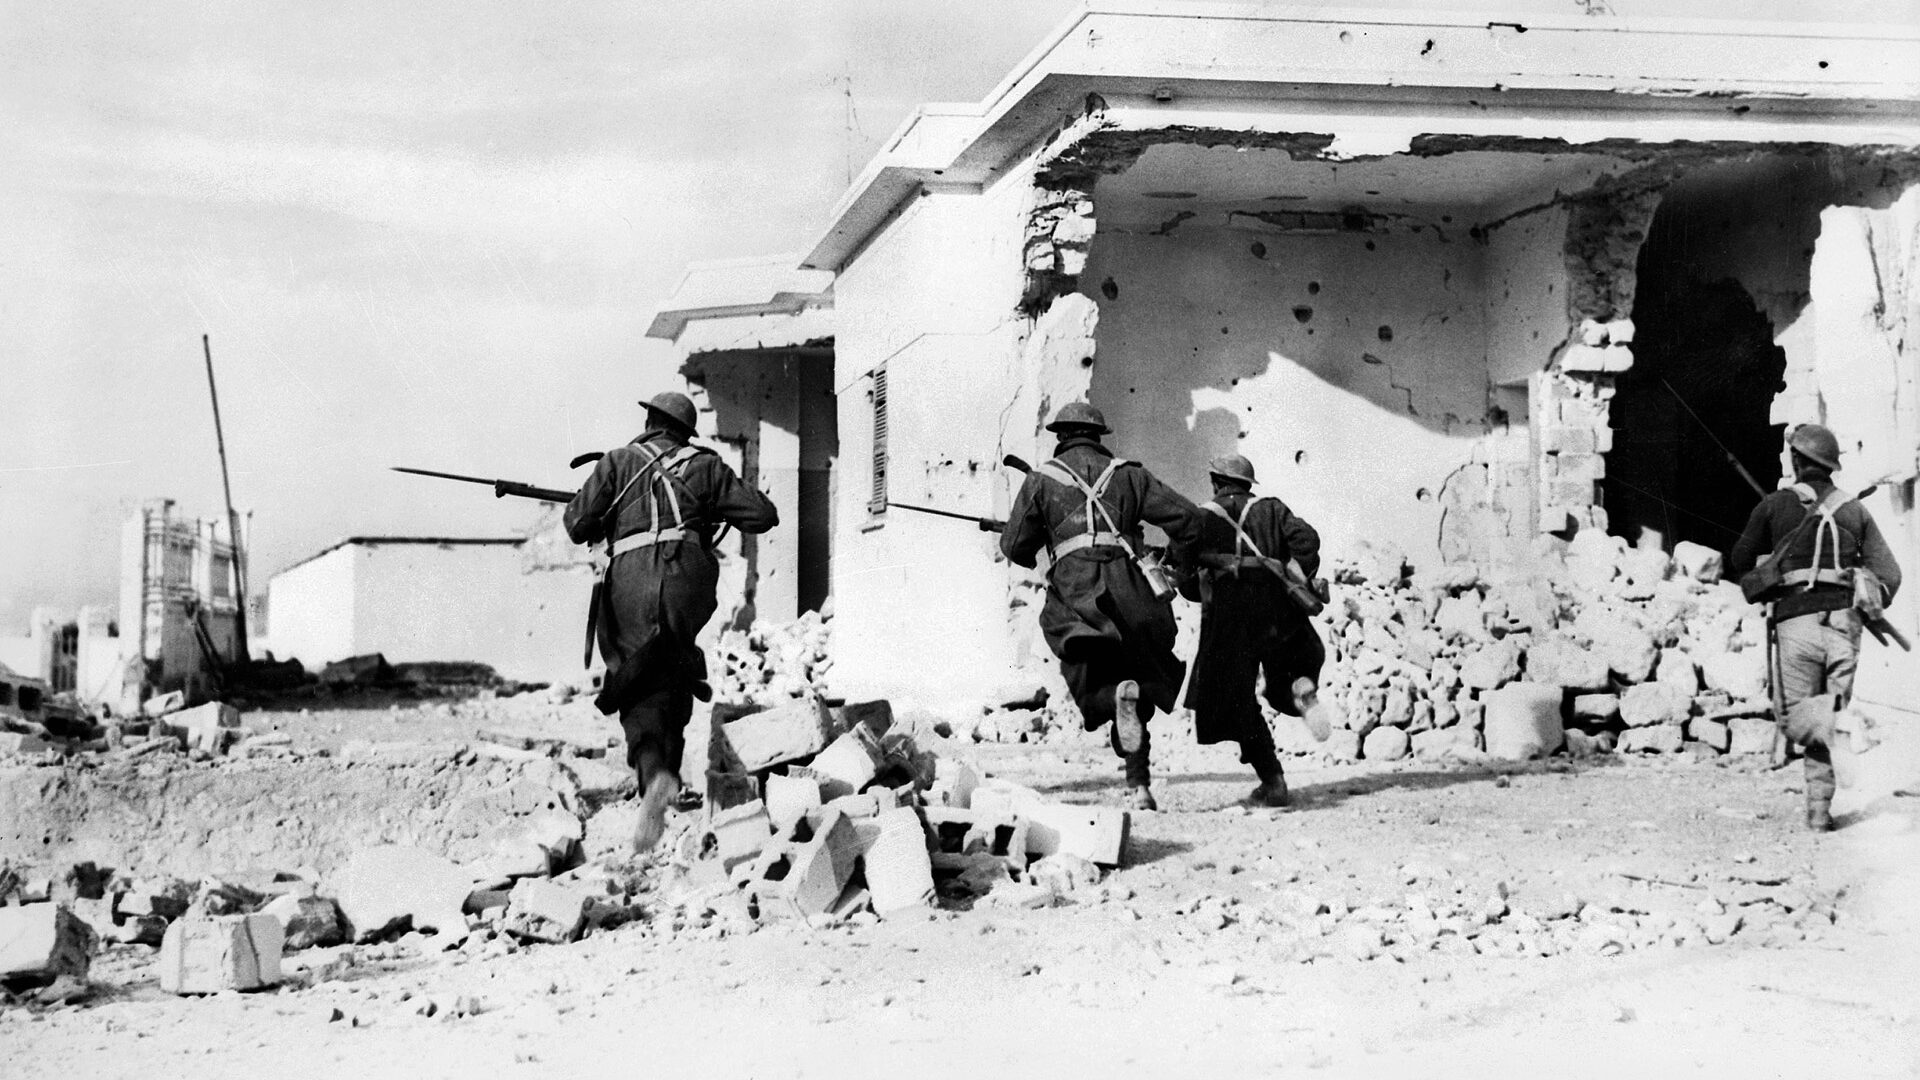
The desert sky lit up like a summer lightning storm on the night of December 31, 1941. The distant thunder of hundreds of guns rolled across the sandy, stony ground. The assault force of New Zealand tanks and South African infantry prepared to move forward through breaches in the barbed wire and minefields protecting Axis positions before the much-fought-over Libyan coastal town of Bardia. The final British push had begun.
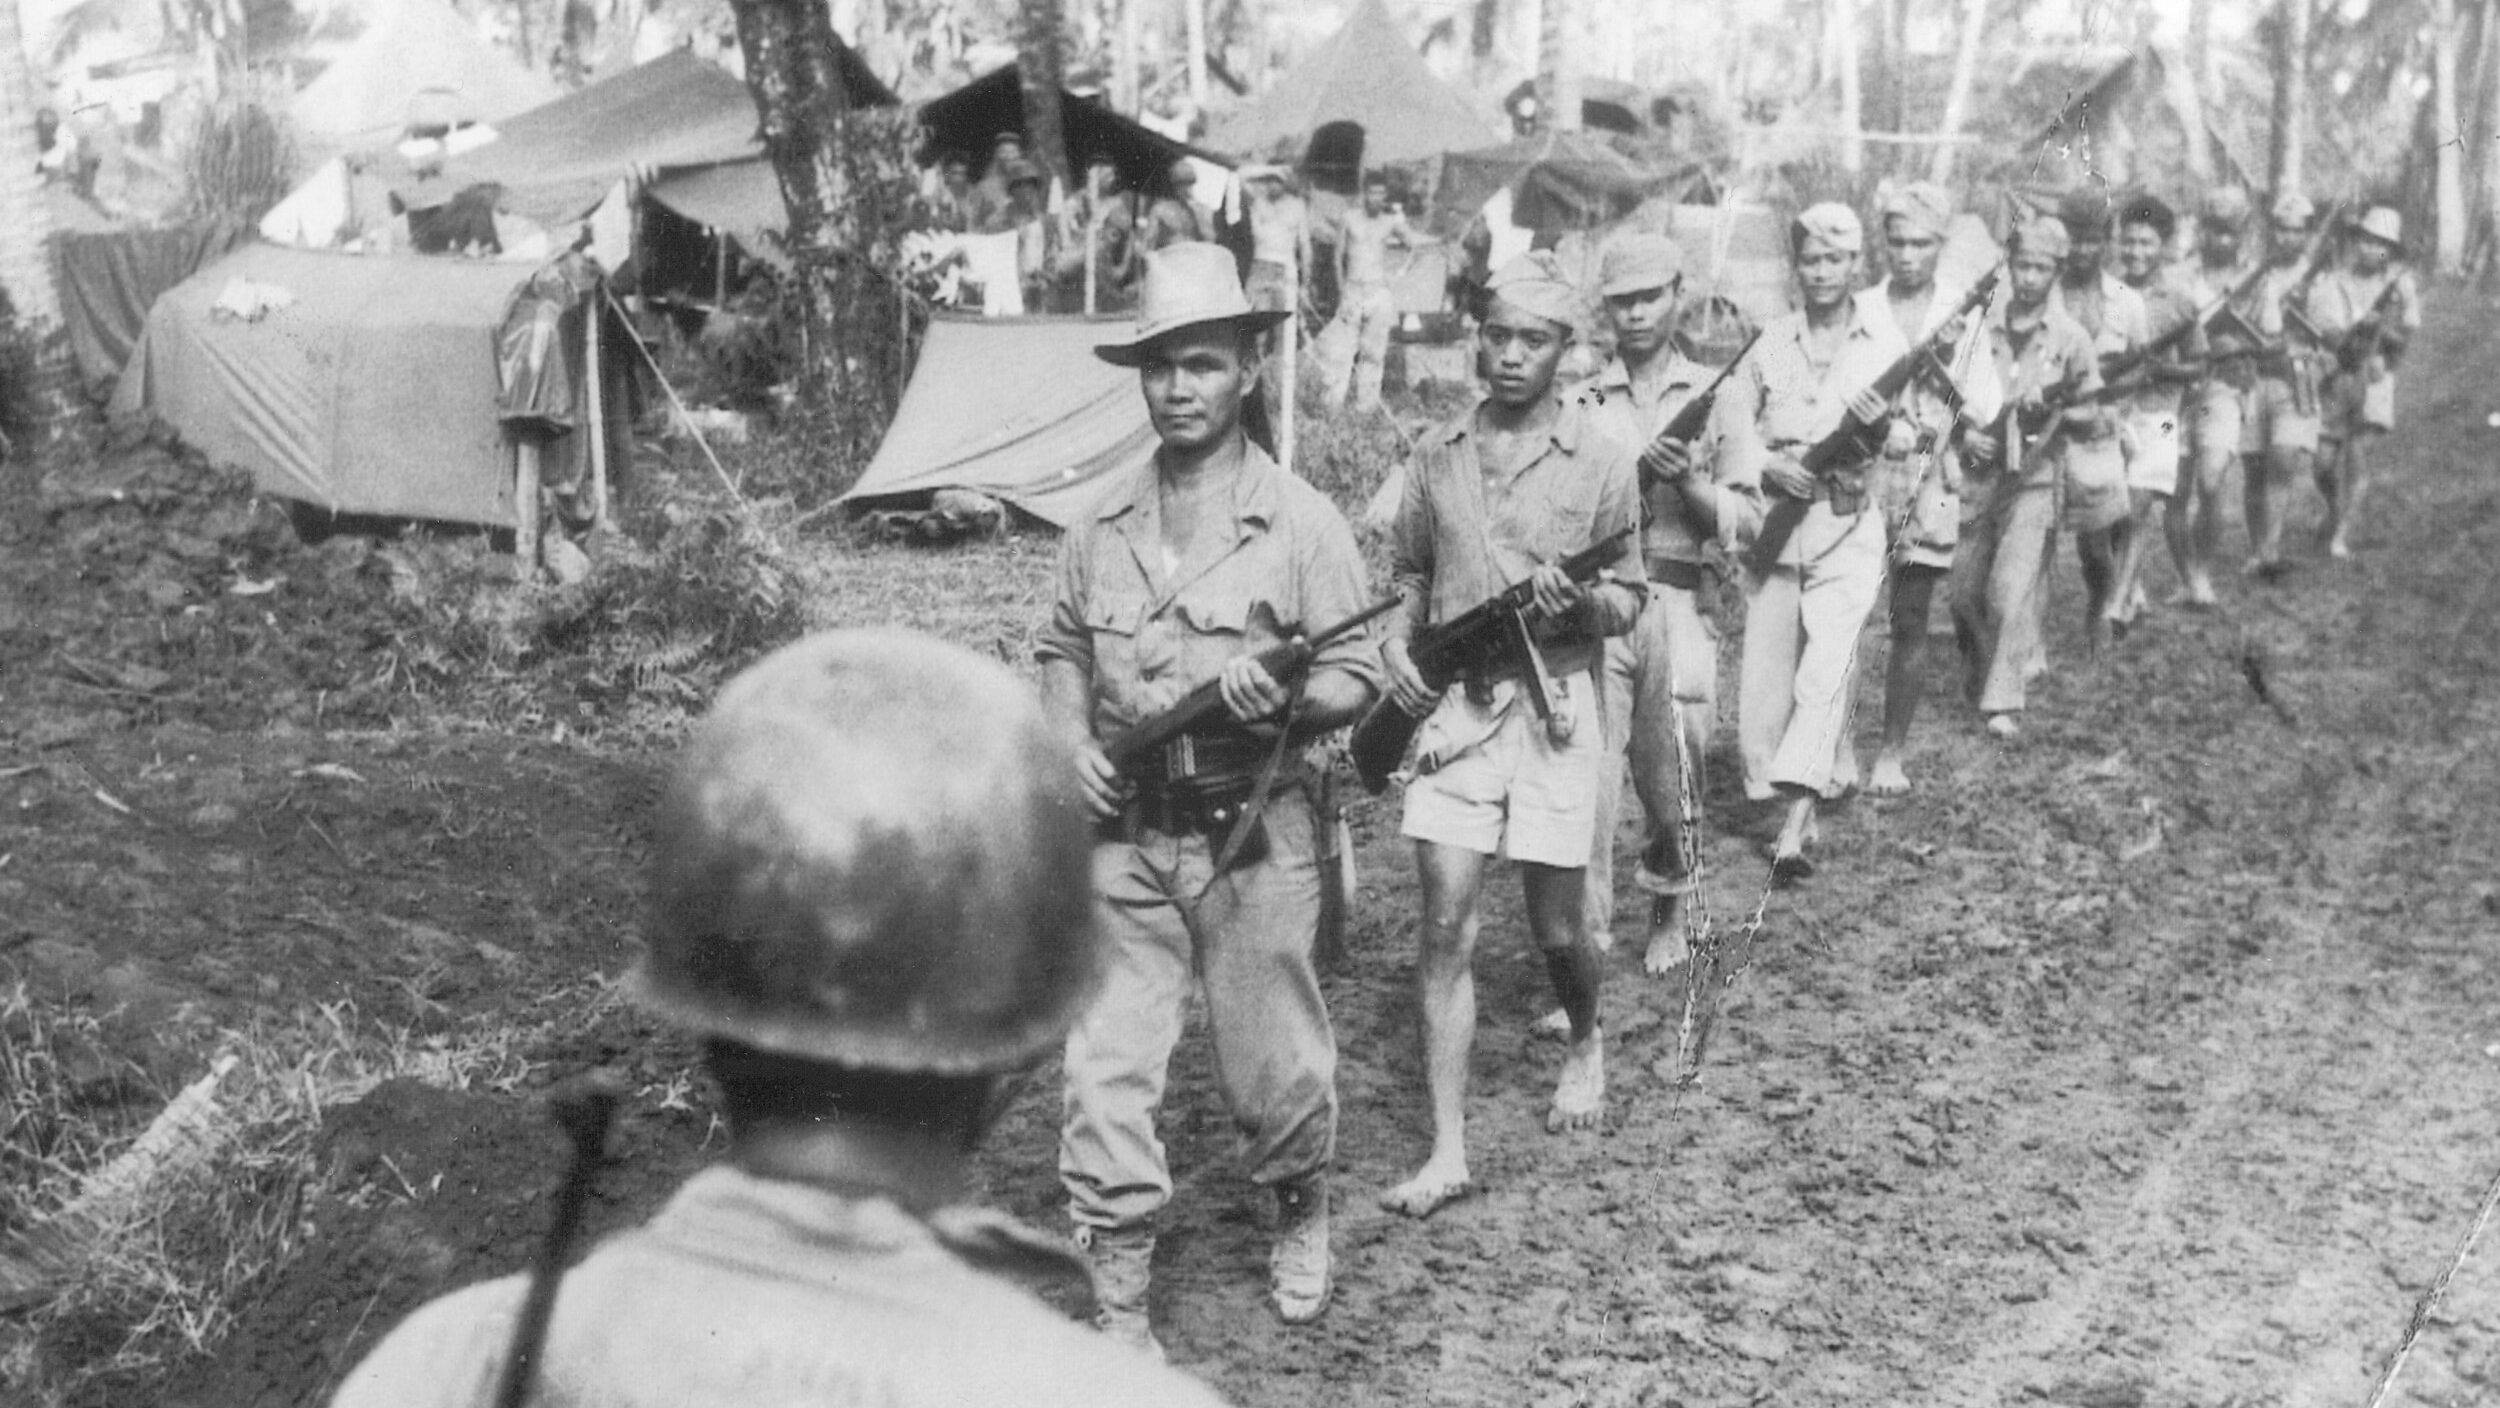
The South Africans were untested but enthusiastic. They were led by a former South African police officer and attorney, Pierre de Villiers, a strong believer in the use of firepower over manpower. He had served in the Great War, and in 1928 he had been appointed a lieutenant colonel in the South African police, later succeeding to the post of commissioner. De Villiers volunteered for military service when World War II started, and eventually took command of the 2nd South African Infantry Division as a major general in October 1940. He oversaw training of the division, which incorporated a police battalion, and supervised the division’s transfer to North Africa in 1941.
“I Need a Few Thousand Dead”
The British Eighth Army’s second Libyan campaign, dubbed Operation Crusader, began on November 18, 1941. The XXX Corps, under Lt. Gen. Willoughby Norrie, launched the main attack with the mission of destroying Axis armored forces between the Libyan-Egyptian frontier and relieving the besieged British garrison at Tobruk. Meanwhile, the British XIII Corps, under Lt. Gen. Reade Godwin-Austen, comprising the 4th Indian Infantry Division, 2nd New Zealand Division, and 1st Army Tank Brigade, undertook a secondary attack to contain Axis forces in the Bardia-Sidi Omar-Halfaya Pass triangle, close to the border. In reserve was the 2nd South African Infantry Division.
North Africa had been fought over relentlessly by the British and Axis powers for more than a year. The fighting began in September 1940 when the Italian Tenth Army, under Marshal Rodolfo Graziani, invaded Egypt from its bases in Libya. It was part of Italian dictator Benito Mussolini’s vision of a new Roman empire—“That great reward for which Italy is waiting,” as Il Duce put it. With Great Britain fighting for its life against relentless German Luftwaffe assaults on the home island, Mussolini hoped to grab Egypt, long a British protectorate, before the Nazis could complete their victory in western Europe. To share in the fruits of that victory, Mussolini needed his own battlefield triumph. “To be able to attend the peace conference as a belligerent,” he explained to Marshal Pietro Bagdolio, chief of the Italian General Staff, “I need a few thousand dead.”
He would soon get his wish. After Graziani chose to dig in at Sidi Barrani, 60 miles inside Egypt, rather than continue all the way to Alexandria as originally planned, the British mounted a spirited counterattack in December 1940. In two months’ time the British, led by resourceful Lt. Gen. Richard O’Connor, smashed the Italian advance, capturing 130,000 prisoners and taking the major fortresses at Bardia and Tobruk. Adolf Hitler, alarmed and annoyed at Mussolini’s ineffectual empire building, dispatched General Erwin Rommel to North Africa in February 1941. Rommel, en route to becoming a legend as “the Desert Fox,” counterattacked the British in turn, driving them out of Libya, capturing O’Connor in the process, and besieging Tobruk. That was the situation on the ground when General Sir Claude Auchinleck took over British forces in northern Africa in mid-1941 and prepared to launch—with Prime Minister Winston Churchill’s enthusiastic support—Operation Crusader four months later.
Rolling Back the Axis
While the armored elements of XXX Corps forced the German and Italian divisions back toward Cyrenaica and El Agheila on the Gulf of Sirte, Axis positions in the triangle held firm, threatening British supply and communication lines and effectively immobilizing one full division of Commonwealth troops. On November 23, the 5th New Zealand Brigade, advancing east from Fort Capuzzo toward Sollum, cut off Axis positions at Sidi Omar-Sollum-Halfaya Pass, effectively isolating Bardia. The next day, Axis-fortified positions on the southern anchor of their defensive line at Sidi Omar and Libyan Omar were attacked and reduced by elements of the 4th Indian Division. Axis forces at Sollum, Bardia, and Halfaya Pass continued to hold out.
The 1st New Zealand Division occupied the Fort Capuzzo area south of Bardia and northwest of Halfaya Pass, and moved additional detachments between Bardia and Sollum and to the west of Bardia. The division had contained the Axis forces at Bardia early in the campaign, but British headquarters decided that these troops were needed farther west to assist XXX Corps. The 2nd South African Division, which had been protecting the line of communication along the Egyptian coast, was ordered to relieve the 4th Indian and 1st New Zealand Divisions. The South African division was directed to contain and reduce Axis positions around Bardia.
Although classified as a motorized unit, the 2nd South African Division in reality had only enough transport to carry one of its three brigades at a time, and movement was therefore somewhat slow. However, the division managed to take over the Omars area on December 3. Leaving a small garrison there, it sent a two-battalion brigade forward on December 4 to occupy positions in the Bardia area, and another two-battalion brigade occupied the Fort Capuzzo area five days later.
A good-size portion of the division—one infantry brigade, one infantry battalion, and one regiment of field artillery—was still at the British railhead southwest of Sidi Barrani, at Bir el Thalatha in Egypt, awaiting transport. On December 9, the division occupying the area between Bardia and Capuzzo had available for action only two infantry brigades (less one battalion), one regiment of field artillery, and an attached New Zealand armored cavalry unit with a few armored cars and just four tanks. No attempt was made to invest Bardia at the time, since the possibility of an Axis counterattack from the west was still a threat. Instead, six mobile combat teams were organized, each consisting of a platoon of three armored cars, a battery of field artillery with four 25-pounders, a platoon of four 2-pounder antitank guns‚ a company of motorized infantry, and a detachment of engineers.
These teams were instructed to clear Axis troops from Gambut, about 40 miles due west of Bardia, all the way to the coast. Special attention was to be paid to the wadis (dry stream beds) running north to the sea. By December 15, they had accomplished their mission, destroying a total of 38 Axis tanks, 34 of which were found unprotected at an enemy repair depot. During this period, the South Africans continued to maintain armored-car patrols around the Bardia perimeter and between Bardia and Sollum. On December 15, the 1st Royal Durban Light Infantry Battalion and two companies of the division’s machine-gun battalion moved up to Bardia from the Omars region and Fort Capuzzo.
Reconnaissance in Force
The Libyan port of Bardia was well fortified, the Axis troops having had several months to establish defensive positions and reinforce strongpoints. The ground offered little or no cover for attackers, the perimeter defined by deep wadis. Axis positions were well concealed, dug in, and prepared for all-round defense. In addition to presenting a formidable perimeter, the defenses also featured some 90 strongpoints, cemented in and heavily wired. In many cases, these were strengthened by deep antitank ditches protected by large numbers of mines.
On December 16, the Rand Light Infantry Battalion carried out a reconnaissance-in-force on the Bardia perimeter, approaching along the coast from the north, with the Royal Durban Light Infantry from the south. During the reconnaissance, a third battalion was held in reserve on an escarpment to the west of the perimeter, and two machine-gun companies from the Cape Dutch Machine Gun Battalion supported the action with long-range fire. Both the north and south reconnaissance battalions reached the wire, blew gaps in the line, and penetrated a short distance into the perimeter. These penetrations were immediately met with considerable resistance by the Axis garrison, and the South Africans subsequently withdrew.
In preparation for operations against Bardia, the South African division was reinforced by an additional artillery battalion of 25-pounders and one of 6-inch guns on December 17. On the same day, the British forces captured commanding high ground about 1,500 yards west of the perimeter and held on despite numerous Axis counterattacks. The loss of the key position prevented the Axis troops from observing the attackers’ activities to the west, north, and south. The position was of corresponding importance to the South Africans since it afforded a good observation vantage of a major portion of the Bardia defensive perimeter. The ground was now set for battle, but preparations for the assault were just getting under way.
Between December 17 and 31, the South Africans initiated an intense harassing effort while also gaining valuable intelligence. Constant shelling and machine-gun fire, uninterrupted night patrolling, and the blowing of gaps in the wire around the perimeter all served to confuse the enemy about the time and place of the planned assault. The New Zealand Cavalry Regiment added to the confusion by ostentatiously demonstrating within full view of the perimeter, with four tanks on the escarpment to the west and armored cars to the south and southwest. A portion of the 2nd South African Division troops continued to contain enemy forces in the area of Halfaya-Sollum while the remainder of the division prepared for the final assault on Bardia.
The division assets available for operations against Bardia included five infantry battalions, a reconnaissance battalion, two companies of the division’s machine-gun battalion, a light antitank gun regiment equipped with 2-pounders, all available division artillery (11 batteries of 25-pounders), four batteries of medium artillery (three 6-inch guns and one 4.5-inch), and two battalions of the New Zealand Cavalry Regiment with 114 tanks (Mark III Valentines and Matildas). The tank force represented a substantial portion of the Eighth Army’s operational armored assets at the time.
As the South Africans made final preparations to assault Bardia, Operation Crusader was drawing to a close. Heavy fighting back and forth across the Libyan desert between Tobruk and the Egyptian border had finally broken the German-Italian mobile forces. Rommel was making a fighting withdrawal to El Agheila, stubbornly maintaining lines of communication and avoiding being cut off and surrounded. Left in the wake of the British advance was not only the garrison at Bardia, but also pockets of Axis troops at Sollum and Halfaya Pass. These positions represented a thorn in the side of the British that had to be removed in order for the Eighth Army to secure its own lines of supply and continue advancing along the coast.

Planning the Attack on Bardia
De Villiers’s initial plan of attack at Bardia contemplated an assault down the coastal plain by his South Africans, following the Tobruk-Bardia road, cutting off the northern portion of the perimeter and continuing south. However, when he was promised two full battalions of infantry tanks instead of two companies, the increased armored strike force allowed him to change his plan to an attack from the south. The broad, flat escarpment leading into Bardia from the west presented the most favorable approach for tanks; it was the same ground the British had used during an attack in the previous year. Every effort was made to cause the defenders to expect just such an attack, and a large portion of the defenders’ antitank guns were sited to cover this approach.
De Villiers’s new southward plan of attack was in the hands of subordinate commanders by December 24. Troops were then withdrawn from the line by individual companies and rehearsed in their roles to ensure absolute timing and coordination. The plan provided for three forces—one each to the north, west, and south—which were ordered to “hold, demonstrate, and contain” the enemy forces. The main attack was to be made by a reinforced brigade on the southern perimeter, jumping off at 0500 hours on December 31. In advance of the assault, an artillery bombardment was to be laid down by warships of the Royal Navy standing by offshore.
De Villiers’s opposite was a 53-year-old Bavarian, Maj. Gen. Arthur Schmitt, another World War I veteran and a proven field ordnance commander. He had been given command of the 556th Rear Area Command, subordinate to Panzer Group Afrika. Because Rommel was short of senior German officers and did not trust the Italians to defend Bardia, Sollum, and Halfaya Pass, he chose Schmitt to command the eastern sector instead. Schmitt’s command, designated Division Bardia, included 4,200 Italians from the Savona Division and 2,200 Germans, mostly in administrative services. Although of limited mobility, the defenders were a formidable force, well-equipped in terms of guns and artillery. The Axis units included infantry, engineers, 86 pieces of artillery of various calibers, a detachment of 13 tanks, and service troops. German forces within the perimeter included the 106-man 10th Oasis Company, supported by six 75mm, three 37mm, and three 47mm guns; the 200th Pioneer Battalion; the 33rd Flak Troop with three 88mm dual-purpose guns; and the 5th Light Flak Troop with 16 20mm guns.
Italian forces included the III Battalion of the 40th Bologna Infantry Regiment and the II Battalion of the 15th Savona Infantry Regiment, each with about 600 men and four 65mm guns; elements of the II Battalion of the 16th Savona Infantry and the Coppeta Battalion; the 4th Genoa Cavalry Group with 870 men and 48 machine guns; a company of the 5th Light Tank Battalion with 13 light tanks; an antitank company with eight 47/32 guns; a heavy battery of four 105mm coastal guns; and assorted other support troops. Italian 20mm Breda guns were dug in on reverse slopes, with good fields of fire that could catch tanks and troops coming over the rise to their front. Although isolated from the rest of the army, typically excellent German planning ensured that supplies and water were plentiful and the morale of the Axis troops was good.
Three Phases of the Assault
The South African plans called for the assault to be carried out in three phases. Phase 1 was to consist of an entry into enemy defenses at two points along the southern perimeter, with the attack coordinated by the commander of the South African 3rd Infantry Brigade. Phase 2 called for an advance on high ground along the southwestern perimeter. The final phase included mopping-up operations on any positions that had been bypassed or that continued to resist.
De Villiers firmly believed that firepower was the key to success in battle. He wanted no more personnel to be used than was absolutely necessary to take a position or secure an objective. To ensure communications and to prevent damaging phone lines, buried conduits were dug in staging areas through which tanks would have to travel, and wires were laid openly along routes where it was unlikely that tanks and Bren carriers would pass. Radio communication was also to be used extensively with pack-radio sets, similar to U.S. Army walkie-talkies, with a range of about two miles. Realizing that the best-planned communication systems could break down, de Villiers saw to it that a number of runners were also standing by.
Engineers were thoroughly trained to support the initial breakthrough. Ample carrying parties were to be provided from the infantry to bring forward engineer stores and explosives prior to the attack, while engineers prepared lanes through the Axis minefields along the perimeter. After the breakthrough, engineers in Bren carriers were to accompany the tanks in order to deal with any minefields they might encounter.
Approaching H-Hour
The main assault force consisted of the 3rd Brigade commanded by Brig. Gen. C.E. Borain, and included three battalions—the 1st Imperial Light Horse, 1st Rand Light Infantry, and the Kaffarian Rifles. Support and containment was to be provided by three groups, codenamed Northforce, Kingforce, and Southforce. Northforce, commanded by Lt. Col. J. Butler-Porter, included the 1st Royal Durban Light Infantry, supported by the New Zealand Cavalry Regiment. Kingforce, under Lt. Col. W. Kingwell, included a company of infantry and two platoons of the 7th South African Armored Reconnaissance Battalion and one squadron of the New Zealand Cavalry Regiment. Southforce, under Maj. P.J. Jacobs, included the 7th South African Armored Recon, less one company and two platoons. In reserve was the 1st South African Police Battalion under Lt. Col. R.J. Palmer. Corps artillery attached included the 234th Battery of the 64th Medium Regiment Royal Artillery, 67th Medium Regiment Royal Artillery, 68th Medium Regiment Royal Artillery, and elements of the 41st Survey Regiment, Royal Artillery.
During the night of December 30-31, one tank battalion, accompanied by infantry and engineers, moved to the assembly areas, the tanks about 1,000 yards to the rear of the infantry. At H-hour minus 3 hours and 5 minutes, the engineers and two infantry battalions, the 1st RLI on the right and the 1st ILH on the left, began their movement forward to the line of departure—a road running 300 yards to the south of the perimeter wire and almost parallel to it.
On a given signal, designated infantry teams assisted in carrying forward bangalore torpedoes and engineer equipment. The troops arrived at their line of departure without incident. At H minus 135 minutes, artillery fire opened in conjunction with a heavy bombardment by the Royal Navy from the Gulf of Sollum. Between H minus 110 and H minus 70, the engineers blew a series of gaps in the defending wire. The infantry crossed the line of departure at H minus 90, then took up a position forming a salient about 400 yards inside the Axis perimeter.
In the rear of the newly established line and under cover of infantry and artillery fire, the engineers widened the five gaps they had opened in the wire, cleared lanes through minefields, and blew the sides of an antitank ditch to create paths for their armor. The tanks arrived at the ditch only seconds before the time fixed for launching the attack and, continuing through the wire and minefields, passed through the infantry.
Phase 1: The Attack Begins
The RLI Battalion followed the tank column on the right flank and encountered considerable resistance from a series of defensive positions in the southeastern section of the Phase 1 objective area. Leaving one company to clear out pockets of enemy resistance, it continued on to its objective. Mopping up was quickly accomplished, and the company rejoined the battalion by about 1000 hours. Meanwhile, the tanks with the right flank, moving behind an artillery, laid down smoke screen, changed direction according to plan, advanced to the northeast at the start of the assault, then made a hard left turn to the northwest as they continued their work of destroying enemy strongpoints and moving on.
The tanks with the left-flank column, having passed through the infantry, continued north, also behind smoke, on the right of the Sollum-Bardia road. A strong wind came up at this time, rendering the smoke screen less effective, with the result that the tank column took heavy losses from antitank fire in emplacements to the northwest. The tanks then swung around to the right and joined the right-flank tank column in cleaning out the area between the two attacking forces, while the ILH Battalion continued on toward its objective. The troops of the ILH Battalion did not receive much in the way of assistance from their tank detachment because the machines could not operate satisfactorily over the broken ground. In spite of this lack of tank support, the infantry reached its objective on schedule and immediately made contact with the RLI Battalion on the right.
Meanwhile, the Kaffarian Rifle Battalion, following the ILH Battalion on the left flank with the mission of establishing a flank position along the Sollum-Bardia road, received heavy fire from the northwest—the same area where the infantry tanks had come under fire. The battalion commander and the majority of the staff of the Kaffarian Battalion became casualties, and the battalion failed to make contact with the ILH Battalion in position to its front. The assault had reached a critical state. Despite its initial success, it was in some jeopardy of being broken.
Shortly after 1100 hours, de Villiers received word that companies of the Kaffarian Rifles were withdrawing to the wire. At about the same time, information was received that an enemy counterattack was forming to the northwest, in position to threaten his left-flank battalion. As a result, the infantry tanks were moved to the rear of the ILH Battalion to counter this new threat. The 1st SAP Battalion was also moved forward from division reserve to secure the flank in place of the Kaffarian Rifles, which was withdrawn for reorganization and placed in reserve.
Moving with deliberation, the Police Battalion succeeded in establishing a flanking position about 2,700 yards east of the Sollum-Bardia road, but could not reach the ILH Battalion to its front. By arrangement between the two battalion commanders, the Imperial Light Horse made contact with the SAP Battalion during the afternoon. The Axis counterattack from the northwest never materialized. The hard-fighting New Zealand tank battalion, with 50 tanks engaged during the first day of action, had 20 tanks lost or damaged, mostly in the left assault column. During the night, recovery operations managed to salvage three of the tanks.
A Revised Phase 2
The South Africans and New Zealanders had penetrated the German-Italian defenses at several points and pressed home their attack but had fallen short of securing their objectives. Despite the failure to reach its Phase 1 targets on December 31, de Villiers considered the situation favorable. Working feverishly through the night of December 31-January 1, his staff completed a revised plan for the second phase of the attack. The new plan called for a night attack to the northwest to be launched at 2200 hours by two brigades of infantry supported by tanks. The line of departure was to be the position already established by the 1st SAP and the ILH Battalions.
To carry out the plan, it was necessary to reorganize the attacking forces. In a daring move on the morning of January 1, the 1st RDLI Battalion, less one company, was withdrawn from the north front, moved around the Bardia perimeter, and put in the line between the 1st SAP and ILH Battalions. The Kaffarian Rifles was assigned to the left attacking brigade and moved into the line. Personnel of the Division Reconnaissance Battalion were dismounted and moved up to relieve the RLI Battalion on the right of the line, which in turn was placed in the line between the ILH and RDLI Battalions. After the rearranging, the units on the line, from left to right, included the 4th Brigade with the 1st South African Police, Kaffarian Rifles, and 1st Royal Durban Light Infantry. Next in line was the 3rd Brigade with the 1st Rand Light Infantry, 1st Imperial Light Horse, and Reconnaissance Battalion. The division was preparing to commit all of its available infantry in a final push.
Phase 2: The Nighttime Assault
During the afternoon, prior to launching the assault, a sandstorm blew up that threatened to impede the operation. Bren guns and submachine guns became clogged with sand and were put out of action. Even bolt-action rifles had considerable difficulty. The only weapons other than bayonets and grenades remaining in working condition were the Vickers machine guns, although visibility was so reduced as to make them nearly ineffective. Despite the storm, the South Africans were determined to execute their plans. The Phase 2 attack jumped off in the darkness as scheduled at 2200 hours. The nighttime assault apparently caught the Axis troops off balance, and the 3rd Brigade had little difficulty reaching its objective quickly. The 1st RDLI Battalion, on the right of the 4th Brigade, encountered stronger defensive fire, but drove forward and achieved its objective as well.
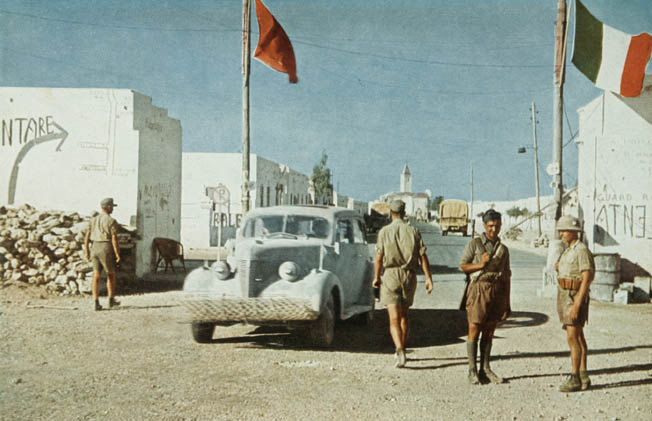
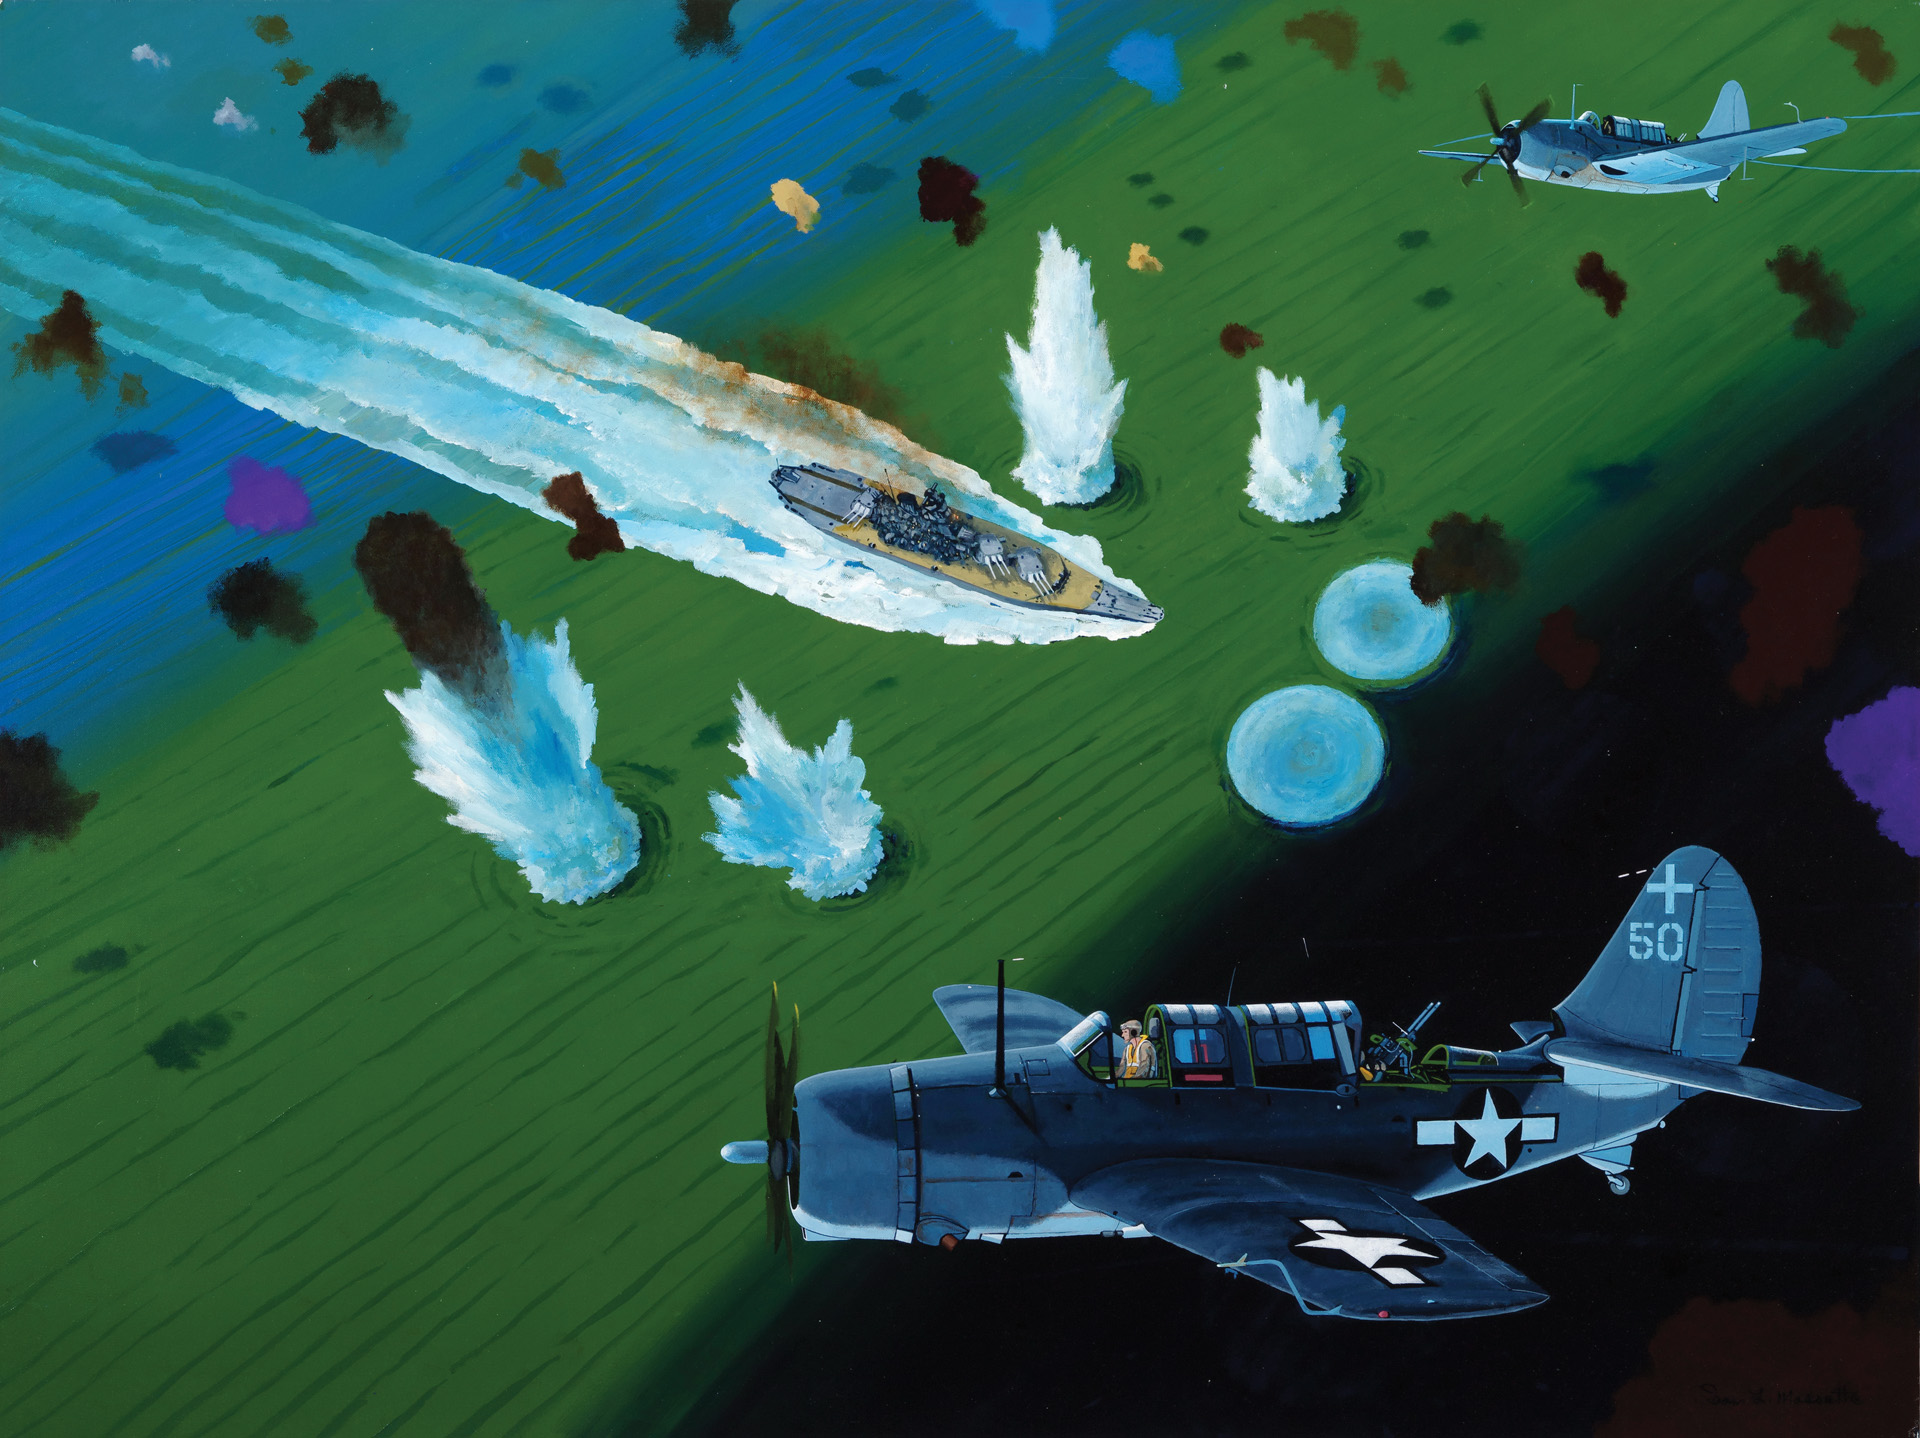
From: journal ‘Signal’, French edition, vol. 2, no. 22, 1941, p. 25.
A Sudden Surrender
While other units were achieving their objectives, the Kaffarian Rifle and 1st SAP Battalions became pinned down by fire from a well-defended Axis position called “the Triangle.” Assistance by armor was impossible; the New Zealand tankers could not get into the area because of mines and an antitank ditch. Although the two battalions eventually took the position, they had not reached their objectives by daylight, and a gap began to develop between the Kaffarian Rifles and the 1st RDLI Battalion on its right. De Villiers ordered his tank commander to send a tank company back to close the gap and assist the two battalions in moving forward, but before this could be accomplished, the Bardia garrison suddenly surrendered. (It was later reported that the Axis forces had lost their last well and did not have sufficient forces to retake it.)
After the surrender, Schmitt somewhat ungenerously complained that he would have held out longer if his Italian allies had performed better. The Italian government was highly offended, but Rommel recommended Schmitt for the Iron Cross. In Rommel’s view, Schmitt’s stand at Bardia had bought him crucial time to consolidate and withdraw his main forces from the deadly British pincers.
Lessons of the Battle of Bardia
The 2nd South African Division reported casualties of 160 killed and 250 wounded, but later information indicated that these numbers were low. The New Zealand tank unit’s casualties included three officers killed, along with 20 enlisted men killed and wounded. Of some 114 tanks engaged, 30 were destroyed and another 24 were damaged. The scales were more than balanced by the capture of Bardia and the liberation of some 1,150 Commonwealth prisoners, including 650 New Zealanders. The British also reported the capture of more than 8,000 prisoners, of whom approximately 1,800 were Germans.
Several factors contributed to the success of Allied operations at Bardia. Even though it was their first action, the South African troops were carefully and thoroughly rehearsed with their combat engineers and New Zealand tank units. Artillery barrages were well coordinated and effective use was made of smoke during Phase 1 of the attack. Command flexibility was demonstrated by the key decision to make a night attack during Phase 2. In addition, de Villiers’s directions were quickly transmitted to the troops through a well-planned and smoothly functioning communication system. Despite some setbacks, the South African commanders were able to adjust their plans quickly and continue the assault, allowing the Axis forces little opportunity to recover. Bardia was an example of a sound tactical plan carried out by well-organized and well-prepared troops, even if they were not yet combat veterans.
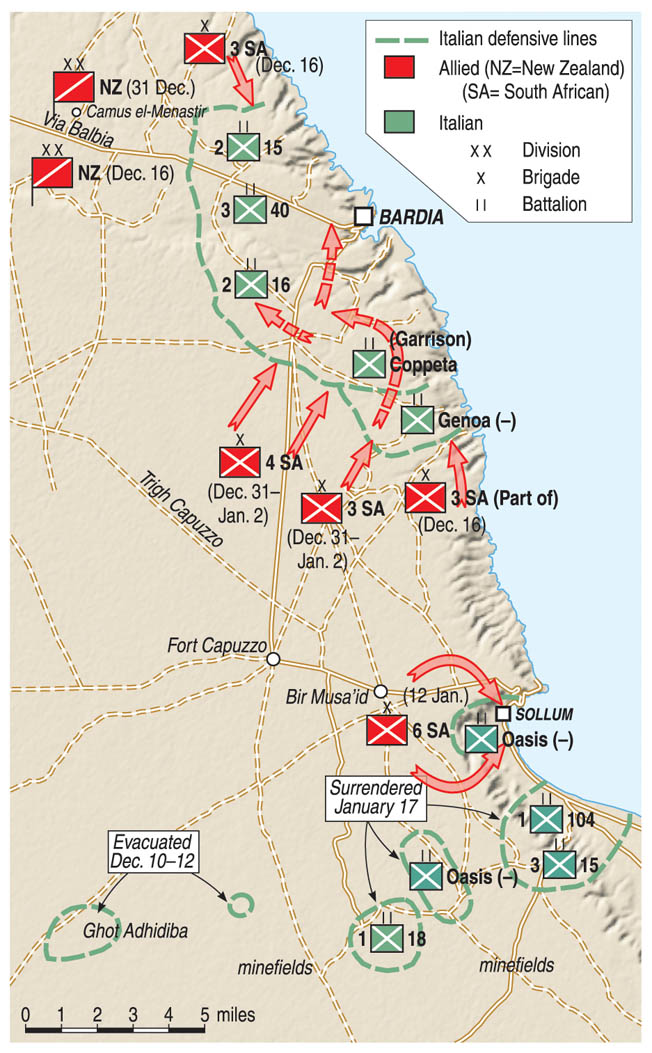
With Bardia eliminated, other isolated German-Italian strongholds on the Libya-Egypt frontier soon fell to Commonwealth forces. Sollum surrendered to the South Africans on January 12 after a small but fierce engagement. Another 5,000 Axis defenders, surrounded in fortified positions at Halfaya Pass, held out against terrific artillery and aerial bombardment with relatively few casualties, before giving in to starvation and thirst on January 17.
Having taken these key positions, the Eighth Army’s communication and supply lines were cleared from Tobruk to the railhead at Bir el Thalatha, and the next phase of the desert war moved forward to positions west of Tobruk. Six months later, on June 21, 1942, two complete infantry brigades of the 2nd South African Division, as well as most of its supporting units, would be captured at Tobruk when the fortress fell to the advancing Afrika Korps after the Battle of Gazala. By then, the seesaw war for North Africa had entered another cycle, and the second Battle of Bardia was just a dim memory, lost in the never-ending swirl of dust and sand in the unforgiving Libyan desert.

Join The Conversation
Comments
View All Comments