By John Damagalski
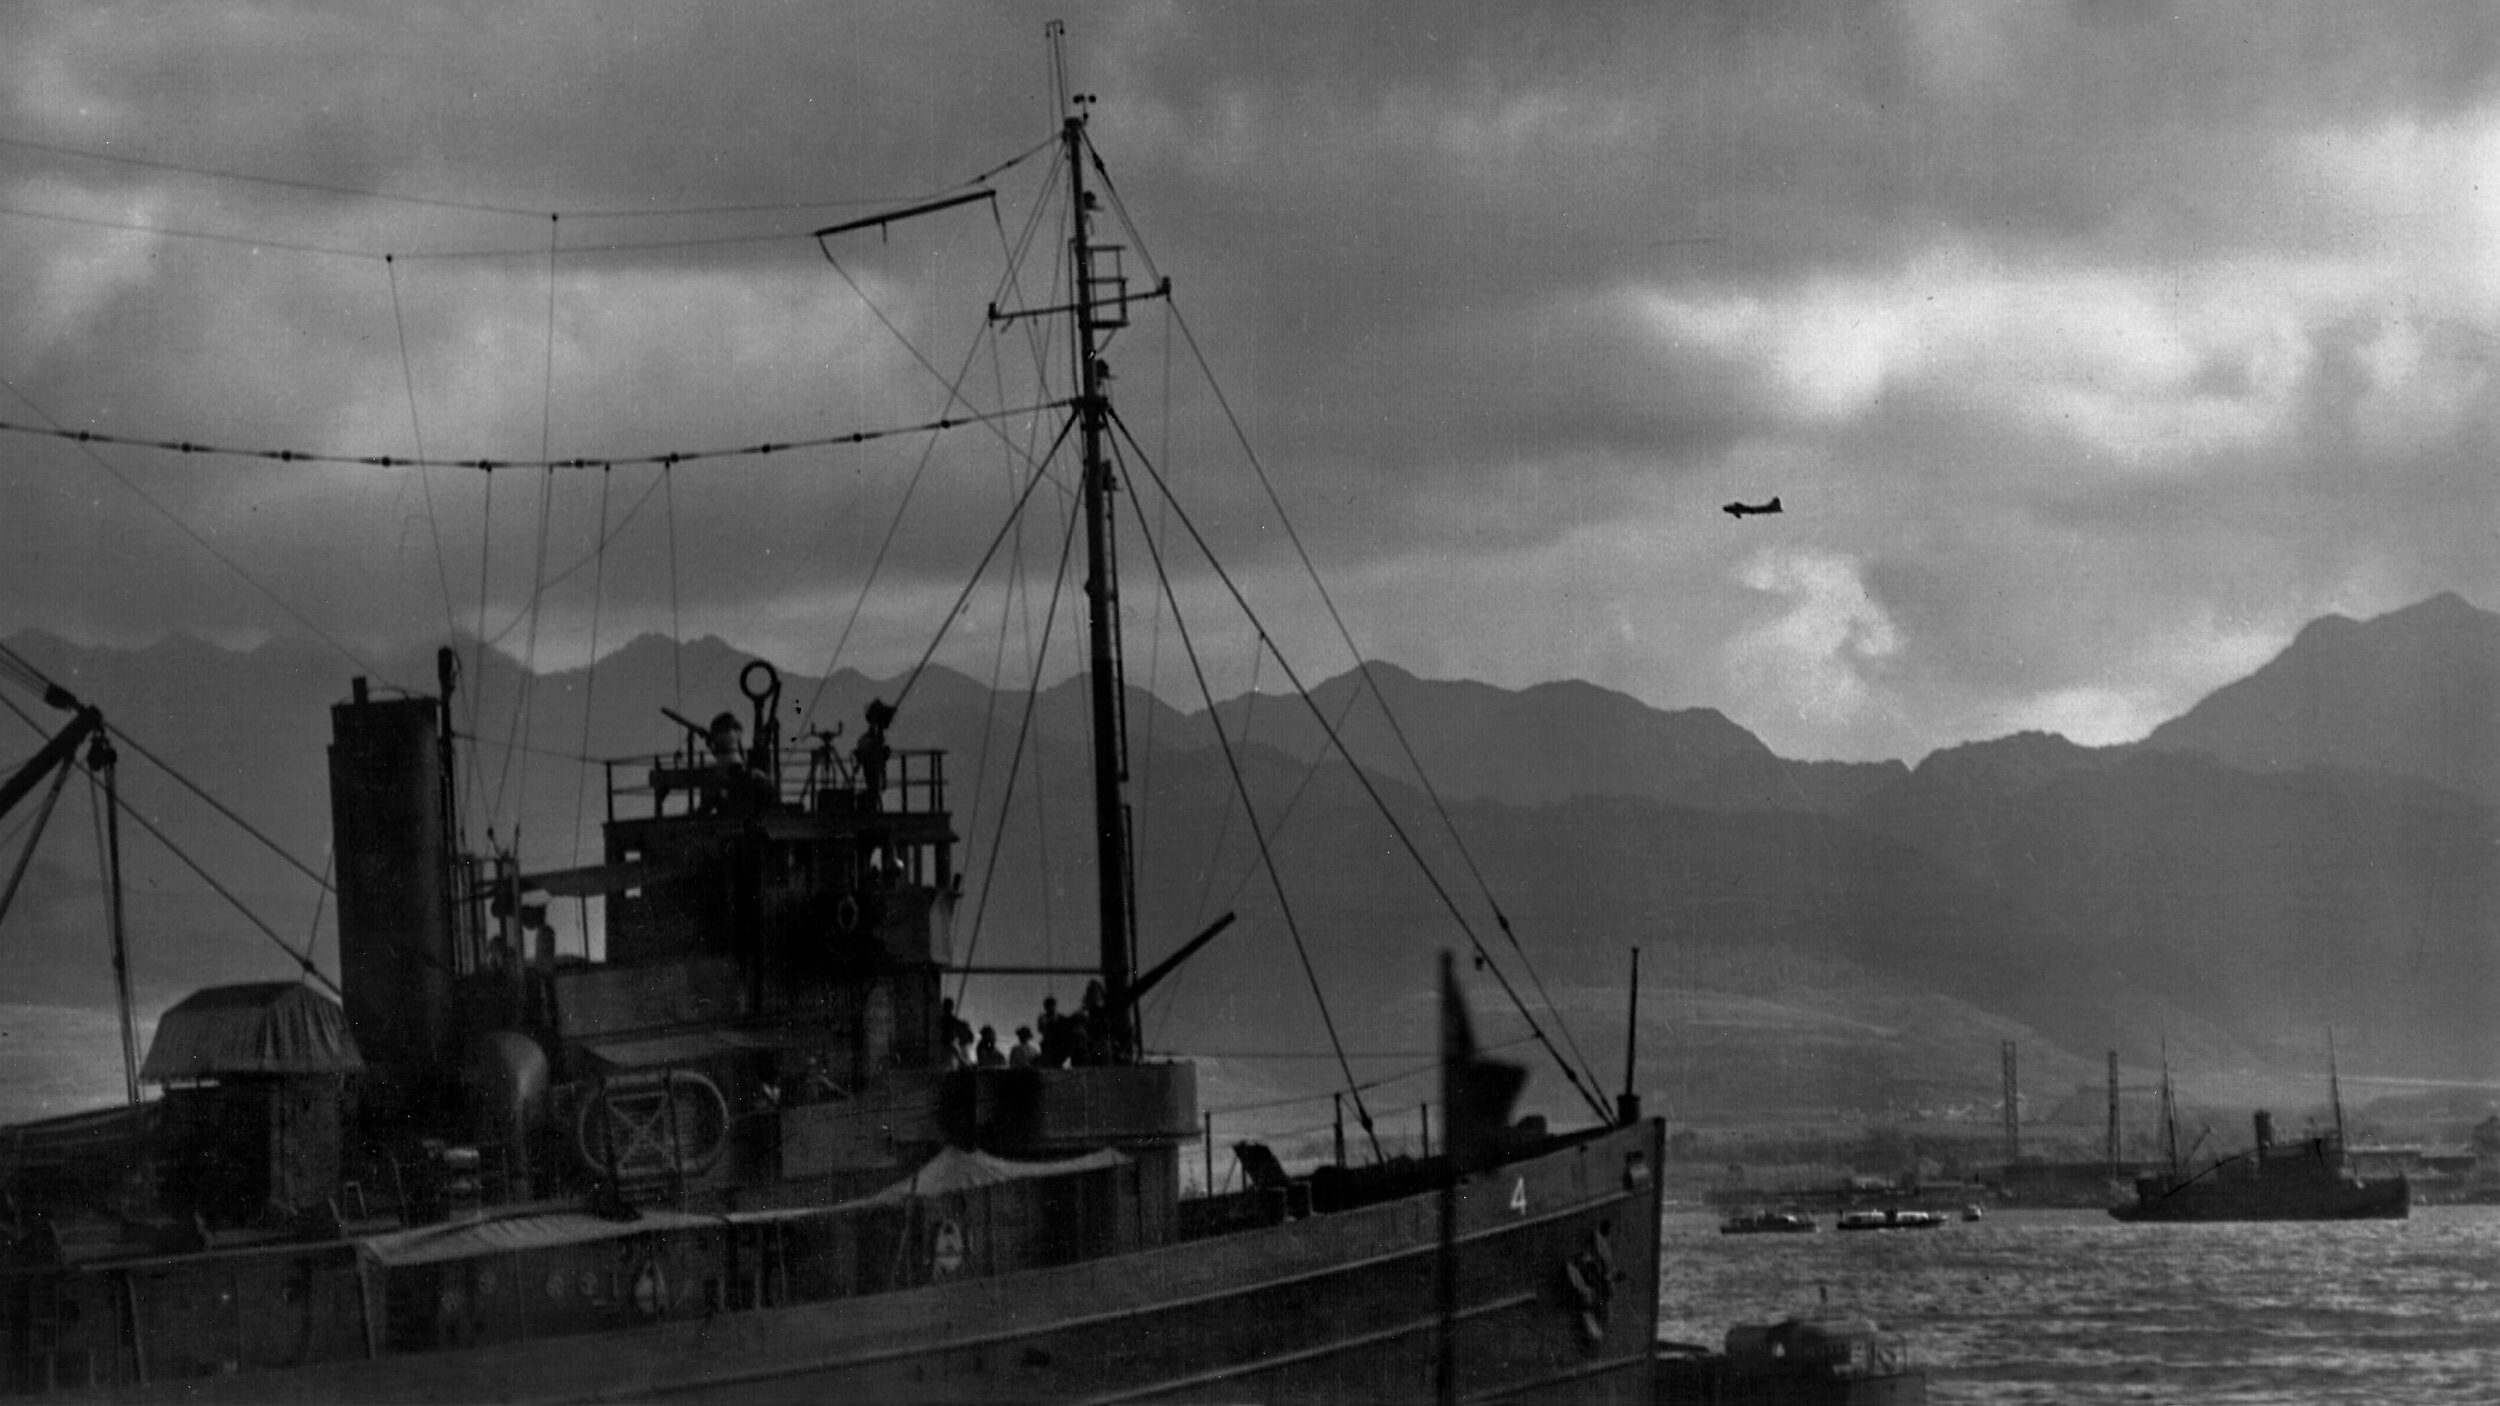
The island of Guadalcanal loomed in the distance as the warships of Task Force 36.1 approached the waters of Iron Bottom Sound on July 5, 1943. The force was returning from a voyage to Kula Gulf in the Central Solomon Islands. Aboard the flagship, the cruiser Honolulu, Rear Admiral Walden L. Ainsworth was satisfied his force had accomplished its mission—a thorough bombardment of Japanese land positions on both sides of Kula Gulf.
The operation was carried out under the cover of darkness and executed nearly flawlessly except for the sinking of the destroyer Strong. Ainsworth incorrectly attributed it to an enemy submarine. The warship was actually torpedoed by a fleeing Japanese destroyer that was never spotted by the American ships.
The middle of 1943 found American amphibious forces again on the move in the South Pacific. After wresting control of Guadalcanal from the Japanese during a bloody six-month struggle, American troops landed on the island of New Georgia farther north and were moving overland toward an enemy airfield near Munda Point. Ainsworth’s bombardment mission was in support of the ongoing land operations in the area.
Destination: Kula Gulf
Ainsworth had risen through the naval ranks in the decades following his graduation from the United States Naval Academy in 1910. He was an experienced leader who served as the commanding officer of the battleship Mississippi for the first half of 1942 before being promoted to admiral. He had been leading forays into Japanese-held waters for almost six months, making the voyage to Kula Gulf seem routine.
The situation suddenly changed when Ainsworth received an urgent message during the mid-afternoon from his immediate superior, Admiral William Halsey. The Imperial Japanese Navy was lurking. Enemy destroyers were expected in Kula Gulf during the night, and Ainsworth was directed to set an ambush.
With no time to take on more fuel and ammunition, the American ships set a new course back toward the enemy. The abrupt increase in speed was the first indication to the American sailors that something was amiss. “In obedience to these orders, this force reversed course, proceeded via Indispensable Strait and close to the southern extremity of Santa Isabel Island at 29 knots in order to reach the vicinity of Kula Gulf in time to intercept,” Ainsworth recorded.
The admiral notified his ships of the new orders at about 3 pm. The route would take the ships through the Slot, a narrow channel with islands on both sides, to Kula Gulf. Bounded by the Slot, New Georgia, and Kolombangara, Kula Gulf was considered enemy-held waters.
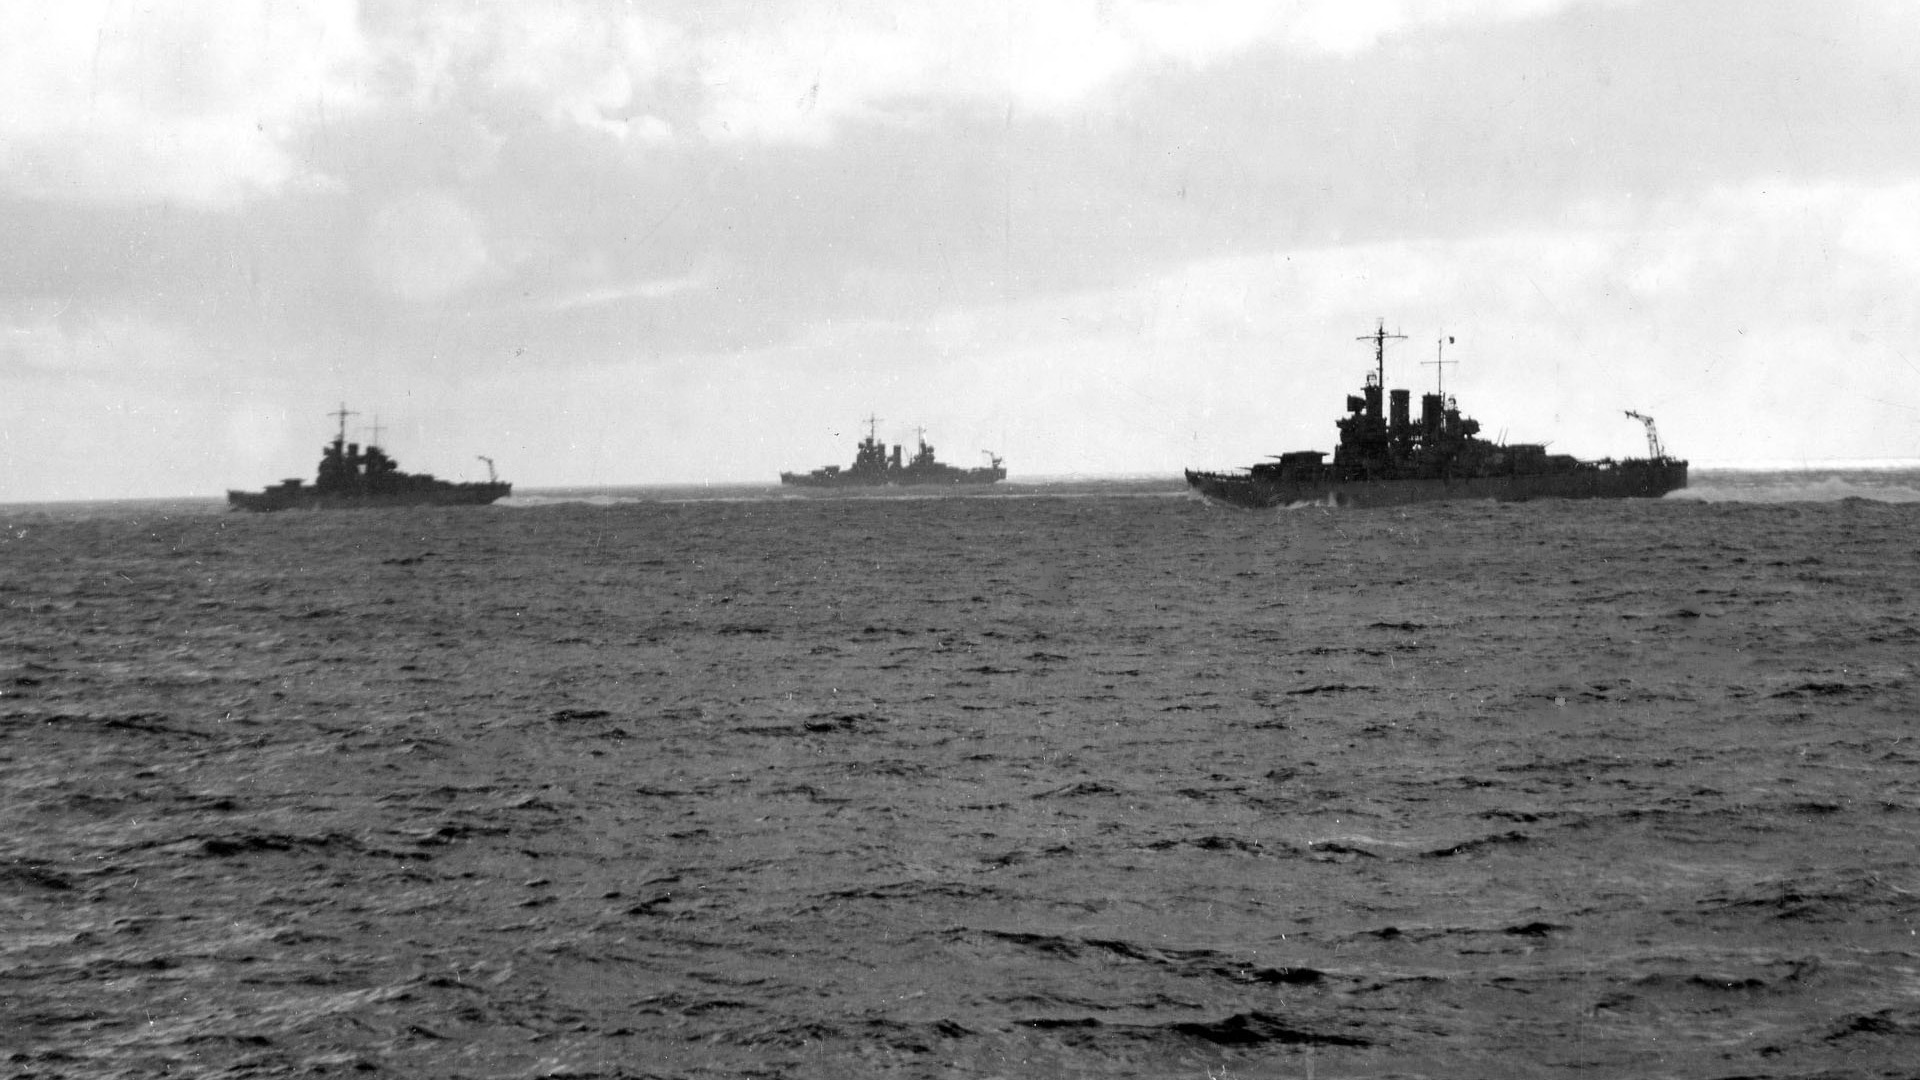
The admiral had a total of seven warships under his command owing to the late addition of two destroyers from Tulagi. Helena and St. Louis joined Honolulu to round out a trio of light cruisers. Four destroyers, Nicholas, O’Bannon, Radford, and Jenkins, under the command of Captain Francis X. McInerney, completed the force.
Akiyama’s 10 Destroyer Flotilla
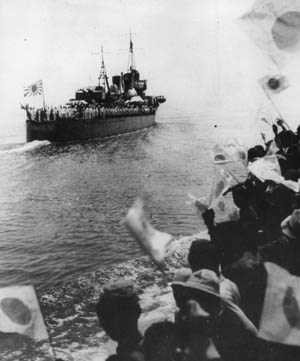
The American intelligence was right on target as to enemy intentions. The Japanese were regularly using destroyers to transport troops and supplies to the front lines on New Georgia from bases farther north. The supply runs, dubbed the Tokyo Express by American sailors, had resulted in numerous naval clashes in the South Pacific during the previous year of fighting.
Japanese Rear Admiral Teruo Akiyama was leading a flotilla of 10 destroyers for the night’s operation. He organized his ships into three smaller units for the mission. The First Transport Unit consisted of Mochizuki, Mikazuki, and Hamakaze. The Second Transport Unit included the destroyers Amagiri, Hatsuyuki, Nagatsuki, and Satsuki. The transport warships were loaded with 2,400 troops and 180 tons of supplies. A third group of ships, designated as the Support Unit, was composed of Niizuki, Suzukaze, and Tanikazi. These destroyers carried no cargo but were to safeguard the two transport groups.
Akiyama’s orders were to travel through Kula Gulf to deliver the men and material to Vila on the southern coast of Kolombangara. He relied on the blanket of darkness to help hide his operation. The admiral used Niizuki, the only ship of his force fitted with radar, as his flagship. With American and Japanese warships on a collision course, the setup for the Battle of Kula Gulf was complete.
Bad weather prevented Akiyama’s force from coming under attack by American bombers. The same conditions kept Allied aerial reconnaissance patrols from locating the enemy ships earlier in the day. The Japanese admiral was, however, keenly alert to the possibility that he could encounter American warships once inside the gulf.
Searching in the Dark
The Japanese operation was proceeding as planned when the clock ushered in the start of July 6, 1943. Admiral Akiyama, who was already operating in Kula Gulf, directed the three destroyers of the First Transportation Unit to move ahead at 12:26 am. The force was to proceed along the southeastern shore of Kolombangara directly to Vila. The remaining ships continued on a course taking them deeper into the gulf. At 1:43 am, he dispatched the Second Transport Unit toward Vila, and the three screening destroyers turned north to reverse course.
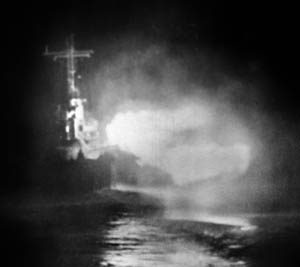
The American task force arrived at the entrance of Kula Gulf shortly after midnight. Admiral Ainsworth slowed the group to 25 knots to conserve fuel as he proceeded with caution. “No contacts had been received from our Black Cat scout planes and one of them had reported that he was returning to base because of the weather,” he later reported. “The night was very dark, no moon, overcast, passing showers. The average visibility at its best did not exceed two miles, reduced to less than one mile at times.”
American radar peering out into the night ahead spotted the enemy ships at exactly 1:36 am at a distance of almost 25,000 yards. The American sailors, however, had no way of knowing they had been sighted by the enemy almost half an hour earlier and were under careful watch by Japanese lookouts. The radar on Niizuki first indicated the presence of American warships in the area. Admiral Akiyama initially decided to proceed with his operation as planned but kept a careful watch on the American vessels.
American radar men worked diligently to find any enemy warships and then ascertain the number, type, and course of the enemy. The separation of the Japanese groups and the sloping contour of Kolombangara in the background made it a difficult undertaking. Ainsworth soon learned he was facing two groups of Japanese ships positioned about 8,000 yards apart and totaling up to nine vessels. The American radar was actually looking at the Japanese Support Unit heading north and the Second Transportation Group moving south toward Vila. The First Transportation Unit, positioned farther south at Vila, was not seen.
Attacking With Radar Advantage
Akiyama changed plans as the American ships continued moving closer to his position. He increased speed to 30 knots and recalled the Second Transportation Unit. The latter four destroyers were weighed down with troops and supplies but still had torpedoes and would have to fight nonetheless.
Ainsworth directed his warships to form a single column as they moved into Kula Gulf. The destroyers Nicholas and O’Bannon pulled into the lead followed by the cruisers Honolulu, Helena, and St. Louis. The remaining two destroyers, Jenkins and Radford, were positioned at the rear of the column. “One minute later the formation turned simultaneously sixty degrees to the left in order to close the enemy,” Ainsworth recorded.
The American admiral needed to make some quick decisions. Radar seemed to indicate the more distant ships were heavier vessels, but the range to the near group was closing fast. He initially wanted to hit both groups simultaneously but soon determined it was not feasible. “It now appeared that it would be much better to hit them separately, even if to do so might give the second group a chance to run back into Blackett Strait. The range by this time had closed to about 7,000 yards, but there had been nothing to indicate that the enemy had either seen us or made contact on our formation.”
Ainsworth wrote not knowing he was under careful watch by the Japanese. He gave the order to open fire on the closest group and directed his force “to blast this group first, reach ahead, then make a simultaneous turn and get the others on the reverse course.”
The American battle plan was built on the advantage in radar technology. Every ship was equipped with SG radar—the most advanced type of unit available. The strategy focused on the use of guns over torpedoes. Ainsworth’s ships were to engage the enemy at medium range with radar-controlled gunfire.
As Ainsworth was making his final decisions, Admiral Akiyama was preparing an attack of his own. Japanese naval doctrine for night battles relied heavily on torpedoes and limited the use of gunfire. There was no shortage of the favorite Japanese underwater weapon. The destroyers of the Support and Second Transport Units had a combined 50 torpedo tubes plus reloads. In spite of almost a year of sea combat in the South Pacific, most American flag officers—including Ainsworth—lacked clear knowledge on the powerful torpedoes the enemy had at his disposal.
The Battle Begins
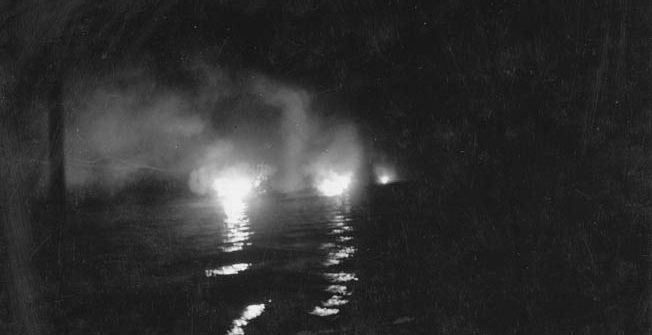
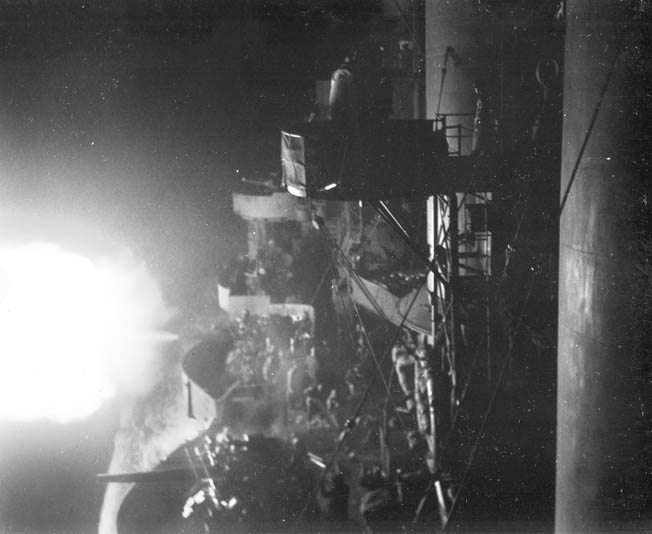
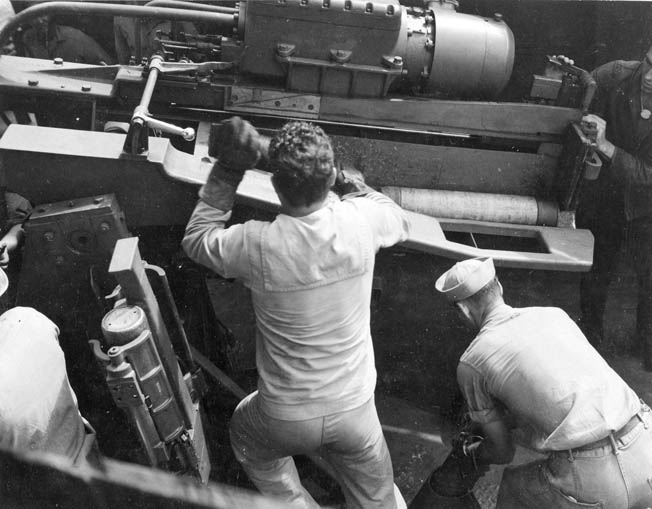
The battle started at about 1:57 am, when both sides opened fire at almost the same time. The three American light cruisers unleashed an opening barrage from their main batteries, sending almost 1,500 shells hurtling toward the enemy in the first five minutes of the battle. Thin streaks of light lashed out into the night each time a six-inch gun roared. Gunners worked at a feverish pace to provide a continuous supply of ammunition. The two forward destroyers added fire from their 5-inch guns.
Ainsworth was convinced his ships were pummeling Japanese targets. “Both cruisers and destroyers had demonstrated in several radar controlled target practices that they do not miss at ranges less than 7,000 yards, and the Task Force Commander has no hesitancy in expressing the firm opinion that this first group of enemy vessels were practically obliterated by the end of five minutes, all remaining [radar] pips on the screen appeared dead in the water,” Ainsworth wrote.
American shells were causing damage, but mostly to a single ship. Gunfire smothered the Japanese flagship Niizuki in the opening minutes of the fight, turning the destroyer into a burning wreck. The destroyer’s steering control was knocked out, causing her to veer out of the formation. Repeated shell hits quickly reduced Niizuki to a flaming wreck. The flagship was out of the battle and would soon sink. Admiral Akiyama went down with the ship along with a large number of his comrades.
The two remaining destroyers of the Support Unit suffered minor damage in the hail of gunfire. Suzukaze lost the use of her forward gun mount and a searchlight in addition to suffering a fire in a machine-gun ammunition storage locker. A dud shell flooded a food storage area aboard Tanikaze. Neither warship, however, was out of the fight.
Three Torpedo Hits on the Helena
The Japanese counterattack started shortly after the American ships opened fire. Suzukaze and Tanikaze each fired spreads of eight torpedoes and then turned sharply to avoid the burning Niizuki. The Americans spotted the turn, prompting Ainsworth to report it to his ships over the radio circuit. “Enemy seems to be reversing course.” The two Japanese destroyers were heading northwest under the cover of smoke to reload torpedo tubes.
The Americans had a key weakness going into the battle—the quantity of flashless gunpowder was in short supply due to the prior night’s bombardment mission. The amount aboard the light cruiser Helena was especially limited. “About fifty rounds per turret and per mount of flashless powder had been saved from the previous night’s firing and was initially used by both batteries until expended, after which smokeless was used,” Helena Captain Charles Cecil reported. The light cruiser’s main battery guns were soon firing with a sheet of flame that created a quick flash of light in the blackness of the night. The flashes likely provided a good aiming point for Japanese torpedo men firing their deadly fish.
The battle continued as the spread of underwater missiles sped toward the American ships. The torpedoes only found two American hulls. One hit St. Louis but failed to explode. Helena was not as lucky. She was hit about seven minutes after opening fire. Three torpedoes slammed into the warship in the short span of about three minutes. The first hit just behind the turret, one blowing off the light cruiser’s bow. It was serious but not lethal damage. The second and third torpedoes hit at almost the same time and place, crashing into Helena dead amidships.
The massive explosion amidships sent up a tower of water and delivered a fatal blow. The damage was extensive and extended all the way down to the keel. Rapid flooding caused the cruiser to sink in jackknife fashion. Ainsworth again turned his ships at 2:03 am, just as Helena was meeting doom. The fog of battle initially prevented the admiral from knowing of the light cruiser’s plight.
The sea battle continued as the men aboard Helena struggled to get off their sinking ship. American gunfire began to subside after Suzukaze and Tanikaze turned away. The destroyers Radford and O’Bannon unleashed a spread of torpedoes in a futile effort to hit the fleeing enemy. All of the weapons missed.
Crossing the T
American attention now focused on the four destroyers of the Japanese Second Transport Unit speeding north at 30 knots. About 13,000 yards separated the opposing forces. Ainsworth executed several turns to better angle his ships to meet the approaching enemy. The adroit boat handling positioned the American ships to “cross the T.” The age-old naval maneuver allowed one force to bring full broadside firepower against an opponent who could only return fire with forward guns.
The American ships opened fire at 2:18 am at a distance of 11,600 yards. “All the targets in this second group seemed to have been taken under fire by more than one ship, particularly as they turned away or were stopped dead in their tracks,” Ainsworth noted. The first Japanese destroyer immediately turned hard right and made smoke. Amagiri escaped with minor damage. Hatsuyuki was next in column. She returned fire with her main battery guns and turned to port. She was hit by two or three dud shells causing damage to the gun director, communication system, and a torpedo mount. The remaining two destroyers quickly reversed course. Satsuki and Nagatsuki went to Vila to unload their passengers and cargo. The latter ship sustained one 6-inch shell hit during the escape south.
The destroyer O’Bannon contributed five torpedoes during the fight—long shots at 10,000 yards. None found a Japanese ship. Radford contributed a small amount of gunfire in the direction of the sinking Niizuki. The guns aboard Nicholas and Jenkins stayed silent during the action, but both destroyers later fired torpedoes that did not find targets.
The American ships turned west at 2:27 am but could not locate any Japanese warships. A star shell from St. Louis illuminated the immediate area but yielded nothing. Radar also failed to find targets. It appeared the sea battle was over.
Ainsworth then directed two of his destroyers to thoroughly search the area. Nicholas forged west, allowing her radar to peer into Vella Gulf. She found no sign of the enemy. Radford’s radar combed Kula Gulf, spotting an apparently beached vessel near Waugh Rock off the Kolombangara coast. Ainsworth radioed the location to headquarters for further investigation by air during daylight hours.
Finding Helena
The subsiding of the battle allowed Ainsworth to turn his attention to the plight of Helena. The ship had failed to answer a routine acknowledgment after a turn. It was a clear indication something was wrong. “Since Helena lost all speed and became dead in the water just as the other cruisers made their simultaneous turn in reversing the action, the fact that the Helena had been torpedoed and had fallen out of formation was not noticed until sometime later,” Ainsworth wrote. “The visibility was very poor and made worse by the smoke of battle.” The admiral had additional calls sent out across various radio channels and by blinker light, but Helena failed to reply.
The continued search of Kula Gulf by Radford eventually unraveled the mystery of the missing Helena. A small dot appeared on the destroyer’s radar scope at 3:13 am. The unknown target was about 5,000 yards away. Ainsworth directed Radford’s Commander William Romoser to investigate. Lookouts were able to discern the faint outline of a shape as the warship cautiously moved closer. Several minutes passed before Romoser had more information to report. “Think we see a two digit number on ship.” The dreadful news soon arrived. “I regret to report the number is 50,” Romoser reported referring to Helena’s hull number. The target was the tip of Helena’s bow, floating freely after becoming separated from the rest of the warship by the first torpedo hit.
With the fate of Helena now known, Ainsworth directed Nicholas and Radford to search for survivors. He placed Captain McInerney aboard Nicholas in charge of the rescue operation. As the two destroyers began their search for Helena survivors, the admiral set a course for the Slot to take his remaining warships out of Kula Gulf. The ammunition supplies on Honolulu and St. Louis were dangerously low owing to the sea battle and previous night’s shore bombardment mission. It was 3:30 am.
The Helena sailors were spread out in the dark night in an area about 61/2 miles off the northeast coast of Kolombangara. It was a dangerous situation for the rescue ships. Although the enemy was thought to have left the gulf, there was no way to know for sure. The destroyers needed to depart Kula Gulf at daylight or face the certain probability of a Japanese air attack.
Picking Up Survivors
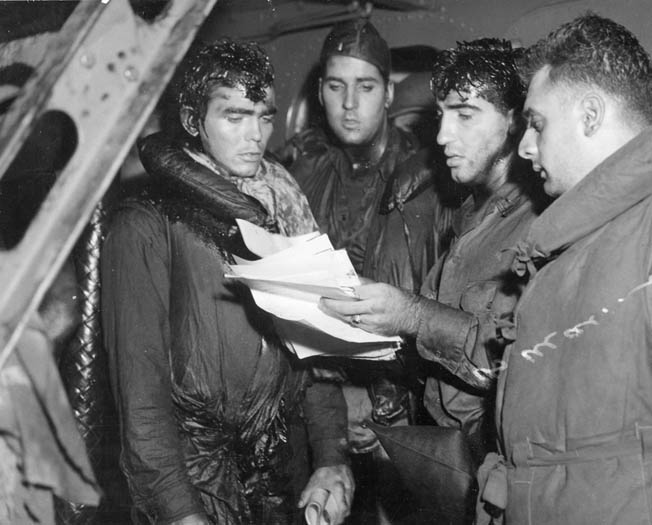
It was 3:41 am when Nicholas and Radford found the first survivors. Both destroyers put nets over the side to allow men to climb aboard and dropped whaleboats in the water to search for more. As many stranded sailors as possible needed to be picked up before morning light ended the rescue operation.
Radar aboard Nicholas suddenly registered a contact just after 4 am. The targets were approaching the survivor area from the west at a high rate of speed. Captain McInerney took his ship northwest to further investigate. The contact was Suzukaze and Tanikaze returning to the scene of the battle for another torpedo strike and to look for the missing Niizuki. The destroyers had been hovering a safe distance to the west reloading torpedo tubes since their first encounter with American ships. However, lacking radar, the pair of Japanese vessels did not see any ships and quickly departed west.
The report of Japanese targets near the rescue operation prompted Admiral Ainsworth to turn around his departing ships from the trek back to Kula Gulf. When a subsequent message indicated the area was clear, he resumed his voyage down the Slot.
Neither Ainsworth nor McInerney knew Japanese ships were still unloading troops and supplies at Vila. Some vessels escaped west via Blackett Strait, but three went north through Kula Gulf. The route would result in yet another clash between the foes. The Japanese were dealt another blow when the destroyer Nagatsuki ran aground on the Kolombangara coast about five miles north of Vila. She was later abandoned after attempts to pull her free failed.
Last Shots of the Battle
The destroyer Amagiri reached the northeast coast of Kolombangara at about 5 am. Aboard was Captain Katsumori Yamashiro, commander of the Second Transportation Unit. This destroyer found Niizuki survivors about 15 minutes later and began to close. At the same time, the rescue of the Helena survivors was continuing about 13,000 yards to the north. Captain McInerney suspended operations when Amagiri appeared on his radar scope. Japanese lookouts sighted the American ships a short time later. Captain Yamashiro quickly abandoned his rescue operation and sped northwest.
The ensuing clash was brief but fierce. Nicholas unleashed torpedoes at 5:22 am. Amagiri returned fire with torpedoes eight minutes later. Both sides had near misses but no hits, with one torpedo exploding 15 feet behind Radford. Gunfire started minutes later. A star shell from Nicholas illuminated the area, helping one 5-inch American shell to find Amagiri. It crashed amidships, destroying the radio room and damaging fire control circuits. Yamashiro had had enough of the fight and departed to the west under the cover of smoke. The Niizuki survivors were left to fend for themselves.
A second Japanese destroyer arrived in the area just after 6 am. Mochizuki exchanged gunfire with the American ships at a range of about five miles just after daylight began to illuminate the area. The destroyer fired a single torpedo to no avail and suffered damage to a gun mount and torpedo tube from American shells. She soon laid a smoke screen to hide her departure from the area. The encounter marked the last shots of the sea battle.
Fought to a Draw
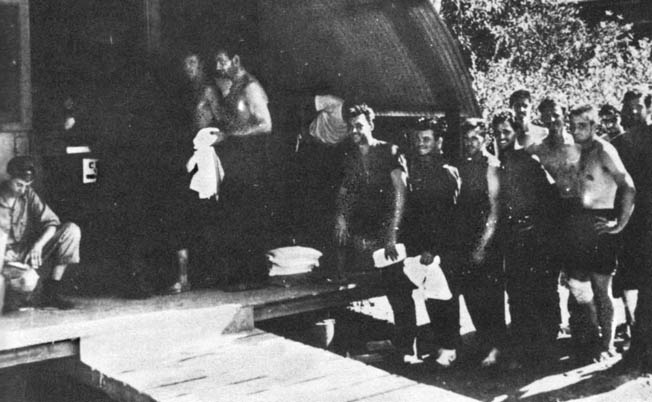
Daylight also brought an end to the rescue of Helena survivors. Captain McInerney knew he had to leave the enemy-held waters of Kula Gulf or face an air attack. With over 700 Helena sailors aboard his two ships, he made the agonizing decision to depart with survivors still in the water. Nicholas and Radford set a course for the Slot, leaving a trail of smoke to conceal their escape. Whaleboats manned with volunteer crews were left behind to help the men still in the water.
Kula Gulf fell silent with the departure of the last American and Japanese warships. Becoming increasingly separated by wind and ocean currents, hundreds of Helena men remained afloat facing an uncertain future. The Niizuki survivors were also clinging to life in Kula Gulf. No rescue was in store for most of them, and a large number perished. Thirty-nine American planes later found the beached Nagatsuki. The stranded destroyer was set aflame and eventually torn apart by large explosions.
Admiral Ainsworth returned to Tulagi confident he had scored a solid victory against the Imperial Japanese Navy. History would later record the clash as the Battle of Kula Gulf. He collected action reports from the individual ships under his command in the weeks following the battle. In his summary report, dated August 1, 1943, the admiral confidently predicted that his force had sunk at least six Japanese ships.
The American conclusions were far from accurate. Typical of American naval commanders in the South Pacific in 1943, Ainsworth had relied too heavily on radar-controlled gunfire and underappreciated Japanese night fighting capabilities. The battle was close to a draw. Helena was the sole U.S. warship sunk during the encounter. The Japanese lost two destroyers—Niizuki and Nagatsuki—but were able to deliver 1,600 troops and 90 tons of supplies to Kolombangara.
The Battle of Kula Gulf was just one of many sea battles fought in the South Pacific. It neither changed the course of the war nor strongly influenced the fighting on the island of New Georgia. American forces continued to advance, and the Japanese Navy continued to lose ships that it could not replace.


My father was a survivor of the USS Helena- and the Battle of Kula Gulf. Russell Clay was the main barber on the ship. He swam for hours after the ship was sunk. He wasn’t getting anywhere so he returned to the life boats until they could be picked up. He returned to the States and was reassigned to the USS Houston. He served 6 years and was discharged on July 4th,1946. He became a full time barber in Cincinnati, Ohio. After many years he re-married and moved to Morganton, North Carolina and passed away2012 at 91 years of age. He was interviewed by the National archives and his story is in the WW II museum in New Orleans.
Roger,
I found your story about your father to be not only inspiring, but also remarkably linked to another event during that same battle. In that event, our ship’s barber saved one of the Helena survivors during the rescue operation.
I served aboard the RADFORD during the Vietnam War, but had the privilege to be at a reunion where both our ship’s barber and the sailor he rescued were present to see a beautiful sculpture commemorating the event presented to our association by the sculptress.
I have a document written by the founder of our association, USSRADFORDDD446, that describes this entire story in detail and I would like to send it to you, if you are open to an email exchange.
Mike Nave
[email protected]
My father was aboard the USS Nicholas during the battle of Kula Gulf. His battle station was to help feed ammunition to a 5 inch Gun from the forward magazine. As stated they pulled survivors from the USS Helena out of Kula Gulf under enemy fire and then washed the oil off of them, provided their own clothes for them, fed them and all the ships made it back to safety. Not a huge battle but this squadron of destroyers constantly patrolled the waters in “the Slot” and constantly kept the Japanese aware that their actions would always meet opposition.
I served on the USS Nicholas (DD-449) 68-70 (Vietnam). It was an honor to have served on one of the ‘Fighting Fletchers.’ Several of the Fletchers that fought during and after the Guadalcanal Campaign were still together in DesRon 25. It was only after I left the ship that I was aware of her great history. The history of all the Fletchers, the Gleaves, Bristol-Livermores, and other destroyers sets the foundation for more Navy books and stories to be written. While we can, every man, officer, and enlisted, who served on destroyers should write, or get with a writer and tell the story of the Sailors of the US Navy who went to sea in the thin hulled destroyers to fight for America.
Thanks for the article. The constant theme about the Navy’s fighting around the Solomons Island chain seems to me to be the critical lack of communicating how effective the IJN’s Long Lance torpedoes were. With all the gun turrets firing it could be easy to assume that some of the hits taken by our vessels were from the enemy ships’ guns, but nevertheless the torpedo threat seems, at least to this landlubber, to be downplayed, with serious consequences to our ships, especially in the furious night battles. From Savo Island’s battle on, their torpedoes constantly showed their effectiveness, while our own “fish” proved woefully inadequate. No doubt this was on the mind of our commanders, knowing that to close the distance between our surface vessels to use our turret guns on the Japanese presented better targets for their “Long Lances”. The IJN’s fast reflexes to launch those weapons also seemed to be a constant thorn in our side. Again, this non-sailor knows that you go into battle with the best plan that you have at the time. Thankfully, the bravery of our sailors to meet the enemy’s ships again and again, resulting in these furious night battles, speaks volumes about the U.S. Navy’s efforts to meet the Japanese surface fleet, even if it seemed as if our sailors were heading into action already hampered by the enemy’s number one threat in the contested waters around these islands.
In the days of warships under sail there was a saying, “Wooden ships and iron men”. This applies to the PT sailors, those men closing to engage the enemy in practically “slingshot” range (in naval terms) with their plywood craft.