By John Diamond
Established in the summer of 1939, Field Marshal Sir Archibald Wavell’s Middle East Command encompassed nine countries and parts of two continents, an area of 1,700 miles by 2,000 miles. He commanded all British land forces in Egypt, the Sudan, Palestine, Transjordan, and Cyprus from his appointment in August 1939. With the outbreak of war his responsibilities had been increased to encompass Aden, Iraq, British Somaliland, and the shores of the Persian Gulf.
Wavell’s duties were to prepare war plans for the entire theater, make arrangements for reinforcements in the event of a crisis, and distribute troops and supplies to his many garrisons. In addition, Wavell was to consult with his naval and air counterparts as well as meet with His Majesty’s ambassadors in Egypt and Iraq, the governor-general in the Sudan, the high commissioner for Palestine and Transjordan, the governors of Cyprus, Aden, and British Somaliland.
The diplomatic and political aspects of Wavell’s appointment were significant and they added to his command problems. For this magnitude of duty and function, Wavell was initially given a headquarters staff of only five officers. During the winter of 1940-1941 this group planned desert operations that came to be called “Wavell’s Offensive.” The first of these offensive efforts, Operation Compass, was the brainchild of Maj. Gen. Sir Richard Nugent O’Connor, who has been aptly termed “the forgotten victor.”
The energy and genius for this campaign, which was originally to be only a five-day raid, was principally O’Connor’s. When O’Connor’s Western Desert Force took the field in December 1940, it was after a year of disasters for the British Army in Norway and France. Fortunately for Wavell, O’Connor had been fondly referred to as “the top of Wavell’s short list of assets.” Wavell chose O’Connor to command the Western Desert Force because he had a reputation for boldness and unorthodoxy.
Wavell and Churchill’s Plans for the Desert War
From a logistical standpoint, the Western Desert, covering Egypt and the Cyrenaican half of Libya, was the true enemy. Everything that Wavell needed for both sustenance and warfare had to be carried by the troops. Available supplies of water, food, fuel, ammunition, and reinforcements were the major limiting factors to free movement in this theater of war. At times, Wavell would go to great lengths to convey these needs to London, but he was often met with only Prime Minister Winston Churchill’s contempt.
Wavell traveled to London in early August 1940 for consultations with Churchill; however, very little was accomplished except for the heightening of the prime minister’s suspicion that the “tail of the army always appeared disproportionate to the teeth.” The interaction between Wavell and Churchill created a deep-seated tension between the two strong-willed men.
At his consultation with the prime minister in August 1940, Wavell complained to the British high command about the inadequate ground forces that he possessed to counter any Italian threat in the region. Churchill wanted action, such as an amphibious landing behind enemy lines, while Wavell concentrated on building up defensive positions.
After heated discussions and although he was “not in full agreement with General Wavell’s use of the resources at his disposal,” Churchill wrote in his wartime memoirs, “I thought it best to leave him in command. I admired his finer qualities, and was impressed with the confidence so many people had in him.” Only the fact that the Middle East was not merely a field command but involved “an extraordinary amalgam of military, political, diplomatic and administrative problems of extreme complexity,” eventually persuaded Churchill to stick with the senior and more experienced Wavell and not supersede him with a more junior officer, such as General Bernard Freyberg, a New Zealander.
The Forgotten Victor’s Army: The Western Desert Force
Prior to the meeting in London, an important change in assignment occurred on June 7, 1940. In Jerusalem, Maj. Gen. O’Connor, who was then in command of the southern district of Palestine, was ordered to report immediately to Lt. Gen. Henry Maitland Wilson, General Officer Commanding (GOC), British Troops in Egypt (BTE). No reason was given for the abrupt summons. In Cairo, O’Connor was instructed to leave for Mersa Matruh, Egypt, a port and railhead, and take over command of the Western Desert Force with the task of defending Egypt from a presumed Italian offensive.
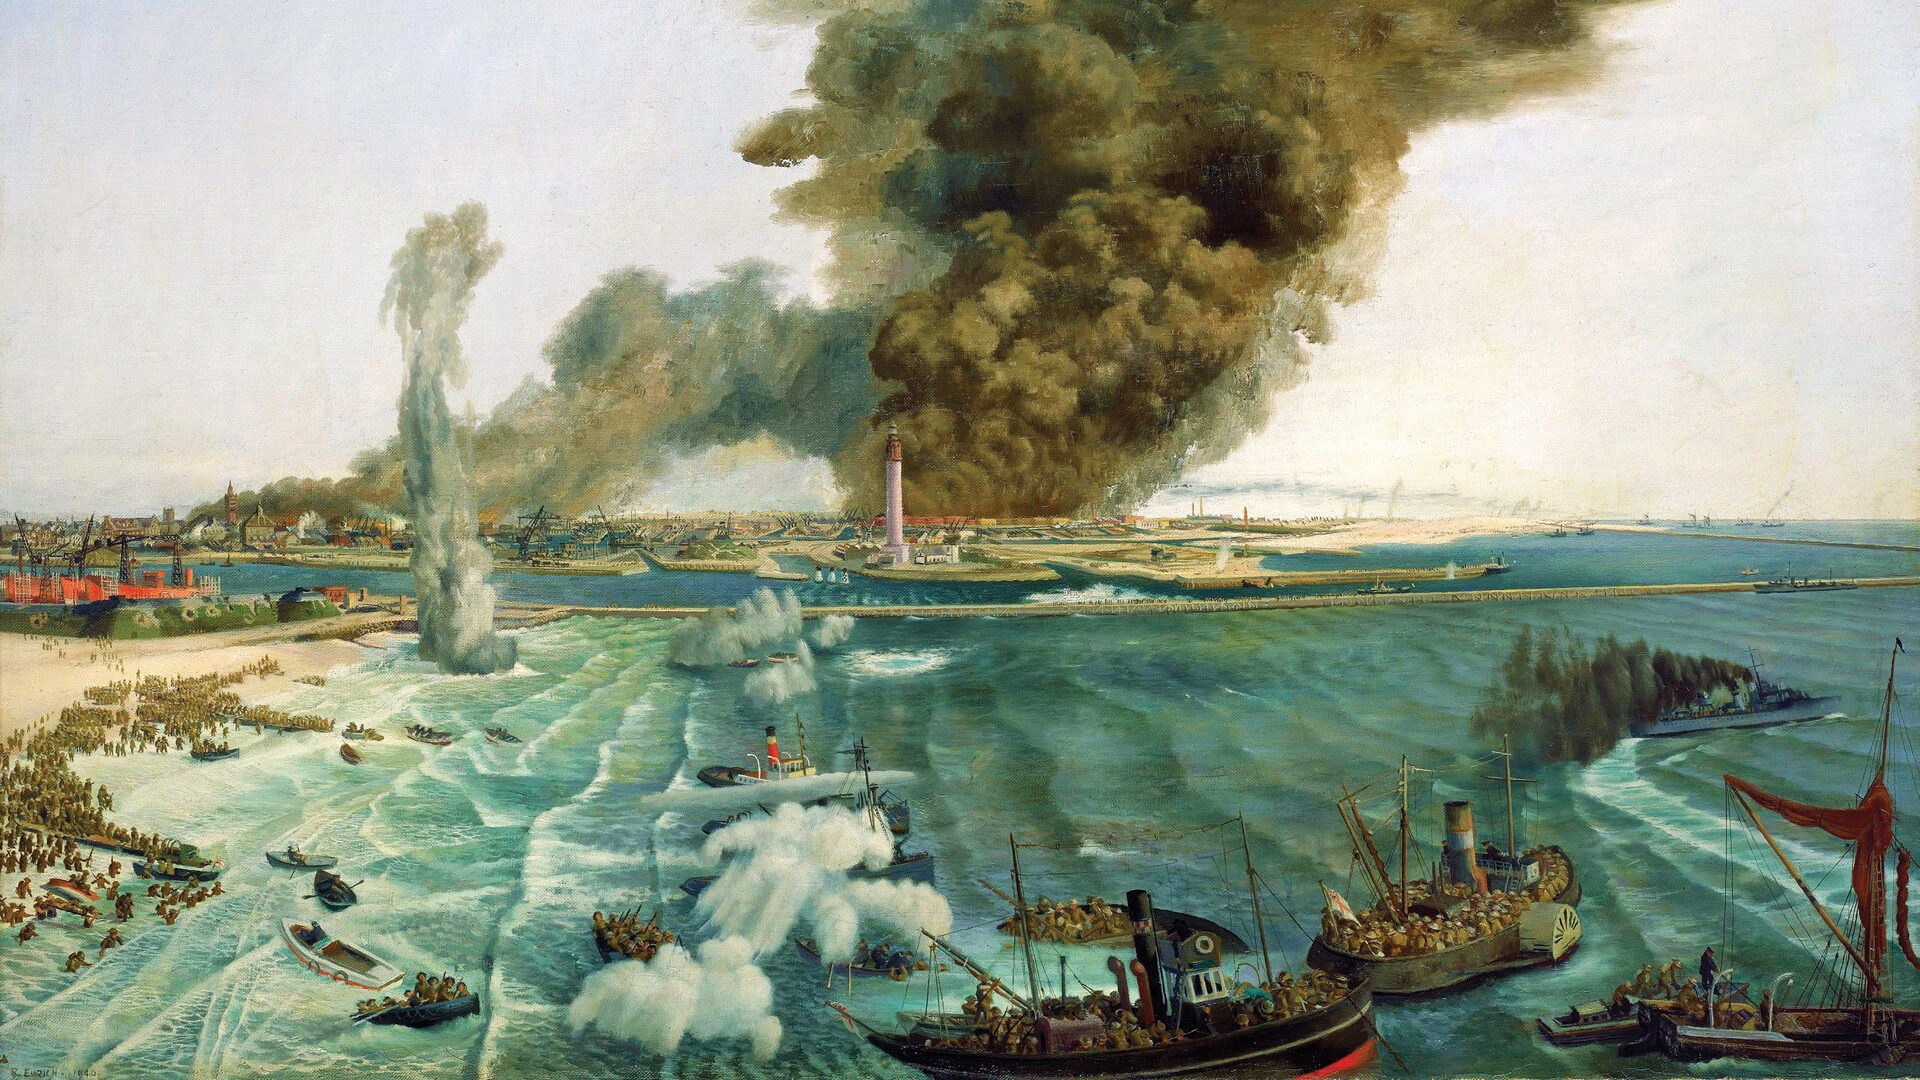
On June 10, 1940, Italian Fascist dictator Benito Mussolini had declared war on Britain and France. Contemporaneous with O’Connor’s assignment, the British Expeditionary Force (BEF) had just retreated from the European continent at Dunkirk, and French forces were reeling from German attacks south of the River Somme. Thus, North Africa was at this time the only theater of operations where Great Britain could engage the Italian enemy on land. Before long, the British would be confronting German tanks and aircraft as well. O’Connor was confident and recalled that he was “given very sketchy instructions as to policy. I did not object really, as I don’t mind being left on my own.”
O’Connor’s Western Desert Force consisted of just two divisions, the 7th Armored and the 4th Indian, which were both below strength in men, vehicles, and, most important for this war of mobility in the desert, tanks. A summary of Wavell’s order of battle read, “twenty-one infantry battalions, two regiments of horsed cavalry, four regiments of artillery with sixty-four field guns, forty-eight anti-tank guns and eight anti-aircraft guns.” In British Somaliland, also under Wavell’s command, even fewer troops were garrisoned. Therefore, approximately 30,000 British troops in the Western Desert under Wavell and O’Connor faced 200,000 Italians and Libyans to the west and 250,000 Italian and colonial troops to the east.
Despite an absence of initial moves on the part of the Italian Tenth Army after Mussolini’s declaration of war on Britain and France, the Western Desert Force was not idle. The 7th Armored Division was organized by General Percy Hobart. In September 1938, following the Munich crisis, Hobart had been sent to Egypt to raise and train Britain’s second modern armored formation, the Mobile Division. He molded this North African tank division into the famous 7th Armored with the black jerboa (desert rat) as its emblem. Numerous German officers were aware of Hobart’s command abilities, particularly in the use of armor, and were busy studying and implementing his lessons on tank warfare.
Hobart’s Mobile Division: “The Best Trained Division I Have Ever Seen”
In mid-1939, General Maitland Wilson, who had been a fellow student with Hobart at Staff College 20 years before but could not be called a friend, arrived to become the new GOC, BTE and Hobart’s immediate commander. After only a brief stay in Cairo, Wilson found fault with Hobart. On November 10, 1939, Wilson wrote a letter to Wavell recommending that Hobart be replaced on the grounds that there was “no confidence in his ability to command the Armored Division to their satisfaction.” Wilson judged Hobart’s overcentralization of command and the heresy of his tactical ideas being based upon the invincibility of the tank to the exclusion of the employment of other arms in correct proportion as his principal flaws.
Wilson’s letter to Wavell ended, “I request therefore that a new Commander be appointed to the Armoured Division.” Hobart’s biographer, Kenneth Macksey, notes, “Neither General Wavell nor General Wilson came out of this transaction with credit.” However, Wavell did write, “I hope that it will be found possible to use General Hobart’s great knowledge and experience in Armoured Fighting Vehicles in some capacity.”
When Hobart departed Egypt, the troops of the Mobile Division lined the route to cheer their general on his way. It must be noted that upon assuming command of the Mobile Division, Hobart showed great ingenuity in improvising equipment at a time when shortages in everything were rife. As more equipment, infantry, armor, and artillery arrived, the troops began to learn more about their weapons and vehicles, as well as working better with the other arms. Other important details, such as learning to live in the desert, how to deploy, and how to recognize the enemy while concealed, all began to take hold in Hobart’s maturing Mobile Division.
General O’Connor, then in Palestine, wrote of the Mobile Division, “It is the best trained division I have ever seen.” Six months after Hobart’s departure, the 7th Armored Division, using Hobart’s methods, began to bedevil the Italian Tenth Army. According to Churchill’s memoirs, “Our troops felt they had the advantage, and soon conceived themselves to be masters of the desert. Until they came up against large formed bodies or fortified posts, they could go where they liked, collecting trophies from sharp encounters.”
The Three Objectives of the Western Desert Force
Both the 7th and 11th Hussars of the 7th Armored Division conducted a series of cross-border raids on Italian outposts. On June 12, 1940, the 11th Hussars raided several Italian defensive positions and took many prisoners. Two days later, Fort Capuzzo and Fort Maddalena were captured by this same regiment along with some light tanks of the 7th Hussars and infantry of the King’s Royal Rifle Corps.
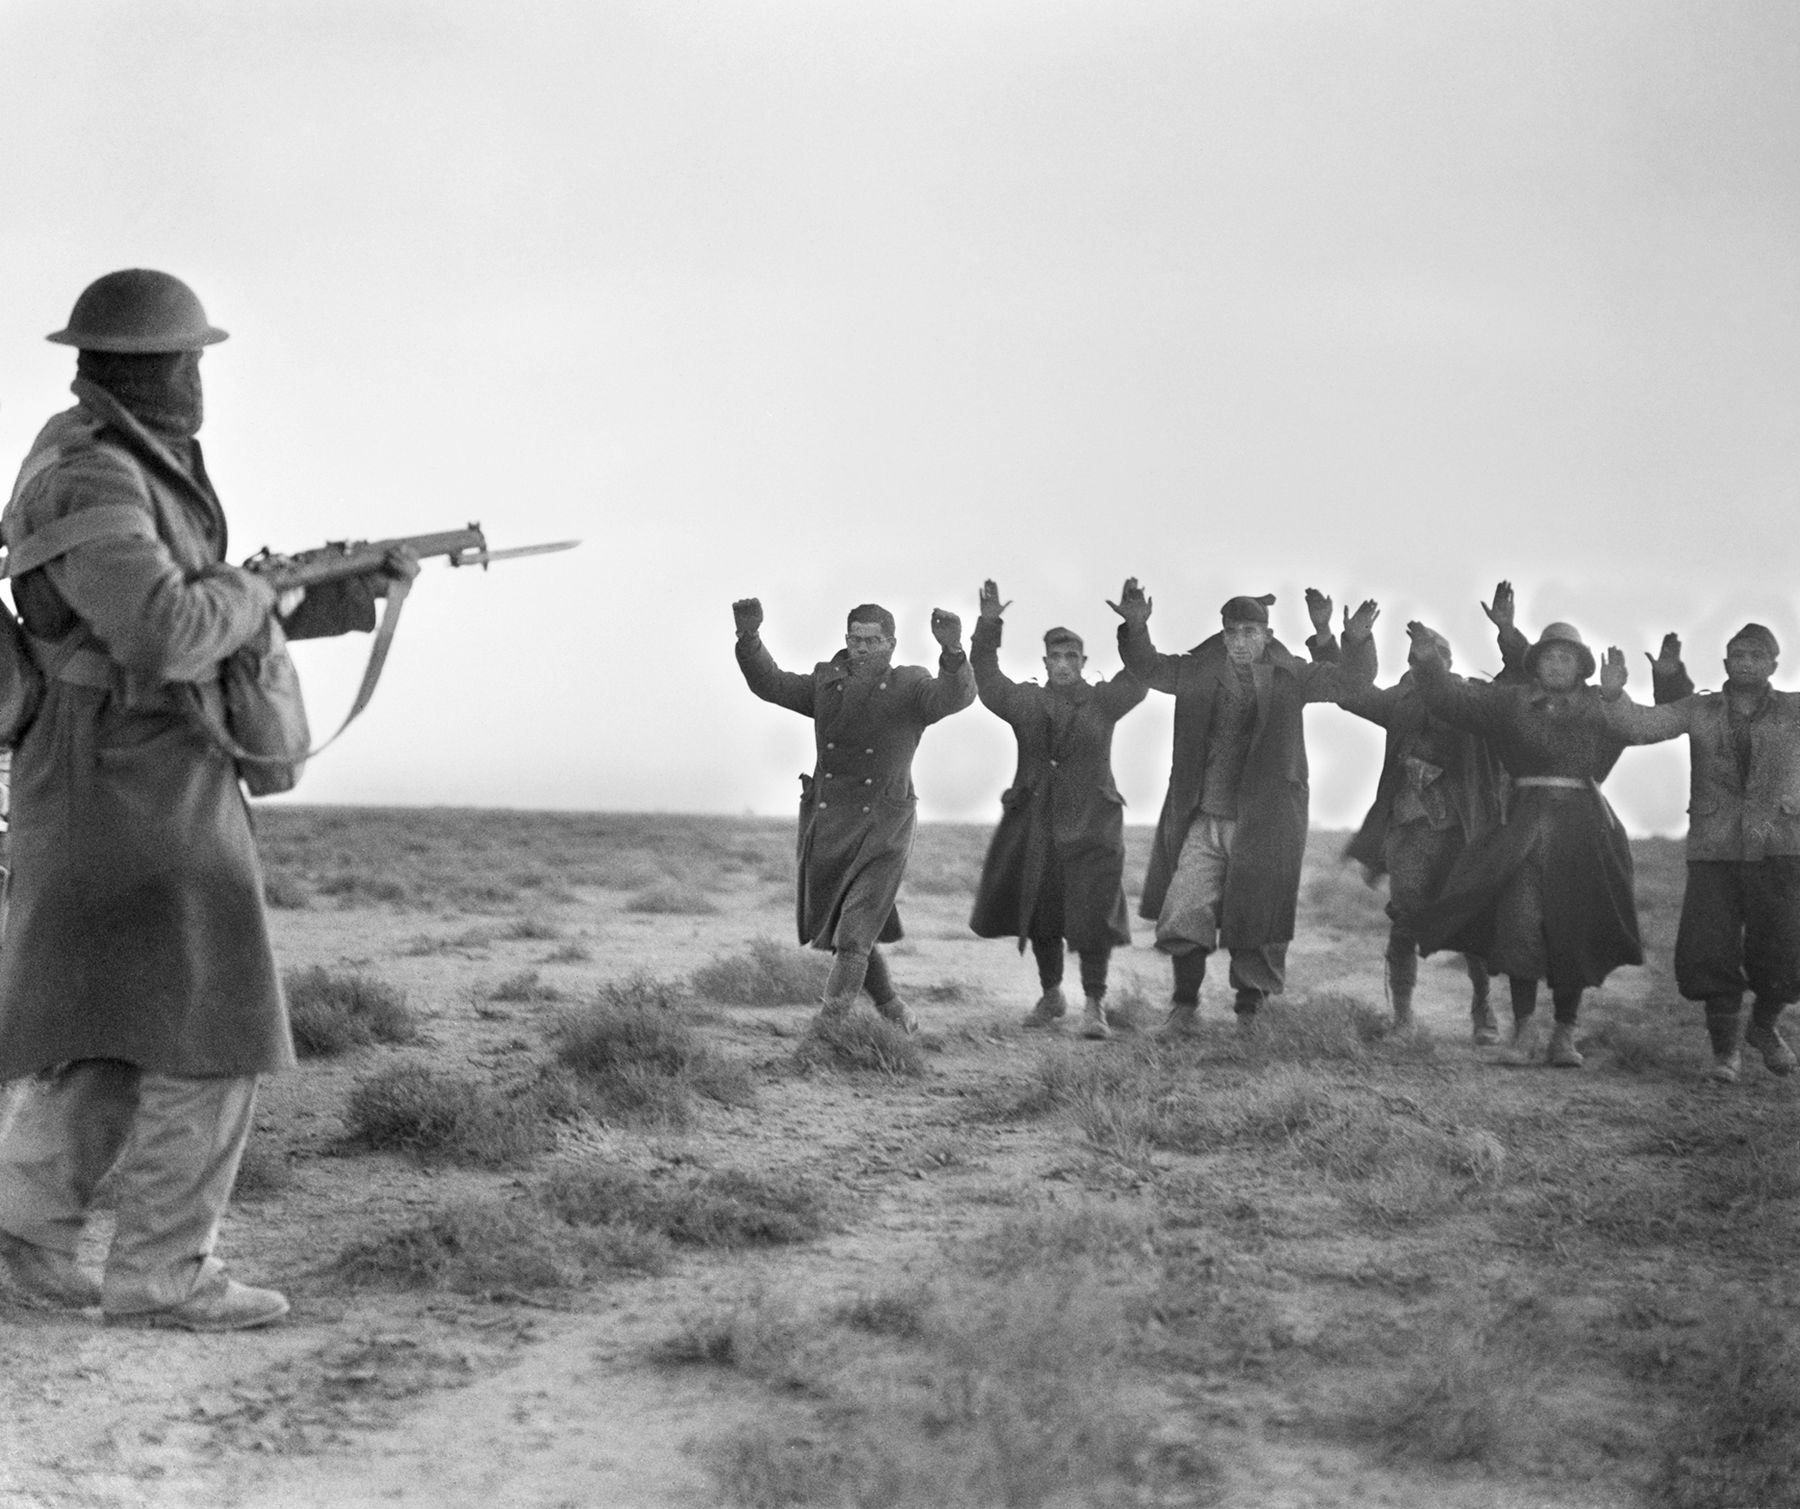
On June 16, General Lastucci, the chief engineer of the Italian Tenth Army, was captured on one such raid. So, although O’Connor’s main force was being husbanded for a later assault, elements of the Western Desert Force were getting some battle experience against the Italians and also being a nuisance to their easternmost outposts in Libya. Early in August, further elements of the 7th Armored Division, including the 3rd Coldstream Guards, the 1st Battalion of the 60th Rifles, the 2nd Rifle Brigade, one squadron of the 6th Royal Tank Battalion, and two mechanized batteries of the Royal Horse Artillery (RHA) continued to harass the Tenth Italian Army with large returns. Albeit with small numbers and a frontage of over 60 miles, in three months of fighting along the Libyan-Egyptian frontier, they killed or captured nearly 3,500 Italians. British losses were roughly 150 men.
Why was the Western Desert so important to the British other than as a site to oppose the enemy after the loss of the European continent to the Nazis? First, objectives in this desert war were not places or features of terrain, but the destruction of the enemy’s army and overrunning of supply depots behind the battlefield. Thus, rear-area bases, which supplied the army in the field, had to be kept out of enemy hands or else the quartermasters’ nightmare, great distance, only became more problematic. Second, the Egyptian desert comprised the western flank of the British defense of the Middle East. In Mussolini’s attack from Libya, his forces had to cross that desert. Third, the Western Desert meant control of the Suez Canal and the shortest water route to India, while Iraqi and Persian oil fields would also be maintained. The oil fields and refineries of Iraq and Iran, which fueled the Royal Navy, the Army, and the Royal Air Force (RAF), were the true prizes of the fighting in North Africa.
Richard O’Connor Rise Through the Ranks
Richard O’Connor was born in Kashmir, India, on August 21, 1889. He was the son of an officer in the Royal Irish Fusiliers and the grandson of a former governor of India’s central provinces. After a series of attendance at public schools in England, O’Connor was a student at the Royal Military Academy at Sandhurst. In September 1909, he was commissioned and served in the 2nd Battalion of the Cameronians with postings both in England and Malta. During the latter posting, he served as the regimental signals officer. When the Great War erupted, O’Connor went to France with the BEF as a captain commanding the 7th Division’s signals company in the 22nd Brigade. In 1915, he was awarded the Military Cross, seeing action at Arras and Bullecourt. In October 1916, he was promoted to brevet major, serving as brigade major of the 91st Brigade, 7th Division. Further promotion in 1917 to brevet lieutenant-colonel resulted in his command of the 2nd Infantry Battalion of the Honourable Artillery Company, 7th Division. During this year of the war, O’Connor received the Distinguished Service Order.
In November 1917, the 7th Division was transferred to the Italian Front, where it was to support the Italian Army against the Austro-Hungarian forces at the Piave River. In October 1918, O’Connor’s 2nd Battalion captured the island of Grave di Papadopoli on the Piave. For this action, O’Connor received the Italian Silver Medal of Honor and a bar to add to his DSO. At the end of the war, O’Connor reverted to his permanent rank of captain.
During the interwar period, O’Connor attended the Staff College, Camberly, in 1920. Important for his future role, he served as brigade major from 1921-1924, of the Experimental Brigade under Maj. Gen. J.F.C. Fuller’s command. This force was conducting maneuvers utilizing the combined arms of tanks, artillery, infantry, and aircraft. From 1925 to 1927, he was a company commander at Sandhurst and from 1927 to 1930, he served as an instructor at the Staff College, Camberly. O’Connor had a young officer named Eric Dorman-Smith as a student. Fuller was also at Camberly, and with O’Connor cultivated Dorman-Smith’s intellect, which was to yield significant results in Operation Compass.
In the early 1930s, O’Connor was posted in Egypt and Lucknow, India. From 1932 to 1935, he was a general staff officer at the War Office in London, attending the prestigious Imperial Defence College in 1935. In April 1936, he was appointed temporary brigadier of the Peshawar Brigade in northwest India. After that posting, he was appointed commander of the 7th Division in Palestine in September 1938 with the rank of major general. Along with this appointment, O’Connor held the position of military governor of Jerusalem at the time of the Arab Revolt.
Facing Off Against the Italian Tenth Army
In August 1939, O’Connor and the 7th Division were transferred to the fortress at Mersa Matruh as war clouds loomed. O’Connor’s charge at Matruh was to defend the base against an anticipated attack by Mussolini’s Tenth Army massed across the border in Cyrenaica, Libya. With Wilson’s summons from Jerusalem to Mersa Matruh came the task for O’Connor to command the Western Desert Force with the specific intent to push the Italians out of Egypt if they attacked and to protect the Suez Canal as an entry point for an invading army into Palestine, Trans-Jordan, and the oil fields of Iraq and Persia.
The Italian Fifth Army was commanded by General Italo Gariboldi. This force was stationed in Tripolitania; however, when the French troops in Tunisia came under the control of Marshal Philippe Pétain’s Vichy collaborationist government, the Fifth Army was moved into Cyrenaica along with the Italian Tenth Army, commanded by General Mario Berti. Marshal Rodolfo Graziani was the governor general of Libya and in overall command of the Italian advance into Egypt in September 1940. Despite being committed to the offensive, Graziani doubted the capabilities of his large but infantry-oriented force, which lacked the mobility of his British adversary.
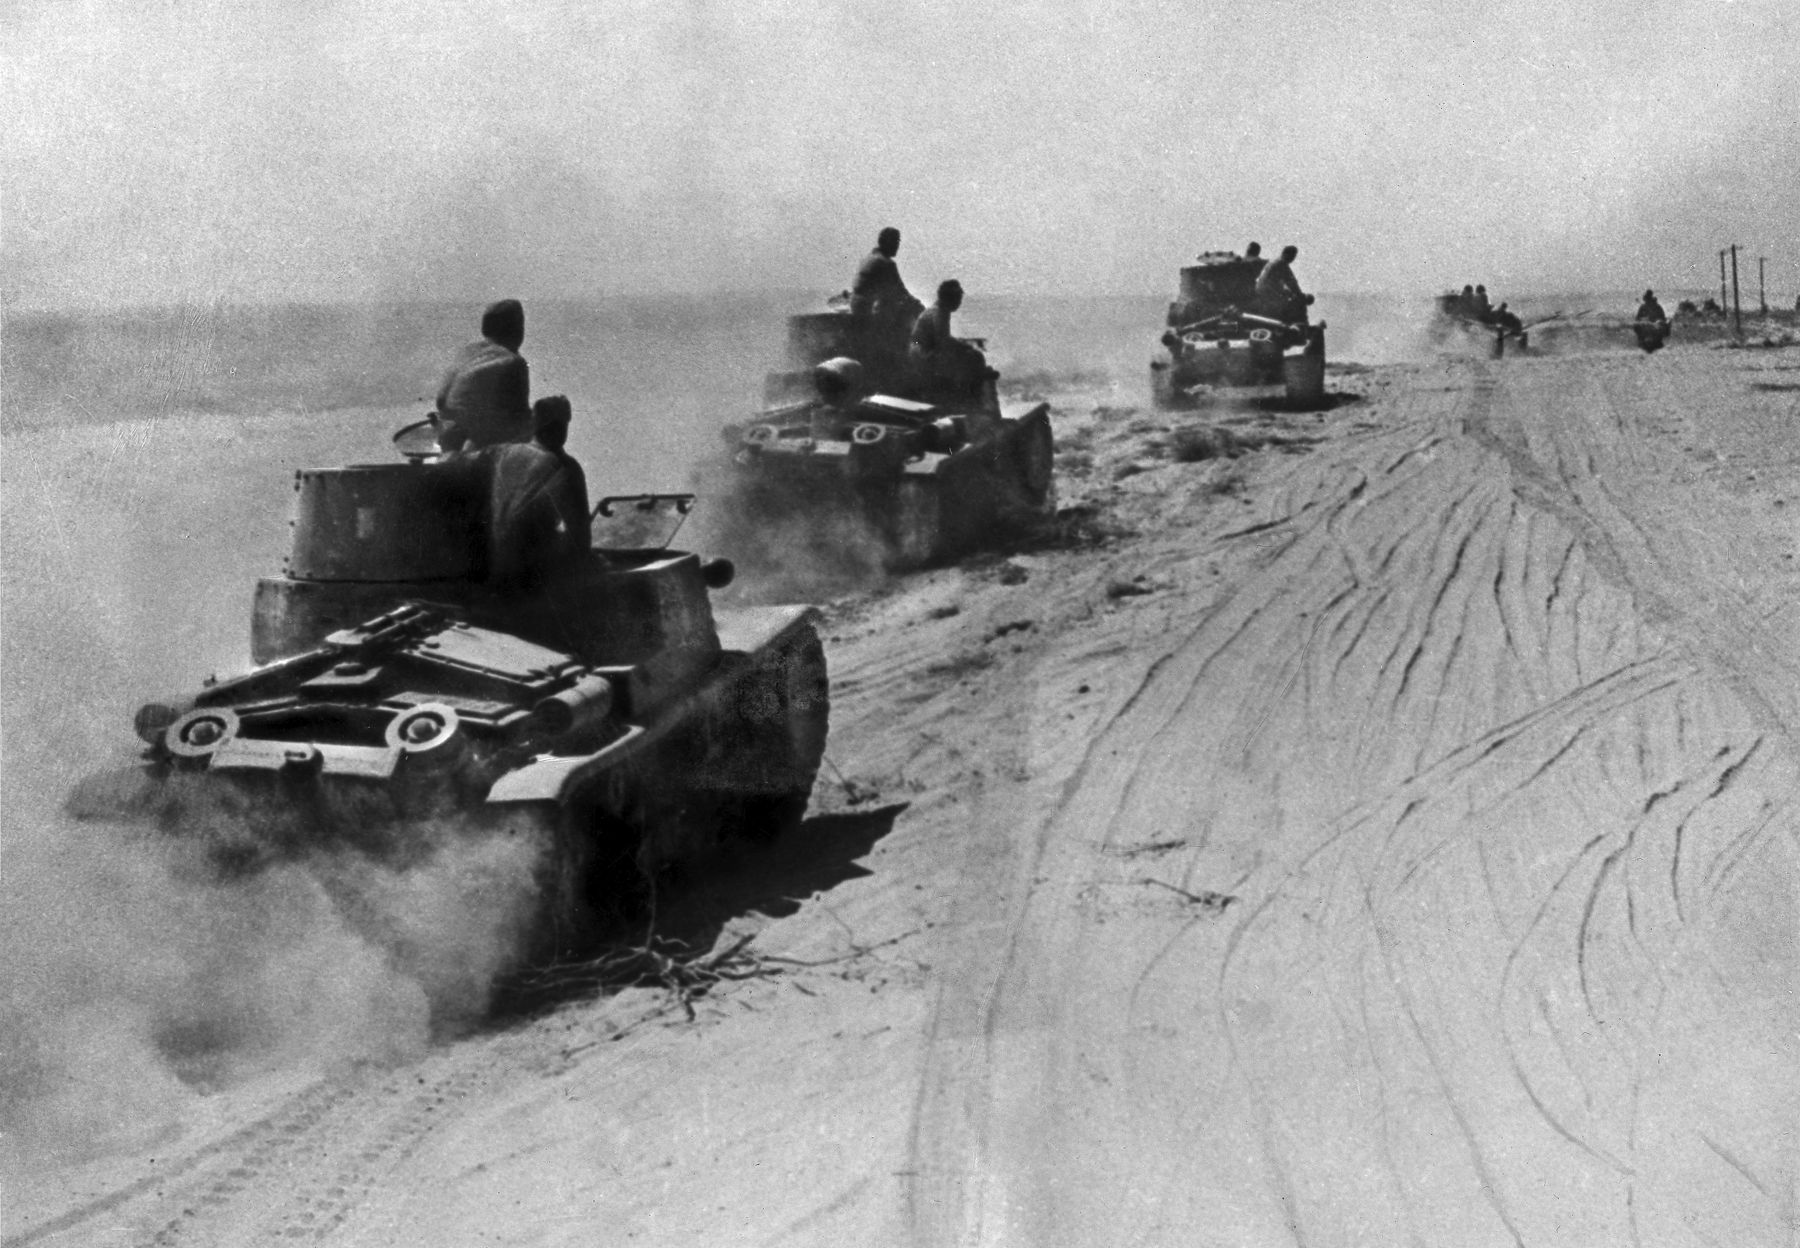
The Italian Tenth Army was composed of four corps: the XX, XXI, XXII, and XXIII; however, the only unit that General Berti had that was not an infantry division was the partially motorized and lightly armored “Maletti Group.” The armor, commanded by General Pietro Maletti, comprised 70 tanks equally divided between the machine-gun-armed Fiat L3 tankette and the slightly heavier M11/39 medium tank, the latter armed with a hull-mounted 37mm gun. With a hull mounting, the M11/39’s gun had a limited traverse, unable to quickly be brought to bear on targets. Although listed as a medium tank, the M11/39 was poorly armored and dubious in its reliability, especially under the cruel conditions of the desert.
Under O’Connor, Maj. Gen. Noel Beresford-Peirse commanded the 4th Indian Infantry Division while Maj. Gen. Sir Michael O’Moore Creagh commanded the 7th Armored Division. Soon after Operation Compass commenced, the 6th Australian Infantry Division under Maj. Gen. Iven Mackay replaced the 4th Indian Division; the latter force was sent to East Africa to fight the Italians in that portion of Wavell’s expansive theater. The British tanks, including the faster Cruiser and heavier Matilda, were superior to the Italian armor.
A Seesawing War in North Africa
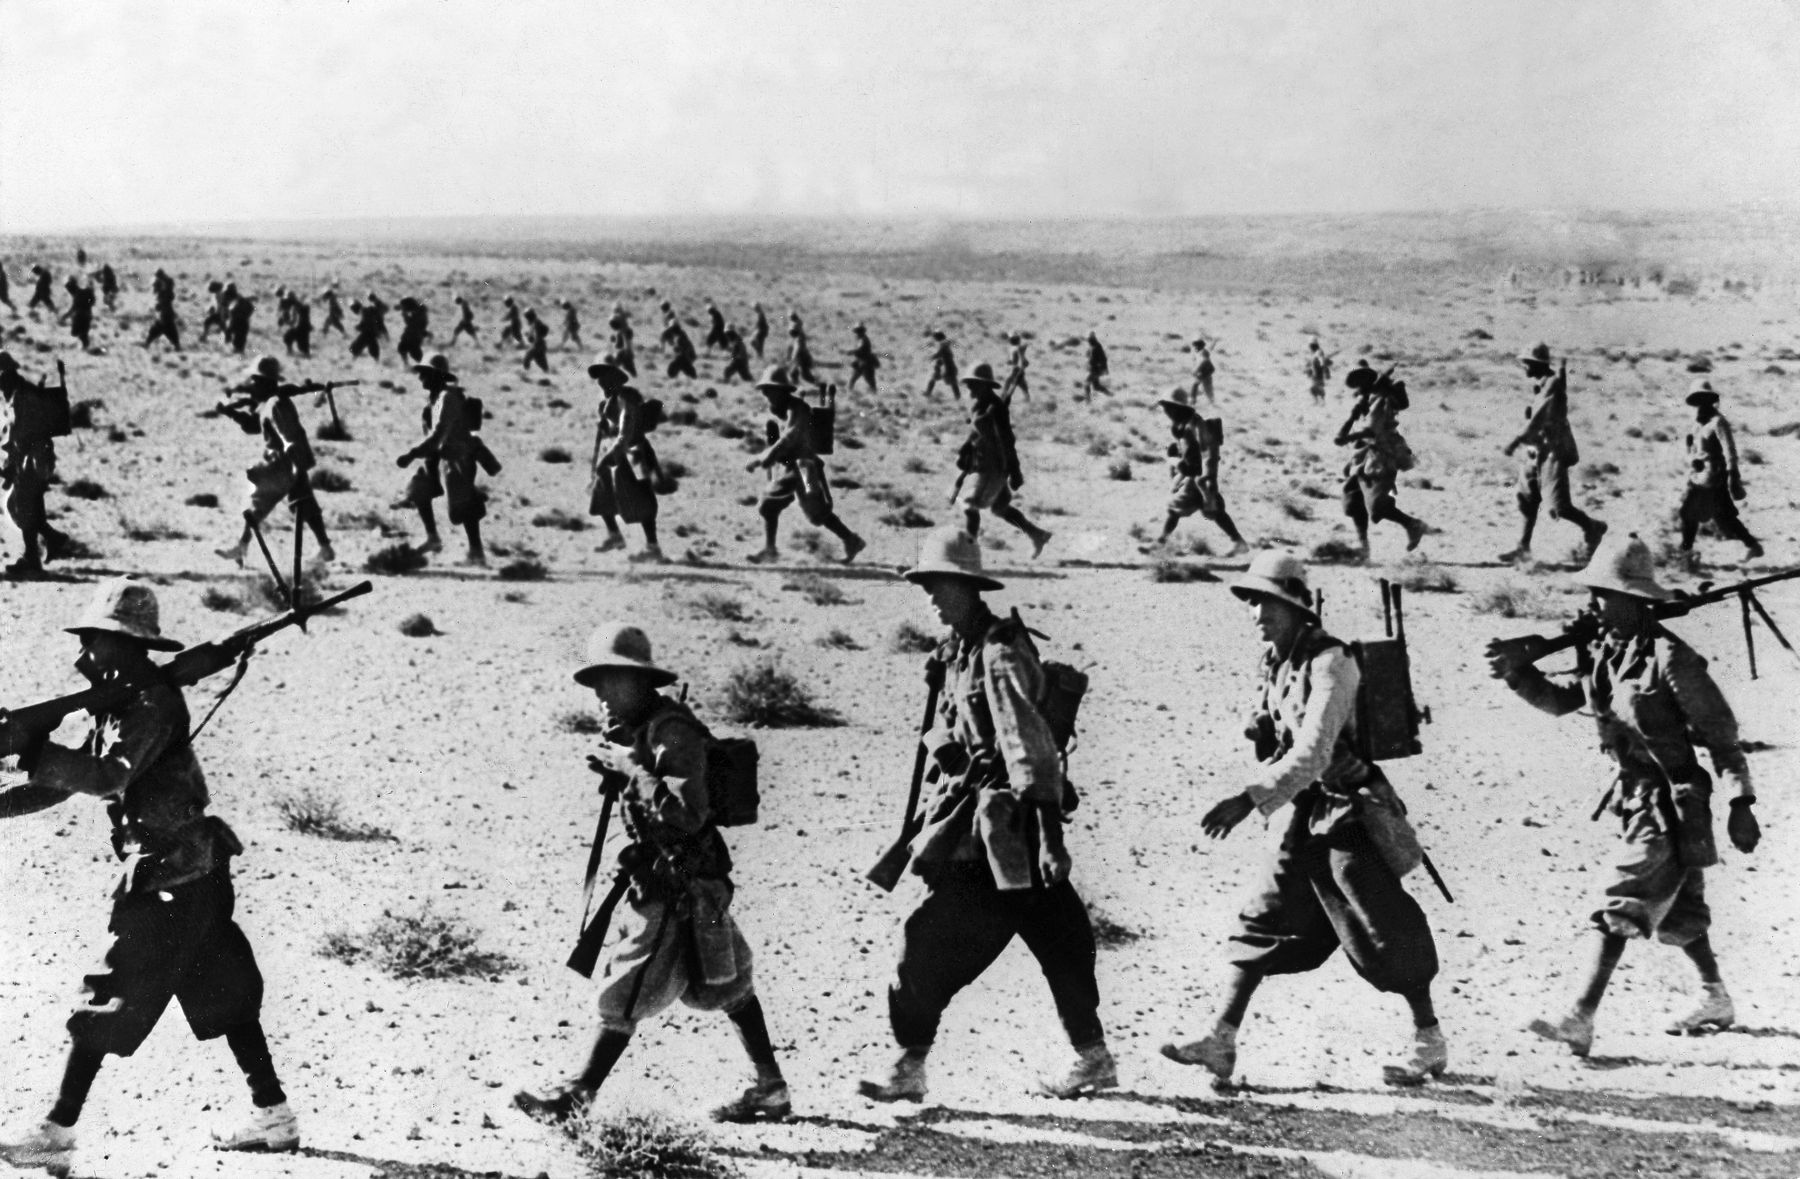
After initial skirmishes along the Libyan-Egyptian frontier during the summer, the Italians commenced their invasion of Egypt. On September 13, 1940, the Italian XXI (Metropolitan) Corps advanced 60 miles into Egypt. At Sidi Barrani, the Italians halted and began fortifying makeshift camps to the south. Ostensibly, the reason for the halt to their eastward advance was a shortage of supplies, principally water, and a desire not to extend their distance from Libyan bases.
The British forces withdrew steadily as the enemy advanced. O’Connor’s initial strategy was to avoid a confrontation with the larger Italian force at the frontier. The main part of his Western Desert Force was to retreat to Mersa Matruh, which was near a stronghold called the Baggush Box. Mersa Matruh was about 150 miles west of the great Egyptian port city of Alexandria and was relatively easy to supply.
O’Connor did, however, leave a thin screen of three battalions of infantry supported by artillery covering a 20-mile front. This small force was accompanied by light tanks of the 7th Hussars and armored cars of the 11th Hussars, along with two motor battalions of the 60th Rifles and the Rifle Brigade with two regiments of motorized RHA to retard the Italian advance. During the Italian march to Sidi Barrani, the Italians suffered 3,500 casualties while the British lost 160 men.
Despite the thin British line, it appeared to O’Connor’s reconnaissance forces stalking the Italians that the “whole force [Italian] ran out of energy.” Mussolini tried to goad Graziani to move on the Egyptian capital at Cairo. However, when he suspected that Graziani and his troops were more likely to fortify their positions at Sidi Barrani and to the south, the Italian dictator launched an attack on Greece with troops that had occupied Albania.
The Italians built a series of strongly fortified camps on a perimeter from Maktila on the coast following a southwesterly arc to Sofafi about 40 miles away. Each camp was surrounded by antitank obstacles and mines and was garrisoned by an infantry brigade with tanks and artillery in support. One evident shortcoming noted by O’Connor was that the fortified camps were too widely spaced to be mutually supporting. With the Italians stationary, it became apparent to the Western Desert Force leadership that they must begin thinking of attacking the enemy rather than waiting to deliver a knockout blow as the Italians approached Mersa Matruh.
These initial actions in Egypt would constitute the start of a seesaw struggle between Italian and later German forces and troops of the British Empire along the North African littoral of Egypt and Libya that would last into 1943. This contentious coastal strip, approximately 400 miles between Alamein and Derna, was no more than 40 miles deep due to a 500-foot escarpment to the south as well as the Qattara Depression to the east, which was an impassable salt marsh for tanks and heavy military vehicles, and the northern edges of the Egyptian and Kalansho Sand Seas crossing the Egyptian frontier into Cyrenaica.
As early as the Italian declaration of war, it was proposed by the Middle East Command, under Wavell, to remain on the defensive and absorb the brunt of the anticipated Italian attack at the fortified base of Mersa Matruh, where O’Connor and the 7th Armored Division had been since August 1939. Churchill yearned for some type of offensive action, especially a move to cut the coastal road; he invited Wavell to Egypt for the week of consultations in August 1940.
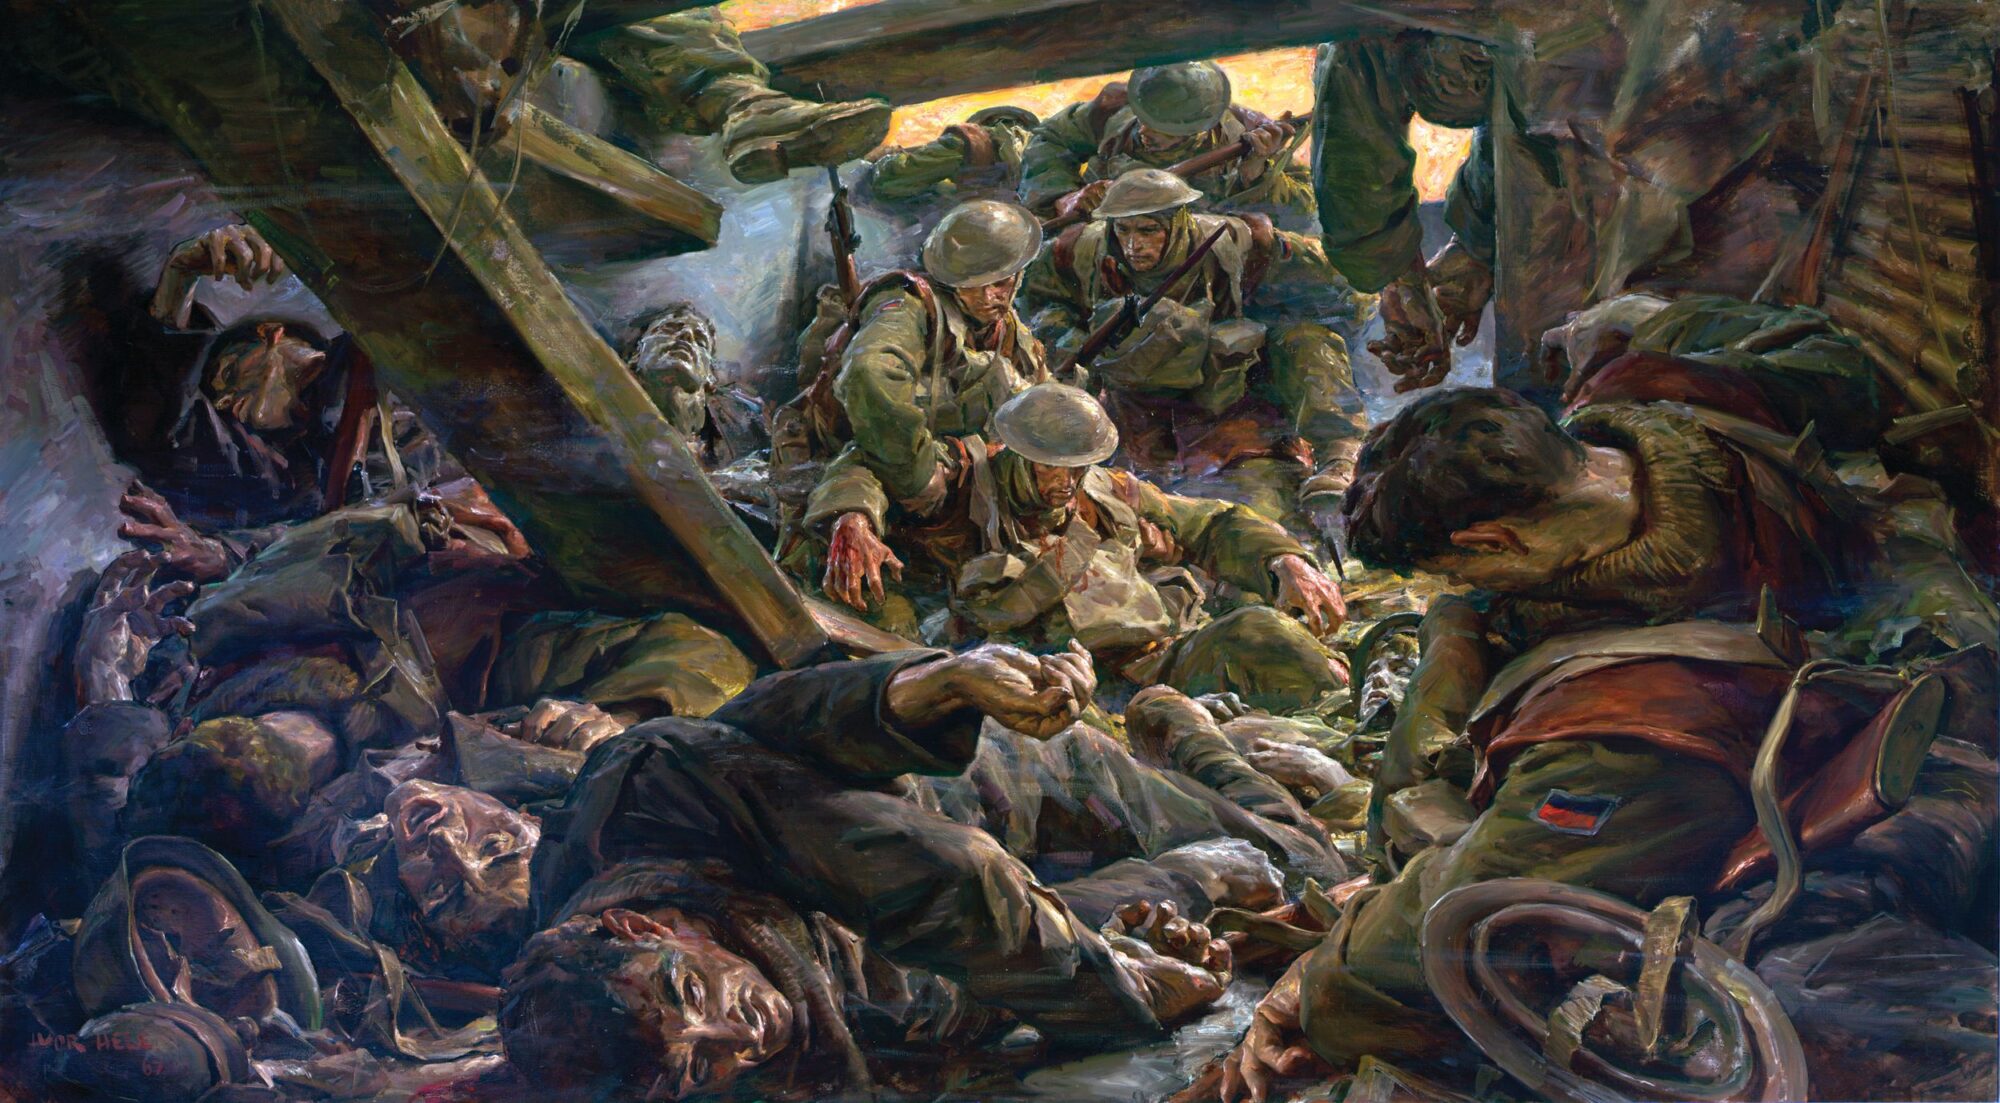
“Assault on a Desert Camp”
O’Connor used the three months of relative calm between the Italian declaration of war and Graziani’s invasion of Egypt to prepare for future operations. He had a penchant for personal inspection and reconnaissance, sometimes ahead of his own front lines, which he had become accustomed to during World War I on both the Flanders and Italian fronts. Actually, on September 11, 1940, prior to Graziani’s offensive, Wavell started to inquire about the possibility of an offensive into Cyrenaica, which he envisioned taking place at the end of 1940 or early in 1941, following the defeat of an Italian invasion if it occurred.
Throughout the autumn of 1940, Churchill stewed over the lack of offensive spirit in the Western Desert. Action in Egypt required substantial reinforcements, some of which Churchill was certain could come from the Middle East Theater itself. He was particularly angry about the “mass of fine troops”—British, Australian, and New Zealander—still garrisoning Palestine. In response to a memo from Secretary of State for War Anthony Eden about strengthening Commonwealth forces in the Middle East, Churchill insisted that there was already a “shocking waste of troops” within the Middle East Theater.
Eden proposed a personal visit to Wavell in Egypt to develop plans for an attack, and it was during Eden’s mission that Italy invaded Greece. On October 28, Eden arrived in Cairo on Churchill’s behalf to inquire as to Wavell’s intentions, especially in light of the prime minister’s desire to aid Greece after the Italian attack. When Eden was about to authorize further British troop transfers to Athens and Suda Bay on Crete, Wavell was forced to disclose his plans for a “five-day raid” against Graziani at Sidi Barrani. Churchill clamored for action in the Balkans until Eden returned to London on November 8 to reveal the “carefully-guarded secret which I wished I had known earlier.” From then on, London concentrated on Wavell’s strike against the Italians massing in the desert using O’Connor’s Western Desert Force as his spearhead.
Churchill wanted a quick success in the desert to allow men and material to flow to Greece; however, he probed the extent to which plans had been laid for the exploitation of the five-day raid. Wavell had yearned for a quick victory, and his correspondence of October 20, 1940, to General Maitland Wilson stated that he expected the raid to last “four or five days at the most” so that he could attend to Ethiopia and Somaliland, where the Duke of Aosta had a large Italian field force. O’Connor was appointed an acting lieutenant general in recognition of the increased size of his command and the ranks of his subordinate commanders.
Wavell did have a plan to attack the Italians, but O’Connor had objections and proposed his own plan to pass through the gap in the enemy’s defensive line at Bir Enba, south of the Nibeiwa camp, and send the infantry division north toward the coast, taking the enemy camps in detail from behind or from the west. Wavell was overjoyed with O’Connor’s flair for the unorthodox approach. A chief architect for this unorthodoxy was Brigadier Eric Dorman-Smith, a member of Wavell’s staff attached to O’Connor to assist in the planning of the real assault after viewing a rehearsal of the attack on November 26.
Dorman-Smith noted that aerial photos of the Nibeiwa camp indicated that all vehicle tracks led into the northwest corner of the camp and suggested that there were no mines in that area. Dorman-Smith’s analysis resulted in a finished paper titled “Assault on a Desert Camp,” which was approved by Wavell and applied to O’Connor’s Western Desert Force attack on the Italians at Nibeiwa camp.
Dorman-Smith, O’Connor, and Wavell shared similar military roots. In July 1931, Dorman-Smith was appointed brigade major to the 6th Experimental Brigade. His brigadier was Archibald Wavell. On one of Dorman-Smith’s reports during this posting, Wavell had penned, “Remember that a little unorthodoxy is a dangerous thing … but without it you cannot win battles.” Thus, before the war Dorman-Smith enjoyed a reputation in the British Army as an advanced military thinker and had played an important part in the struggle to mechanize the Army.
Operation Compass Begins
On November 28, Wavell could sense the potential for O’Connor to win a victory after six months of training and operational planning. Wavell wrote, “The difficulties, administrative and tactical, of a deep advance are fully realized. It is, however, possible that an opportunity may offer for converting the enemy’s defeat into an outstanding victory…. I do wish to make certain that if a big opportunity occurs we are prepared morally, mentally and administratively to use it to the fullest.”
The date of Operation Compass was fixed for December 9, 1940. The troops were to begin moving westward on December 6, and the approach march to Nibeiwa was to start at dawn on December 8. Both the 7th Armored and 4th Indian Divisions were to move south of the main escarpment since less dust would be raised by the vehicles to alert the Italians to the west.
O’Connor possessed an instinctive knowledge of mobile, light mechanized warfare, but for this attack he would use heavy Matildas of the 7th Royal Tank Regiment (RTR). Instead of the conventional method of using an artillery bombardment followed by a combined infantry and armored advance, it was decided to use the Matildas, under command of Lt. Col. R.T. Jerram, in an attack on the fortified camps first, leading the way for the infantry of the 4th Indian Division to follow up the armored assault. At Nibeiwa, the assault would be a surprise move, unsupported by an artillery barrage, down an unmined track into the northwest corner of the camp, attacking the camp from the rear.
While this was occurring, other infantry would draw the defenders’ attention away to the east of the camp with heavy small-arms fire and pyrotechnics. This latter diversion was conducted the 4th Battalion, 7th Rajput Regiment, 11th Indian Infantry Brigade east of the Nibeiwa camp. This unit withdrew at 6 am on December 9, three hours after successfully diverting the attention of the Italians.
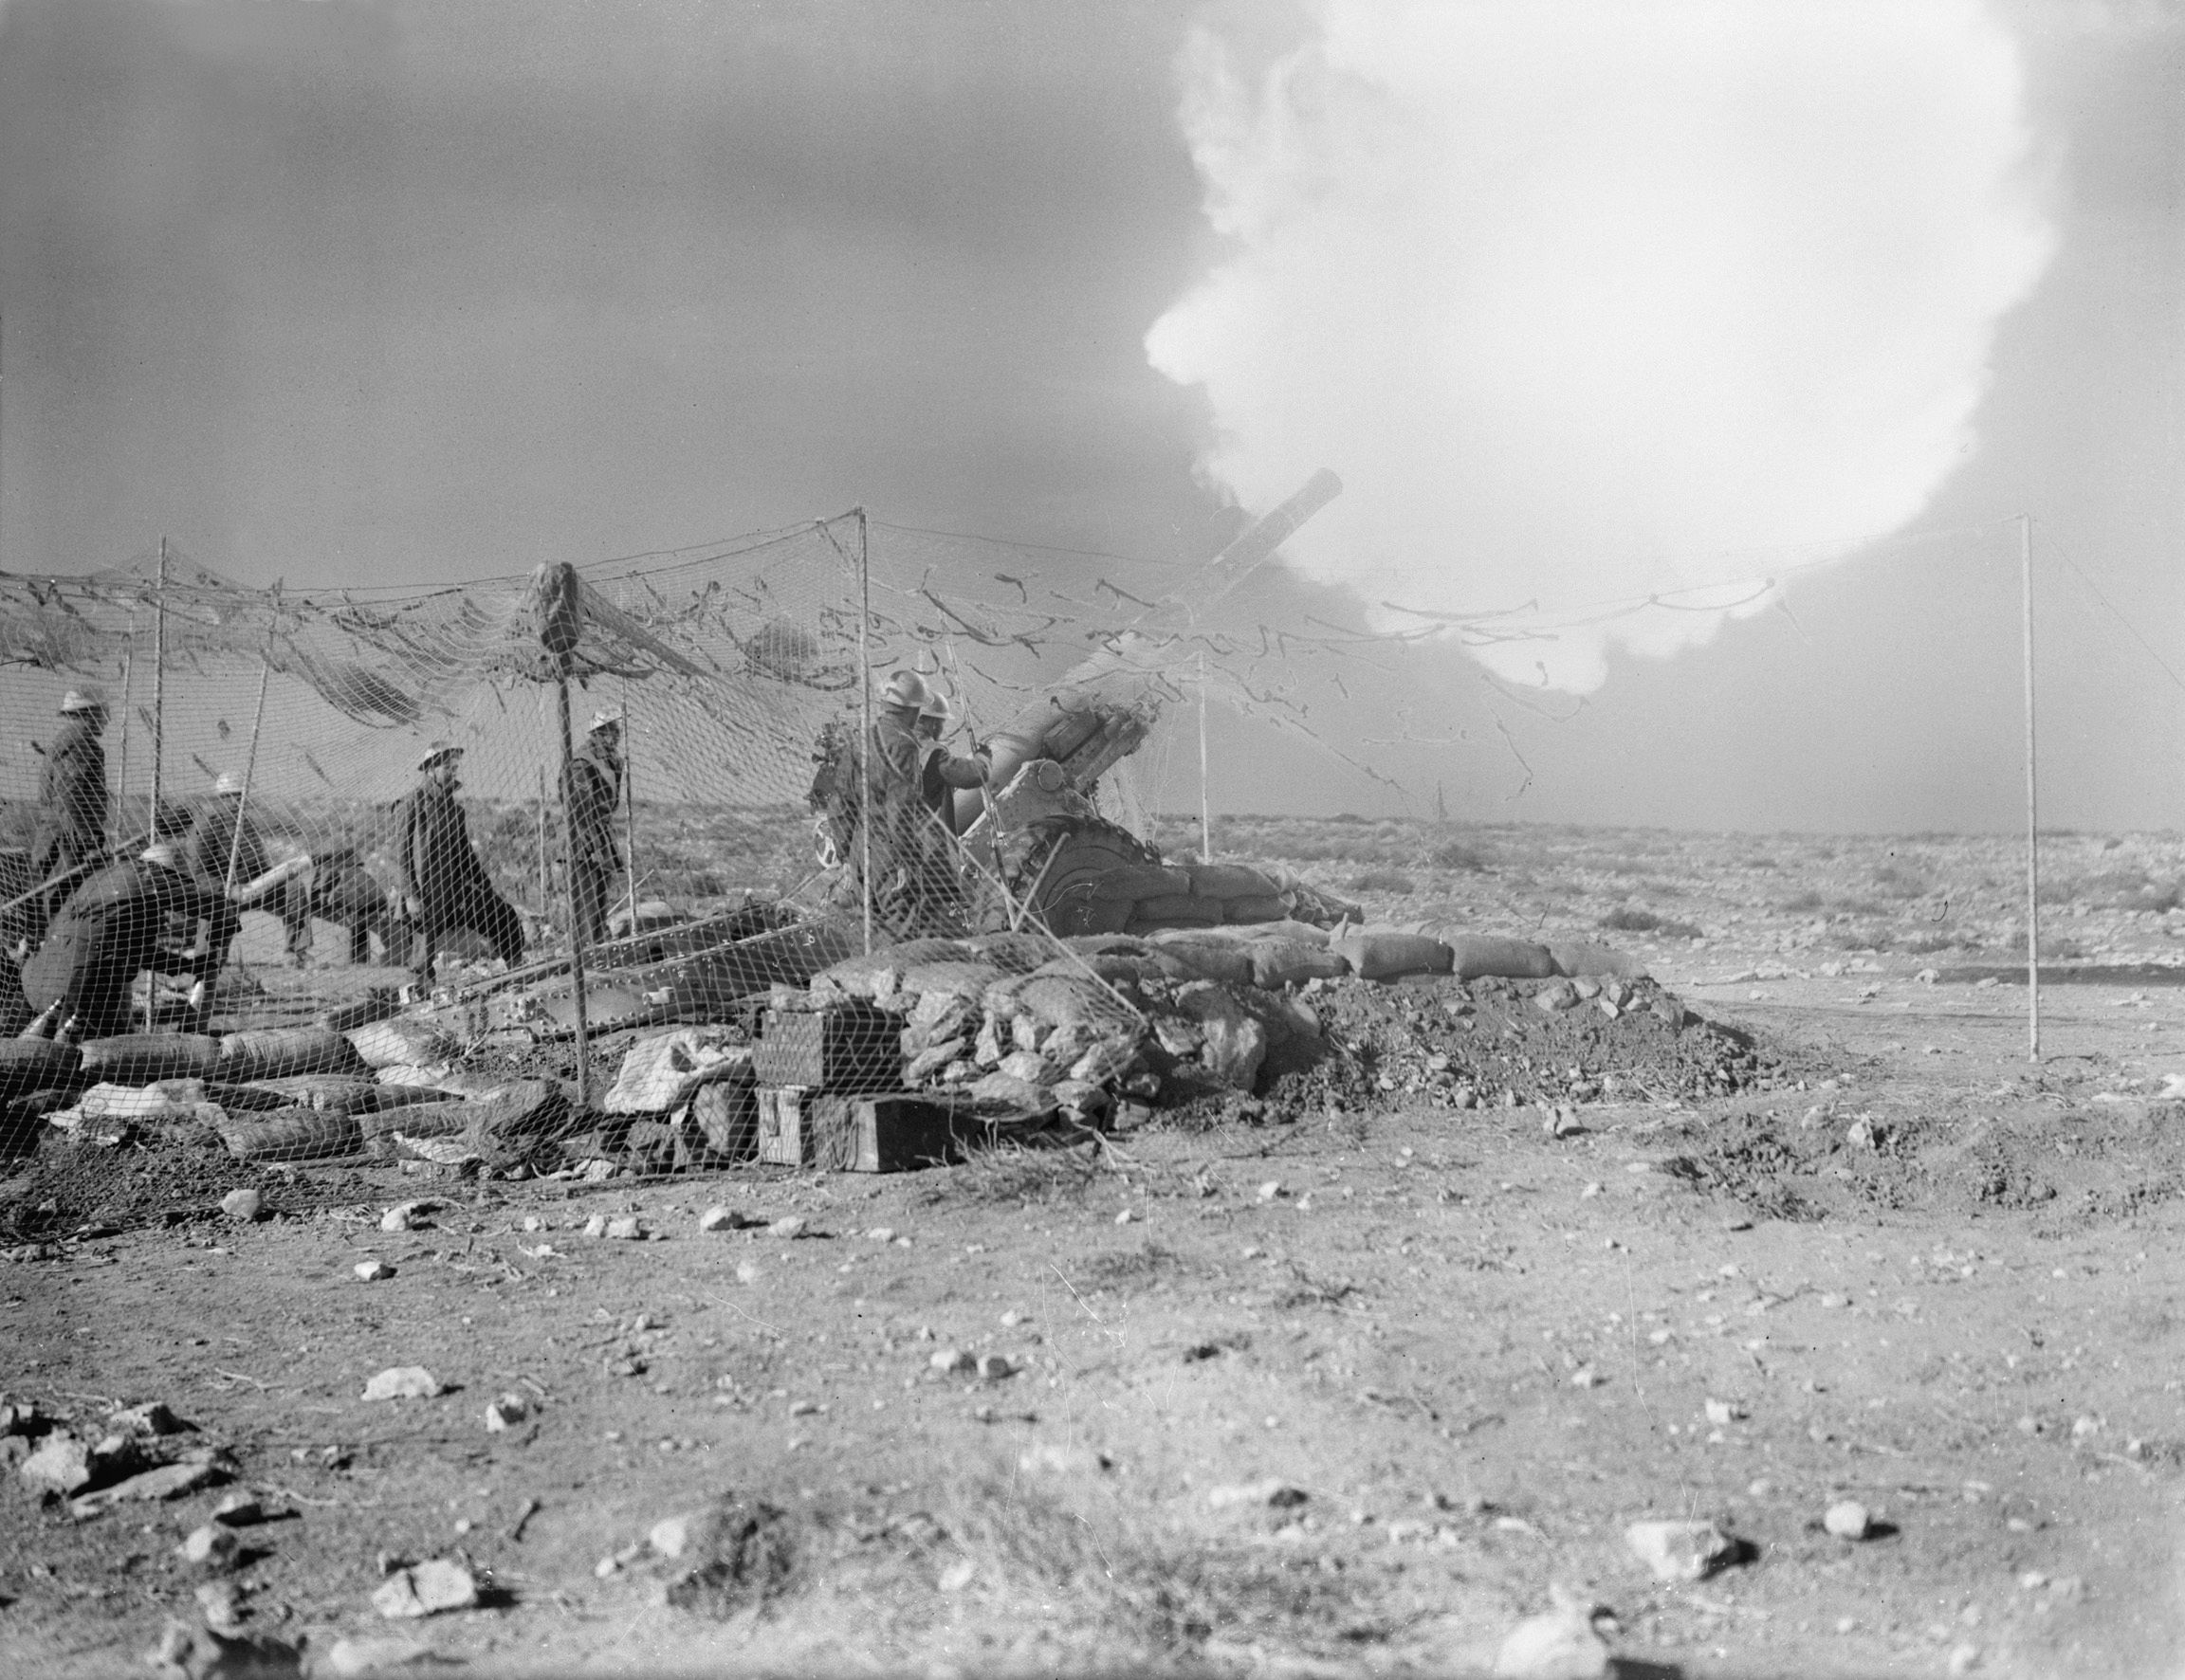
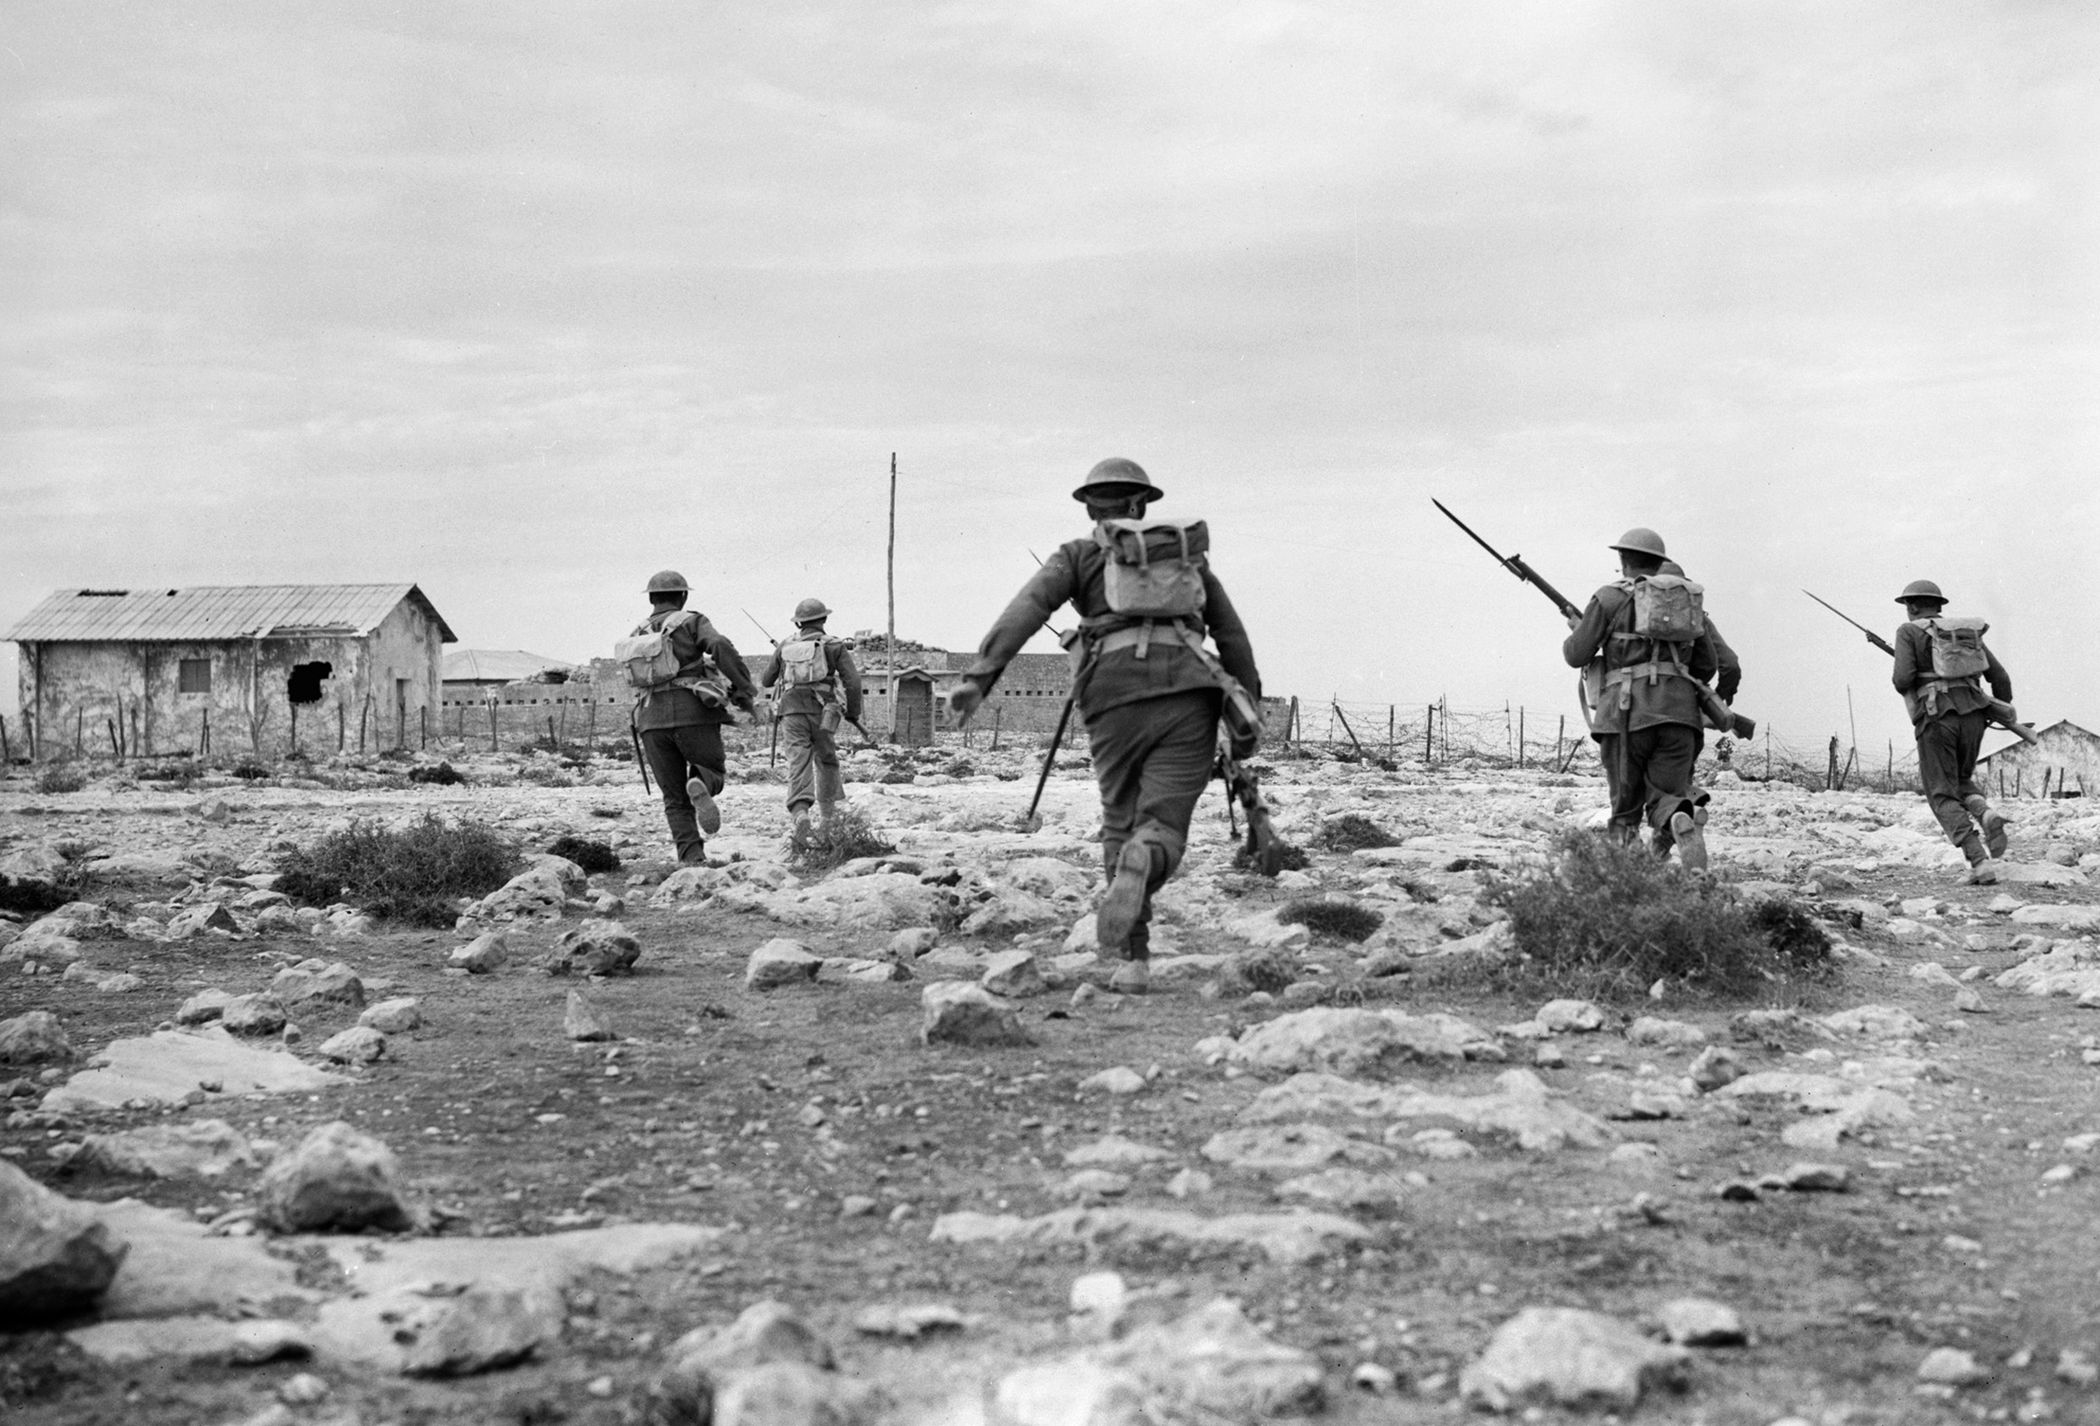
At 7 am, over 200 guns opened fire on Nibeiwa. The British tanks crashed through barbed wire with Italian machine-gun and artillery fire ineffective against the Matildas’ three inches of armor. The turrets of the Matildas had fascines attached to them to assist in crossing antitank ditches, but none were encountered. Immediately behind the tanks were the motor infantry of the 2nd Battalion Queen’s Own Cameron Highlanders and 1st Battalion of the 6th Rajputana Rifles of the 11th Indian Infantry Brigade, which advanced in Bren carriers. Italian artillery crews and infantry were lightly protected in sandbag-lined pits and slit trenches, which were easily neutralized by the British tanks’ 2-pounder and machine-gun fire.
After the victory at Nibeiwa, other fortified camps, Tummar West and East, were defeated in detail, utilizing the same method of attacking from the west or rearward side of the fortified positions. During the attacks on Nibeiwa and the Tummars, the 4th Armored Brigade drove north, forcing the 400-strong Italian garrison at Azziziya to surrender.
“A Complete and Very Unpleasant Surprise”
On the morning of December 10, the 16th Brigade, under Brigadier C.E.N. Lomax, advanced unsupported and met considerable resistance from the Italians, including two Libyan divisions and the 4th Blackshirt Division, at Sidi Barrani. The artillery and Matilda tanks finally waited out a sandstorm and attacked from the east along with the 11th Indian Brigade. The Italians surrendered Sidi Barrani late that afternoon.
On the night of December 10, the Italians, who had earlier evacuated the Maktila camp through Selby Force, a detachment of 1,800 troops that had advanced from Mersa Matruh under the command of Brigadier A.R. Selby, were attacked and defeated by this British formation along the coast road east of Sidi Barrani the following day. After the capture of Sidi Barrani, the remains of the two Libyan divisions and the 4th Blackshirt Division were trapped between the British 16th Infantry Brigade and Selby Force. On December 11, Selby Force, supported by armor, attacked and secured the surrender of the 1st Libyan Division. By nightfall, the 4th Blackshirt Division had also capitulated.
By December 11, O’Connor was savoring victory. Point 90, another fortified Italian position, was taken that day. The 7th Armored Brigade had failed to prevent the Italian evacuation of the Sofafi and Rabia camps to the southwest due to a sandstorm, and later that night it was sent in pursuit of these fleeing garrisons to Buq Buq adjacent to the coast road west of Sidi Barrani. O’Connor wanted to pursue the Italians along the coast road to Benghazi itself, but Wavell had decided to send the 4th Indian Division to join the British offensive against the Italians in Abyssinia, replacing it with the 6th Australian Division. This delayed O’Connor’s timetable.
O’Connor later recalled that Wavell’s decision “came as a complete and very unpleasant surprise…. It put paid to the question of immediate exploitation.” The departure of the 4th Indian Division deprived O’Connor of much of his artillery and transport. However, Operation Compass was a victory to this point, yielding 38,000 Italian prisoners, 237 guns, and 73 light and medium tanks at a cost of 600 killed, wounded, or missing. To the Italians, this debilitating defeat was known as the Battle of the Marmarica, named after the coastal plain where the actions took place.
“The Most Effective and Happiest Time of My Command”
By December 15, British and Indian troops and armor had captured Sollum, Halfaya and Fort Capuzzo. The attack on Bardia would follow. For this assault, the 7th Armored Division awaited the arrival of the 6th Australian Division.
Italian Lt. Gen. Annibale Bergonzoli’s XXIII Corps faced the British and Australians at Bardia with approximately 40,000 defenders. The Bardia defenses comprised an 18-mile perimeter, which included a permanent antitank ditch, barbed wire, and some concrete sangars. Some Italian tanks were present, but the only battleworthy ones were the M13/40s with their 47mm guns.
In January 1941, the Western Desert Force was redesignated XIII Corps. That same month, MacKay’s 6th Australian Division commenced the assault on Bardia. After breaching the wire and filling in the antitank ditch, it took only three days for the Australians and British armor to capture roughly 36,000 prisoners; the commanding general escaped to Tobruk along the Via Balbia.
On January 5, Wavell appeared to be in favor of exploiting O’Connor’s breakthrough, although Churchill’s penchant for his planned Greek expedition always seemed to be sapping units from the offensive into Libya. Wavell instructed O’Connor to consider raiding as far as Benghazi once Tobruk was taken. Interestingly, O’Connor had already made the same plans independent of Wavell’s instruction. When the Greek government declined Churchill’s offer of a British expeditionary force, he informed Wavell that Benghazi was now of the highest priority.
O’Connor’s Australians and his 4th Armored Brigade moved into positions opposite Tobruk on January 6 and 7. Tobruk, like Bardia, was defended by rings of underground concrete posts, barbed-wire entanglements, and an anti-tank ditch. The perimeter was larger at 30 miles, and the garrison of the XXII Corps numbered around 25,000 men with 220 guns and approximately 60 tanks. On the night of January 9, aggressive Australian patrolling against the Tobruk garrison resumed. By January 12, Tobruk was surrounded.
The main attack by the Australians did not occur until the night of January 20-21. Twelve hours after the attack began, part of the garrison under General Petassi Manella surrendered. On the afternoon of January 22, Brig. Gen.Vincenzo della Mura and the remaining 17,000 defenders surrendered. The Italians lost 25,000 killed, wounded, and captured. The Australians, in contrast, had only 400 killed, wounded, or taken prisoner. In addition to the large prisoner haul, abundant stores of food, weapons, and other supplies were also appropriated.
As Tobruk fell, it was decided to have XIII Corps report directly to Wavell, thereby removing Wilson’s BTE in Cairo from the chain of command. O’Connor said this change had produced an interval that was “the most effective and happiest time of my command.”
“Fox Killed in the Open”
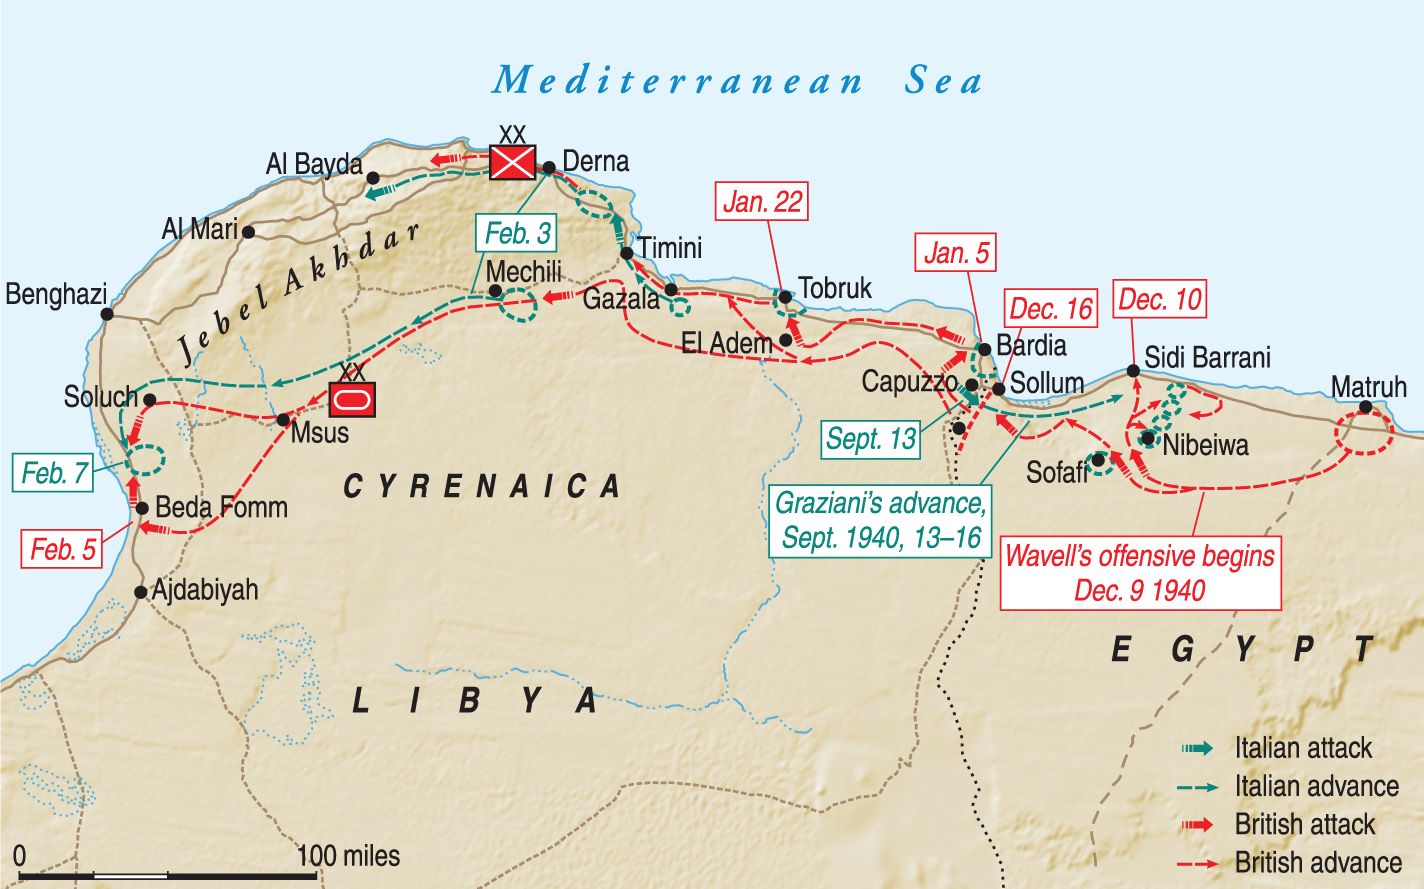
After the fall of Tobruk, O’Connor continued the advance toward Derna with the Australian 6th Division, while the 7th Armored Division was sent south of the Jebel Akhdar mountains toward Mechili. On January 24, the 4th Armored Brigade clashed with Italian armor on the Derna-Mechili track. The Italians were able to destroy some British light and cruiser tanks while losing several of their own. On January 25, Italian infantry was putting up a determined defense against the Australians; however, after many uncoordinated actions in which most of the Italian 60th Sabratha Infantry Division was destroyed, Derna was captured on January 26. Also on this day, the remaining Italian divisions in eastern Libya began retreating northwest along the coast toward Benghazi, setting up O’Connor’s next coup de main to intercept the remnants of the Italian Tenth Army at a soon to be famous desert marker, Beda Fomm.
O’Connor’s plan was to have the 7th Armored Division continue to travel across desert tracks via Msus and Antelat in an attempt to cut off the retreating Italians. Meanwhile, the Australian 6th Division would be hard on the heels of the Italians who were clinging to the coast road north of the Jebel Akhdar mountains. On February 4, the 4th Armored Brigade, with A and C armored car squadrons of the 11th Hussars in front, struck out across the desert along with an armored car squadron from the King’s Dragoon Guards (KDG).
Behind the armored car force were tanks from three tank regiments—the 3rd and 7th Hussars and 2nd RTR—followed by the 2nd Battalion of the Rifle Brigade, antitank guns of the 4th RHA, and elements of the 106th RHA with portee-mounted 37mm antitank guns. This formation was called Combe Force, after its commander, Lt. Col. John Combe of the 11th Hussars. Its total complement consisted of about 2,000 men.
By 3:30 pm on February 4, the armored cars of the 11th Hussars cleared the fort at Msus. Combe Force continued its march and reached Msus late on the morning on February 5, hitting the coast road near Sidi Saleh, 10 miles south of Beda Fomm, at noon. At 2 pm, a company of the 2nd Battalion, Rifle Brigade was in position across the road with two more companies screening the positions occupied by the 4th RHA. These British troops had arrived just 30 minutes before the leading elements of the retreating Italian Tenth Army appeared.
Machine-gun and artillery fire brought the Italian column to a halt. The Italians began to fan out across the desert to probe south only to find other elements of the Rifle Brigade blocking the road. Thus, Combe Force found itself in the path of the entire retreating Italian Tenth Army. At 6 pm, the 7th Hussars and elements of the 2nd RTR were ordered to attack the Italians on the road nearer to Beda Fomm at a terrain feature called the Pimple. The fighting continued all day on either side of the road, but despite increasing pressure and a growing shortage of ammunition, the Rifle Brigade and 11th Hussars continued to block the road.
On February 6 at 10:45 am, the 10th Italian Bersaglieri with L-3 light tanks attacked the roadblock defended by the 11th Hussars and 2nd Battalion of the Rifle Brigade but were beaten when thousands of Italian soldiers began to surrender. The remainder of the 4th Armored Brigade (7th and 3rd Hussars) arrived and struck the Italians in their left flank just north of Beda Fomm.
During the night of February 6, quiet prevailed in the Beda Fomm area. At 11 am the following day, General Virginio, Chief of Staff of the Tenth Army, arrived at 4th Armored Brigade headquarters to surrender. O’Connor wrote, “I think this may be termed a complete victory as none of the enemy escaped.” Later on, in a communiqué to Wavell, O’Connor stated, “Fox killed in the open,” to use British hunting parlance.
A Shift in Focus to Greece
Wavell’s force never exceeded 30,000 troops in battle; however, despite equipment wear and shortages of food, ammunition, and water, his Western Desert Force under O’Connor advanced 500 miles in 10 weeks and in the process destroyed the Italian Tenth Army. O’Connor captured 130,000 prisoners in contrast to 555 British troops killed and 1,373 wounded. After Beda Fomm, O’Connor’s gaze shifted westward to Tripoli. Dorman-Smith was sent by the XIII Corps commander to meet Wavell in Cairo to ask for supplies and permission to move on Tripoli.
However, when Dorman-Smith arrived at Wavell’s office only a map of Greece appeared on the wall. Maps of the desert had already been removed. Wavell said, “You see, Eric, I am planning my spring campaign!” Wavell was focused on Greece and giving his support to Eden’s wish to send the most powerful force that could be raised across the Mediterranean to the Balkans.
O’Connor’s offensive would advance no farther, taking up forward positions at El Agheila since Churchill ordered the westward movement of XIII Corps to halt there. Wavell designated the 6th Australian Division, part of the 7th Armored Division, and most of the supplies and air support for Churchill’s doomed operations in Greece and Crete. With his advance coming to a halt, O’Connor was appointed commander BTE in Cairo, since Wilson was overseeing the British expedition to Greece and Crete.
O’Connor’s Capture
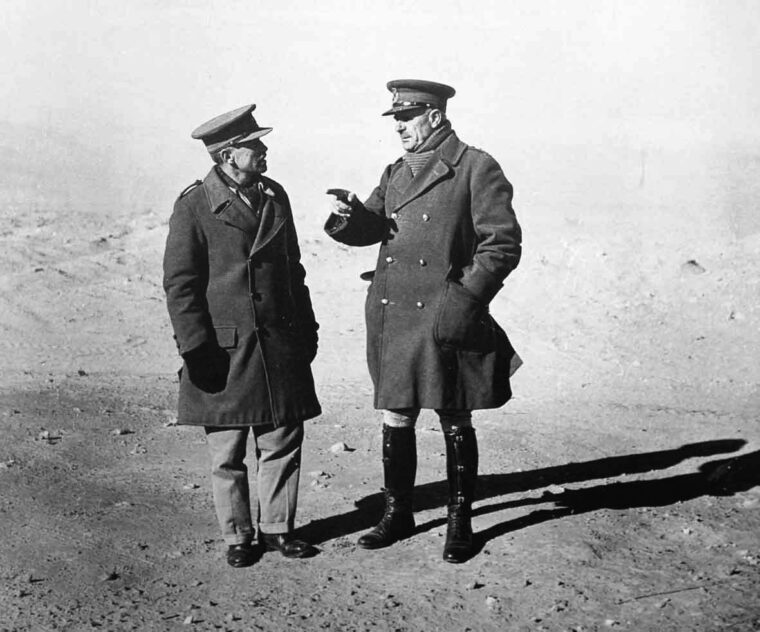
On March 31, 1941, German General Erwin Rommel, while bolstering the Italians in Libya with the arrival of the Afrika Korps, launched his offensive against the British. The inexperienced 2nd Armored Division was swiftly defeated by the Nazis, necessitating a trip to the front by Wavell to confer with Lt. Gen. Sir Philip Neame, the commander of British and Commonwealth troops in Cyrenaica. O’Connor was also summoned and, although he refused to relieve Neame, stayed on to advise him.
Unfortunately, while traveling back to their headquarters on April 6, O’Connor and Neame were captured by a German patrol. O’Connor was imprisoned in a castle near Florence, Italy. On his third escape attempt, O’Connor reached British lines in Italy in December 1943. In Britain, he was knighted and promoted to the permanent rank of lieutenant general. In January 1944, O’Connor became commander of VIII Corps. He later fought in Western Europe.
During Operation Compass, Mussolini lost over 200,000 men. Wavell demonstrated a high degree of offensive spirit in ordering O’Connor’s counteroffensive into Libya because the two divisions employed were the only troops available to defend Egypt, and one of them (4th Indian) was soon to be removed from O’Connor. The relatively untrained 6th Australian Division replaced the 4th Indian Division and performed superbly, capturing Bardia, Tobruk, and then Derna in January 1941. On February 7, the entire Italian Tenth Army surrendered at Beda Fomm.
This campaign demonstrated Wavell’s brilliance; however, a large portion of the credit for the victory goes to the strategic vision and tactical capabilities of Richard O’Connor and Eric Dorman-Smith.

Join The Conversation
Comments
View All Comments