By Richard Willis
The six-day Battle of Megiddo fought in September 1918 was a decisive climax to the struggle in Palestine between the Ottoman Empire, backed by the Germans, and Great Britain and her allies. In the rush to Damascus, troops from several Allied nations fought with vigor and exuberance in the shadow of the ancient battleground city of Megiddo, where the Egyptians and Canaanites had battled in the 15th century B.C.
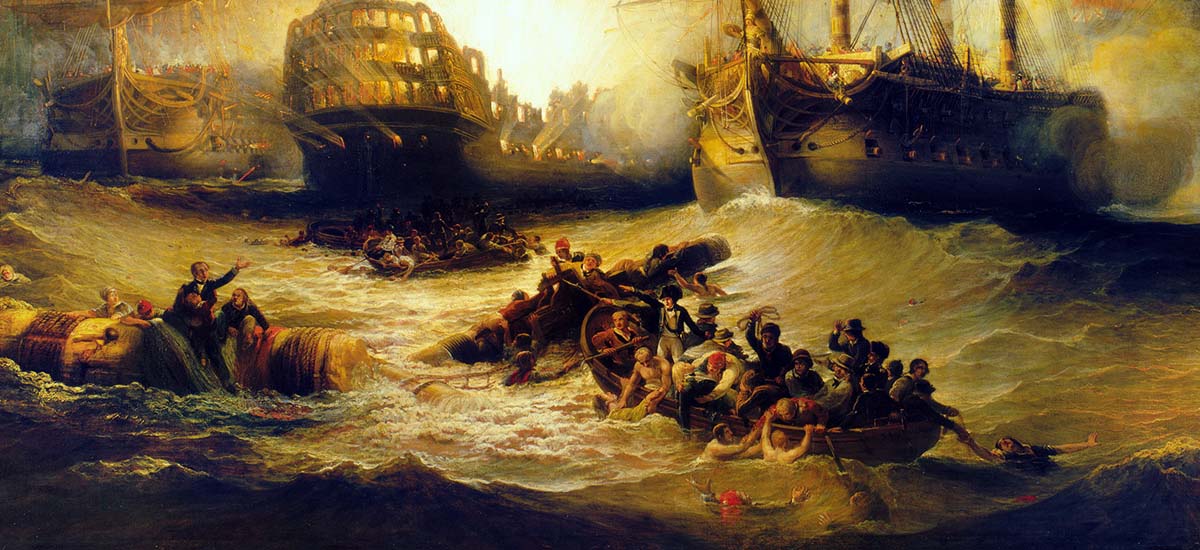
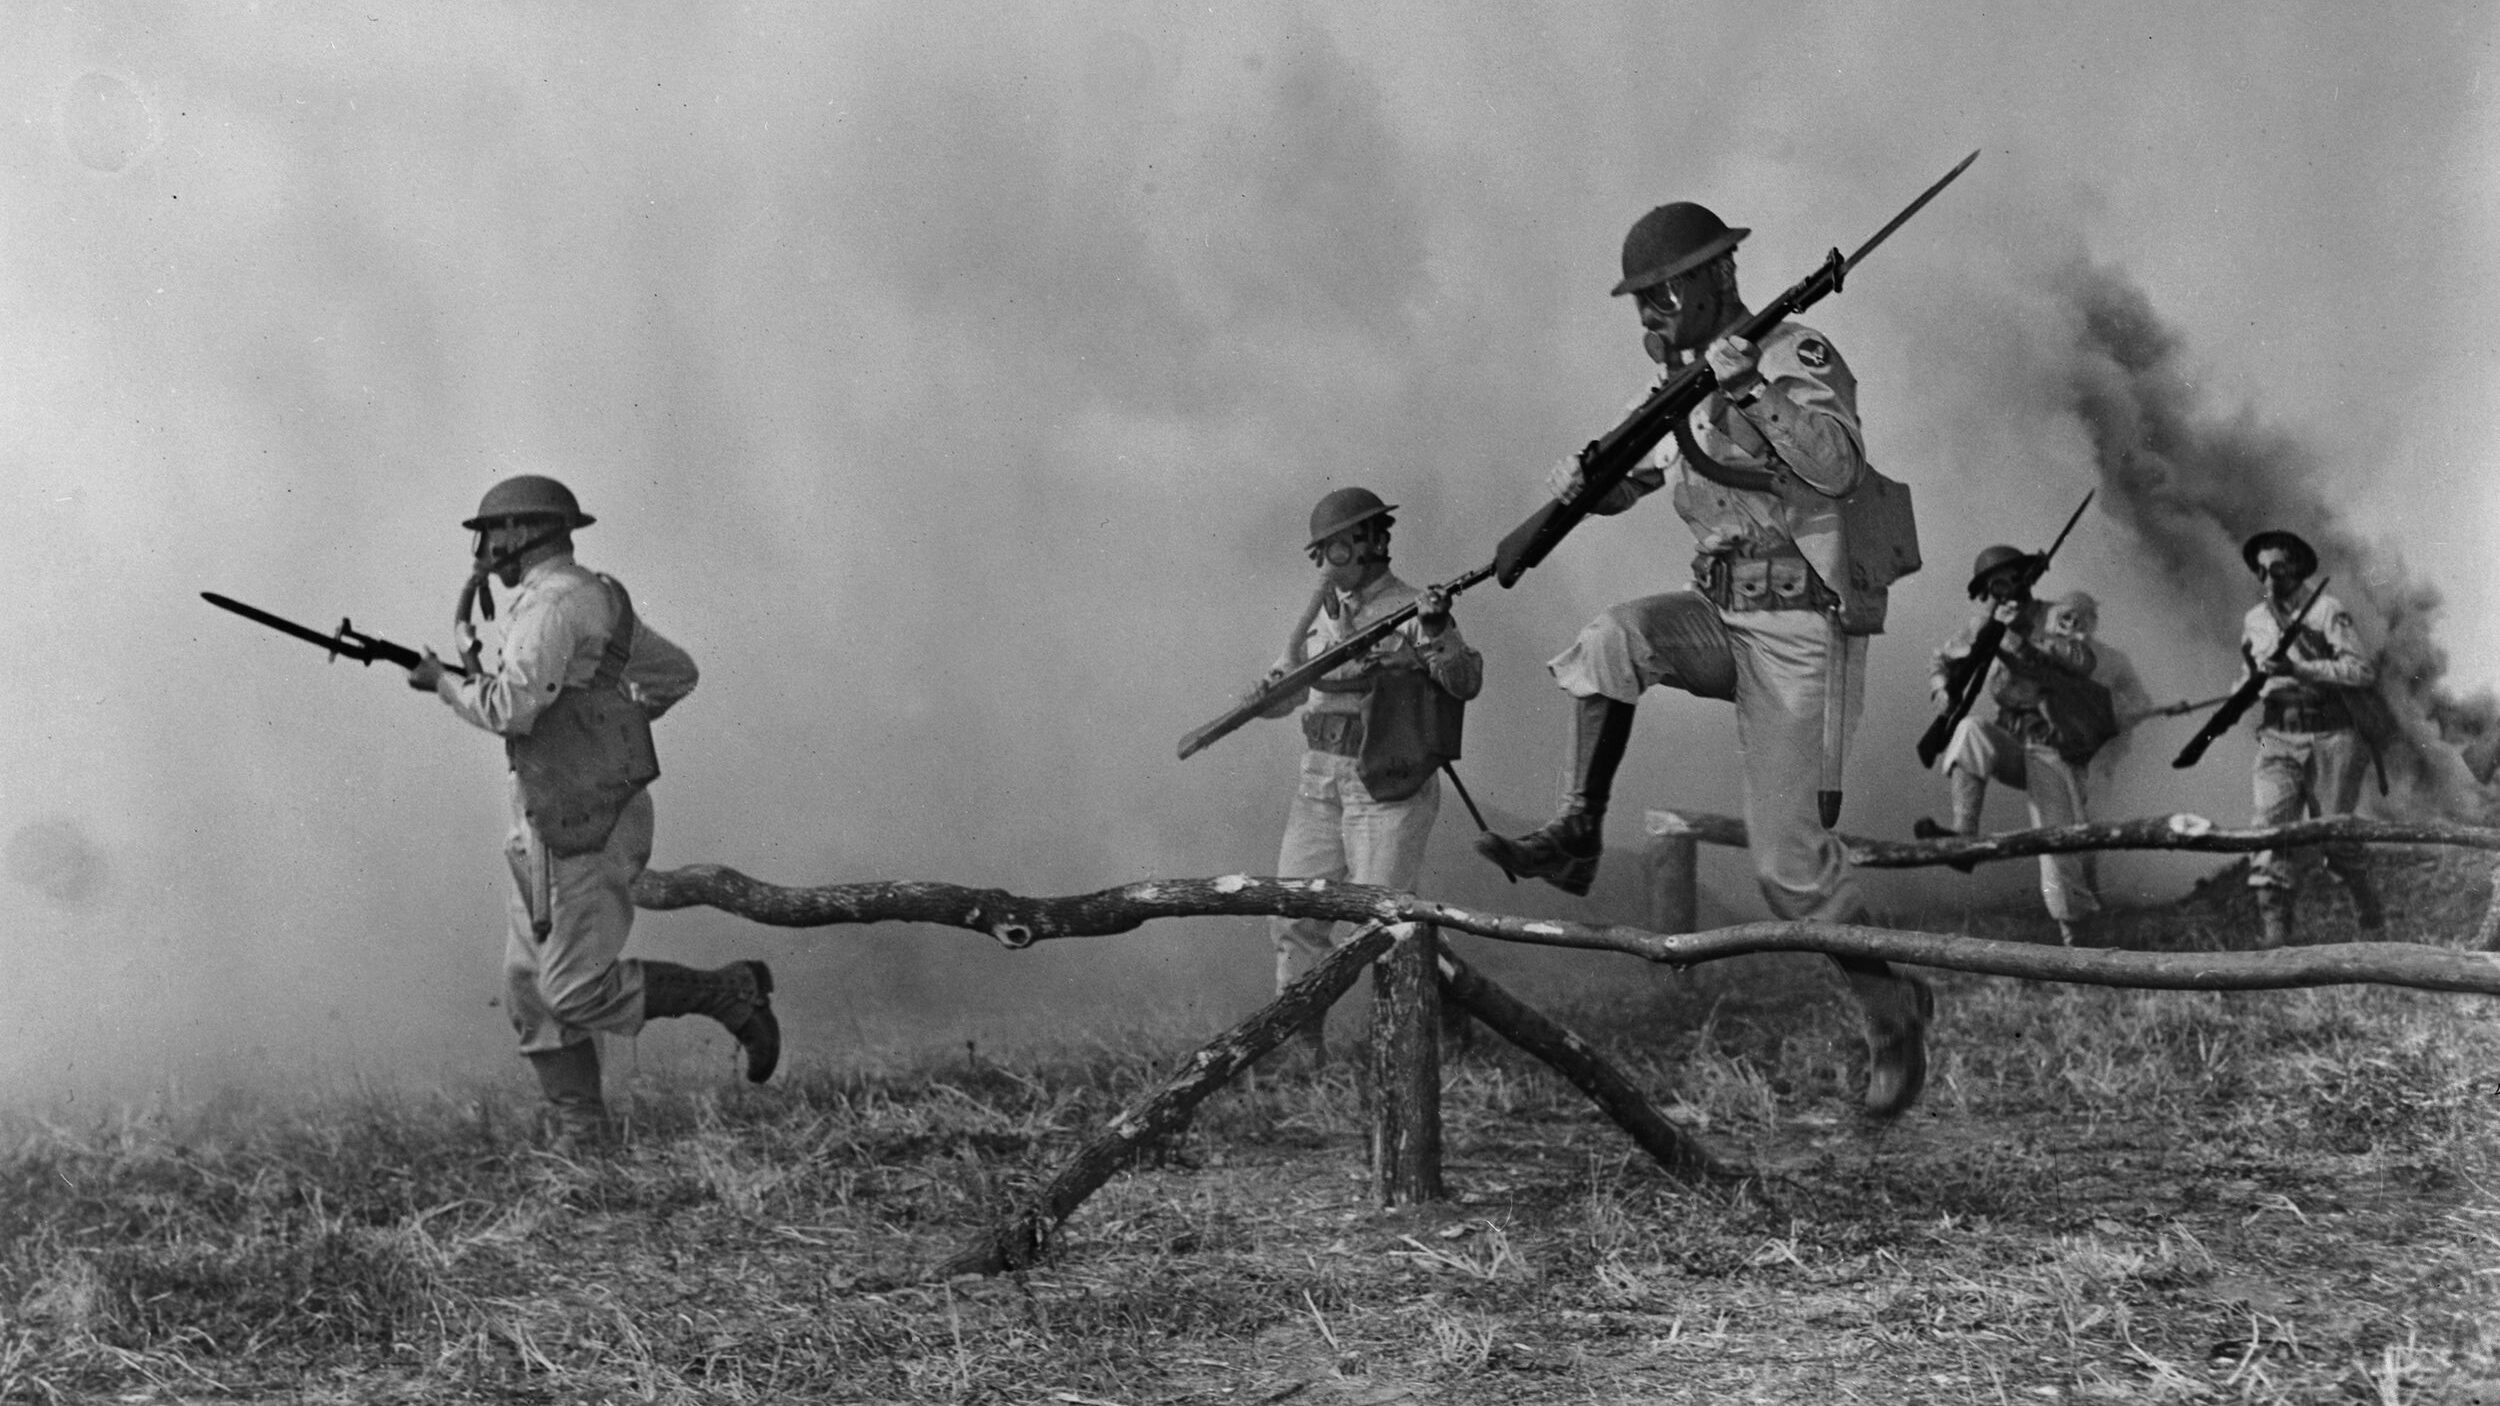
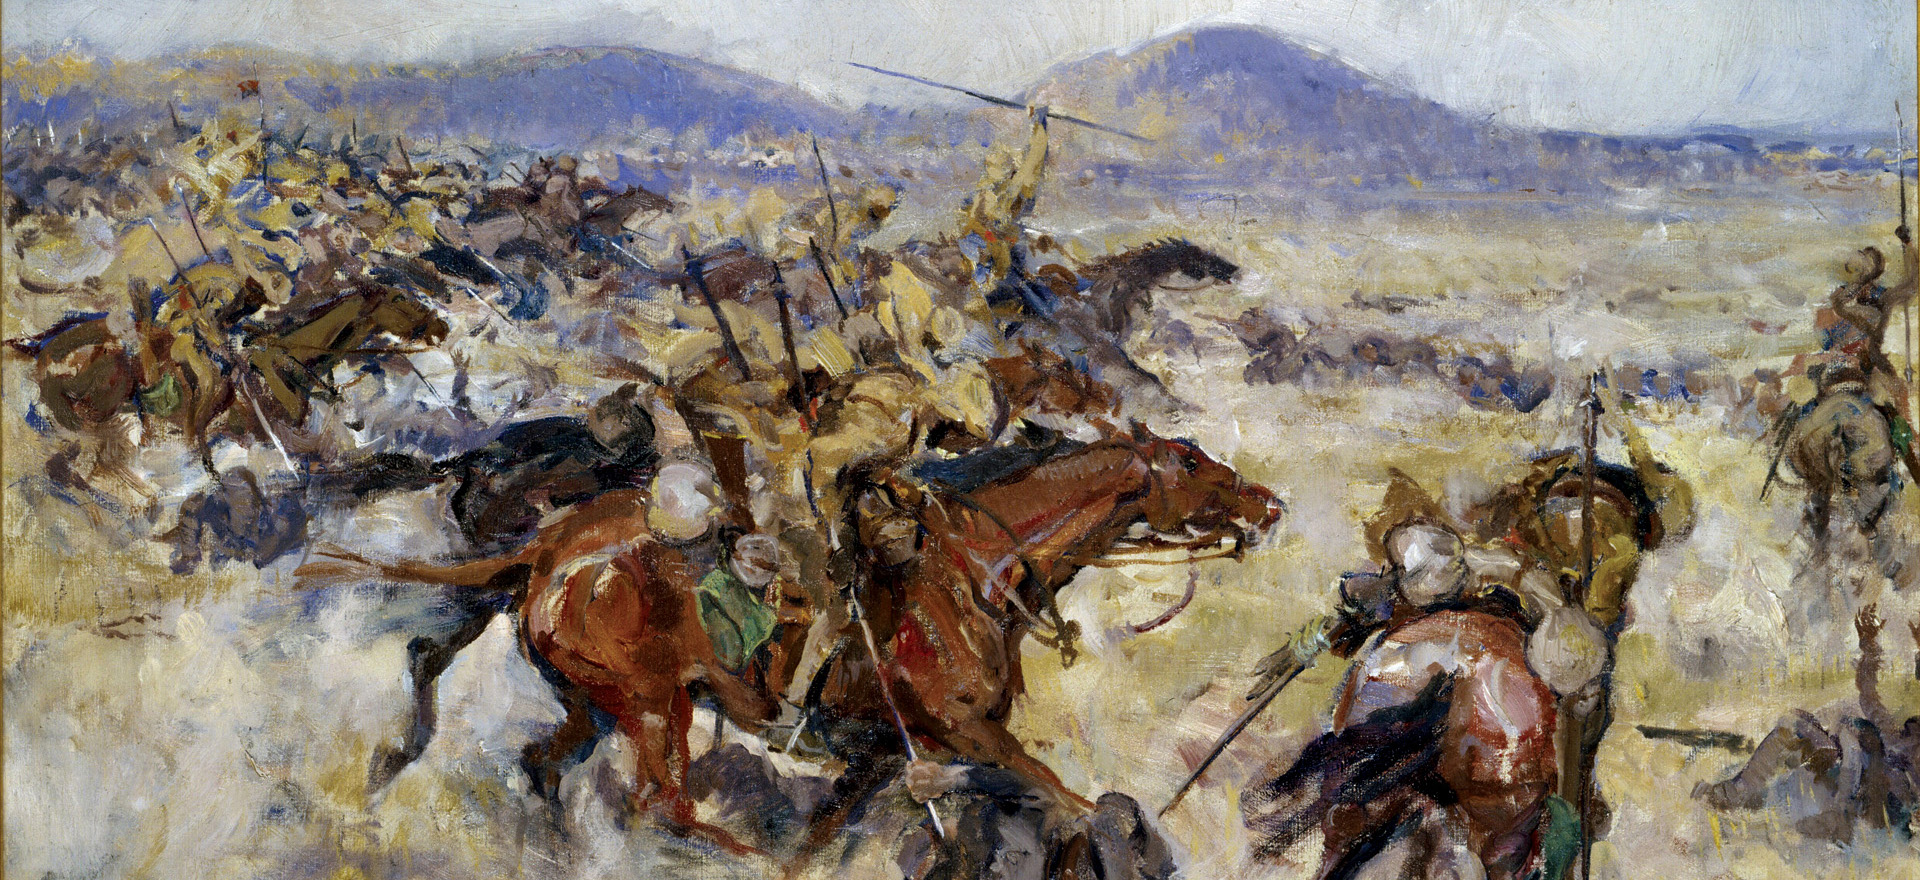
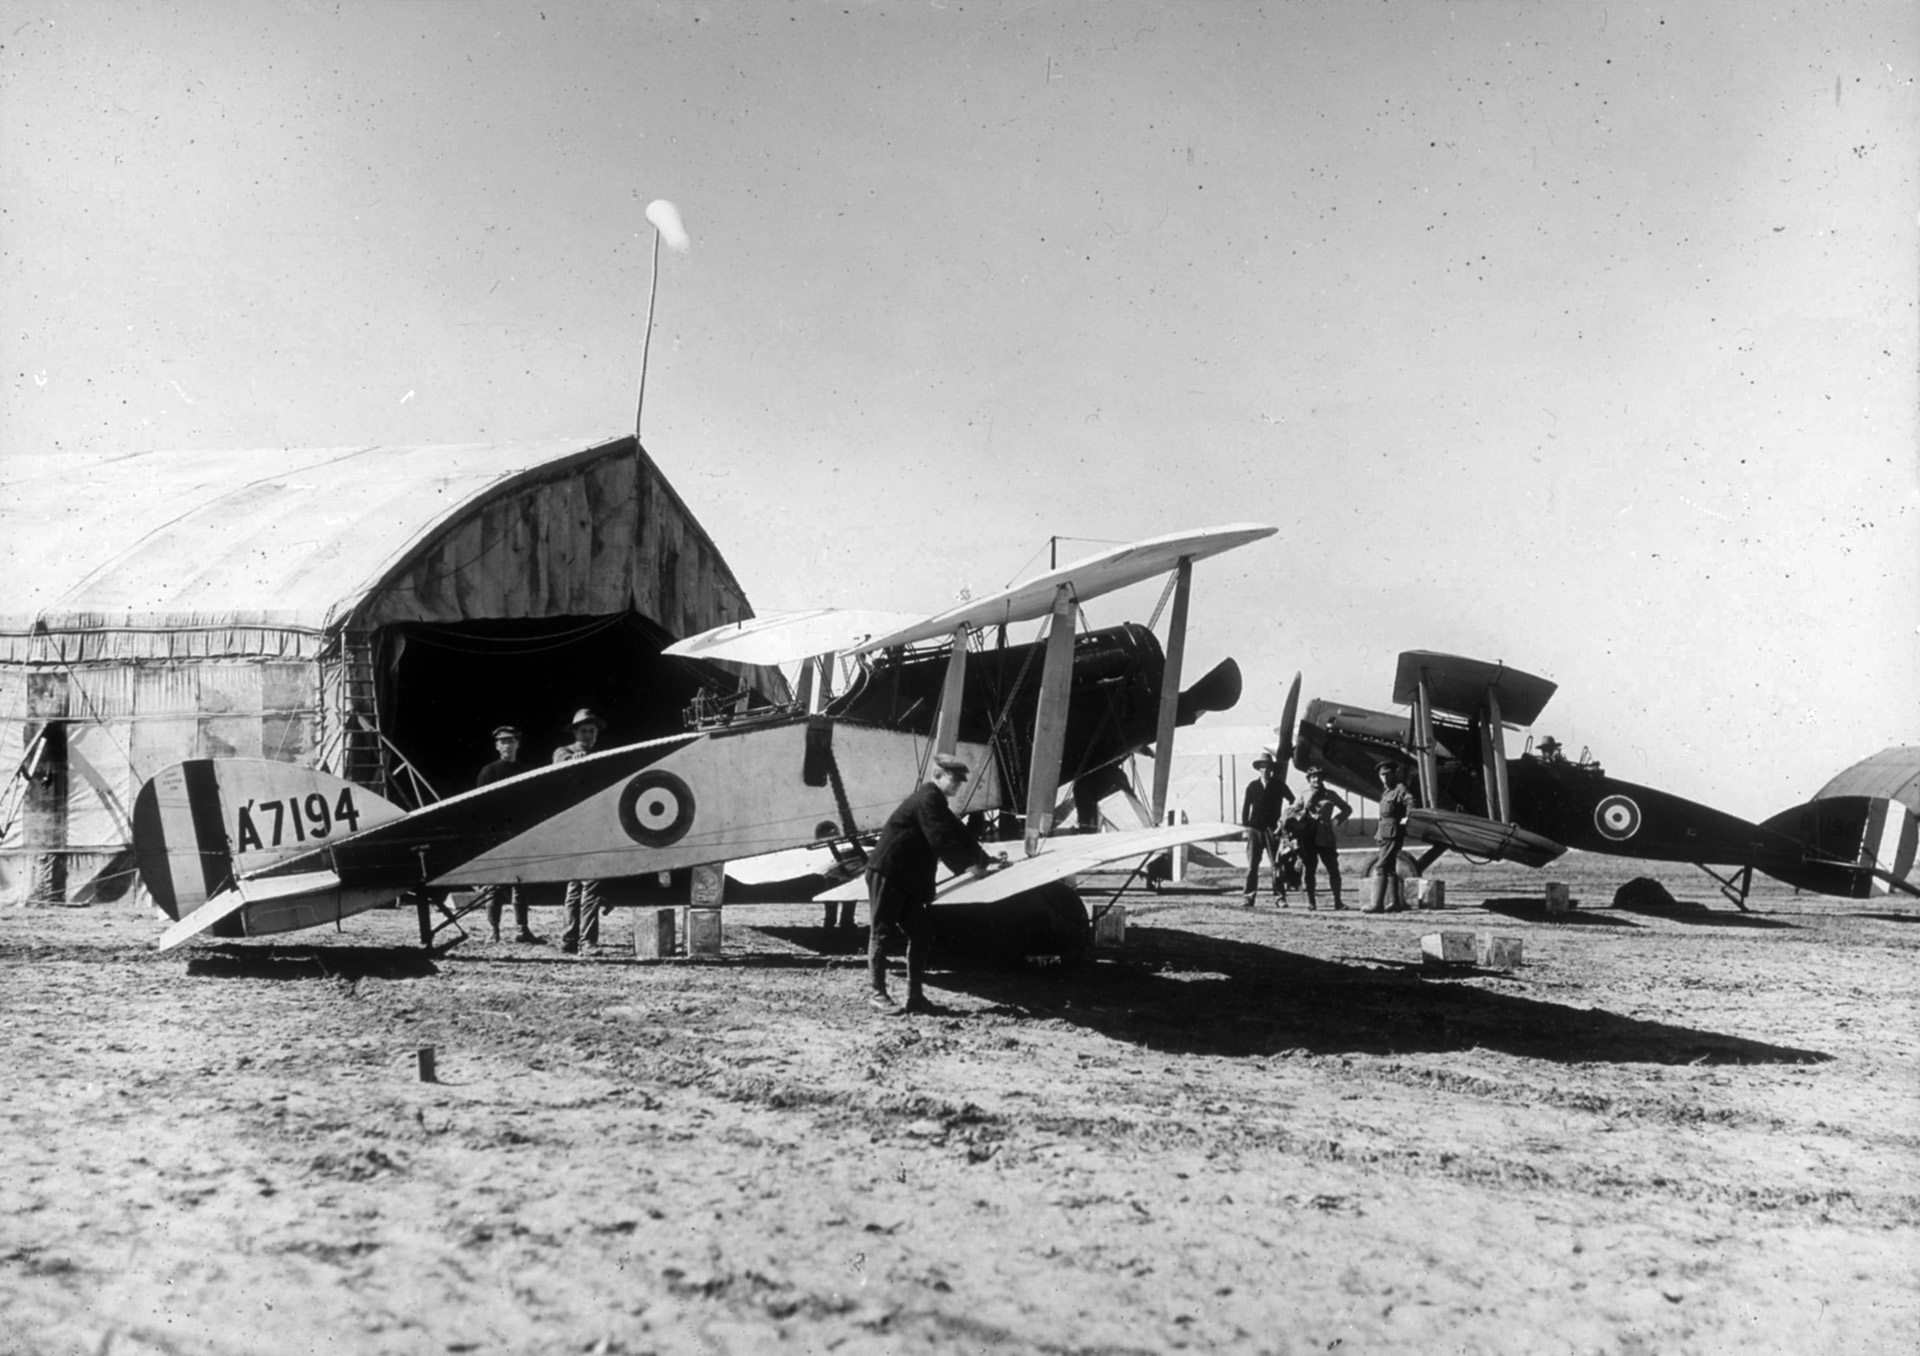
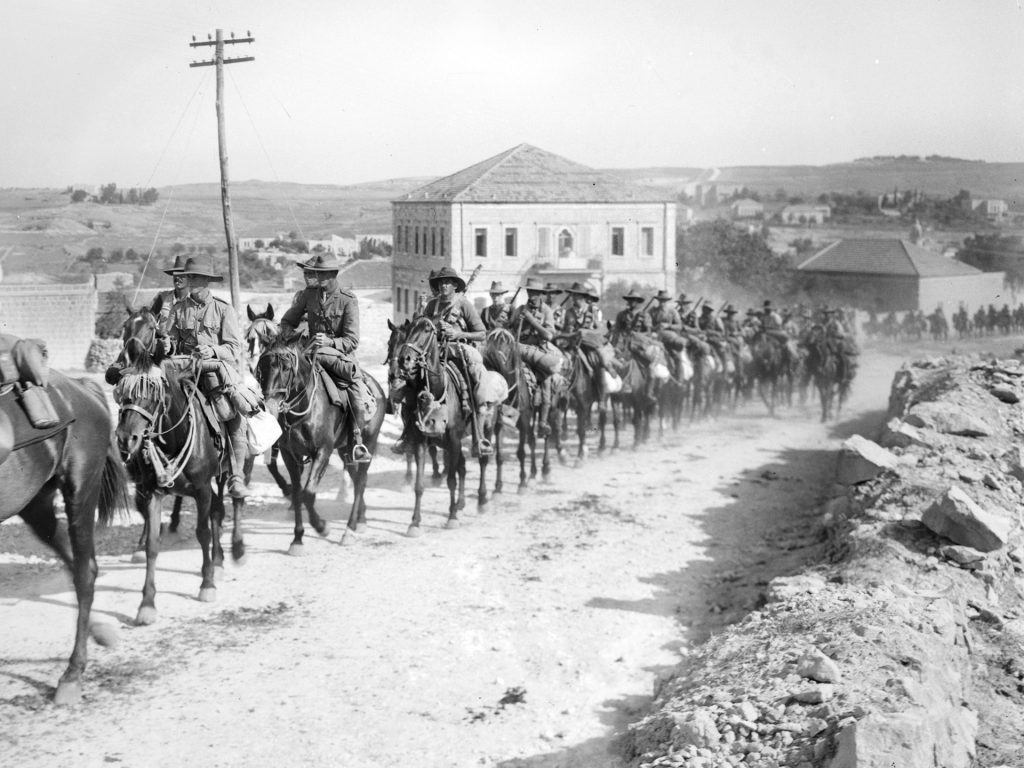
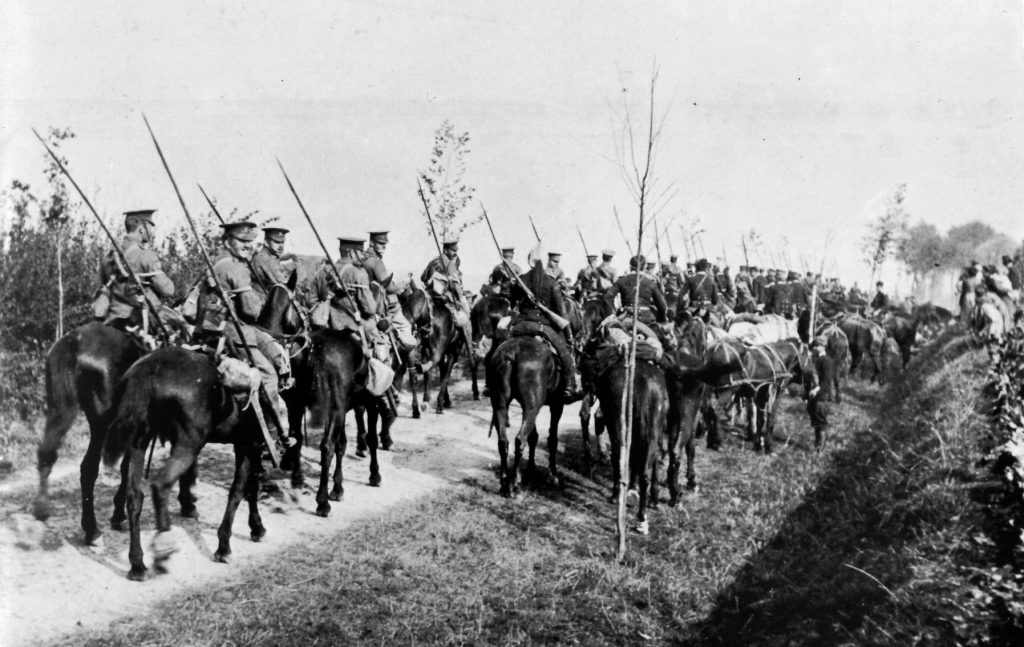
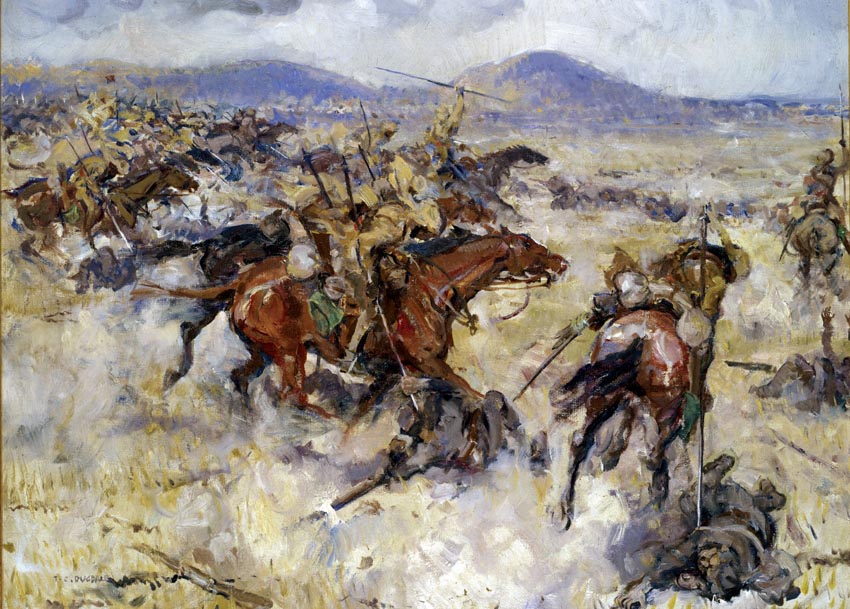
Far from the Western Front in World War I Europe, Allied cavalrymen rode across Palestine and left behind them the ravages of a Turkish rout. Allied artillery, the Royal Air Force, and the Australian Air Corps pummelled the Turks. Then, swift-riding horsemen in full regimental uniforms and armed with swords and lances consolidated the gains.
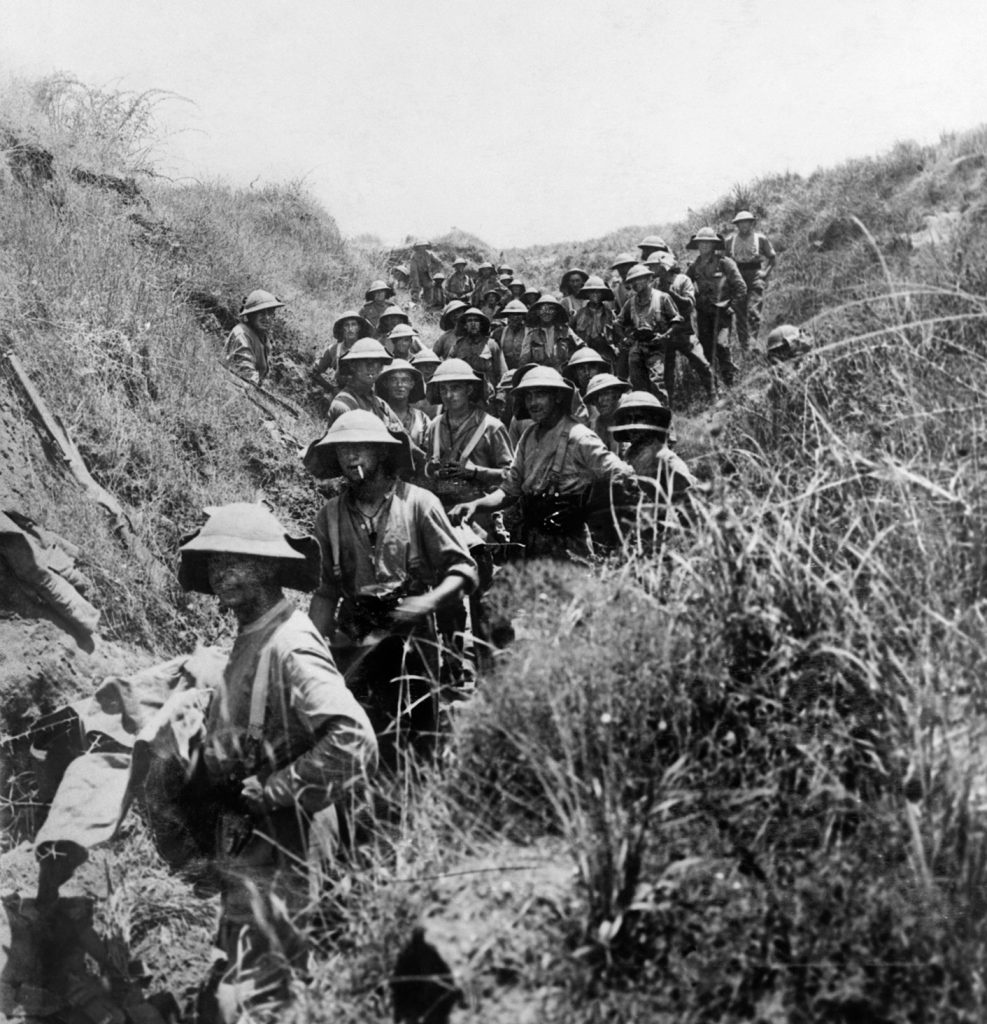
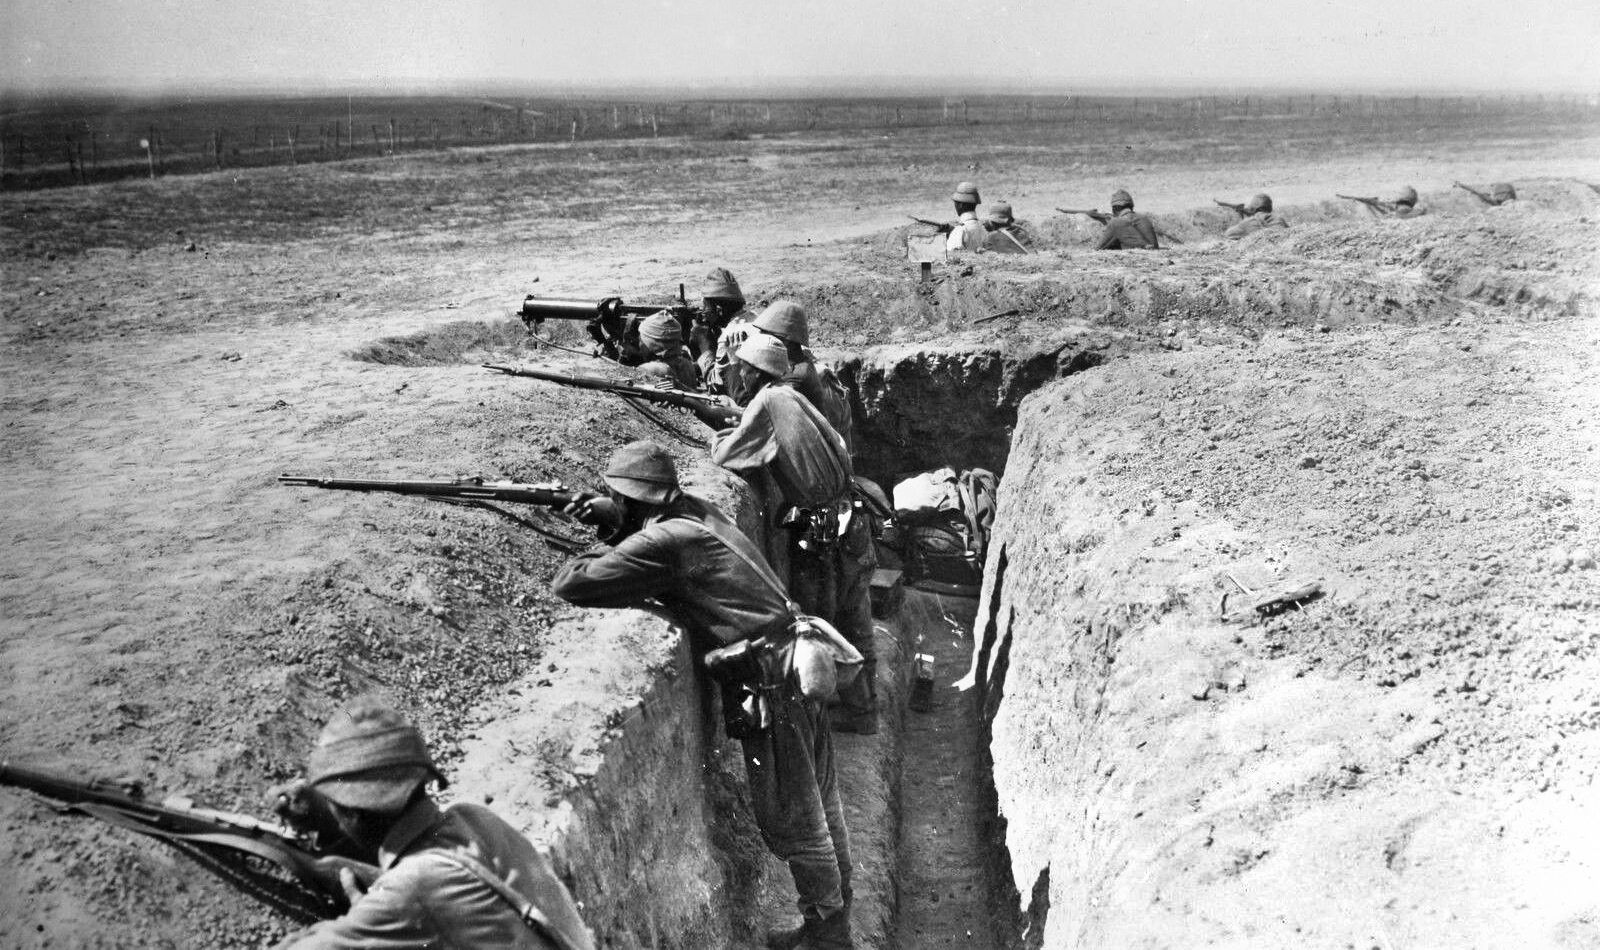
To many of the participants in the campaign it was a dream; to others a nightmare, as though what had happened in the Holy Land in former times had sprung forth again, breathing fire, sword, and lance from the pages of the Bible. The Turks, shelled or bombed out of their trenches, hid in wadis (ravines), and the moment the Allied cavalry appeared the demoralised Ottoman conscripts often surrendered.
The Allied cavalry tended to ride hard and rough, covering great distances in times that the world had forgotten were possible—a foretaste of the German blitzkrieg two decades later. The sight of the ruined city of Megiddo must have made the troops question how many armies had been ground to death by chariots on this same terrain. Perseverance, bravery, and sound leadership were to result in the final withdrawal of the Ottoman Empire from the Middle East.
Since the beginning of World War I, British leaders had been keenly aware of the vital importance of keeping the Suez Canal open to maintain access to their eastern colonies. The decision to invade Palestine was taken in 1917, partly in response to the continuing stalemate on the Western Front.
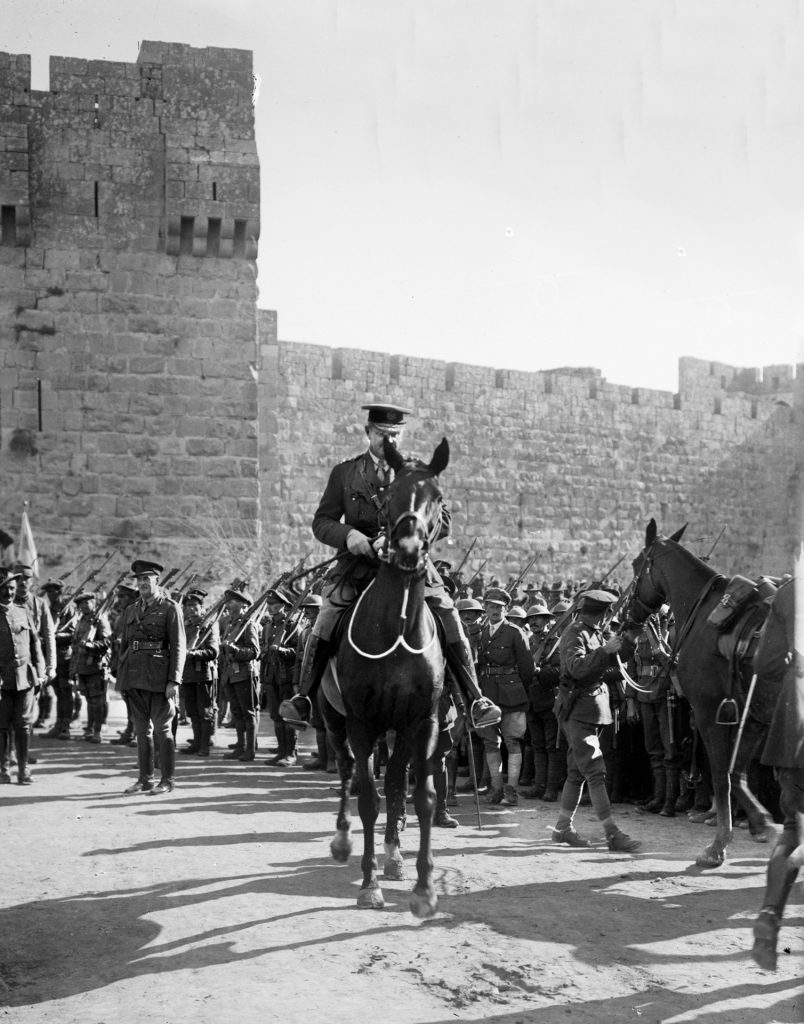
Much of the credit for the defeat of the Turks can be given to General Sir Edmund Allenby, noted for his dexterity in planning and executing warfare. Allenby was thoroughly familiar with the power of military man and horse, owing partly to his experience of leading the Cavalry Division of the British Expeditionary Force in 1914. He had also been appointed commander of the Third Army in 1915 and performed satisfactorily in the Battle of Arras in 1917.
After arriving in the Middle East, Allenby gave orders to move his headquarters from Cairo to Rafah, nearer the front, in an effort to be in closer touch with his troops. In contrast, the Ottoman headquarters was too far from the front, which put the Ottoman commanders at a disadvantage. Allied success followed between October 31, 1917, and November 7, 1917, in the battles of Beersheba and the Third Battle of Gaza. The Palestinian Arabs saw Allenby as a prophet of God, and he was highly respected by both his troops and the enemy. He tolerated no nonsense and was feared by his subordinates. When displeased, Allenby often unleashed a fearsome rage.
Allenby’s victory in autumn 1917 did not guarantee that the same troops would be available to fight in the Battle of Megiddo nearly a year later, as many of them were transferred to France to counter the German Spring Offensive of 1918 on the Western Front. With the removal of many of his troops, Allenby had no choice but to halt his advance. A vital element of Allenby’s approach to his command in 1918 was the Desert Mounted Corps, led by Lt. Gen. Sir Harry Chauvel.
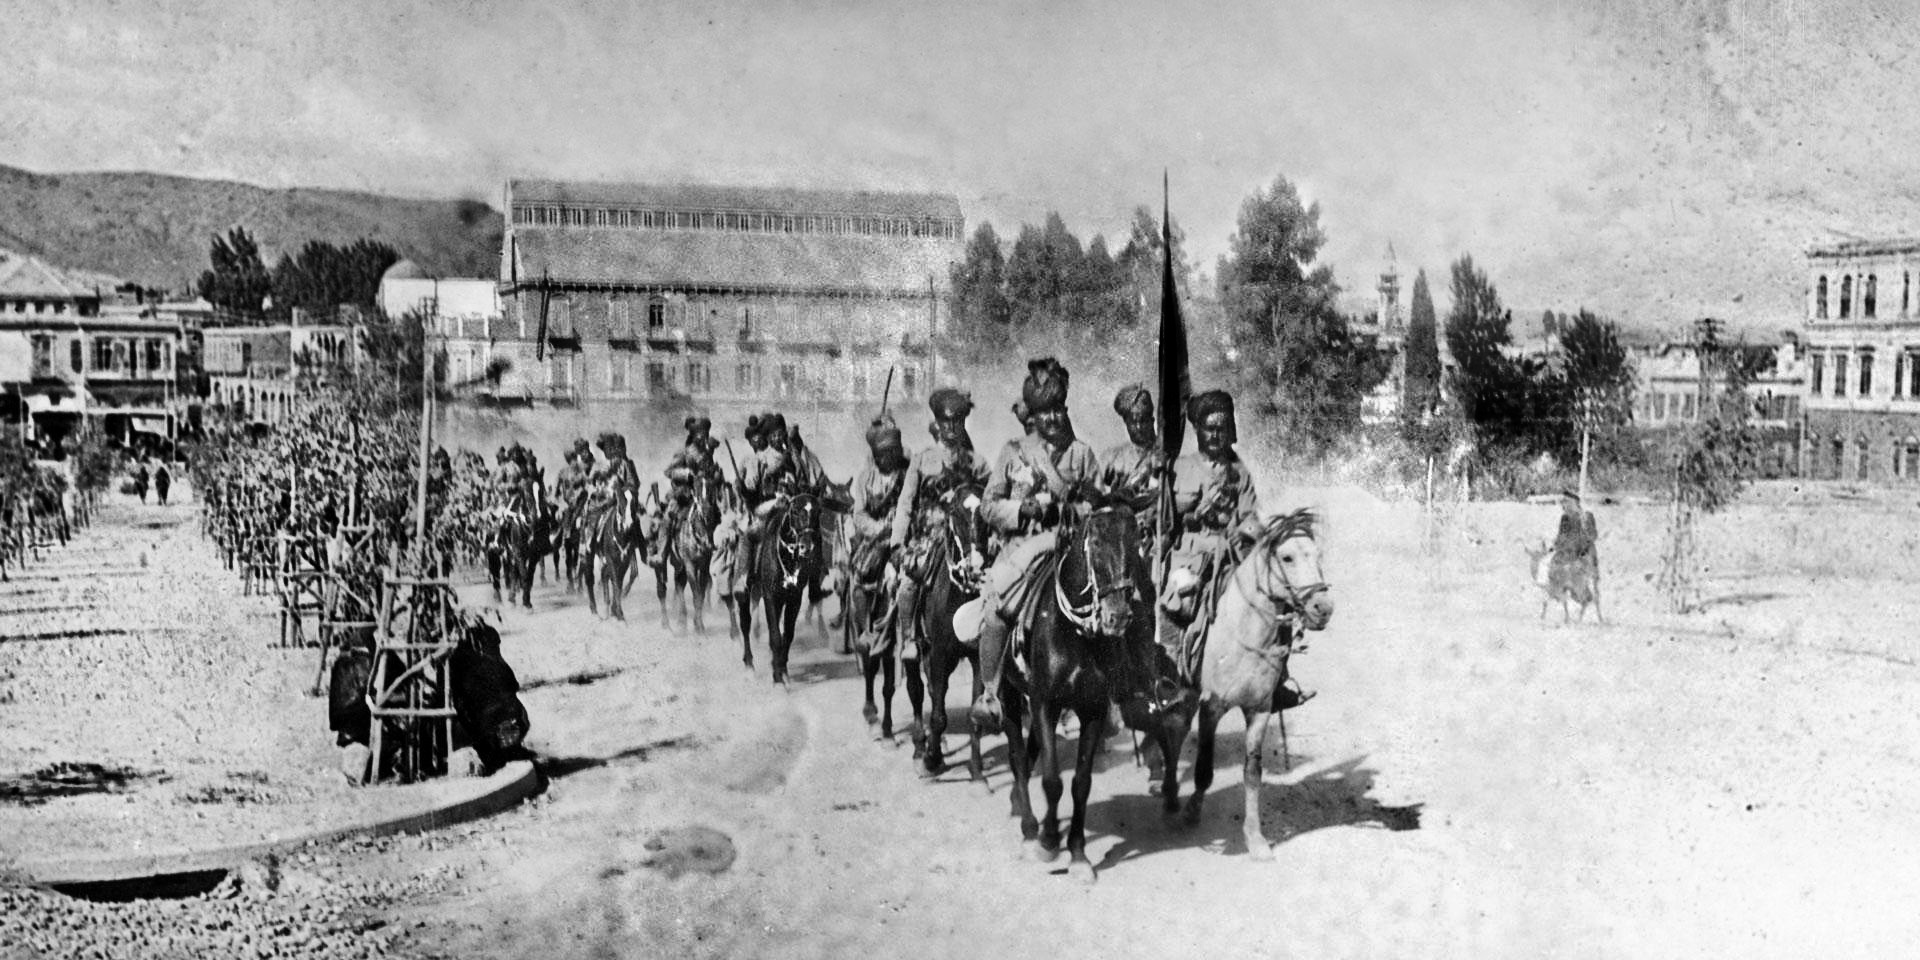
When hostilities resumed in September 1918, the DMC was without the camel units that had formerly been part of Chauvel’s command. It now relied on troops from Britain, Australia, New Zealand, and India. The Indian soldiers were used to a similar climate, and the corps was dominated by the Indian troops of the 4th and 5th Cavalry Divisions. Allenby’s infantry had learned to fight in highly mobile cavalry campaigns such as Beersheba the previous year, which had involved the four divisions of XX Corps and two divisions of the DMC, and in exercises organized by Allenby during summer 1918.
Physically fit and now experienced in this kind of warfare, the mounted divisions were highly trained and groomed for battle. Other nations, too, were part of the Allied army, including a South African field artillery brigade and the French Regiment Mixte. Even Palestinian volunteers made their presence felt, with a significant number joining the 38th and 39th battalions of the Royal Fusiliers.
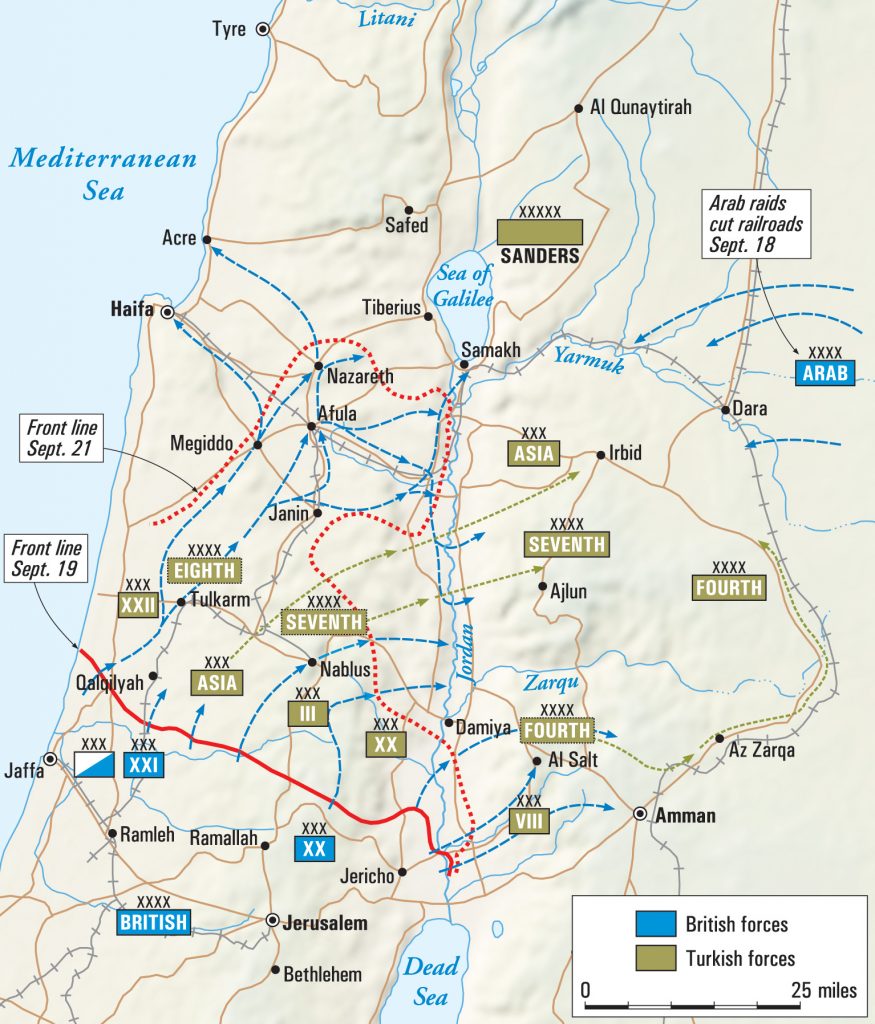
Because of the wide geographical spread of the troops, the military struggle for Megiddo comprised two distinct engagements, at Sharon and Nablus, rather than a single battle. One key action was the cavalry advance past the ancient site of Megiddo on the night of September 19-20, giving its name to the whole action.
In October 1914, German warships attacked Black Sea ports, thereby bringing Russia into the war. The entry of Russia subsequently compelled Britain and France to declare war on Turkey. Turkey had been neutral but decided to throw in its lot with the Central Powers; the Ottomans believed that Germany would be victorious over the Allies.
The Turks launched an attack on the Suez Canal, which was under British protection, in 1915, but the Ottoman Empire failed to make much progress. In the course of the fighting, the Turks lost 2,000 troops. Broken railway lines and the significant geographical expanse of the Sinai remained major impediments to both the Turkish and British forces. Poor roads added to their problems, yet military operations in and around Palestine continued, involving the Senussi Muslim sect. A revolt by Arab tribes against the Turks, drawing on the initiatives of Colonel Thomas Edward Lawrence, captured the railhead across the Sinai. In summer 1917 the Allies planned to launch a major campaign in the region against the Turks.
Opinion in the British government was divided between those who considered that fighting the Central Powers on the Western Front was the only way to victory, and those, including British Prime Minister Lloyd George, who pinned hope on the defeat of relatively minor powers such as the Ottomans. General Sir William Robertson, head of the Imperial General Staff, apprehensive about starting a new offensive on the Western Front, appointed Allenby and sanctioned a plan to capture Gaza.
Important archival evidence reveals that the British and Allies sustained relatively few casualties in the campaigns that unfolded in late 1917 and early 1918, whereas the Ottomans lost 25,000 men. British and Allied losses were 5,000 combatants, proportionately not nearly as disastrous as the huge numbers perishing on the Western Front. In the months leading up to the Battle of Megiddo, the British War Office invited Allenby to launch a major attack on the Ottomans in the autumn, but offered no reinforcements and expected him to draw on the military resources already at his disposal.
Turkish losses in 1917 set the stage for the British victory at Megiddo. Allenby spent summer 1918 consolidating his forces’ positions and made sustained efforts to reinforce and organize his army, despite opposition from the War Office. Effective coordination spearheaded by Allenby ensured that his troops received training for the desert conditions and were ready to engage in an autumn offensive. He also improved the British defenses and communications facilities.
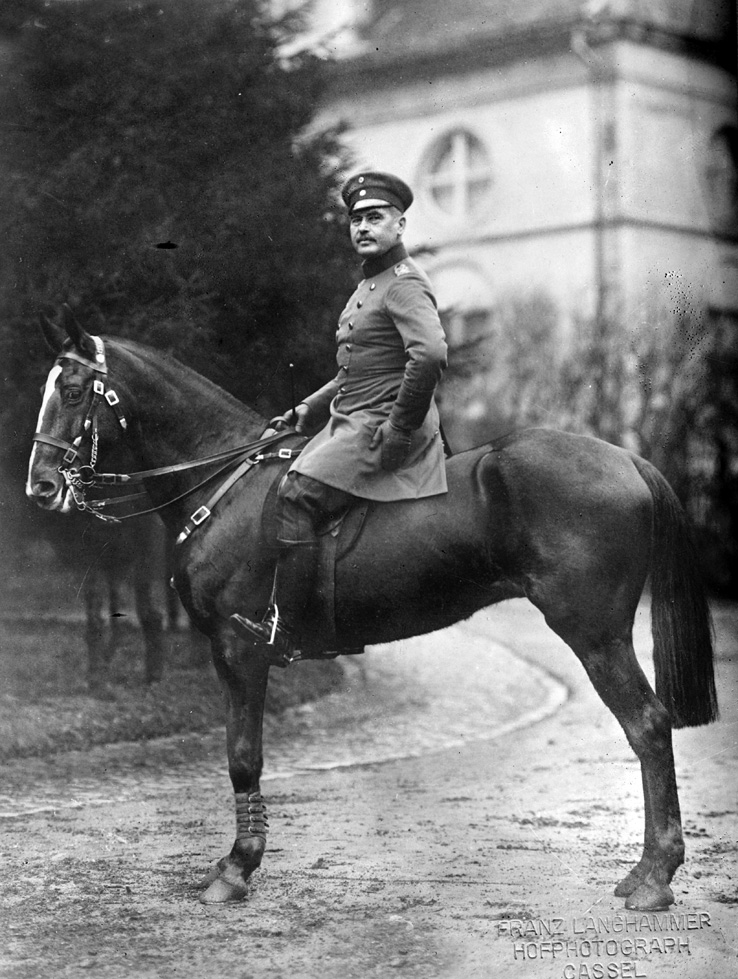
The Turks, under German General Otto Liman von Sanders, commander of the Yildirim (Thunderbolt) Army Group, assembled during the same period three armies totalling 34,000 men. The Seventh and Eighth armies were positioned west of the Jordan River, and the 4th Army was deployed east of it.
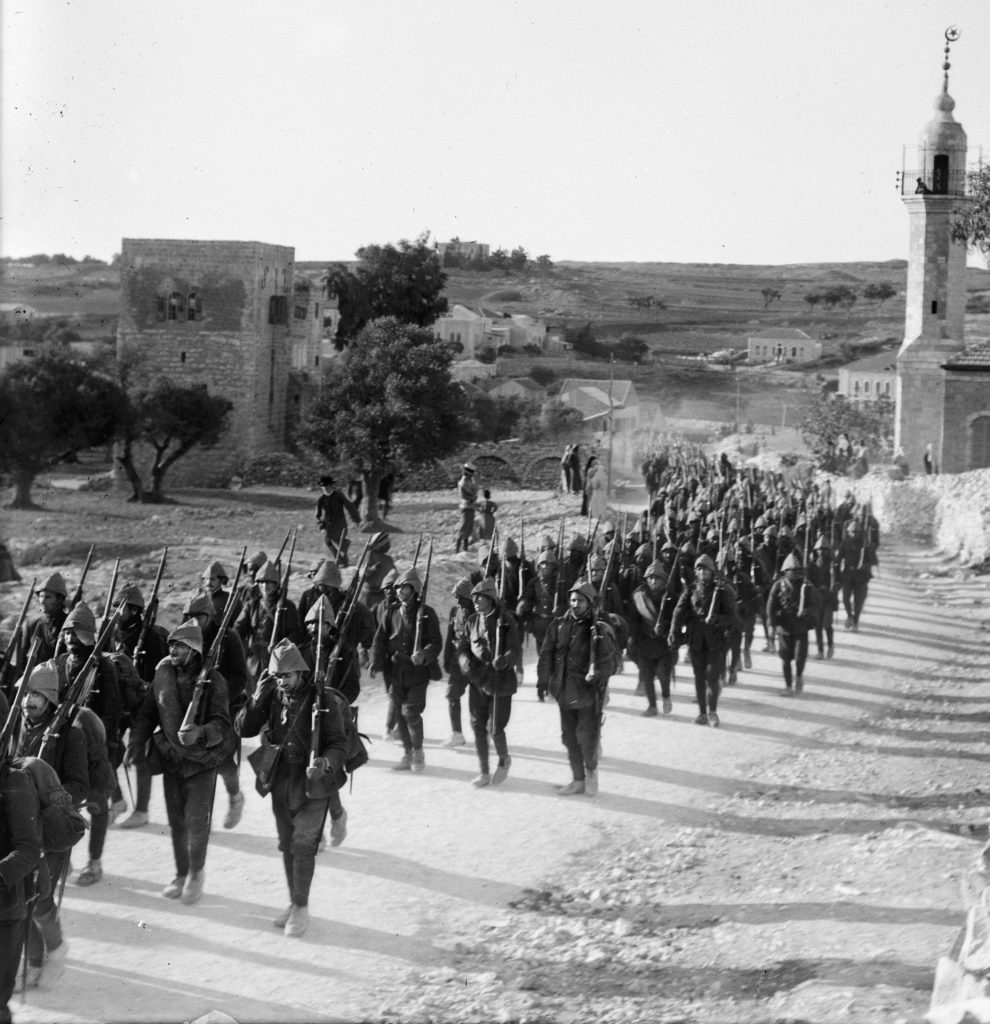
Where the Turkish armies could access a rail network, coal and wood to fuel the trains was in limited supply; the crews often were forced to rely on anything that would burn. The overall state of the Turkish army was poor, even though it had time to rebuild during the months when military action in Palestine had been suspended. This can be partly explained by Enver Pasha, the Turkish war minister, diverting Turkish forces to seize the Baku oil fields, and also partly by shortage of materiel at this stage in the war.
Turkish military readiness was also lower than it might have been owing to the casual approach to army life Ottoman officers displayed, a situation made worse by high rates of desertion among Arab conscripts. Communications in the Ottoman armies were poor, and they received little help from an unreliable telephone system and a railway network that covered only a small portion of the field of conflict and functioned poorly at best owing to the shortage of fuel. Trucks were still somewhat rudimentary, and the Turks had few of them; vital equipment shortages in general limited the ability of the Turkish army to function optimally.
Liman von Sanders was descended from Jewish ancestors and had been appointed head of the German Military Mission to the Ottoman Empire in December 1913. He was frequently at odds with his colleagues, as well as with the German ambassador and the Turkish ministers. Yet he was judged to have performed creditably during the Allied landings on the Gallipoli peninsula, where he had commanded the Ottoman defense. Some similarities between Allenby and Liman von Sanders were evident: Neither would tolerate any form of incompetence among their subordinates, and both had high credentials in the leading of cavalry.
With 69,000 men at his disposal, 12,000 of whom were cavalry, Allenby planned to launch an offensive along the coast in the west on the Plain of Sharon, where the landscape was particularly suited to mounted operations. He aimed to knock out the Turkish army at the first opportunity and prevent any possibility of retaliation, preparing his plans to the utmost detail. Allenby’s strategy was bolstered by the assistance of the newly renamed Royal Air Force. Its primary role would be to destroy Liman von Sanders’ telephone connections and damage communication between the command structures within the Turkish army.
To gain an additional advantage, Allenby did his best to deceive the Turks into thinking that the main attack would be initiated in the east. In the Jordan Valley, the British simulated the presence of men belonging to the main force, using wooden horses and dummy equipment made of canvas. The Allied infantry and cavalry units stealthily moved to the coast and hid in camouflaged tents and linen shelters to conceal their presence from German aircraft.
The ploy was to move supplies and military personnel at night, deploy phantom forces, and use donkeys to kick up dust to exaggerate and heighten the extent of activity. Allied forces in the sector consisted of the mounted division from the Australian and New Zealand Army Corps—which gave the appearance that most of Allenby’s force was in the Jordan Valley—and the Australian Flying Corps, which maintained a superiority in the air and so succeeded in preventing aerial observation of Allied troop movements. Action in the Jordan Valley on September 17-18 gave further credence to the deception. Secrecy was vital, and knowledge of the deception was confined to Allied commanding officers and those immediately involved in the operation.
Nearer the coast, Allenby was able to muster a clandestine force to confront the Ottoman XXII Corps. The plan was to launch an attack from this region on the coastal plain on September 19, 1918. Allenby’s army, by contemporary accounts, was highly motivated and physically and mentally strong.
It is surprising that Allenby’s strategy was not exposed to the Turks. A soldier of the 7th Indian Division was captured on September 17 and revealed details of the deception, but Liman von Sanders, to the relief of Allenby, was convinced that the solder was a plant and intended to deceive the Ottomans. This failure to believe what the captive had revealed meant that in the coastal sector, the Turkish infantry and cavalry were outnumbered by 10 to one.
On the night of September 18-19, the RAF unleashed a bombing raid on Afula, destroying many key Turkish positions with the result that, at the outbreak of hostilities, Liman von Sanders was unable to communicate with his armies. At 04:30 am on September 19, the full weight of the British and Allied artillery launched a major bombardment of the Ottoman army, dispatching 1,000 shells per minute and concentrating its fire on the area chosen for the military breakthrough. The greatest impact came from the howitzers, with one type using 100-pound shells having a range of 11,000 yards.
The barrage only lasted for 15 minutes, though the bombardment was the heaviest launched in any theatre of World War I. At 4:45 am, four divisions of British and Indian infantry began advancing towards the Ottomans along the coast on the Plain of Sharon, and only the 75th Division met with notable resistance. The Turkish artillery did attempt to fight back, but it had almost no effect since their guns fired only upon unoccupied trenches. The failure of the artillery to get better results was surprising, given the esteem in which this arm of the Turkish forces had previously been held.
Following the Turks’ inept response, the DMC moved into the gap that had so effectively been opened by the infantry, dividing and disorienting the Turks, whose position was further compromised by a breakdown in communications. Many of the Turkish troops offered no resistance at all, often surrendering in vast numbers. The Allied infantry quickly broke the Turkish lines, and the Plain of Sharon provided the cavalry with an excellent opportunity to advance rapidly. The Turks were forced to retreat, first to Tul Keram and then east to Messudieh Junction.
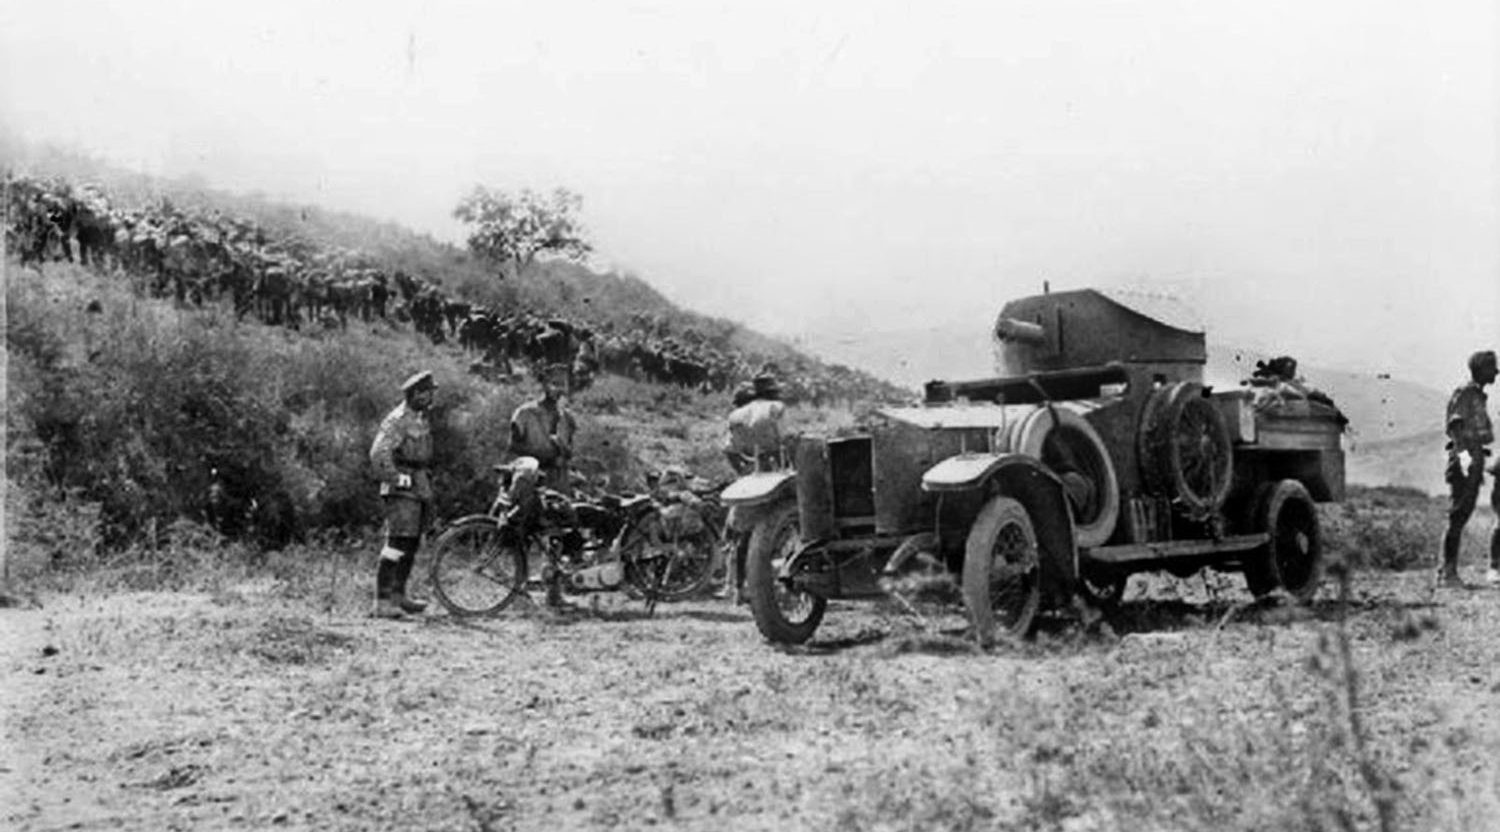
At this point, the Arab rebels entered the fray. Forming what was referred to as an irregular army, the rebels were led by the Emir Feisal and Colonel Lawrence. These Arabs harbored an intense hatred of the Turks, and the feeling was mutual. The Arab force received support from a British mechanized force, including a Light Car Patrol and two Talbot trucks, and from a small French detachment. Alongside Feisal and Lawrence was the small Arab regular army, led by Ja’far Pasha el Askeri, which consisted of infantry, a camel battalion, and military armaments. These Arab forces contributed to the rout and combined with the Allies to scatter and overwhelm the Ottoman soldiers.
The Allied operation was further aided by the actions of the Australian 5th Light Horse Brigade and the New Zealand Mounted Brigade, and the Turkish losses were made worse by RAF aerial attacks. The advance became more rapid, and by the end of the first day the cavalry had covered 21 miles. By the time they reached Megiddo, the Allies encountered no opposition, as the Turks had abandoned this area. Resistance was minimal, and where the mounted force did come across resistance, their enemy was lanced to death.
The Ottoman Fourth Army in the Jordan Valley was oblivious to the destruction being inflicted on the western coast, but news of the defeat eventually became spread by escaping refugees and scattered forces retreating from the west. The British and Allies found themselves in a commanding position only 24 hours after the Battle of Megiddo had commenced. Liman von Sanders, based in Nazareth, was aghast to be roused from sleep by the sound of the British 18th Lancers arriving and forced to flee in his pajamas to avoid capture. Accompanied by only three staff officers, Liman von Sanders made his way to Samakh, where he set up a temporary headquarters.
The 18th Lancers subsequently overran a large Turkish barracks, while the Gloucester Hussars, part of the British Fifth Mounted Brigade, sought to take the northern part of Nazareth. At 04:25 am on September 20, they besieged the town. Most of the stunned Germans and Turks surrendered, though a minority decided to make a stand and a few German headquarters clerks desperately attempted to burn incriminating documents—only to be wiped out by the invading force. When arriving at the south of Nazareth, a squadron of the Lancers encountered a convoy of Turkish trucks, which they seized. One vehicle was found to be transporting £20,000 worth of gold (nearly £800,000 in today’s money).
Allenby deeply regretted the news that Liman von Sanders had escaped. Brig. Gen. Philip J.V. Kelly, in charge of the 13th Cavalry Brigade, had been personally charged with arresting Liman von Sanders, and failure to do so practically cost him his job. Liman von Sanders returned to Nazareth and attempted to lead his forces, which were at this stage in considerable disarray.
Turkish fatalities were substantial by late morning, and the British had succeeded in capturing 1,000 Turks. In contrast, British forces reported relatively few losses. By early afternoon Liman von Sanders had given up hope of retaining Nazareth and set off towards the Sea of Galilee.
Colonel Henry W. Hodgson, the acting major-general in charge of the Australian Mounted Division, gave orders at 3:50 pm for the 3rd Light Horse Brigade to cut off fugitives who were retreating northwards from Jenin to Afula. The 10th Light Horse Regiment rapidly advanced and, when three miles from Jenin, came across 1,800 Germans and Turks, who offered no resistance and surrendered as a group.
Allenby’s strategy had gone according to plan. He had been able to hide the movement of his infantry divisions and artillery to the coastal plain, and as soon as a gap appeared, he had sent in his mounted force. His offensive was a hammer blow to the enemy so severe that the Turks were unable to launch any kind of effective retaliation. The British forces had excelled, and the Turks fallen well short of displaying the kind of military abilities that had been evident in the Gallipoli campaign they had won.
One substantial weakness was that in the trenches, Ottoman troops failed to maintain hygiene, and this meant that rates of dysentery and related illnesses were exceedingly high. Liman von Sanders’ cavalry was considerably outnumbered by the DMC and, though not short of motivation, had received inadequate training and lacked experience; hence, it was not sufficiently aggressive. Little meaningful liaison among the Turkish cavalry apparently took place, and this, too, led to inefficiency and poor performance.
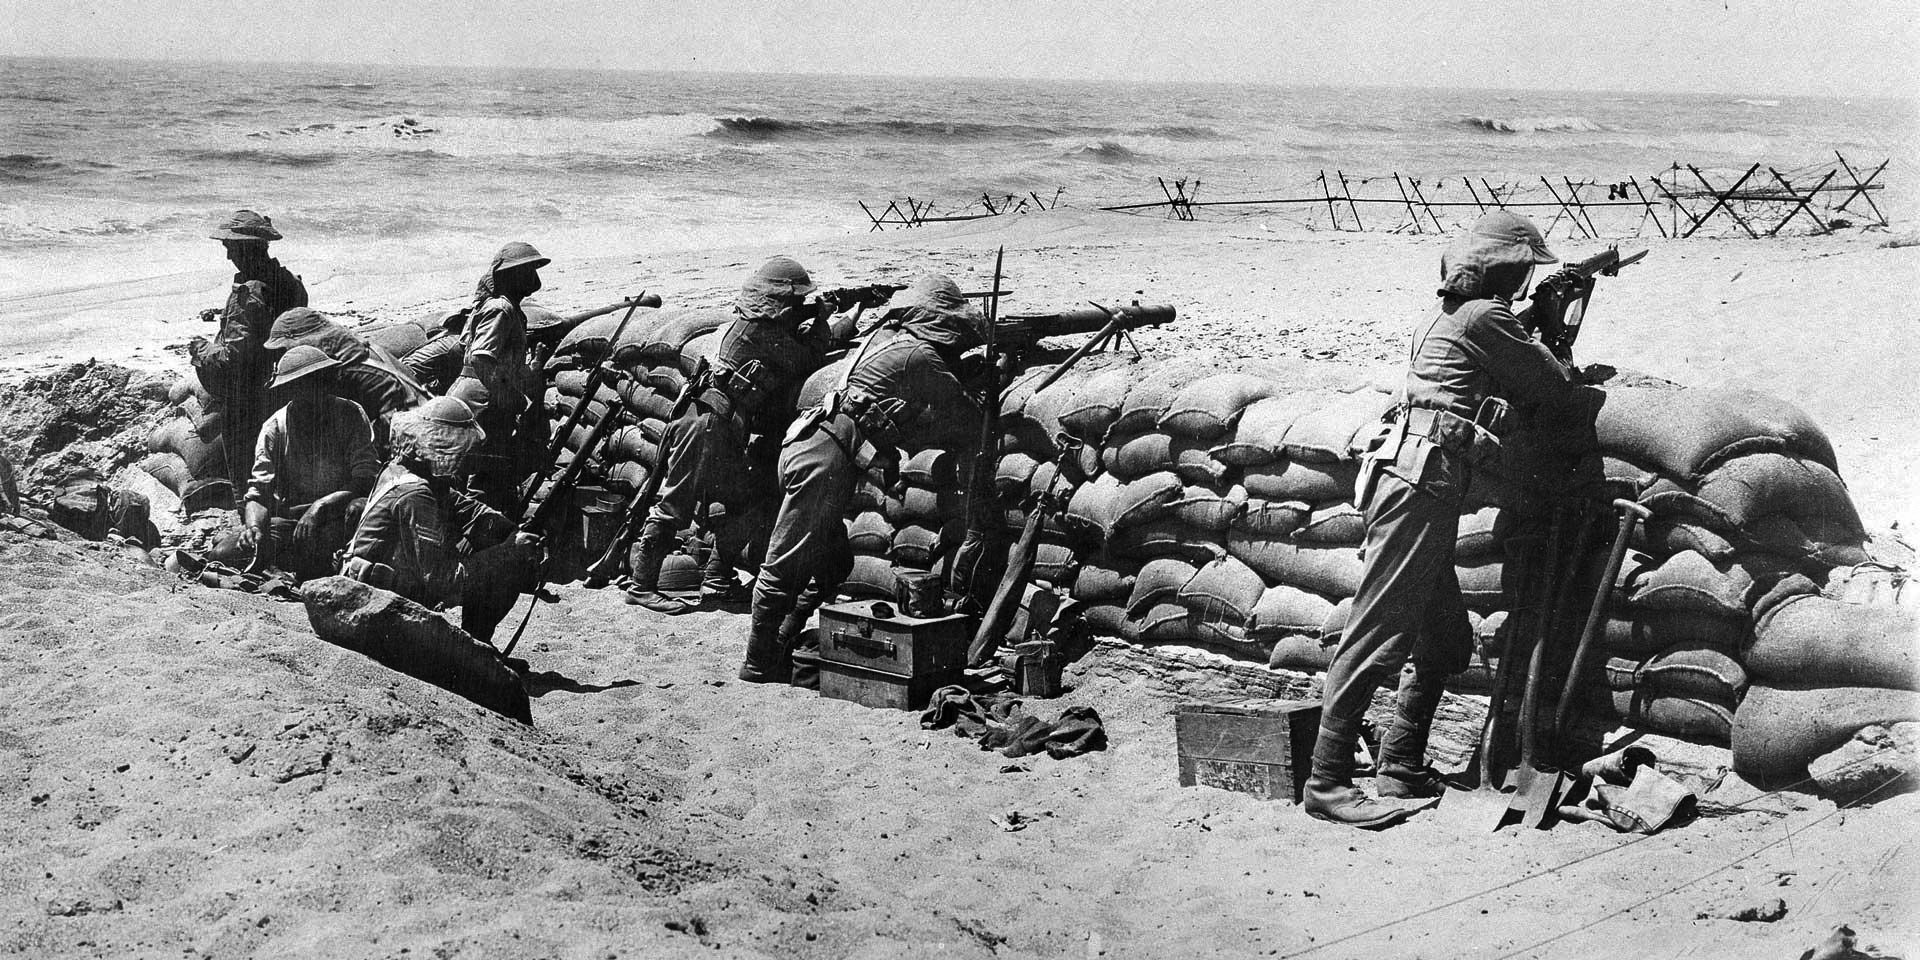
Wherever Allenby looked, there was evidence of victory for the British and their allies. The Turkish XXII Corps, which had been positioned near the coast, was completely defeated. The corps’ commander wandered aimlessly behind British lines and only made it to Tyre just before the town was captured. Pockets of Turkish resistance, such as the stand at Nahr Falik, were few and far between and were quickly overrun.
Nor had the Germans lived up to the strengths normally attributed to them. The German Asia Korps was significantly better equipped and organized than the Turkish infantry and so were able to some degree to bolster the Turkish forces. However, during the retreat from Nablus, some observers considered the Germans’ fighting strength to have been little better than that of the Turks. Neither force could match the physical capabilities of the British and the Allies. Allenby had seen the importance of mobility, while Liman von Sanders, conditioned by his experience at Gallipoli, was convinced that standing ground was the secret to military success.
The stamina of the Allied cavalry was evinced by the 40-mile northwards advance, which was achieved in 25 hours. High standards of horsemanship were apparent and guaranteed the success of the mounted corps. This was especially true of the Indian cavalry, which tended to be more agile and leaner than its British counterparts. No less were the achievements of the French, and indeed the Regiment Mixte showed particular skill in its dynamic capture of an Austrian battery position 2,000 yards north of Tul Karm.
The great distances the horses could travel gave the DMC a distinct advantage over infantry, and at close quarters the lancers could inflict severe injuries or fatal wounds. Fugitives from Tul Karm fleeing along the road to Nablus were chased and cut down and at the same time bombed and fired upon from the skies. The British captured vast supplies of food and water, rifles and machine guns, and military vehicles from the Turks and Germans. One soldier of the Gloucester Hussars single-handedly captured 37 wagons, four officers, and 100 men.
The Australian Light Horse Regiment, which covered 11 miles in 70 minutes despite their horses being in a state of near exhaustion, met a significant number of Turks about three miles from Jenin, but as the Ottomans and the few Germans with them were taken by surprise, they surrendered without any resistance. Much booty was found, mainly stocks of food and supplies, including 120 cases of champagne. Before the arrival of the first brigade, much produce had been set alight to avoid it falling into the Allied hands.
Over the course of the day, some 8,000 Turkish prisoners streamed into Jenin. By this stage, the role of the British infantry had virtually come to an end. As the day progressed, the British cavalry denied the Ottomans and Germans any cut-off routes to the north.
The almost total exhaustion of the horses mandated respite for them. They were given water and rest, but not for long, as Allenby estimated that the Turks might be planning to make a last stand in the Samarian Hills. However, the extent of the destruction of Turkish forces meant that any counterattack would prove fruitless, and any turnaround became impossible once the coastal sector had been penetrated and the British cavalry were advancing northwards.
On September 20, the Allied XX and XXI Corps successfully confronted the Turkish Seventh and Eighth armies, which did not manage to present much resistance. The rapid defeat led to the surrender of tens of thousands, who were in a state of panic and debility. More effective was the German Asia Korps, which by contrast was more able to withstand the pressures meted out by their enemy. Meanwhile, Kelly’s 13th Cavalry brigade pressed on into the Samarian Hills on land so rough that the riders were at times forced to dismount and lead their horses on foot.
September 21 was a comparatively calmer day. Nablus was overrun by the Australian 5th Light Horse Brigade from XXI Corps. Brig. Gen. Mustafa Kemal Ataturk, commander of the Turkish Seventh Army, decided to evacuate the remaining Ottoman troops. The Allied airplanes unleashed an attack that resulted in almost complete annihilation of the Ottomans. Miles of burned-out equipment and vehicles littered the retreat. The British attempted at times to press the abandoned booty into service, but reusable assets were hard to find. Surprisingly, the Turkish death toll was not as high as Allenby had predicted, yet wherever the Turks attempted to escape to the hills they were soon found and added to the masses of prisoners. On the morning of September 22, Allenby—feeling very satisfied at the success of his army—entered El Lajjun with the order that the losing enemy be chased to Damascus and that the port of Haifa be captured.
Further Turkish casualties resulted from British and Australian aircraft bombing Tul Keram on September 23. The inhabitants fled in confusion. The British cavalry, advancing rapidly northwards after their inroads into the coastal west, captured large amounts of land, eventually encircling the Seventh and Eighth Armies, who had little choice but to plead for surrender or commit themselves to what was seen as suicidal resistance. By noon of September 23, the Ottoman Seventh and Eighth armies had “virtually ceased to exist,” according to British archival records.
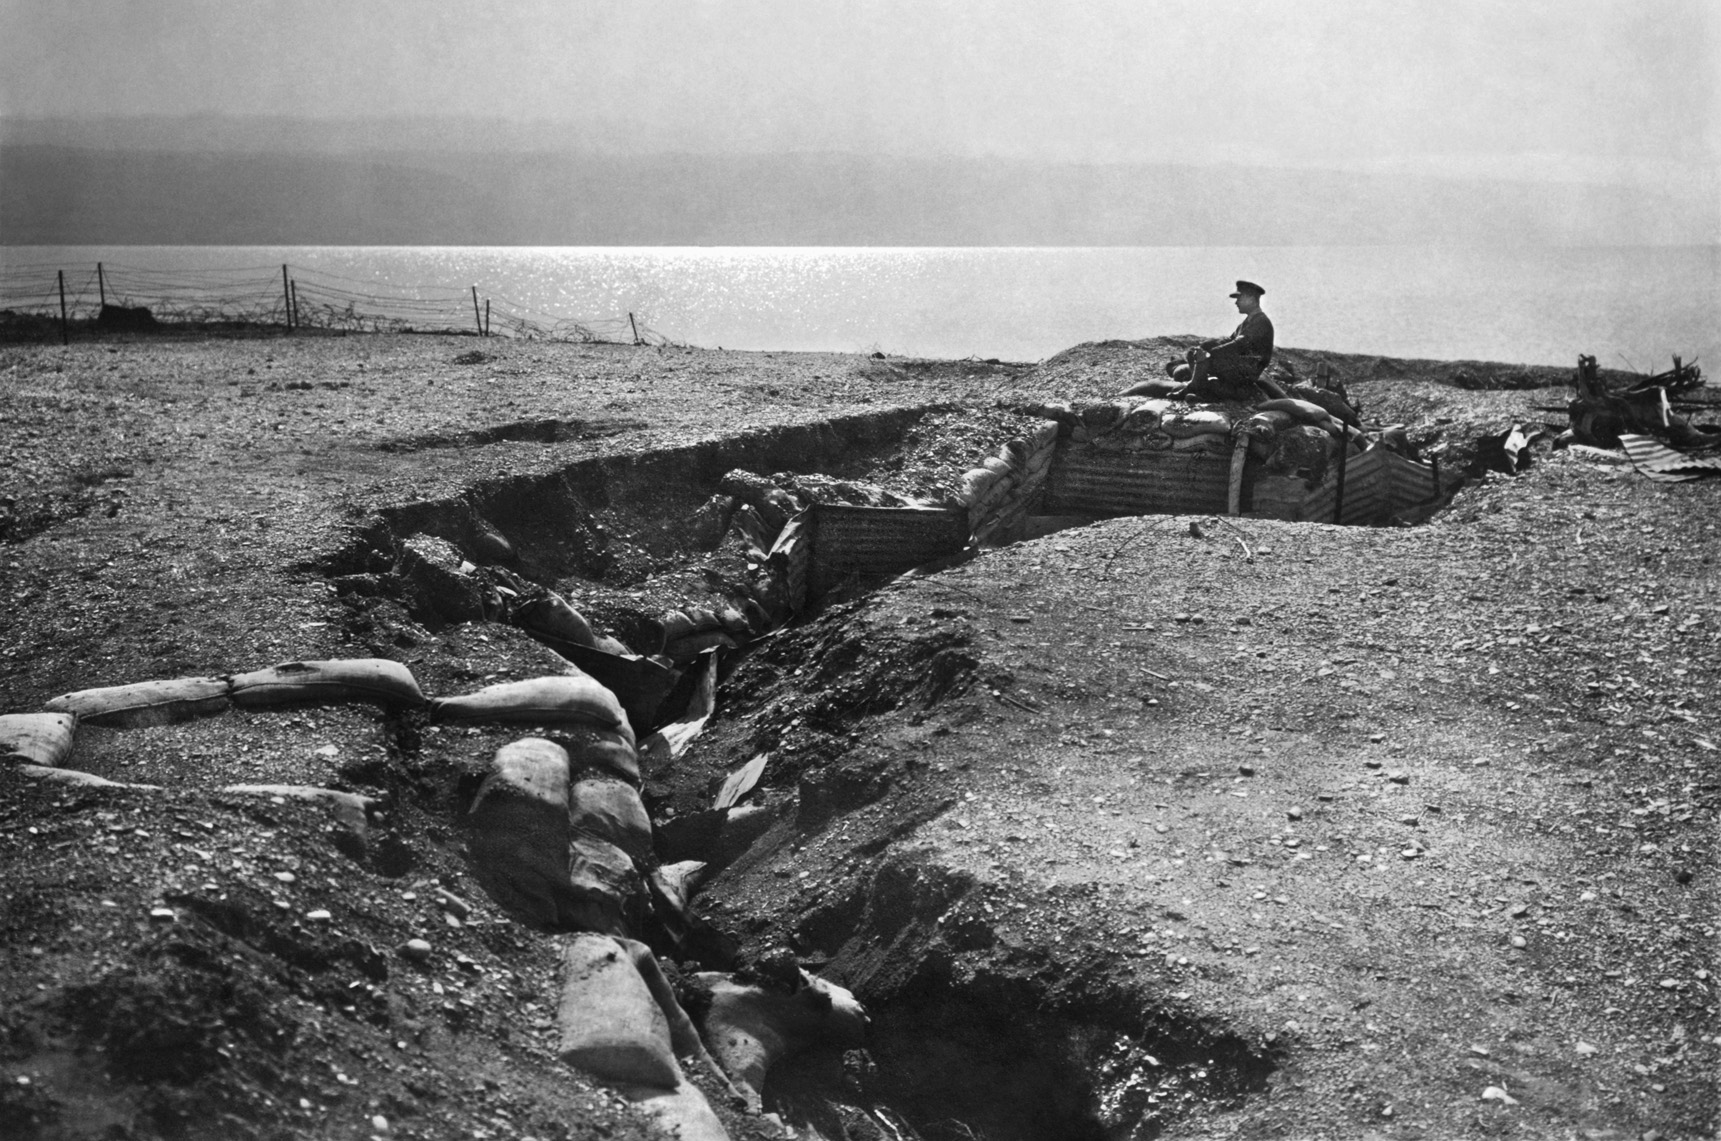
These Allied successes contrasted with the failures on the Western Front in Europe, where the military forces had remained virtually static for four years. Trench warfare was less common in Palestine, where the swift movement of mounted men and infantry characterized the campaign.
Chauvel then ordered the 5th Cavalry Division to capture Haifa and the port of Acre. With the capture of these towns, victory was complete. The taking of Haifa was essential so that supplies could be unloaded. Little opposition was met at Acre, but Haifa, attacked by troops under Brig. Gen. Cyril R. Harbord, proved more troublesome. One possible explanation for this was that a sizable Indian cavalry unit, the Hyderabad Lancers, was diverted from a fighting role to escort prisoners. Even so, the overall surge of cavalry to the north is best described as a tour de force, and the speed with which the mounted forces pressed forward was unrelenting.
The Mysore Squadron of the DMC made a considerable contribution by storming Mount Carmel. The heroic ascent of Mount Carmel took place under enemy fire from above, complicated by the lameness of the exhausted horses. After the fighting had ceased, only 15 of the cavalrymen had survived the ascent. Surprisingly, these men overran their opponents in the midst of machine-gun fire and over rocky terrain. They captured military equipment in the process, including a 150mm gun, and rounded up 78 prisoners.
Further military action led to an operation to seize the remaining fords across the Jordan; the Turks incurred significant fatalities and the capture of 9,000 more prisoners. Although the Turkish Seventh and Eighth Armies had been obliterated on September 25, even at this late stage of the battle the Allies carried out their most aggressive assaults of the week. The Australian squadrons made a considerable contribution by punching through enemy defences on the eastern bank. Eventually, the exchange of gunfire fizzled out. Before this occurred though, a small number of entrenched Turkish troops on the opposite bank of the Jordan, which were serving as an Ottoman rearguard, defended their position against the Canterbury Mounted Rifles, who had to dismount and clear the area at bayonet point. Again, serious carnage was avoided by large-scale Turkish surrenders, with 2,500 prisoners taken by the British and Allies. A large part of Palestine, with the exception of Samakh, was now under British control. Liman von Sanders pinned hope, perhaps irrationally, on some kind of reversal of fortune at Samakh, where he could count on some support from German machine gunners.
Lieutenant R.R.W. Patterson brokered a particularly impressive surrender by convincing the Turks that his forces were far greater than they actually were. The outcome was almost beyond belief, for 2,800 men surrendered to just 23 Australians. During the course of the battle, the number of Turkish prisoners increased to 25,000. Allenby switched his attention to Transjordan, deploying the New Zealand Mounted Brigade, whose determined efforts quickly secured Salt and Amman. The battle was drawing to a close. With the rest of the Turkish Fourth Army unable to function in any meaningful way, Allenby, with renewed vigour, planned the complete expulsion of Turks from Palestine.
These cavalry operations are some of the most celebrated in the history of warfare. The effectiveness of the British artillery and infantry was outstanding, and Allenby’s advances were practically unknown in terms of the amount of territory captured and their lightning speed. Although the role of the infantry following the bombardment had been exceptional, the part played by the cavalry cannot be overemphasized. The use of cavalry by the British in military campaigns was declining, yet the advent of war in Palestine provided one final opportunity to exhibit its strengths. By contrast, the Turkish cavalry were ineffective and demoralized.
The Turks had outnumbered the British, but the latter had far better means of communication—particularly the railway network they could employ, which extended from the Sinai desert to Rafah and Jaffa. In the wake of the end of hostilities in the Battle of Megiddo, Allenby was given no definite operational orders; however, he was mindful that an advance on Damascus was a move that was both desirable and obvious.
Allenby ordered the DMC to proceed to the Sea of Galilee. Concerns that the corps would run out of resources were allayed when it managed to requisition supplies en route. The men of the DMC were highly confident, and their subsequent victory was arguably one of the most effective operations by cavalry in recent history. The victory was decisive, and the number of men lost in action was exceptionally low in contrast to the millions of soldiers who died on the Western Front.
The clash at Megiddo had virtually destroyed the Seventh and Eighth Ottoman armies west of the River Jordan, and any counterattacks proved to be futile. In the wake of Great Britain’s decisive victory, Damascus was eventually captured in a relatively straightforward operation. The main assault leading to the capture of Damascus was launched on the morning of September 27. Making their way up the Golan Heights, Australian troops arrived at Kuneitra in the afternoon of September 28.
On the morning of October 1, the Allies reached Damascus; by October 6, action had generally died down. The vanquished Turks signed an armistice on October 30, which would not have been conceivable before the crushing Allied victory at Megiddo. In the five weeks since its beginning, Allenby’s troops had wiped out three Turkish armies, taken 76,000 prisoners, and advanced 350 miles. In addition, the victors took possession of vast stores of weapons and supplies.
Despite the Allied prowess and undeniable distinction that led to such a victory, the Ottoman army was undeniably hamstrung by logistical shortfalls. The Turks did a commendable job of persevering in the face of such operational poverty and shoe-string resources, although their demise in the face of Allenby’s relentless attacks was inevitable.
The diversionary tactics and the RAF operations were outstanding, and these made major contributions in destroying the Ottoman lines of communication to divisional headquarters and, in some cases, between the headquarters themselves.
Allenby was not free of constraints. Indeed, he had more than his share of administrative glitches. Moreover, the weather did not always favor his plans for attack. In addition, London was not always accommodating: The War Office demanded that he knock Turkey out of the war but denied him the forces he requested to accomplish it. It was to Allenby’s credit that he managed to do so. As a result of his single-mindedness and perseverance, his legacy after the Battle of Megiddo was garlanded in victory and triumph.