By Jon Diamond
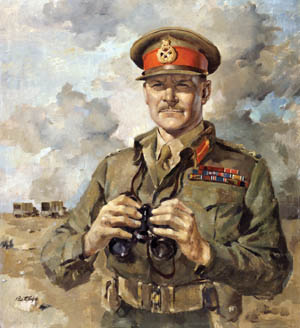
Brigadier Eric Dorman-Smith, serving as a liaison to Lt. Gen. Richard O’Connor during Operation Compass, the Western Desert campaign, traveled to General Archibald Wavell’s Middle East Command headquarters in Cairo on February 12, 1941, to seek permission to advance British XIII Corps farther west to Tripoli after the total victory over the Italian Xth Army at Beda Fomm, which gave Britain and her Commonwealth Allies control of the Cyrenaican half of Libya.
In Wavell’s office, Dorman-Smith curiously found that the maps of the Western Desert no longer hung on the walls. Instead, they had been supplanted by those of mainland Greece, Crete, the Dodecanese Archipelago, and southeastern Europe.
Rather than granting permission for a continued assault against Tripoli, Wavell informed Dorman-Smith about the upcoming Greek expedition: “You find me busy in my spring campaign.”
On February 10, Churchill’s War Cabinet had ruled out any possibility of continuing the advance to Tripoli. Wavell was directed to give first and foremost priority to assisting Greece. After the war, Wavell stated, “Having not one single complete formation available, I had to provide for the defence of Crete, the restoration of the situation in Iraq, and for a possible commitment in Syria. The German attacks on the [Corinth] Canal which began in February caused a fresh commitment, since large numbers of observers were required to watch for mines dropped in the Canal.”
As background, on October 28, 1940, Italy invaded Greece without coordinating with Germany. England immediately promised assistance to Greece and, on November 6, Churchill announced the establishment of airbases and port facilities on Crete.
Since October 24, 1940, German Air Staff officers had noted the possible British interest in establishing a base on Crete for use by the Royal Air Force’s Bomber Command for employment against German-controlled Romanian oilfields. On October 26, a German Navy representative recommended the capture of Crete in the course of the Balkan campaign.
With these two briefings, Crete had become more important. To the Germans, the strategic importance of Britain’s possession of Crete was related to British dominance of the Eastern Mediterranean, a jumping-off point for landing on the Balkan coast and waging attacks against Ploesti.
Capturing Crete was a necessary German block against these British threats. It was doubtful, however, that the RAF would have stationed major bomber formations on Crete to attack the Romanian oilfields, which were more than 1,000 miles away. The unescorted Wellington bomber had the range but the Lufwaffe’s fighters in Greece would have presented a grave threat to these unescorted bomber squadrons.
Notwithstanding, on April 25, 1941, Hitler issued Directive No. 28 for Operation Merkur, the code name for the seizure of Crete, with an execution date of the middle of May. The task of planning the mission fell to the commander of XI Fliegerkorps, General Kurt Student.
The mission’s objective was to establish a base for the air campaign against the British in the Eastern Mediterranean. Essentially, the directive stipulated that Operation Merkur must not delay staging operations or in any way jeopardize the coming invasion of the Soviet Union, Operation Barbarossa. The German invasion of Crete would be the only operation during the war in which an expansive strategic target was attacked and secured by airborne assault alone.
On April 17, 1941, Churchill gave Wavell permission to withdraw Lt. Gen. Henry “Jumbo” Wilson’s imperial forces from Greece. At this time, Wavell cabled London stating that Crete would hold. The Allied evacuation ended on April 30 with approximately 25,000 troops being shipped to Crete, and Wilson left for Jerusalem to command the Baghdad relief mission. An additional 16,000 imperial troops were brought to Egypt by the Royal Navy, but not before many British troops were taken prisoner in the Peloponnese and every major piece of equipment was lost. The following day, May 1, the Luftwaffe began its aerial bombardment of Crete.
The deployment of strong air force elements to the Balkans and to Greece, as well as the parachute assault conducted by elements of the 7th Flieger Division at the Isthmus of Corinth on April 26, 1941, unmistakably told the British that Hitler was targeting Crete. When XI Fliegerkorps began to move from northern Germany across the Balkans, German intentions were confirmed.
By May 12, the British intelligence network left behind in Greece reported to London, Cairo, and Crete every movement of German forces. Ultra intercepts completed the intelligence gathering.
On May 15, Churchill publicly announced the British intent to defend Crete in order to gain a favorable influence in the “overall global situation” among nonbelligerents (i.e., the United States and the Soviet Union). Thus the British War Cabinet recognized both Crete’s military and political strategic importance after the debacle in Greece. Crete could not fall to the Germans by default.
Crete’s location—160 miles south of Athens, 200 miles north of Africa, and 325 miles southwest of the Dardanelles Straits—defined its strategic importance, but Crete’s terrain made the island’s defenses difficult. A steep range of barren mountains, rising to 8,000 feet, runs the entire length of the 160-mile-long island, sloping gradually to the north but steeply to the south. This topographic feature produced the large but limited-capacity port of Suda Bay.
The British fleet in the Mediterranean was the Allies’ first defense against possible Axis attacks on the oilfields in Iran, the refineries in Haifa, and the Suez Canal, each of which was vital to sustaining of the British war effort. The naval base at Suda Bay, on Crete’s northwestern coast, provided an ideal point, although for only a handful of British ships, to base or to refuel while protecting Britain’s vital economic possessions.
Wavell was well aware that all of the island’s strategic points lay on the north coast. The lack of any port facilities on the south coast and the absence of a major north-south road to traverse the island hampered reinforcement and resupply from Egypt. Telegraphs, telephones, and transport were all primitive.
The three strategically placed airfields at Maleme, Retimo, and Heraklion were all located on the northern shore and were connected by Crete’s only motor road, which ran in an east-west direction. Maleme was at the western end of Crete with Retimo in the center and Heraklion farther to the east.
The only factor that seemed to favor Wavell’s position on Crete after the evacuation from Greece was Germany’s underestimation of his force’s strength on the island atonly 5,000 British troops.
If the island’s three airfields could be held, the British High Command believed there was a strong chance of preventing a German air landing since there were no major points other than Maleme, Retimo, and Heraklion for paratroops to seize, and their numbers were deemed to be finite.
There was a flaw, however, in British optimism. The troops evacuated from Greece, like those after Dunkirk, had brought away only their personal weapons, such as rifles and a few light machine guns. Many of the units had an ad hoc appearance and were poorly-equipped, being devoid of adequate numbers of artillery pieces, tanks, AA guns, mortars, machine guns, and transport. Many of the British, Cypriot, and Palestinian troops were from lines-of-communication units.
To demonstrate the dearth of heavy weaponry to combat an assault, only two heavy infantry (“I”) tanks had been provided for each of the airfields. Three additional Matilda tanks were being sent to the island along with a smattering of light tanks. Trenches, gun emplacements, wire obstacles, and demolitions had to be dug with steel helmets replacing entrenching tools. Above all, there were hardly any British aircraft on the island.
Whoever controlled Crete would threaten a large part of the Eastern Mediterranean—particularly important to the German plan to invade the Soviet Union. Having secured the airfields in Greece, if the Germans could also capture and use those on Crete, they could dispose of any aerial threat to the planned southern flank of Operation Barbarossa.
After commanding the New Zealanders in Greece, General Bernard Freyberg was given charge of all troops on Crete (“Creforce”) and positioned his corps headquarters near Hania, just to the northwest of Suda Bay. He had no staff or intelligence support and was forced to improvise a headquarters by using regimental officers, few of whom had any training. The result was a dearth of corps-level intelligence preparations to defend Crete. Radio and communications equipment was insufficient to adequately link each level of command or the geographically disparate garrisons defending each of the three airfields.
With intelligence from Britain, though, Freyberg had detailed knowledge of when and where the assault was to take place. When he sighted the approaching German airborne units on May 20, he remarked, “They are on time.” The German commanders found it difficult to obtain accurate intelligence about British forces on Crete, despite attempts at low-altitude flights.
Student planned for tactical surprise by attacking with paratroops and glider-borne infantry at the three airfields simultaneously while Freyberg’s defense of Crete was based on preventing enemy seizure of the Allied strongpoints: the three airfields and the port at Suda Bay.
Unfortunately, with limited transport on the island, preparations for defense and development of tactics were essentially rudimentary, leaving each of the four defense sectors wholly independent of the other without the chance of needed reinforcement at critical times.
On Crete there were, at the end of April, between 27,000 and 28,000 Allied troops, exclusive of the Greek battalions. Not all were combat troops and only a fraction—the 14th Infantry Brigade of the British 6th Division—were not evacuees from Greece. The survivors of the 4th and 5th New Zealand Infantry Brigades and the 6th Australian Division from Greece had been formed into new units.
Freyberg succeeded Maj. Gen. E.C. Weston, Royal Marines, who up to that time had been the senior officer on the island. At Suda Bay, Weston commanded the Mobile Naval Base Defence Organization (MNBDO), which was reinforced by the 16th and 17th Australian Battalions, both improvised. The Royal Marines were mostly specialists belonging to AA and coastal artillery units as well as searchlight and maintenance units.
Some 1,200 British riflemen, formed from various units along with the 106th Regiment, Royal Horse Artillery (RHA) acting as infantry, were also attached to the garrison. In October 1940, Crete possessed eight heavy and 12 light AA guns. With the arrival of the MNBDO in April and early May 1941, the total number of AA guns was brought up to 32 heavy and 36 light (of which 12 were not mobile) and 24 searchlights.
Three brigades of the New Zealand Division, under the temporary command of Brigadier Edward Puttick (replacing Freyberg), were deployed around Maleme airfield, the port of Hania, and Galatos, located south of the coast road between the two sites. The 4th New Zealand Brigade comprised three infantry battalions (18th, 19th, and 20th) under the command of Brigadier Lindsay Inglis, whose headquarters was situated between Galatos and Hania.
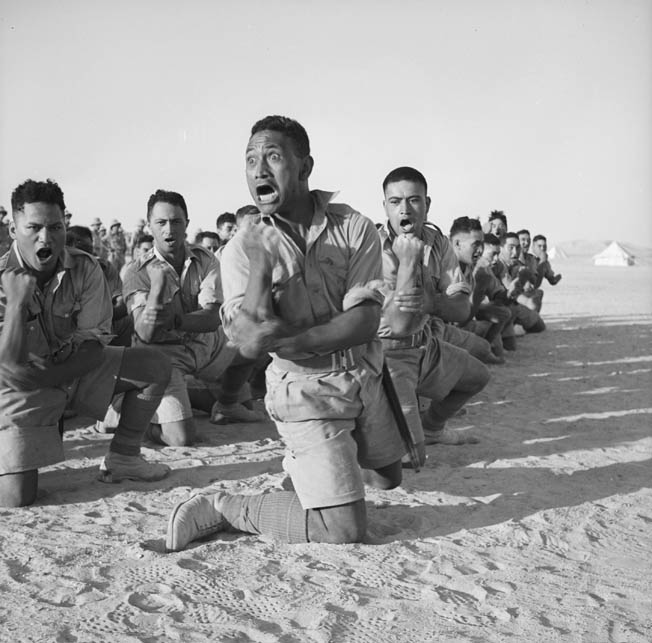
The 5th New Zealand Brigade, composed of the 21st, 22nd, 23rd, and 28th Maori Infantry Battalions, was commanded by Brigadier James Hargest with his HQ at Platanias, to the east of Maleme airfield. Of note, Lt. Col. L.W. Andrew was the commander of the 22nd New Zealand Battalion defending Maleme airfield, Maleme village, and Hill 107 just south of the airfield and to the east of the Tavronitis riverbed.
The 10th (Improvised) Infantry Brigade comprised the New Zealand Divisional Cavalry Detachment and a Composite Battalion formed from various New Zealand personnel and two Greek battalions. This ad hoc formation was commanded by Lt. Col. Howard Kippenberger and was situated near Galatos.
At Retimo were four battalions of the 19th Australian Brigade and six battalions of the 4th and 5th Greek Regiments. Their HQ was under the command of the senior Australian officer, Brigadier George Alan Vasey. Lt. Col. Ian Campbell was in charge of a sector HQ and his own battalion, the 2/1st, with the mission of defending the airfield and Hill A to the east of Retimo in the vicinity of an olive oil factory.
At Heraklion, the 14th Infantry Brigade—consisting of four British (2nd Battalion, the Leicestershire Regiment; 2nd Battalion, the York and Lancashire Regiment; 2nd Battalion, the Black Watch; and the later arriving 2nd Battalion, Argyll and Sutherland Highlanders) and three Greek battalions (of the 3rd and 7th Regiments), along with 300 Australian riflemen and 250 artillerymen employed as infantry—were under the command of Brigadier B.H. Chappel.
There was no separate reserve sequestered outside the sectors, but one of the New Zealand brigades in the Maleme sector and a British battalion at Suda were designated “Force Reserve” and were to be kept ready to move at short notice on Freyberg’s order. The heavy AA guns were mostly concentrated in the Suda-Hania area with all sectors possessing some light AA guns, except Retimo, which only possessed a dozen well-camouflaged field pieces.
Freyberg recognized that the forces deployed on Crete were inadequate to face the predicted attack. On May 1, he sent a message to Wavell in Cairo identifying deficiencies in equipment, artillery, and ammunition, and requested RAF and naval support. He recommended that, if additional resources could not be made available, the decision to hold Crete be reconsidered.
Wavell relayed Freyberg’s message along with his own concerns on the subject to the Commander of the Imperial General Staff (CIGS) but, under pressure from Churchill, who felt that Crete must be held for political reasons, Wavell received instructions to “hold Crete at all costs.” Freyberg proceeded with his preparations to defend Crete from the predicted airborne and seaborne assault.
Wavell cabled Freyberg, “I have most definite instructions from War Cabinet to hold Crete and even if questions were reconsidered, doubtful if troops could be removed before enemy attack.” According to Freyberg, Wavell “did everything humanly possible to get us every available bit of equipment, artillery, and defence store.” Wavell further dispatched, “[Freyberg] did not anticipate, any more than anyone else, the overwhelming strength in which the German Air Force was to make the attack, nor how carefully and skillfully their plans had been laid nor the losses they were prepared to accept to attain their object.”
The Invasion Begins
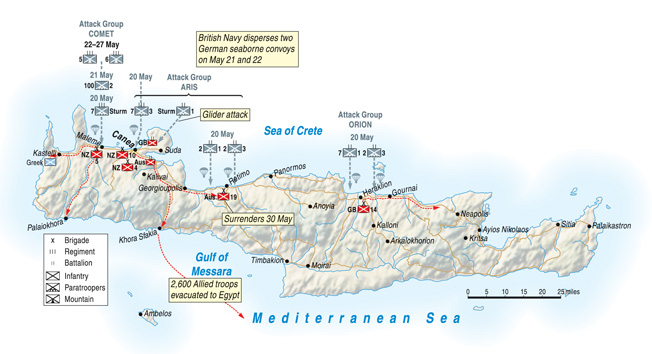
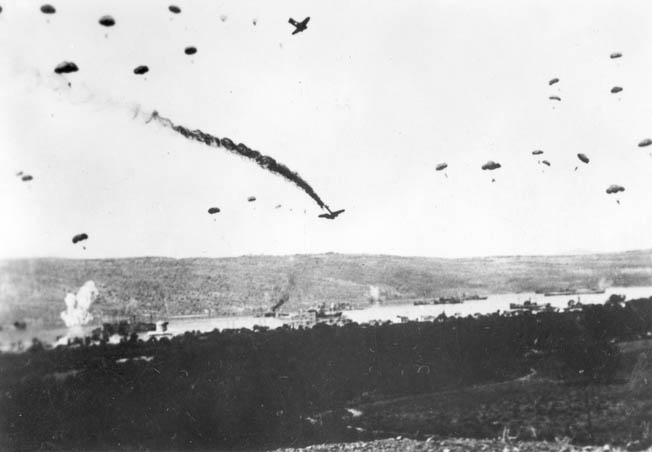
At 6 am on May 20, heavy bombing of key points preceded the landing of parachute and glider troops around Maleme (8 am), Retimo (4:15 pm), and Heraklion (5:30 pm). By nightfall, only a firm area at Maleme was held by the German paratroops, and none of Freyberg’s airfields had been captured.
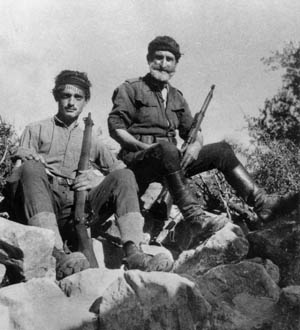
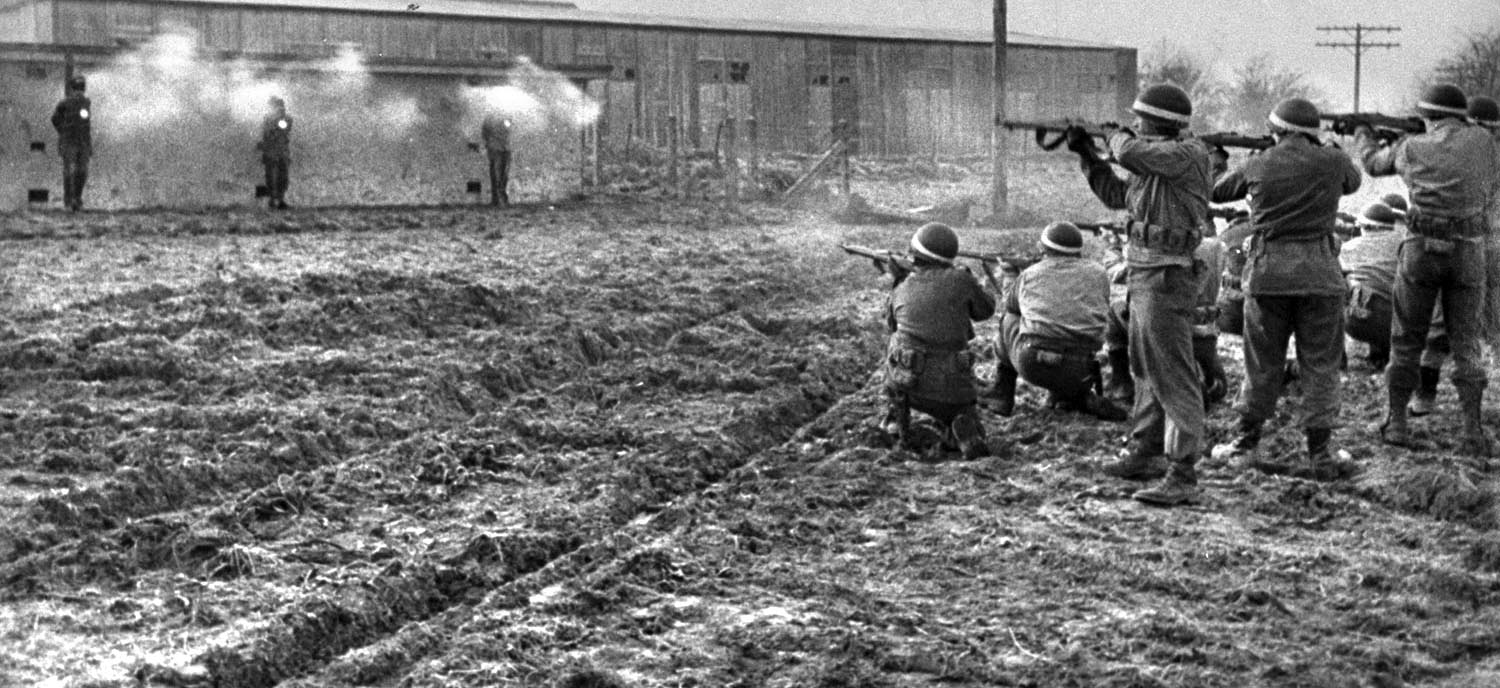
The Germans demonstrated theor brutality when a battalion of Fallschirmjägers landed at Kondomari, southeast of Malame, on May 20. Armed civilians joined the 21st and 22nd New Zealand Infantry Battalions in battling the paratroopers. After Crete fell, German troops took revenge on the partisans, shooting as many as 60 men from Kondomari. Another town, Kandanos, was destroyed and most of its residents executed.
Freyberg cabled Wavell on May 20: “Today has been a hard one. We have been hard pressed. So far, I believe, we hold aerodromes at Retimo, Heraklion, and Maleme, and the two harbours. Margin by which we hold them is a bare one, and it would be wrong of me to paint an optimistic picture. Fighting has been heavy and we have killed large numbers of Germans. Communications are most difficult.”
According to the British Official History, “The enemy’s domination of the air played an important part, for the sky seemed full of German aircraft ready to take part in the land fighting; any movement was spotted, and men were virtually pinned to their cover.”
Indeed. At the start of the battle, the number of German aircraft available was 280 bombers, 150 Stuka dive bombers, 180 fighters (Me-109 and Me-110), 100 gliders, 530 Ju-52 transports, and 40 reconnaissance planes.
Battle for Maleme Airfield, May 20-22, 1941
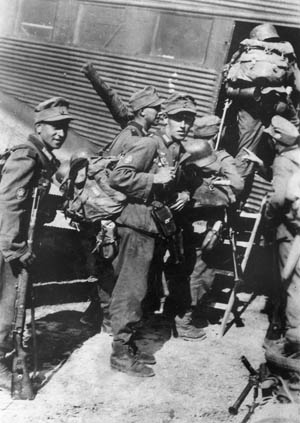
At 8 am on May 20, glider-borne troops of the Luftlande Sturmregiment, commanded by Generalmajor Eugen Meindl, and ad hoc groups of Fallschirmjägers arrived over Maleme attempting to capture the airfield there. Maleme was defended by the 5th New Zealand Brigade under the command of Brigadier Hargest. At 8:15, the 3rd Fallschirmjäger Regiment, under Oberst Richard Heidrich, parachuted into “Prison Valley” to the southwest of Hania and Suda Bay.
They were preceded by glider detachments under Leutnant Genz and Hauptmann Altmann that landed on the Akrotiri Peninsula north of Suda Bay. These forces were to silence AA guns as well as an Allied communications center around Hania, but they met strong resistance from heavy AA gunfire and elements of the Royal Welsh Fusiliers. The German paratroops were also met by elements of the 4th and 10th New Zealand Brigades at Hania and Galatos, respectively.
The scene at Maleme on May 20 has been described by author John Sadler: “Sweeping in at under 400 feet, beneath the elevation of the heavier AA guns, the Junkers kept in tight formation until they reached the drop zones…. If the 3.7-inch guns couldn’t register, the Bofors, manned by the marines, certainly could and they fired till the barrels glowed red. The slow-moving transports were a gunner’s dream and the shells tore through metal and flesh, dismembering men and aircraft in mid-air, slain parachutists tumbling, ‘like potato sacks’ from the wrecked fuselages.”
As described by Churchill in his post-war history, The Grand Alliance, “The onslaught continued … when troop-carrying aircraft again appeared. Although Maleme airfield remained under our close artillery and mortar fire, troop-carriers continued to land upon it and in the rough ground to the west. The German High Command seemed indifferent to losses, and at least a hundred planes were wrecked by crash-landing in this area.”
A critical sequence of events, which probably represented the turning point of the entire battle, occurred during the afternoon and night of May 20 that led ultimately to the withdrawal of 22nd New Zealand Battalion on the morning of May 21 from Hill 107. This action enabled the Germans to land there later that day unimpeded by direct artillery and small arms fire.
Hill 107, located to the south of the Maleme airfield and to the east of the Tavronitis riverbed, was defended by A and B Companies on its reverse slopes with D and C Companies in front of the forward slopes facing the riverbed and airfield, respectively.
During the afternoon of May 20, while on the reverse slope of Hill 107 and after being wounded and confronted with strong paratroop attacks against his entire perimeter, Lt. Col. L.W. Andrew, V.C., judged that his 22nd Battalion could not hold its positions, especially due to the wide and dispersed deployment, and he concluded that he must withdraw from the immediate vicinity of the airport.
Although possessing a wireless set in his HQ, Andrew knew nothing of what was happening to his two forward companies on the airfield and the other side of Hill 107 as he lacked direct sight of them and his C and D Companies lacked wireless sets. At 5 pm he requested that Hargest release the 23rd New Zealand Battalion to him but was denied due to its commitment to fighting elsewhere.
The correctness of not using the 23rd Battalion for immediate counterattack has been questioned. Others have wondered whether Hargest was confused and misinformed. Faced with Hargest’s refusal to commit the 23rd Battalion to assist Andrew’s 22nd Battalion, the latter ordered his own counterattack late on the afternoon of May 20 with his sole reserve platoon and two Matilda tanks of the 7th Royal Tank Regiment, but it failed to retake the bridge over the Tavronitis.
At 6 pm, Andrew contacted Hargest by wireless to tell him of the counterattack’s failure and that, without support of the 23rd Battalion, he would have to withdraw. Hargest said, “If you must, you must.” Hargest promised, though, to send two companies, one of the 23rd Battalion and one of the 28th (Maori) Battalion, to reinforce him.
If Andrew had observed before nightfall the western slopes of Hill 107 where his C and D Companies were, he would have seen that C Company was still strongly defending the airfield to the north and that D Company was also intact along the Tavronitis riverbed to the west. Both C and D Companies had suffered many casualties but they inflicted much greater losses on the paratroopers. But Andrew was unaware of these facts and merely knew that the Germans were building up in strength from the west against what he believed to be his only two remaining companies (A and B).
Not long after 9 pm, Andrew radioed Hargest’s HQ that he was withdrawing to the subsidiary ridge (Vineyard Ridge) to the southeast of Hill 107; Andrew positioned the remnants of A and B Companies of 22nd Battalion in line with 21st Battalion on that ridge. It was Andrew’s fateful decision to withdraw A and B Companies, under severe pressure, that handed Maleme airfield to the Germans.
While the one company from the 23rd Battalion assisted Andrew’s withdrawal to Vineyard Ridge, the other company from the 28th Maori Battalion reached the airfield in the dark. This company, upon reaching the edge of the airfield, was in fact only 200 meters from C Company’s command post; however, the Maori detachment believed that the airfield’s defenders had been overrun and turned back, possibly fearing an aerial attack with the onset of dawn. Had the Maoris linked up with C Company and continued to defend the airfield on May 21, the course of the entire battle could have swung in favor of the Allies.
The survivors from Company D, under Captain Campbell, on the Tavronitis slope of Hill 107, upon learning that Andrew’s Battalion HQ had left the reverse slopes of Hill 107, had no alternative but to fall back as well. By dawn, the Germans were in possession of Hill 107.
C Company’s commander, Captain Johnson, found out about Andrew’s decision to withdraw during the early hours of the morning of May 21 and, knowing that his men could not withstand another 24 hours of attack, he led his surviving troops away from the airfield at 4:30 am. By dawn on May 21, no New Zealand troops remained within the airfield perimeter. From their new positions, direct fire was only possible on the eastern end of the runway.
Maleme airfield was lost and became an effective operational airfield for the enemy before the second day of the battle had started. The 100th Gebirgsjäger (Mountain) Regiment started to arrive at Maleme by 5 pm on May 21. The 3rd Fallschirmjäger Regiment, which had landed in Prison Valley, south of Galatos and Hania, sent out patrols to link up with German forces moving east from the now-captured Maleme airfield.
Even though Freyberg may have been confused by Hargest’s misleading message about the situation at Maleme as “quite satisfactory,” the Creforce commander was overly concerned about the enemy’s seaborne reinforcements. Freyberg was still vacillating on whether an attack from the sea would commence or whether air landings at the airfields would continue. Whether due to a strategic error or lack of Ultra intelligence, Freyberg did not move needed troops for the further defense of the airfields, specifically Maleme.
Even Churchill commented that “Freyberg … did not readily believe the scale of air attack to be so gigantic. His fear was of powerful organized invasion from the sea. This we hoped the navy would prevent in spite of our air weaknesses.” Freyberg later acknowledged, “We for our part were mostly preoccupied by seaborne landings, not the threat of air landings.”
Thus, there was a hesitation in leadership to commit the 23rd Battalion to counterattack the airfield because of its responsibility for coastal defense. On the morning of May 21, Hargest remained at his HQ at Platanias and did not let his battalion commanders mount an attack on Maleme.
According to historian Antony Beevor, “Hargest, Puttick, and Freyberg all accepted the principle of counterattack, yet showed little enthusiasm for the enterprise. A more disastrous state of mind for a commander preparing such an operation is hard to imagine. Without action to prevent a German build-up and attack from Maleme, a German victory became inevitable.”
After delaying, Freyberg, with his 6,000 troops in the Hania and Suda Bay area, kept the Welsh Regiment, his largest and best equipped unit, at Hania to garrison the seafront and committed only the 20th Battalion of Inglis’s 4th Brigade to the counterattack at Maleme. As a result, Freyberg’s counterattack on Maleme was both too late and too little.
Nonetheless, the 20th and 21st New Zealand and 28th Maori Battalions did counterattack the airfield during the early morning hours of May 22; however, after making some initial gains, they had to call it off by the afternoon since the New Zealanders were exhausted and now had become subjected to heavy aerial attack as well. It was now broad daylight, and intense German mortar and machine-gun fire made it impossible to cross the open space. Without artillery or air support, the New Zealanders had no choice but to retreat.
In fact, on May 21, the Royal Navy intercepted a convoy of Greek vessels carrying troops of the 5th Gebirgsjäger Division and essentially destroyed the 3rd Battalion of the 100th Gebirgsjäger Regiment of that division at sea, but at considerable loss to the British fleet.
After that foray, the Luftwaffe controlled the skies over the sealanes during daylight. In the sea battles of May 21/22, as described by Churchill, “The Navy had lost two cruisers and three destroyers sunk, one battleship, the Warspite, put out of action for a long time, and the Valiant and many other units considerably damaged. Nevertheless, the sea-guard of Crete had been maintained. The Navy had not failed. Not a single German landed in Crete from the sea until the battle for the island was ended.”
Battle for Retimo, May 20-29, 1941
At 4:15 pm on May 20, 1,500 paratroopers of the 2nd Fallschirmjäger (less the 2nd Battalion) under Oberst Alfred Sturm dropped on part of the 19th Australian Brigade and the 4th and 5th Greek Regiments at Retimo. These paratroopers, comprising the regimental HQ, at first captured the airfield but faced rapid counterattacks from the Australians and the Greeks led by Lt. Col. Ian Campbell, resulting in the capture of Sturm and his HQ.
Although lacking sufficient troop numbers and adequate antiaircraft support, Campbell concentrated his defense around the airstrip, leaving only a light screen around the town and on the beaches.
The lack of heavy weapons and AA guns, along with excellent concealment of the Allied infantry trenches, misled the German paratroops into believing that the area was lightly held. Of the 161 transport planes utilized by the Germans, 15 were shot down by the Allies.
Other German paratroopers of the 3rd Battalion, under Hauptmann Weidemann, landed to the west of the 19th Australian Brigade and headed for the town of Retimo but were met by fierce resistance from the Greek Gendarmerie and Cretan civilians. To avoid heavy casualties, Weidemann fell back and established a defense around an adjacent village, Perivolia. Here the 4th and 5th Greek Regiments continued to beleaguer Wiedemann’s German paratroops.
The 1st Battalion of paratroopers, under Major Kroh, landed to the east of many of the Allied troops and succeeded in taking the majority of Hill A, which overlooked Retimo airfield’s eastern end. Kroh’s men resisted numerous attacks by Campbell’s Australians, including his tanks.
As the day wore on, it became imperative to dislodge this paratroop position atop Hill A, so Campbell contacted Freyberg for additional support but none could be spared. The day’s end would find Campbell planning a counterattack with his entire force around the airfield at dawn on May 21.
The tenacity of the Australian infantry prevented Retimo from becoming another Maleme. Retimo airfield and town still remained under Allied control. German paratroop reinforcements were unable to break through the Commonwealth defenses. The defense of Retimo demonstrated that fierce counterattacks could dislodge landed paratroops.
As John Sadler wrote, “There is no escaping the conclusion that an injection of the same urgency and dash could have turned the tide at Maleme and altered the entire course of the battle.” So, too, historian Antony Beevor noted, “If events at Maleme had followed the pattern at [Retimo] and Heraklion, then the Germans would have lost the battle of Crete.”
Since no attack had been made at Georgeopolis, located between Suda Bay and Retimo on May 20, Freyberg moved the 2/8th Australian Battalion during the night to Suda, followed the next night by the 2/7th Australian Battalion and Brigadier Vasey’s HQ. Thereafter, the two battalions and supporting units at Retimo, under the command of Ian Campbell, acted as an independent force; it soon became impossible to reach it and Retimo remained completely isolated until the end.
On the morning of May 21, Campbell’s Australians successfully counterattacked Kroh’s force on Hill A, with the German survivors retreating to form a position around Stavromenos and the olive oil factory. The next day, Campbell attacked the factory with his Australians and the 4th Greek Regiment; however, the thick walls of the building, along with some language barriers among the Allied troops, caused the assault to wane in intensity.
At both Perivolia and Stavromenos, “a virtual stalemate” continued for several days. On May 25, Campbell’s men suddenly captured the olive oil factory after bombarding it with their field guns’ last few rounds. Major Roy Sandover, commander of the 2/11th Battalion, and his men participated in the bloody attacks on Perivolia. They captured some of the outlying houses but the Germans blasted them with light antitank weapons.
Quickly realizing that without heavy weapons more attacks would only lead to a waste of lives, Sandover ceased his assault on Perivolia. Campbell’s entire garrison at Retimo had fulfilled their orders; namely, to deny the airfield and the port to the enemy.
However, the Aussies had no knowledge of the evacuation from Heraklion to the east. Communication by land had been blocked and Campbell was unable to contact Creforce by wireless. A small boat sent from Suda with supplies reached the Australians in the early hours of May 28, shortly after their two tanks had been finally destroyed in an attack on the German strongpoints round Perivolia.
Lieutenant Haig, the young naval officer commanding the supply boat, had failed to bring Freyberg’s message with instructions for evacuation due to confusion at Suda and Creforce headquarters. All Haig could tell Campbell was to head for Sphakia on the south coast. But Campbell would not abandon his mission at Retimo until officially relieved.
Both Campbell and Sandover finally had to accept that they could not break the German grip on the coast road. An idea to attack toward Suda was discarded, and Campbell insisted on continuing to deny the airfield to the enemy as ordered. On May 29, German mountain artillery and motorcycle troops were advancing from the west while another German force had left Heraklion in the east for Retimo.
The next morning, the Germans renewed their advance, with tank support, against the survivors of the Australian 2/1st and 2/11th Battalions. Rather than incur more futile casualties, Campbell surrendered with most of the garrison, while Sandover, along with 13 officers and 39 NCOs and other ranks, later escaped to Egypt by submarine after spending many months hiding in the mountains of Crete.
Battle of Heraklion, May 20-29, 1941
On May 20, the 3,000 paratroops of the 1st Fallschirmjäger under Oberst Bruno Bräuer, with the 2nd Battalion of the 2nd Fallschirmjäger Regiment attached to it, dropped around Heraklion onto the 14th Infantry Brigade, under the command of Brigadier Chappel, and suffered grievous losses.
After initially remaining silent in order to convince the Germans that their previous raids on the gun emplacements had put them out of action, small arms and AA fire decimated the initial wave of transport aircraft and paratroops, the latter landing in open terrain with little cover.
Since the Stukas and Me-109s had returned to their base on the island of Skarpanto, east of Crete, because they could not wait for the delayed Ju-52 troop carriers, the British Bofors gun crews shot down 15 of these slow transports in two hours. The 2nd Battalion of German paratroops was caught in a deadly crossfire dealt to them by the 2nd Leicesters and the 2nd Black Watch.
The 3rd Battalion of the 1st Fallschirmjäger Regiment, under Hauptmann Karl-Lothar Schulz, was assigned the task of taking the town of Heraklion and initially had to overcome Greek troops and Cretan civilians resisting them prior to gaining control of some of the town.
The 1st Battalion of the 1st Fallschirmjäger Regiment under Major Erich Walther landed relatively unscathed but, recognizing the plight of that regiment’s 2nd Battalion, quickly moved to its aid. The 2nd Fallschirmjäger Regiment’s attached 2nd Battalion, under Hauptmann Gerhard Schirmer, landed intact and far to the west of Heraklion to block Allied reinforcements from Retimo, thereby isolating Crete’s easternmost port and airfield.
Brigadier Chappel’s Allied troops immediately attacked on May 20 with the two Matildas of the RTR and the six light tanks of the 3rd Hussars. Chappel had decided to counterattack within the first two hours of the aerial assault since he knew that the outcome of the battle would be decided early. But Chappel, although decisive on the first day of the German landings, did not throw his entire weight into advancing against the severely reduced enemy to crush them on May 21.
In addition to expecting reinforcements from the 2nd Battalion, Argyll and Sutherland Highlanders, the 14th Infantry Brigade had insufficient ammunition for a major attack and lacked the local intelligence to realize how few reserves the Fallschirmjägers actually possessed.
Parenthetically, the leading company of the Argyll and Sutherland Highlanders with two Matildas did not arrive from Timbaki in the south to Heraklion until midday on May 23 due to harassing attacks by the paratroopers. Since his orders were to hold Heraklion and the airfield there, as well as being ignorant of the disaster at Maleme due to lack of wireless sets, Chappel adopted a risk-averse posture and stayed within his perimeter, assuming that by simply holding on the German assault would end.
At dawn on May 28, after having endured a five-day stalemate with the Germans at Heraklion, the 14th Infantry Brigade officers were informed that Royal Navy craft would embark the troops from Heraklion harbor that night. The withdrawal, which had remained a secret that whole day, was conducted flawlessly and any extra supplies and vehicles were destroyed. About 3,500 men had embarked by 2:45 am on May 29.
Aftermath of the Maleme Airfield Capture
On May 23, German airborne assaults continued, and the Allied troops commenced withdrawing to a new line near Galatos. On the night of May 23, the 5th New Zealand Brigade was withdrawn into divisional reserve and its front taken over by the 4th New Zealand Brigade.
Two days later, the British front lines at Galatos came under attack by elements of Gebirgsjäger regiments. The attack began early in the afternoon and tore a large gap in the 10th New Zealand Brigade’s front by cracking the 18th Battalion’s line. The situation was restored by Colonel Kippenberger, who made an unexpected counterattack with two companies from the 23rd New Zealand Battalion, sent by Hargest, along with two light tanks of the 3rd Hussars, thus delaying the German onslaught and enabling the New Zealand Division to disengage.
After Kippenberger’s counterattack on Galatos forced a temporary German retreat from the village, he realized there was now no alternative but to retreat to a line linking up with Vasey’s two Australian battalions at the end of Prison Valley.
As Wavell stated in his postwar commentary, “On 24th and 25th May the fighting continued with the same intensity. The enemy continued to land troops and to force back our line from the Maleme area towards Canea, which was heavily bombed and almost destroyed. General Freyberg now abolished the separate Maleme sector and put the New Zealand troops who had formerly occupied it under General Weston, Royal Marines, the commander of the M.N.B.D.O.”
Given the ferocity of the German airborne attack and the disaster at Maleme, Wavell had tried to send more reinforcements to the island. The only means of doing so was by fast warship that could reach Suda Bay under cover of darkness, disembark troops, and get clear of the island before dawn. This limited both the number and type of troops that could be sent.
Some of them were the Argyll and Sutherland Highlanders, along with two battalions of commandos known as “Layforce,” a body of specially picked troops who had been sent out from Britain for combined operations under the command of Colonel Robert Laycock. Two hundred men from Layforce had arrived at Suda Bay on the night of May 24 on the cruiser HMS Abdiel.
The main body had to return to Alexandria after failing to land, finally reaching Suda Bay two nights later aboard fast destroyers and the Abdiel. According to Churchill, “Fortunately, two commandos, about 750 men, under Colonel Laycock, had been landed at Suda by the minelayer Abdiel on the night the 26th. These comparatively fresh forces, with the remains of the 5th New Zealand Brigade and the 7th and 8th Australian Battalions, fought a strong rear-guard action, which enabled almost the whole of our forces in the Suda-Canea-Maleme area that still survived to make their way to southern shore.”
On May 26, the Germans broke through the Hania-Galatos line and Allied troops withdrew to Suda Bay. Further troops withdrew to the south to Sphakia so that a seaborne evacuation could be conducted. By the end of the seventh day, Freyberg signaled Wavell that his force was exhausted and that the Allied position was hopeless.
In Freyberg’s own words, “A small ill-equipped and immobile force such as ours cannot stand up against the concentrated bombing that we have been faced with during the last seven days…. Once this section [Suda Bay] has been reduced the reduction of Retimo and Heraklion by the same methods will only be a matter of time.”
After the war, Wavell wrote, “26th May proved the critical day. Our line west of Canea was broken and driven back on Suda Bay, so that a considerable portion of the base area fell into enemy hands. Suda Bay became no longer tenable. All troops were much exhausted and the enemy air bombing was as intensive as ever. The enemy had by this time landed some 30,000 to 35,000 troops on the island.
“Early on the morning of 27th May, General Freyberg decided that evacuation was inevitable, and reported to me accordingly. In view of the situation he described and the impossibility of sending further reinforcements, I gave orders for the withdrawal of our garrisons from Crete.”
On May 27, the Germans deployed a five-regiment attack against Freyberg’s Force Reserve (consisting of Royal Welsh Fusiliers, Northumberland Hussars, and the 1st Ranger Battalion from the King’s Royal Rifle Corps) of about 1,300 men. After being surrounded by the Germans, some of the Force Reserve broke out to rejoin the main force at Suda.
To keep an evacuation route to Sphakia open and buy time for an Allied withdrawal to get started, the Allies mounted a counterattack with elements of the 19th Australian Brigade and the Maoris of the 5th New Zealand Brigade.
Even as late as May 27, Churchill continued to exhort Wavell, “Victory in Crete is essential at this turning-point in the war. Keep hurling in all aid you can.”
But on May 27, Wavell signaled to Churchill that Crete was no longer defensible: “Canea front has collapsed and Suda Bay only likely to be covered for another 24 hours, if as long. There is no possibility of hurling in reinforcements…. Force at Retimo reported cut off and short of supplies. Force at Heraklion also apparently almost surrounded. Fear we must recognize that Crete is no longer tenable and that troops must be withdrawn as fast as possible. It has been impossible to withstand weight of enemy air attack, which has been on unprecedented scale and has been through force of circumstances practically unopposed.”
London reluctantly ordered the island’s evacuation, which occurred in an orderly fashion from May 27 through June 1.
On the afternoon of May 27, Freyberg received approval from Wavell to withdraw over the White Mountains to Sphakia on the south coast. From Suda a road climbed the mountains to the south but stopped a few miles short of Sphakia, to which it was linked by a steep and twisting mountain path. This was the road along which the main British force withdrew.
Wavell initially wanted the remnants of Freyberg’s force from the western part of the island to withdraw to Retimo and link up with the Heraklion garrison, but Freyberg disagreed and Creforce HQ set off southward. In any event, the coast road to Retimo was blocked, so Retimo and Heraklion were already isolated.
Nonetheless, part of Crete’s Allied garrison headed eastward for Heraklion (to be evacuated by Royal Navy Force “B”), while the surviving troops from the Maleme-Canea-Suda Bay area headed south across the island toward Sphakia to be embarked by Royal Navy’s Force “C.” Their withdrawal was covered in the early stages by Layforce, 5th New Zealand Brigade, and 19th Australian Brigade, the latter two working as one force.
The 4th New Zealand Brigade, some light tanks of the 3rd Hussars, and a Royal Marine battalion also covered the retreat which, in spite of poor terrain and logistics and six days of aerial and paratroop assault, was conducted in a determined manner under the leadership of General Weston.
Through the efforts of the Mediterranean Fleet, 16,000 men were brought off the Cretan beaches and harbors to Egypt. This was a major feat since the Luftwaffe had ensured that a British ship within 50 miles of Crete in daylight would not reach the island. Only the fastest warships, during darkness, were able to patrol off the north coast of Crete.
On May 29, a small number of troops (less than a thousand) were embarked from Sphakia, while 4,000 were evacuated from Heraklion, despite horrendous bombings by the Luftwaffe that resulted in the sinking of a Royal Navy cruiser. Also, on this day, the Germans took complete control of the airfields and ports of Retimo and Heraklion.
On May 30, the Royal Navy’s Force “D,” from Alexandria, evacuated 6,000 men at Sphakia with the Allied rear guard having retreated to just a few miles from that port on the south coast. The following day, Royal Navy’s Force “C” returned to evacuate an additional 1,500 men from Sphakia; General Freyberg left Crete by Sunderland flying boat.
According to General Wavell, “The Navy sustained heavy losses in ships during the passage to and from Crete, and it had been decided that the evacuation must end on the night of 31st May-1st June. The embarkation during the last two nights was carried out under conditions of considerable difficulty, rations and water were limited, and the troops, scattered in various hiding places during the day to shelter from enemy air attack, were difficult to collect for embarkation.
“I ordered General Freyberg to return to Egypt on the night of 30th-31st May, and he and his staff were taken off by flying boat. General Weston remained in command and was taken off the following night. It is regretted that a considerable number of troops had to be left behind, including an Australian battalion and the bulk of ‘Layforce,’ who had all fought most skillfully and gallantly to the end.”
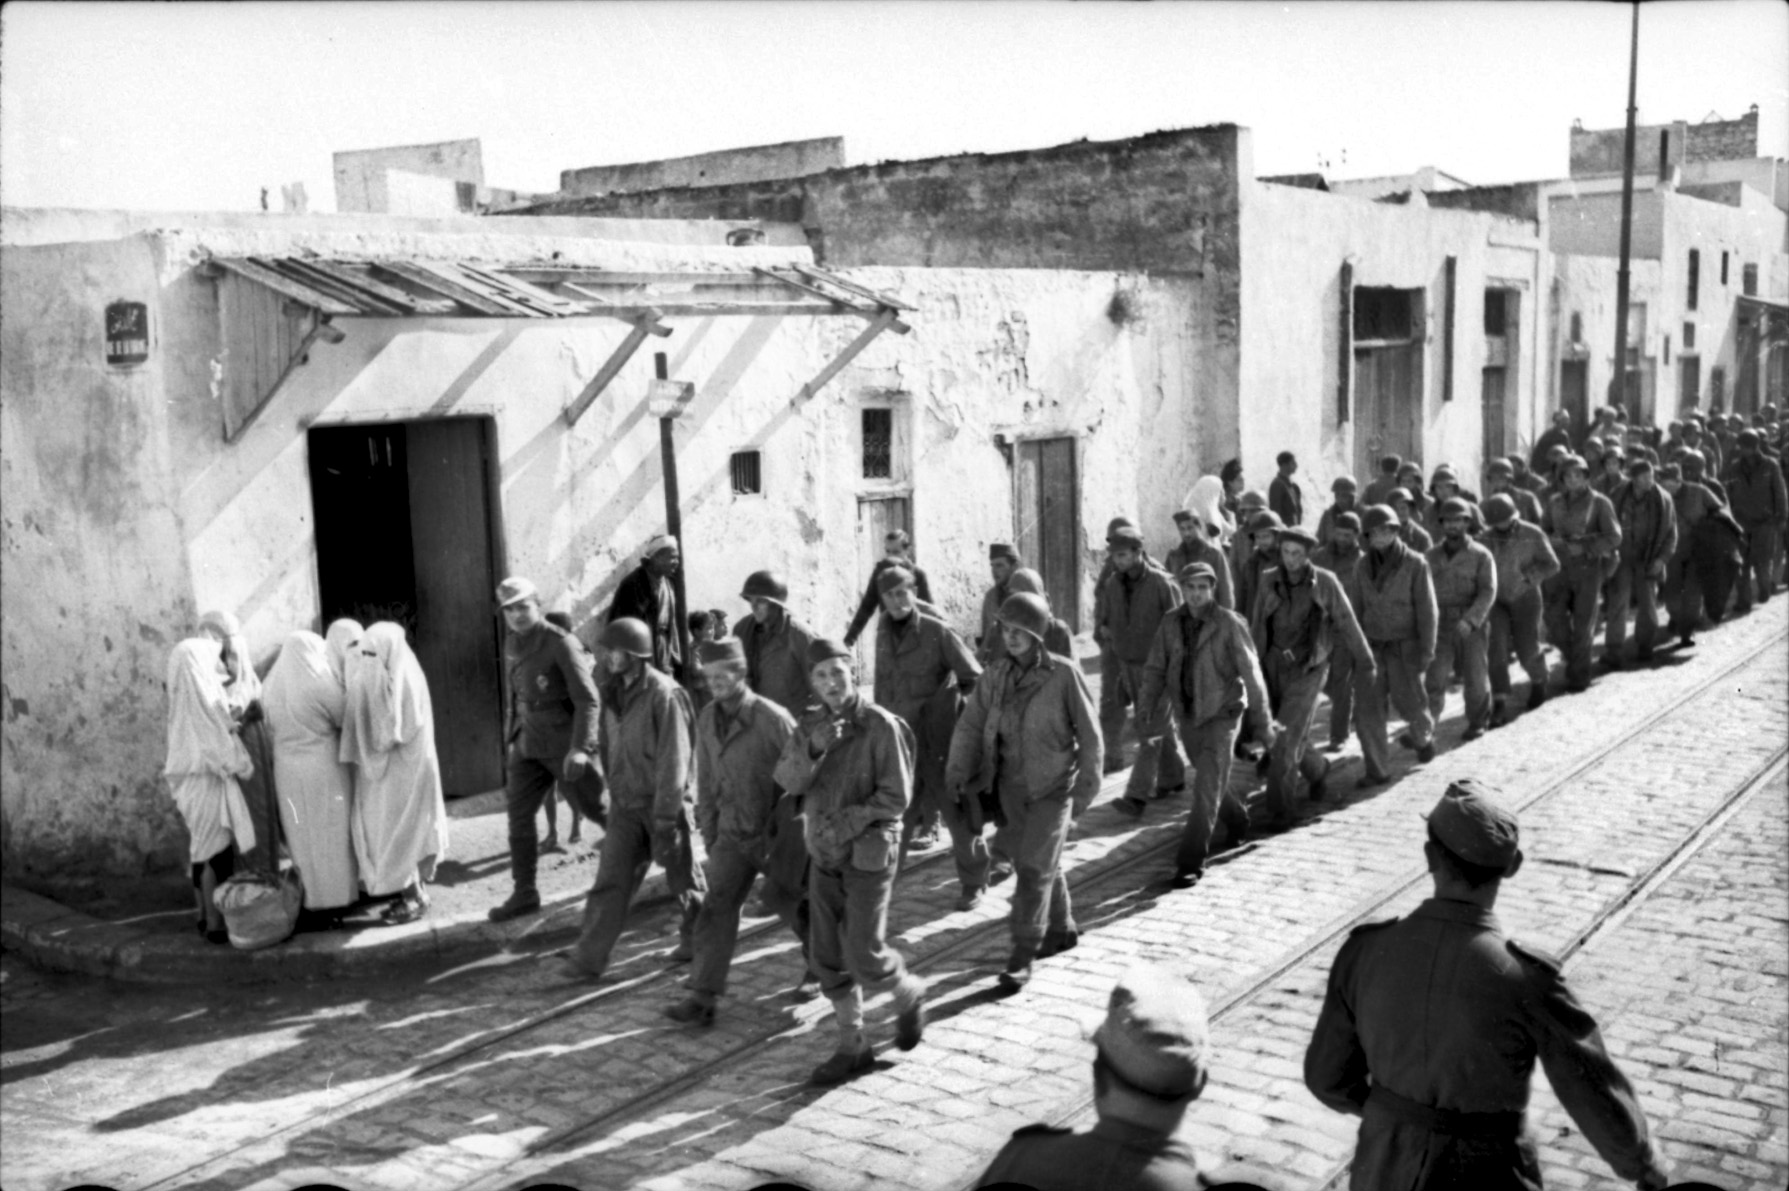
Out of the total of 27,550 imperial troops on the island at the beginning of the attack, 14,580 were evacuated: 7,130 out of 14,000 British; 2,890 out of 6,450 Australians; and 4,560 out of 7,100 New Zealanders.
The failure to hold Crete was due mainly to the overwhelming superiority of the Luftwaffe and the way in which it was handled in conjunction with paratroops and glidermen. Allied officers who had fought through the last war in France claimed that the bombardment the troops underwent in Crete was both more severe and continuous than anything they had ever experienced.
Wavell’s HQ in Cairo suffered from the dual major handicaps of lack of proper equipment (i.e., aircraft, tanks, and artillery pieces) and the inability to reinforce the island with either men or matériel due to inadequate southern harbors and road networks as well as control of the air by the Germans.
Wavell admitted, “It was the enemy air force which was the deciding factor. Even had the German attack been beaten off, it is very doubtful whether the troops in Crete could have been maintained in face of the enemy air force, which made the approach of shipping to the island most hazardous.”
Wavell was highly complimentary of his Imperial infantry, their commander, and the men of the Royal Navy and RAF: “The troops, including the Greeks on the island, fought magnificently under the most stern conditions, and deserve the very greatest credit for their efforts.
“General Freyberg and General Weston, and the subordinate commanders … set a fine example to their men and handled their troops with determination and skill…. The work of the Royal Navy in preventing the enemy attempts at invasion by sea and in evacuation of the troops in spite of extremely heavy losses in ships and men was beyond all praise.
“To Admiral Sir Andrew Cunningham himself, who took the responsibility of ordering the evacuation to proceed in spite of the losses, the Army owes a deep debt of gratitude…. Although they were completely outmatched in numbers, the Royal Air Force never failed to do their utmost to support the Army. Though they were obliged to operate from distant places in Egypt, they attacked to the utmost of their ability and in spite of heavy and inevitable losses.”
The defense of Crete, though unsuccessful, undoubtedly frustrated the enemy plan for future operations by destroying such a large number of the airborne troops and their transports. The total German losses were at least 12,000-15,000, of whom a very high proportion were killed.
(One of the Fallschirmjäger casualties was Max Schmeling, world heavyweight boxing champion in 1930 and who had legendary bouts with Joe Louis in 1936 and 1938; he injured his leg and back on the May 20 jump and spent months recovering.)
Although ending in evacuation and imprisonment for many Allied troops, the decision to defend Crete probably led to Wavell’s victories in Syria and Iraq, as well as maintaining Cyprus and Tobruk in Allied hands.
Some have argued that despite the losses in personnel and matériel on Crete, the resistance mounted against the invasion may have greatly contributed to saving the British position in the Middle East at this crucial juncture of the war.
One must wonder if, had there been more wireless sets to facilitate better communication between the commands at the three airfields, a more robust counterattack at Maleme on the first and second days of the battle to keep that airfield in Allied hands, and a greater RAF presence to interfere with the Luftwaffe, Crete might have been a victory for Wavell and Freyberg.
Churchill referred to a “battle report” captured from Student’s XIth Fliegerkorps at the end of the war: “British land forces in Crete [said the Germans] were about three times the strength which had been assumed. The area of operations on the island had been prepared for defence with the greatest care and by every possible means…. All works were camouflaged with great skill…. The failure, owing to a lack of information, to appreciate correctly the enemy situation endangered the attack of XIth Fliegerkorps and resulted in exceptionally high and bloody losses.”
Shortly after the battle, Wavell thanked his evacuees “for the great courage and endurance with which you attempted the defence of the island of Crete. I am well aware of the difficulties under which you carried out your task and that it must have appeared to many of you that you were insufficiently equipped and supported. As Commander-in-Chief I accept the responsibility for what was done. It was for strategical reasons necessary to hold the island … if this could reasonably be done.”
As a footnote, because of his high losses on Crete, Hitler vowed never to use parachute and glider-borne troops as an assault force in a major operation again.


Very good article about the battle of Crete. I found Crete to be a very Pyrric victory for the Germans, and Italians. But one has to look at the complete theatre picture, and beyond to see how much worse it could have been.
I had recently read the book “Nazi Victory Crete 1941” by David Arthur Thomas, which gave much insight to the overall picture for the war and it’s relationship with Crete.
https://www.amazon.com/Nazi-Victory-David-Arthur-Thomas/dp/0812815599
It was the 1st Battalion Welch Regiement, NOT the Royal Welsh Fusiliers.