By William E. Welsh
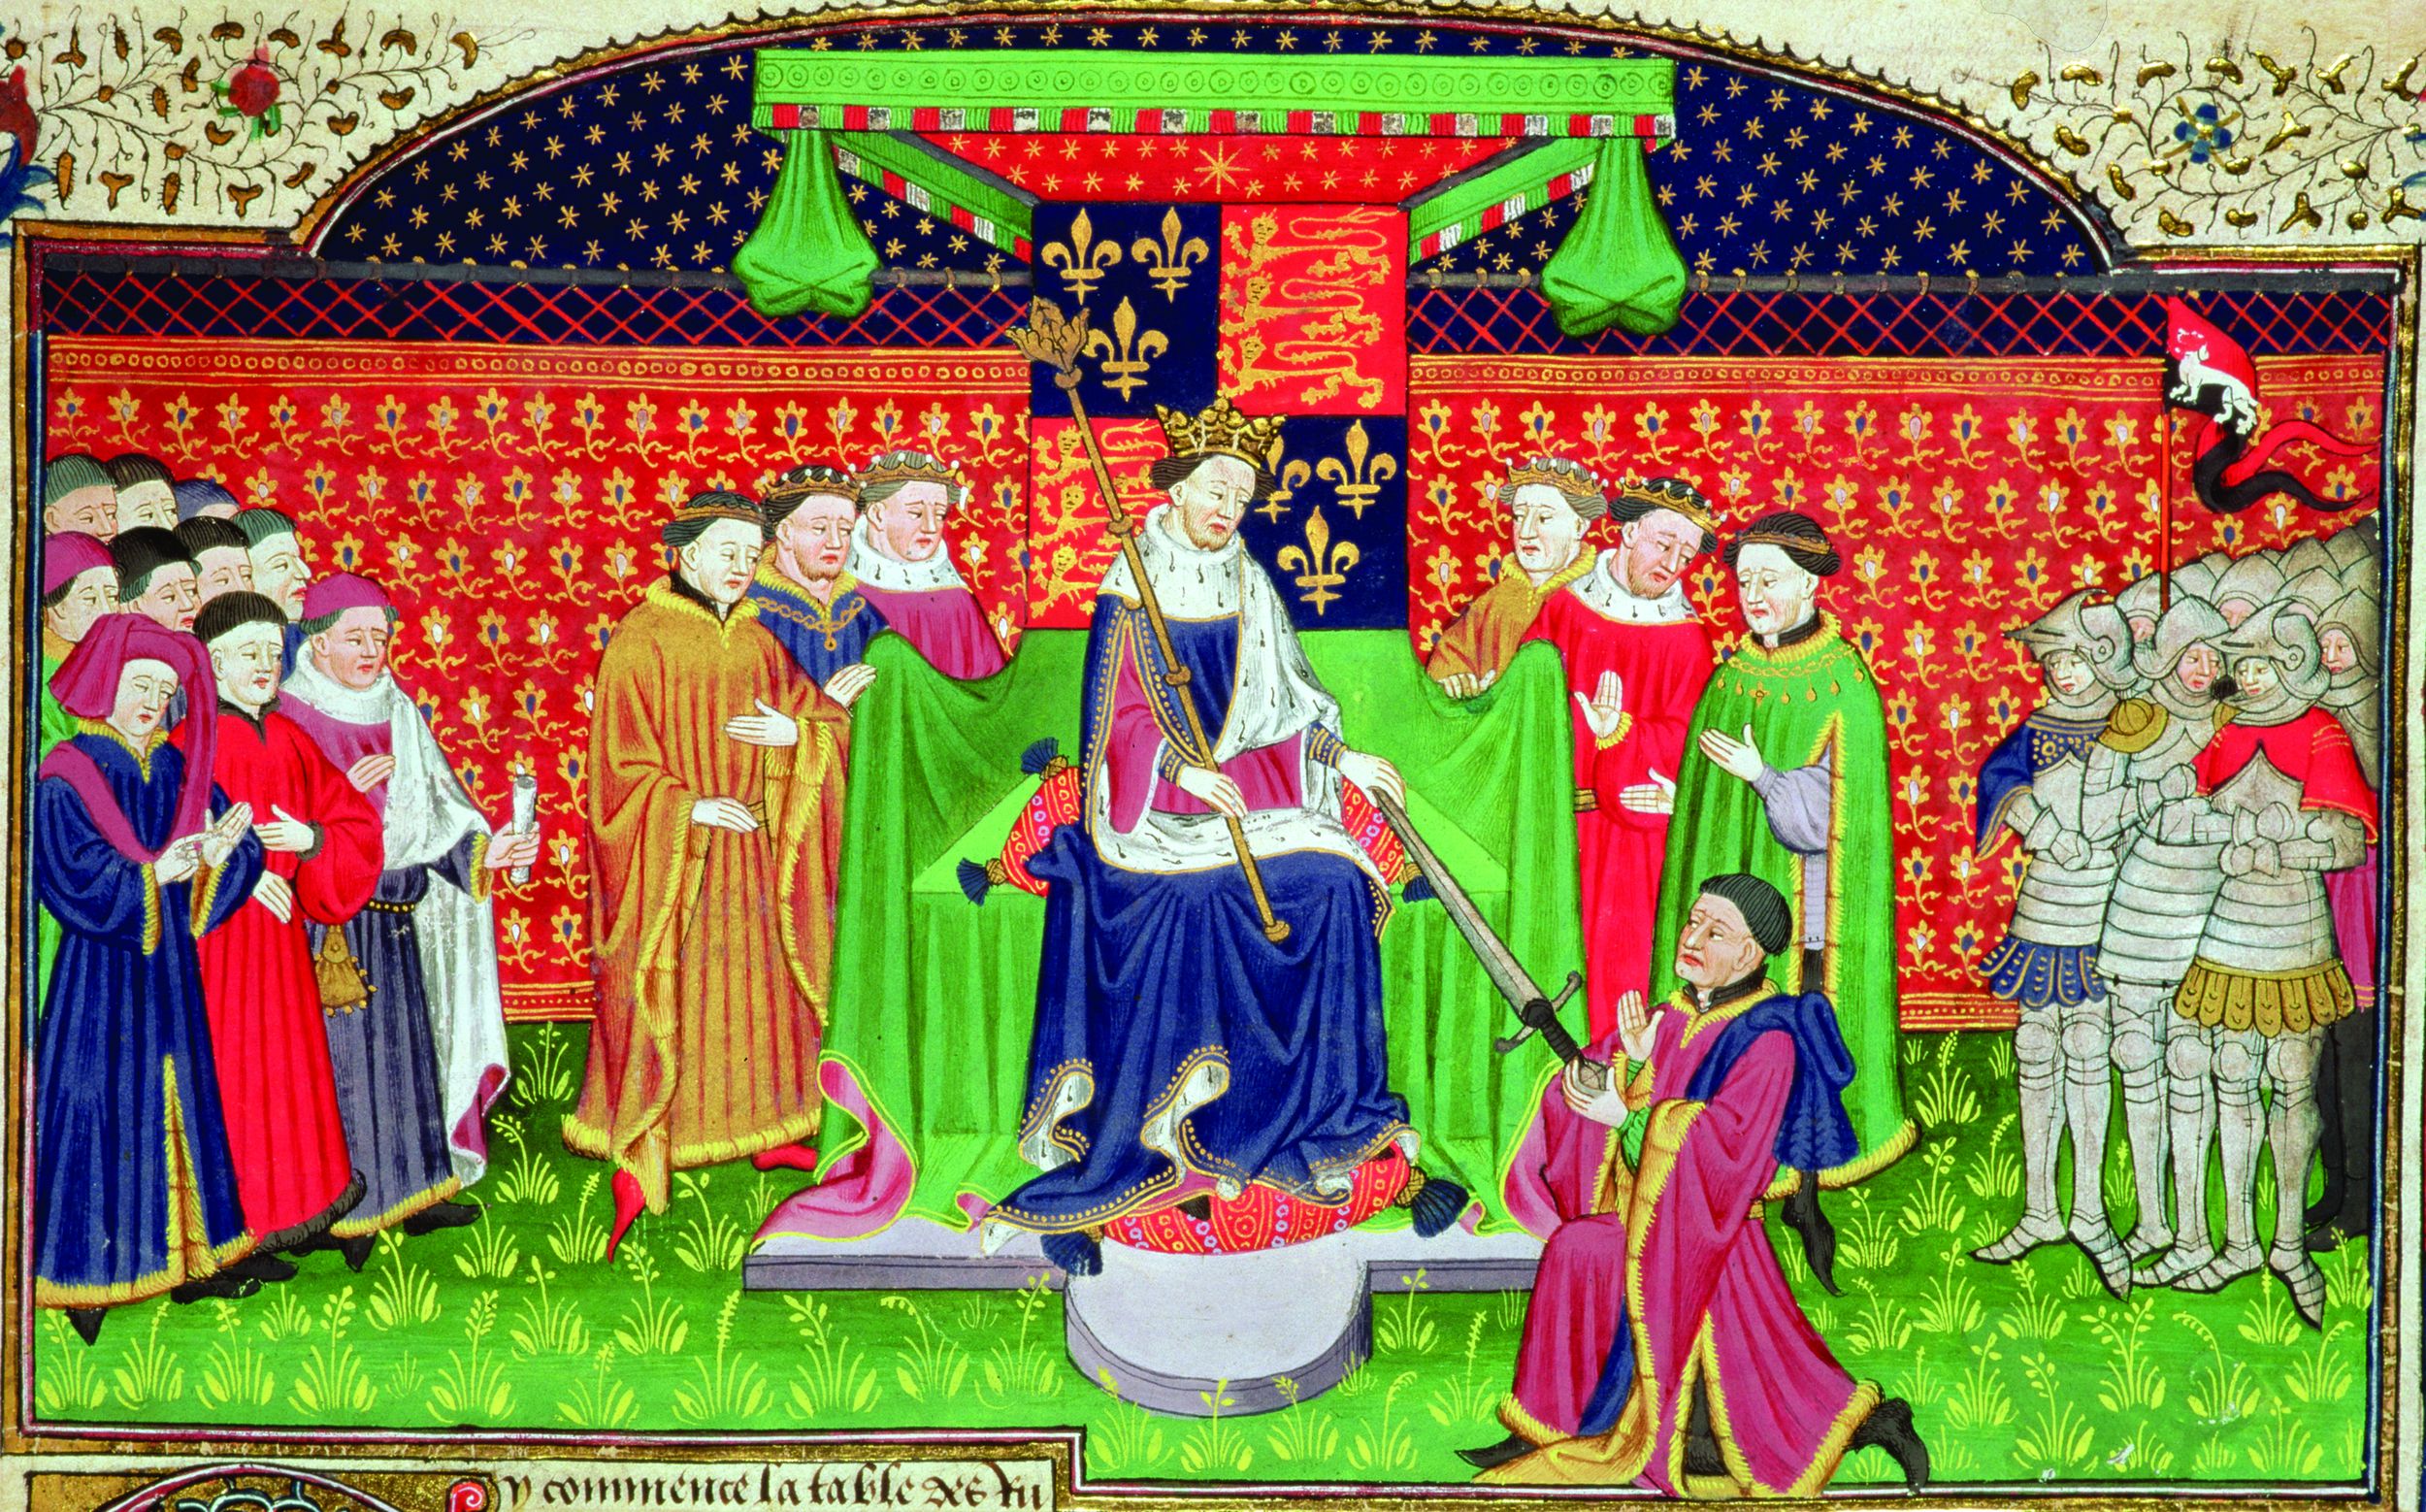
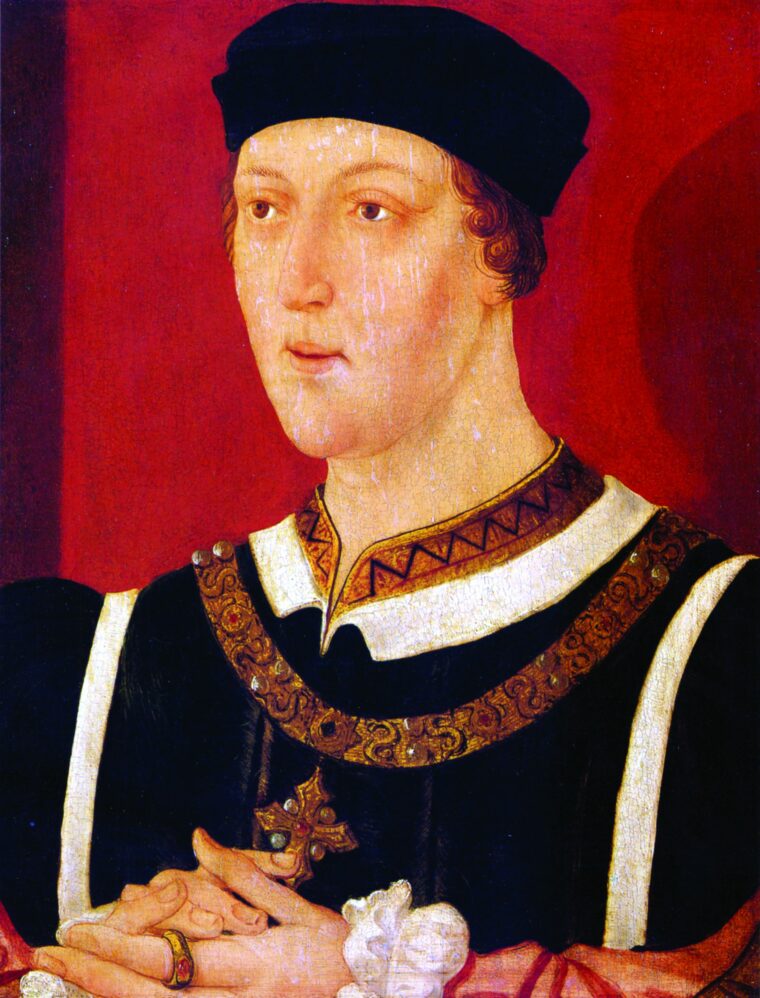
Indolent, weak-willed, and prone to periodic fits of madness, King Henry VI had let England slide downhill since coming of age in 1437. Military defeat in France, civil unrest, and royal favoritism had been the shameful hallmarks of his nearly two-decade-long reign. These factors were fertile ground for an explosive rivalry that developed between Richard Plantagenet, the third Duke of York, the most powerful and wealthy noble in the realm, and Edmund Beaufort, the Duke of Somerset, the king’s favorite minister.
Henry VI Versus the Duke of York
The only child of Henry V and Catherine Valois, Henry lacked his father’s sharp mental faculties and his martial abilities, and he had to depend on others to help him retain England’s possessions in France, which consisted of Normandy in the north and Gascony in the south. In 1446, Henry appointed Somerset to serve as Lieutenant of France, replacing York. His opposition to French-born Queen Margaret’s push for peace with France had made the Duke of York a powerful enemy at court, and Henry gave in to his wife’s wishes to rid the country of the troublesome duke.
To do so, in 1447 Henry appointed York to serve as Lieutenant of Ireland. York correctly interpreted the appointment as banishment and stayed in England as long as he could before sailing to Ireland in 1449. Meanwhile, England’s grip on its French territories under Somerset’s leadership was rapidly slipping away. By August 1450, the French had reconquered Normandy, and by October 1453 they had retaken Gascony as well.
York considered himself the best man to steer England through its unrest. He returned from Ireland in 1450 and assumed a seat on the king’s council, where he pushed for reforms and for the prosecution of those, like Somerset, whom he believed responsible for the loss of England’s possessions in France. Over the next two years, York sparred continuously with Somerset, who also held a claim to the throne through the Beaufort family, a branch of the House of Lancaster. Fearing that Somerset was out to destroy him, York tried to seize power in 1452. Raising a small army on his Welsh estates, he marched toward London but found the city’s gates barred. Lacking widespread support from the peerage, York had no choice but to capitulate. To remain free, he was forced to swear an oath of allegiance to Henry in St. Paul’s Cathedral, vowing never again to take up arms against the king.
York as Protector of England
When the king fell prey to mental illness in 1453, Somerset called a meeting of the peers of the realm to decide who would rule on the king’s behalf while he was ill. To Somerset’s surprise, the Dukes of Salisbury and Warwick put together an alliance whose members favored having York serve as Protector of England. The decision to give the office to York rather than Somerset did not sit well with the Beaufort family, the poweful Percys of Northumberland, or the queen.
During York’s 14-month tenure as Protector, he put Somerset in the Tower of London on charges of treason for his conduct in France during the last phase of the Hundred Years’ War. But the first protectorate came to an abrupt end in January 1455 when the king recovered enough to retake the throne. One of his first acts was to free Somerset from the Tower. Immediately afterward, York was again out of favor and Beaufort, Percy, and other Lancastrian peers had the king’s ear. Sensing that the political tide had turned against them, York, Salisbury, and Warwick quit London for their estates in the North, where they immediately began to raise an army and reclaim power.
Confrontation at St. Albans
Henry left London on May 21 bound for Leicester, where he intended to hold council with the highest peers of the realm. Although York, Warwick, and Salisbury were invited to the meeting, they sensed a trap. A dozen nobles and 2,000 troops escorted Henry on his journey. York and his allies, fearing the meeting would go against them, assembled an army in Yorkshire and marched south to intercept the king before the meeting could convene.
Although Somerset was present in the king’s entourage, the king had given command of the royal army to Humphrey Stafford, Duke of Buckingham. On learning that York had put an army into the field within striking distance of the royal army, Buckingham advised the king that the safest bet was to take refuge in St. Albans and try to negotiate with York.
The king’s army swept into the town just after sunrise and began fortifying the place. York’s 3,000-strong army arrived shortly afterward and deployed on a ridge to the east of the town. The Yorkists, sporting white roses as their battle sign, found the three roads into town from the east heavily guarded. York commanded the right wing; Richard Neville, Earl of Warwick, the center; and his father, Richard Neville, Earl of Salisbury, the left. On the Lancastrian side, Somerset and Henry Percy, Earl of Northumberland, held the gate at Shropshire Lane that led into the center of town, while Lord Clifford of Craven blocked the southern entrance to town at Sopwell Lane. The king unfurled his banner in the market square with the rest of the army.
York’s quarrel with the king that day was relatively simple to resolve: hand over Somerset so that he could be tried for treason. The men in the Yorkist ranks were mostly archers drawn from the northern march along the Scottish border, where raids and skirmishes were as regular as the tides of the sea. These men were armed with longbows as tall as they were. They sported sturdy steel caps and wore either short-sleeved mailed shirts or padded jackets. Stiff leather braces protected their left wrists from chafing bowstrings.
Guarding the roads into town from the east were supporters of the king. Early that morning they had blocked key entry points to the town by sliding heavy beams across the roads. Men-at-arms hefted swords and poleaxes and stood shoulder-to-shoulder with footmen toting billhooks and halberds. The Lancastrians, as they were known, wore red roses as a show of support.
“A Warwick! A Warwick! A Warwick!”
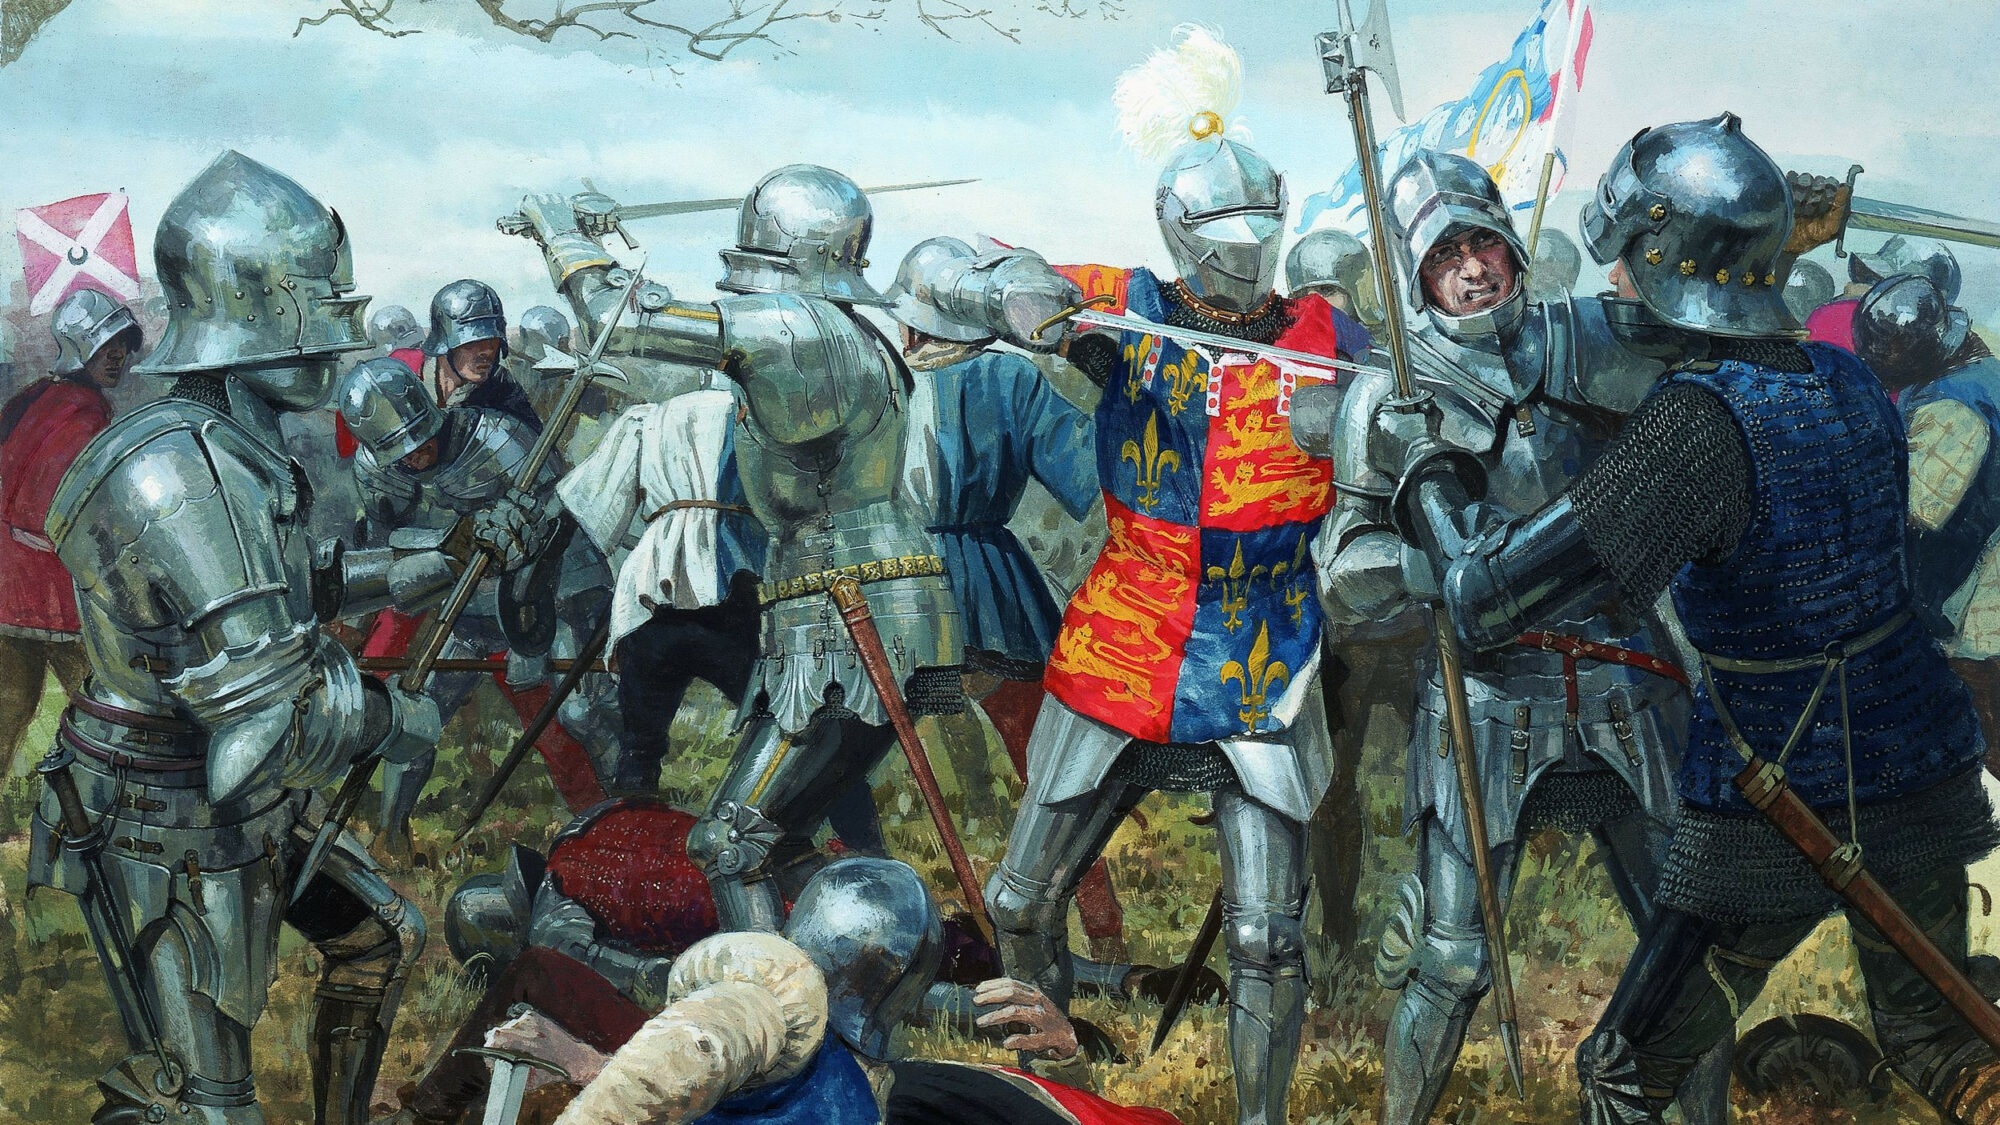
The two sides negotiated for an hour but failed to come to a resolution. When the talks ended, York resorted to arms. At 10 am, the Yorkists made a sudden rush at the town’s gates. Attacking down narrow lanes where they could not bring their superior numbers to bear, the Yorkists were thrown back with heavy losses. A second assault fared no better. While the Lancastrians were fighting at the gates, Warwick led 600 men through gardens behind the houses on the edge of town. Advancing undetected, Warwick’s men burst onto Holywell Street behind the men at the gates. A great shout went up: “A Warwick! A Warwick! A Warwick!”
One band of soldiers veered left to attack Clifford’s men from the rear, while another group turned right toward the market square where the king was protected by his retainers. The majority of the Lancastrians fled for their lives. Even Henry’s standard-bearers abandoned their liege, leaving the king alone to confront his captors. For those few who stood their ground, the battle was bloody and deadly. The abbot of St. Albans, who witnessed the slaughter, recorded the fighting: “Here you saw one fall with his brains dashed out, there another with a broken arm, and a fourth with a pierced chest, and the whole street was full of dead corpses.” The battle lasted less than an hour. Henry’s chief councilor, Somerset, and two of his top commanders, Northumberland and Clifford, were among the dead who littered the
marketplace.
Finding the king sitting dazedly under a tree, the Yorkist commanders kneeled down and asked his forgiveness. The following day, the victorious Yorkists took Henry back to London. Later that year, Parliament and the king agreed to again bestow on York the title of Protector and Defender of the land. The second protectorate had begun.
From Protector to Traitor to Royal Heir
York had made certain strategic and tactical changes to his military plans that resulted in the victory at St. Albans. Most importantly, he did not allow himself to be stalled by negotiations as he had been when he stopped outside the gates of London in 1452. He also raised a larger army and saw that it was led by experience captains. After they seized power, York and the Nevilles were shrewd enough to make sure that Parliament passed an act pardoning them for taking up arms against the king. Moreover, Henry proved too weak-willed to charge them with treason. But the second protectorate was short-lived. Four months after York was appointed Protector, the king again relieved him of his duties in February 1456.
For the next three years there was acute tension in the realm, as York and Queen Margaret waged a constant political battle to sway the reed-like Henry, who by that time had become nothing more than a figurehead on the throne. In June 1459, Margaret convened a great council meeting in Coventry at which the Yorkist leaders—all three of whom were excluded from the meeting—were found guilty of treason. Alienated by the council’s decision, the Yorkists once again resolved to take up arms against the king. York recruited new forces in Wales, Salisbury in the north country, and Warwick in Calais.
Their efforts to unite were not without incident. On September 3, a Lancastrian force under orders to intercept Salisbury’s troops on their march from Yorkshire to Shropshire was defeated by Salisbury at the Battle of Blore Heath. Salisbury subsequently united with York and Warwick at Ludlow. With a large army led by Margaret and Henry bearing down on him, York was cornered at Ludford Bridge on October 12. When their best soldiers—the Calais garrison led by Andrew Trollope—defected to the Lancastrian side on the eve of battle, the Yorkist leaders abandoned their small army to its fate and fled abroad. York went to Ireland, while Salisbury, Warwick, and York’s eldest son, Edward, Earl of March, all sailed for Calais. At yet another meeting of the great council in November, York, Warwick, and Salisbury were branded traitors and their property declared forfeit.
As a prelude to their return to England, Warwick, and Salisbury launched a propaganda campaign to persuade the English people that they were best qualified to serve as the king’s chief ministers. Salisbury, Warwick, and March landed in June 1460 at Sandwich in Kent and marched on London, where they were welcomed warmly by the city’s pro-Yorkist residents. The following month they marched north and defeated the Lancastrians, recapturing the ineffectual Henry at the Battle of Northampton on July 18. This time it was Margaret’s turn to flee. She decamped to Wales, where she was given safe harbor by Jasper Tudor, Earl of Pembroke.
Warwick escorted Henry back to London, and Parliament canceled the sentences against the Yorkist leaders. York, who returned from Ireland, went before Parliament and claimed the throne for himself, on the grounds that the Yorkist title to the throne was more legitimate than the Lancastrian claim. But Parliament was reluctant to remove a king who had reigned for almost 40 years, regardless of whether that reign was pitifully ineffective. A compromise known as the Act of Accord was signed on October 25, whereby Henry would remain on the throne but York would govern in his behalf. As a concession to York, Parliament agreed that upon Henry’s death the crown would pass to York or to one of his sons—not Margaret’s son, the Prince of Wales. The act gave York the power to crush rebellion and wage war abroad on behalf of the king. To finance these undertakings, York was given the principality of Wales, the duchy of Cornwall, and the earldom of Chester.
A Formidable Opposition: Queen Margaret and the Lancastrians
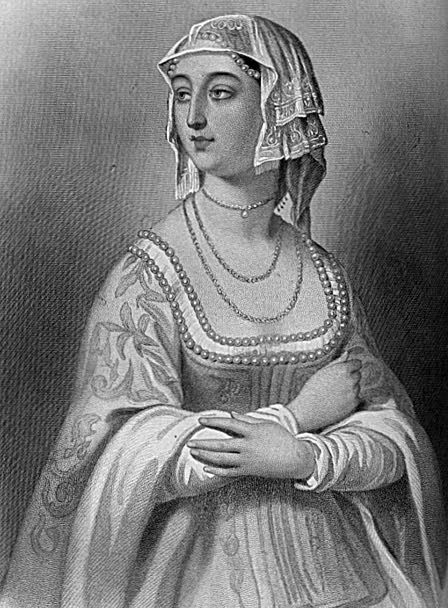
Not surprisingly, Queen Margaret vehemently opposed the accord that would disinherit her son. She immediately set about mobilizing key supporters to overthrow York by force. In a series of letters, she called on those peers of the realm sympathetic to the plight of her son to assemble in the north country. To her supporters in the South, such as Henry Beaufort, Third Duke of Somerset, and Thomas Courtenay, Earl of Devon, she sent letters calling on them to march to Yorkshire. Twenty-four-year-old Somerset, who had seen his father slain before his eyes and had been badly wounded himself at St. Albans, had been in France trying unsuccessfully to oust Warwick from his base in Calais. Somerset returned to England in October, landing at Poole, and assembled forces from his base at Corfe Castle in Dorsetshire. Trollope, who had assisted Somerset in trying to pry Warwick from Calais, also returned from France to help the queen and her supporters. Writing to Somerset and Devon, Margaret “prayed them to come to her as hastily as they might, with their tenants as strong in their harness as men of war.”
The Lancastrian opposition in the North up until that time had been led primarily by Henry Percy, Third Earl of Northumberland, who had a long-standing feud of his own with the Nevilles, particularly with Salisbury. Other peers whom Margaret called to her side included Henry Holland, Duke of Exeter; James Butler, Earl of Wiltshire; Thomas Roos, Lord Roos; John Clifford, Lord Clifford; Ralph Greystoke, Lord Greystoke; John Neville, Lord Neville; and Henry Fitzhugh, Lord Fitzhugh. Margaret did not limit her request for assistance to those in England. By the time the Act of Accord was passed, she had sailed from Wales to Scotland in search of additional support. Before long, the Lancastrian army assembled in Yorkshire approached 15,000 men.
The House of York Prepares for War
York knew that Margaret, Somerset, and other loyal Lancastrians nobles had no intention of adhering to the accord and were willing to fight to restore the status quo. Within a matter of weeks, word reached London that a large Lancastrian force was assembling in Yorkshire. This was particularly unpalatable to York and Salisbury, who had substantial hereditary landholdings in the county. York’s first objective was to march north to reestablish control over his holdings in West Riding. Once that was done, he would, if necessary, fight the Lancastrians to ensure that the rebellion did not spread south. These were sound objectives, but York seemed to have little idea of the extent of the Lancastrian opposition or the size of its army, which seemed to grow larger with each passing day.
At some point before he set out for the North, York commissioned John Neville, Lord Neville, who was Salisbury’s cousin, to raise troops on York’s behalf to fight the Lancastrians in the North. York granted him permission to assemble all able-bodied men between the ages of 16 to 60 to fight the rebels. By combining whatever troops Neville might raise with those that York and Salisbury would gather on their march north, York hoped to face the Lancastrians with an equal number of men. Using the power granted him by York, Neville subsequently raised several thousand men.
The troubles York encountered raising troops in London and the surrounding area did not bode well for the upcoming campaign in the North. Not only was he substantially short on funds because of the large sums of money the crown owed him, but before shifting north he was compelled to dispatch his eldest son, the 18-year-old Earl of March, with a substantial force to Shrewsbury to block Pembroke from reinforcing the Lancastrian army in the North.
Departing from London
Before leaving London, York put together his will should he be murdered or fall in battle. While March blocked Pembroke on the Welsh border, Warwick remained in London to watch over Henry and defend the coast against any raids across the English Channel by the French. In addition to the forces he expected Neville to raise, York also planned to rely on a number of longtime supporters such as Richard Hanson, Edward Bourchier, and Henry Retford, as well as northern knights Thomas Parr, Thomas Harrington, and James Pickering.
York left London on December 9, accompanied by 60-year-old Salisbury and York’s second son, 17-year-old Edmund, Earl of Rutland. Between them, Salisbury and York began the expedition with fewer than 500 men. York planned to recruit the majority of his army on the way north, and therefore was not in a position to contest the advance of Somerset and Devon, who were en route to Yorkshire from the west country via Bath, Evesham, and Conventry. York also took with him guns from the royal arsenal in the Tower of London.
His army traveled along the Great North Road that passed just west of Cambridge and ran through Stamford and Newark. The men who joined his ranks were probably drawn from East Anglia, the Midlands, and Yorkshire. Altogether York and Salisbury were ultimately able to raise an army of between 5,000 to 6,000 men. It was a modest force for the time and sufficient to restore order in a region, but far short of what would be needed to win a set-piece battle against a well-organized and well-led foe. York and Somerset traveled separately in order to find places to camp more easily.

Arriving at Sandal Castle
By the fall of 1460, Yorkshire had fallen into a state of anarchy that allowed the Lancastrians to gain the upper hand. The Yorkists, lacking a strong northern champion, were on the defensive. In November, Northumberland, Clifford, and Roos held a council in the city of York, at which they agreed to kill or drive off the tenants of York and Salisbury in West Riding (the western portion of Yorkshire). At the same time, Northumberland and the other Lancastrian nobles in Yorkshire were actively recruiting an army to regain control of the crown for Margaret. The subsequent arrival in mid-November of Devon and Somerset, who had been joined by Exeter and Wiltshire on their march north, dramatically tipped the scales in the county in favor of the Lancastrians. The remarkable feat of fielding such a large army was testimony to the outrage felt by many common Englishmen toward the Act of Accord. When the Lancastrians from the south joined Northumberland’s already large army, the Lancastrians probably had more than 20,000 men under arms, ready to do battle with York.
York’s army marched north in dismal weather. The sky was bruised black and purple, and rain fell heavily on the soldiers. The Yorkists had to contend with streams and rivers in flood, with many bridges out. Worse still, enemy scouts shadowed their columns as they neared Yorkshire. At Worksop in Nottingham, the two sides clashed when York’s fore riders ran headlong into a mounted enemy troop led by Trollope. In the short but deadly clash that followed, Trollope’s men massacred York’s scouts, leaving his army without eyes and slowing its progress to a crawl.
York arrived in Sandal Castle on December 21. Although the march normally took less than a week, the miserable weather, the recruiting effort, and the artillery train stretched the trip considerably. Margaret had been so successful in mobilizing the Lancastrian nobles that York had no chance to substantially increase his manpower. He soon learned that most of his and Salisbury’s tenants in West Riding had been run off and their property burned and looted. The castle was a good defensive position at which York could wait for reinforcements from other areas. Lord Neville was thought to be operating in the area and might bring a considerable force, and at some point the Earl of March was expected to quit his blocking position at Shrewsbury and march to his father’s aid with a sizable force.
Holding for Reinforcements
The dilemma York faced was whether he had enough provisions to hold out until reinforcements arrived. The ranking Lancastrian in the area, Somerset, had established his base at Pontefract Castle, nine miles north of Sandal. Somerset had stationed his forces in the immediate vicinity of Sandal Castle to prohibit the Yorkists from obtaining supplies from the town of Wakefield and to block any reinforcements attempting to join York. For this reason, the keeper of the castle had been unable to collect sufficient provisions to feed York’s army. Lacking any artillery to conduct a siege, Somerset hoped to force York to quit the castle. The only good news was that York’s ally Edmund Fitzwilliam still held another stronghold, Conisburgh Castle, to the southeast. That position was nearly impregnable, as Fitzwilliam had improved its defenses considerably with Lancastrian artillery captured at Northampton.
Once he arrived at the castle, York set his men to work improving an already strong position. From his experience in France, York was well acquainted with the advantages of strong field fortifications. Without any artillery to conduct a formal siege, Somerset would be forced to wait for an opportunity to strike some or all of the Yorkist forces on open ground when they ventured away from the castle and outer works. Somerset’s plan was to strike the Yorkists from all sides if they ventured from the castle.
The town of Wakefield lay within view of Sandal Castle to the north, just beyond the Calder River. Somerset, Devon, and Northumberland were encamped on the south bank of the Calder, directly opposite the castle. Somerset and Devon were deployed east of the road from Sandal to Wakefield, while Northumberland was deployed on the west. Exeter and Trollope were positioned farther south of the Calder on the west side of the road, and Roos was farther south of the Calder on the east side of the road, hidden in a deep wood. To the south of Exeter and Trollope, and also on the west side of the road, Wiltshire was deployed. Clifford covered the village of Sandal Magna, just east of the castle.
The Duke of York’s Fatal Error
York and his men passed a dreary and somber Christmas at Sandal Castle. After the holiday, the duke had no choice but to send out foraging parties while he waited for reinforcements to arrive. Somerset and Devon waited as well for one of the parties to approach Wakefield in order to spring an ambush that might lure York out of his castle. They got their opportunity on the afternoon of December 30. Without the usual trumpet blasts that would signal an attack, the Lancastrians under Somerset and Devon formed up. Tramping south across open fields, they overtook the foraging party before it could escape. A desperate struggle ensued as the band of Yorkists fought for its survival.
As York watched the attack on the foraging party unfold, he observed another large force marching southwest toward the melee on the south side of the river. These men marched out quickly from behind a large tract of forest and joined the fight. York believed these men were reinforcements led by Lord Neville coming to his aid. York sallied forth at once in an attempt to unite with Neville and crush the Lancastrians. In a hastily convened council, Salisbury and the other captains advised against a sortie, but York was not intimidated by his enemy, thundering, “I think that I have there as many friends as enemies, which at joining will either flee or take my part. Therefore advance my banner in the name of God and St. George, for surely, I will fight with them, though I should fight alone.”
Orders were given to prepare for battle. But Neville, unknown to York, had aligned himself instead with the Lancastrians. Observing Neville’s force maneuver behind Somerset’s troops, York thought he was attacking the Lancastrians from the rear, when actually Neville was merging with the enemy.
York mustered his men and, accompanied by Rutland and Sir David Hall, his chief military adviser, led his troops away from the castle and onto the road toward Wakefield. He did not fully realize that Neville had switched sides until he drew closer to the action and observed them fighting alongside the other Lancastrians. Still confident in his ability to carry the day, York ordered his men into battle. Encouraged by the confidence of their leader, the Yorkists charged into battle and the enemy reeled under their onslaught.
“Like a Fish in a Net”
The battle did not favor the Yorkists for long. Those Lancastrian commanders not yet engaged waited patiently until York was exposed on level ground between the castle and the river before they advanced from hidden positions in the forest. Once York committed himself, Northumberland advanced and struck York’s left flank. Northumberland’s men soon joined the battle, and Roos emerged from the woods to the east of the road to strike York’s right flank. The Yorkists struggled to maintain their flanks as the battle quickly expanded. With casualties piling up, York’s line began to waver and his men gave up the ground that they had gained in their initial assault. York was now at least a half mile from the castle, and to retreat would mean complete disaster. His one hope was for Salisbury to gather the remaining troops at the castle and march to his assistance.
From the safety of the castle, Salisbury watched the disaster unfold before his eyes. Hastily assembling the few remaining troops who had stayed behind, Salisbury and his son, Thomas Neville, marched quickly off the hill where the castle was perched and across the flat ground to York’s assistance. About the same time that Salisbury reached the beleaguered Yorkists, the force led by Exeter and Trollope delivered a second hammer blow to York’s left flank. York’s presence on the front line with his men helped maintain their morale, and the addition of Salisbury’s small reserve enabled York to hold on for a short while in the face of overwhelming odds.
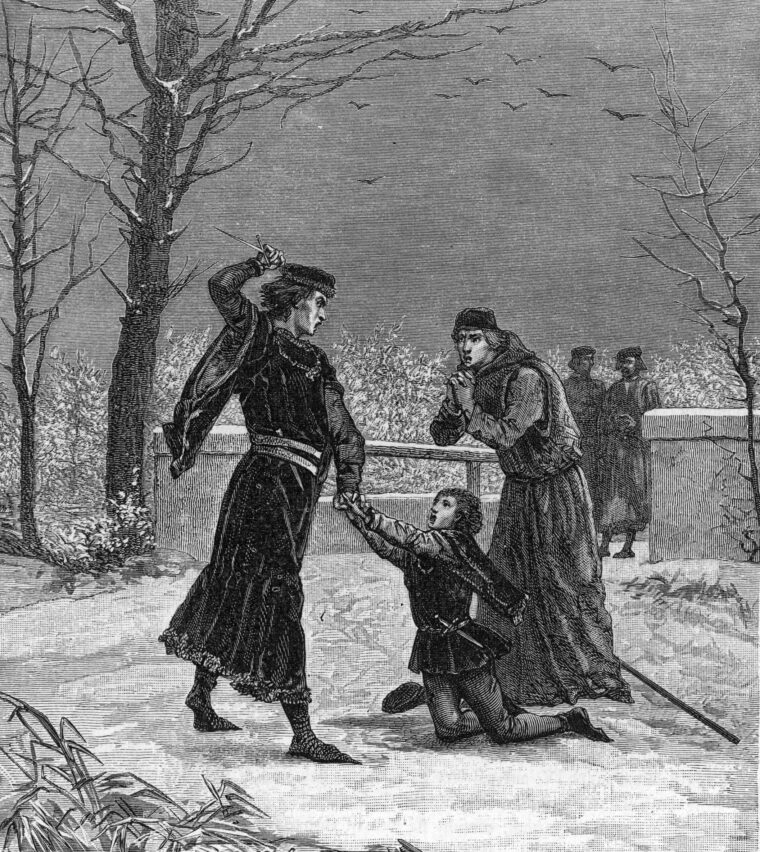
Realizing that his men were soon going to be completely surrounded, York somehow managed in the growing chaos to gather Rutland and his tutor, Sir Robert Aspall, and order them to try to make their way back to Wakefield and continue until they reached a safe haven. Spying Rutland and his tutor making their way toward Wakefield, Clifford took a handful of men and pursued them.
Within minutes of speaking his last words to his son, York and his men were attacked from behind by Clifford’s men advancing from Sandal Magna. An eyewitness described the outcome of the battle: “When [York] was in the plain ground between his castle and the town of Wakefield, he was environed on every side, like a fish in a net or a deer in a buckstall.” Assailed from all sides, York’s line crumbled. Those remaining alive fought in isolated pockets as the last of York’s force was crushed between the enemy like grain between millstones.
With no cohesive force left to lead, York threw himself into the melee. All around him men were dying. Disdaining to surrender, York took up his last position against a stand of three elm trees, where he fought gallantly until he was hacked to death. Once York was dead, all remaining resistance evaporated, and surviving Yorkists fled for their lives, discarding equipment and weapons that would slow their escape. Eager to settle scores that had festered over the past five years, the Lancastrians chased the defeated Yorkists and struck down a large number of them before they could get away. Other Lancastrian forces occupied Sandal Castle. The red rose had won the day.

Revenge of the House of Lancaster
The bodies of the dead were thrown into a large ditch next to the battlefield dug by the victors. That night a gentle snow fell on the battlefield where the dead were stacked together like cords of wood. The scene was recorded by a Yorkist soldier who survived the slaughter and was scouring the field for his slain father. “At midnight the kindly snow fell like a mantle on the dead and covered the battlefield with a blanket of white, which when it had finished gave no trace of what had gone before.”
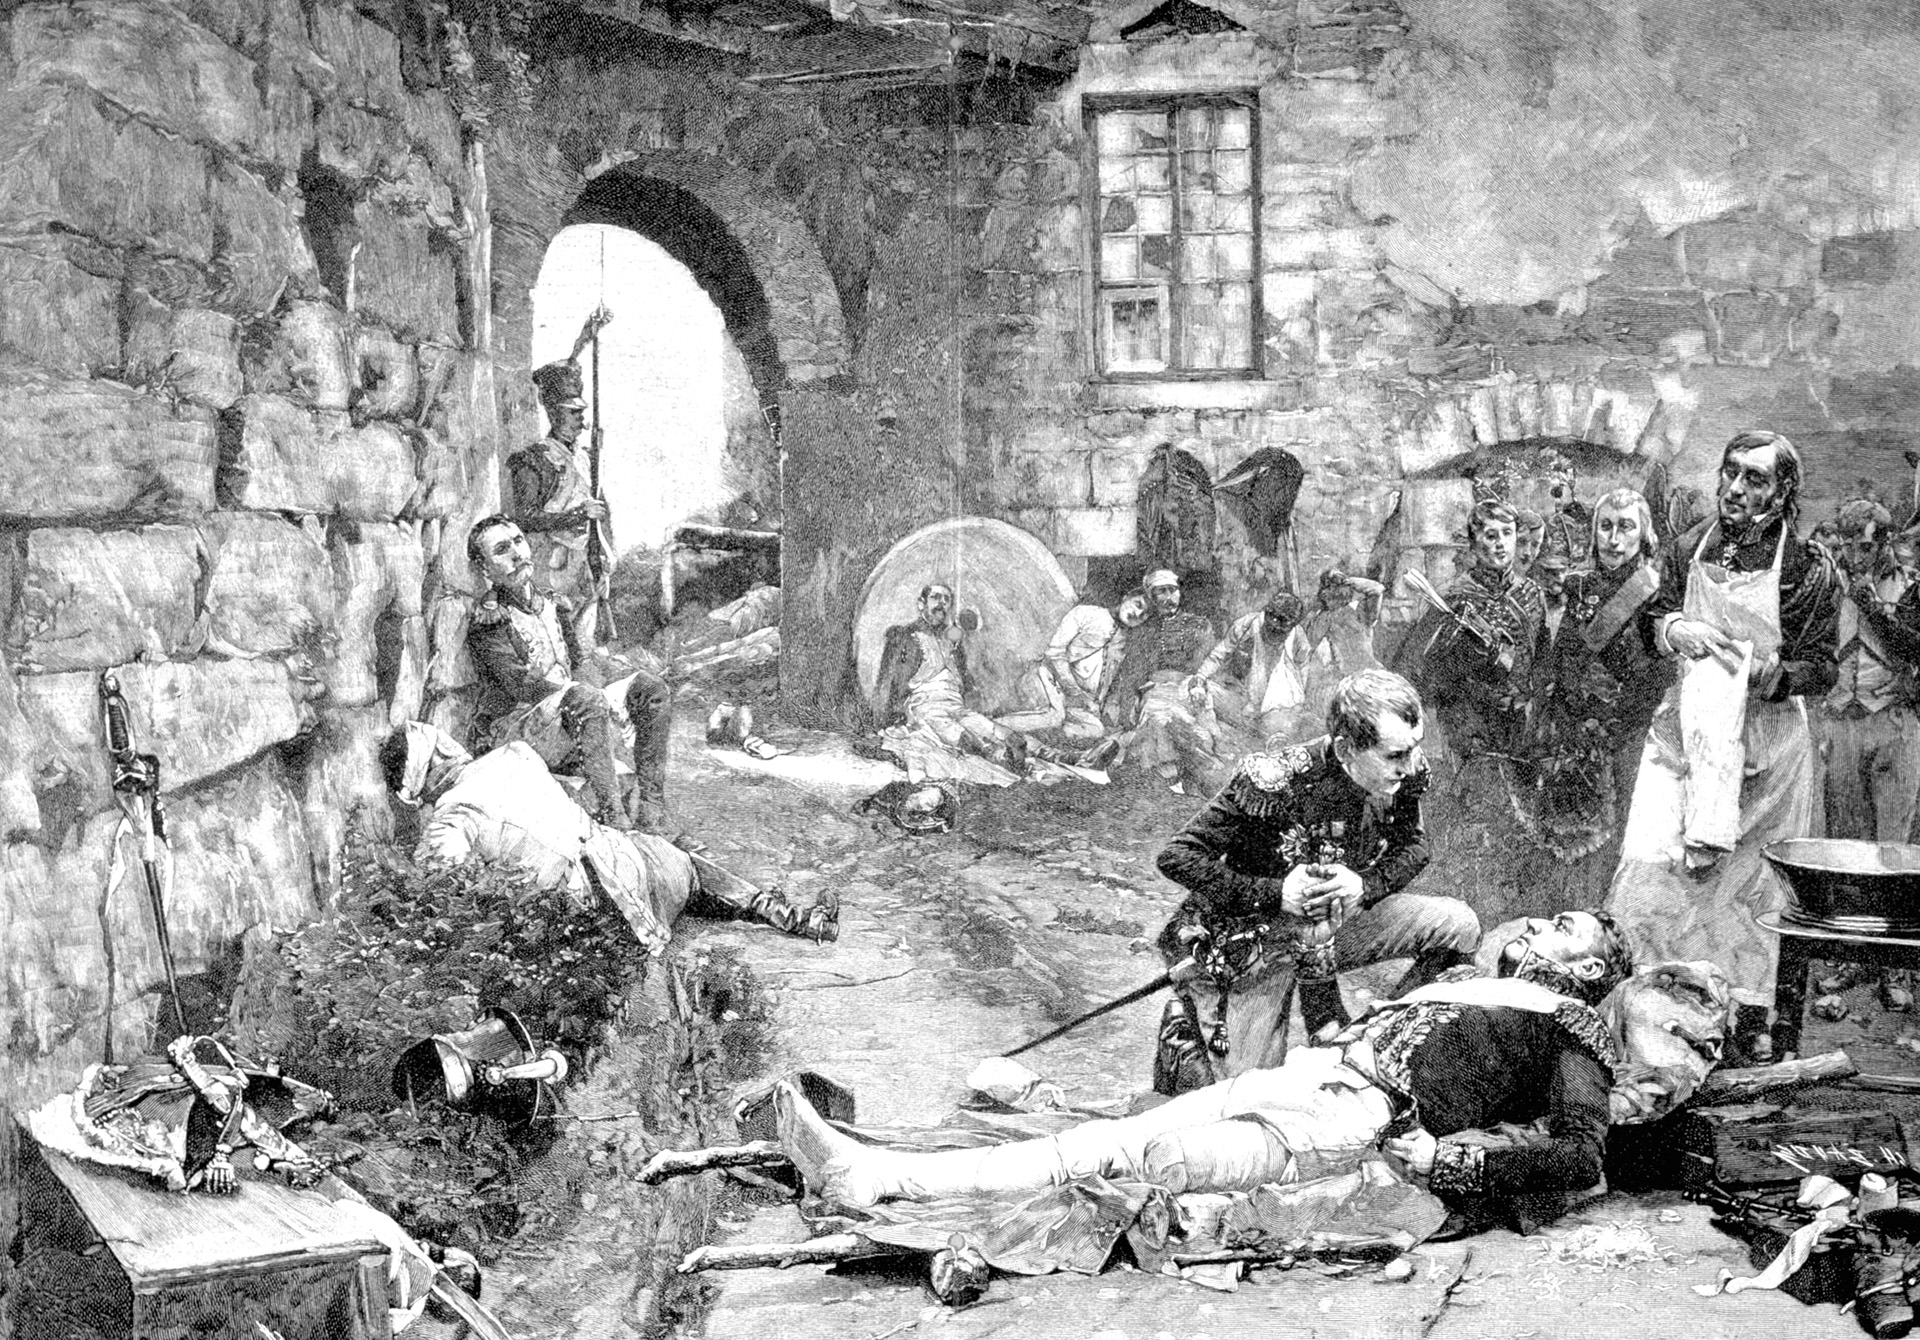
The Lancastrians thirst for revenge was not quenched with the death of York. Clifford caught up with Rutland and Aspall on Wakefield Bridge. Despite the youth’s pleas from bended knee, Clifford was merciless. “By God’s blood, thy father slew mine, and I will do thee and all thy kin,” he said, thrusting his sword completely through the boy’s throat until it came out the back of his neck. Salisbury was captured and led off to Pontefract, where he was beheaded the following day. The heads of the three Yorkist nobles were then taken to the city of York and stuck on spikes atop Micklegate Bar, the gateway into the city. In a further gesture of contempt, the Lancastrians placed a paper crown atop Richard’s head to mock his claim to the throne.
The Yorkist army at Wakefield lost 3,000 men. Lancastrian losses were far fewer. The knights who fell fighting for York include Bourchier, Hall, Harrington, Parr, Pickering, Retford, and Salisbury’s son, Thomas Neville. The Lancastrians were able to bask in their victory for only a short time. After the beginning of the year, Margaret joined Somerset’s army in Yorkshire, bringing with her both Scottish and French mercenaries. By extensive pillaging on its march south, the large Lancastrian army alienated the population of the Midlands. To keep them out of London, Warwick fanned the flames by spreading propaganda about alleged atrocities committed by the mercenaries and claiming that they planned to sack the city.
Losing the Battle, Winning the War
The 18-year-old Earl of March learned of his father’s demise while in Gloucester, having redeployed south from Shrewsbury. With the encouragement of Warwick and others, he resolved to take the crown from Henry. But before he could do so, he needed to not only defeat the Lancastrian northern army under Margaret and Somerset, but also a Lancastrian western army under Pembroke. At the Battle of Mortimer’s Cross fought February 2, Edward smashed Pembroke, removing the threat from Wales.
Warwick, who still had Henry in his custody, entrenched at St. Albans in an attempt to block the Lancastrians from entering the city before Edward could arrive. In a confused battle fought in the city’s streets, Somerset drove off the Yorkists and reunited Henry with his wife and son. When the Lancastrians arrived at the gates of London, they were denied entry by the frightened townspeople. Unwilling to assault the city, Margaret retreated to Lancastrian strongholds in the North. March subsequently entered London and was proclaimed King Edward IV on March 4.
This set the stage for a showdown between the two monarchs. Edward marched north later that month and defeated Henry’s army under Somerset at the Battle of Towton, fought in Yorkshire on March 29 in the middle of a snowstorm. The decisive victory dispersed the Lancastrians, and Henry and his family, along with Somerset, fled to Scotland.
During the next four years, the Yorkists fought two more battles in the North, eventually wiping out the last vestiges of Lancastrian support. When Margaret and the Prince of Wales fled to France, Henry slipped back into northern England but was caught and imprisoned in the Tower of London. The first phase of the Wars of the Roses was over.


Join The Conversation
Comments
View All Comments