By Arnold Blumberg
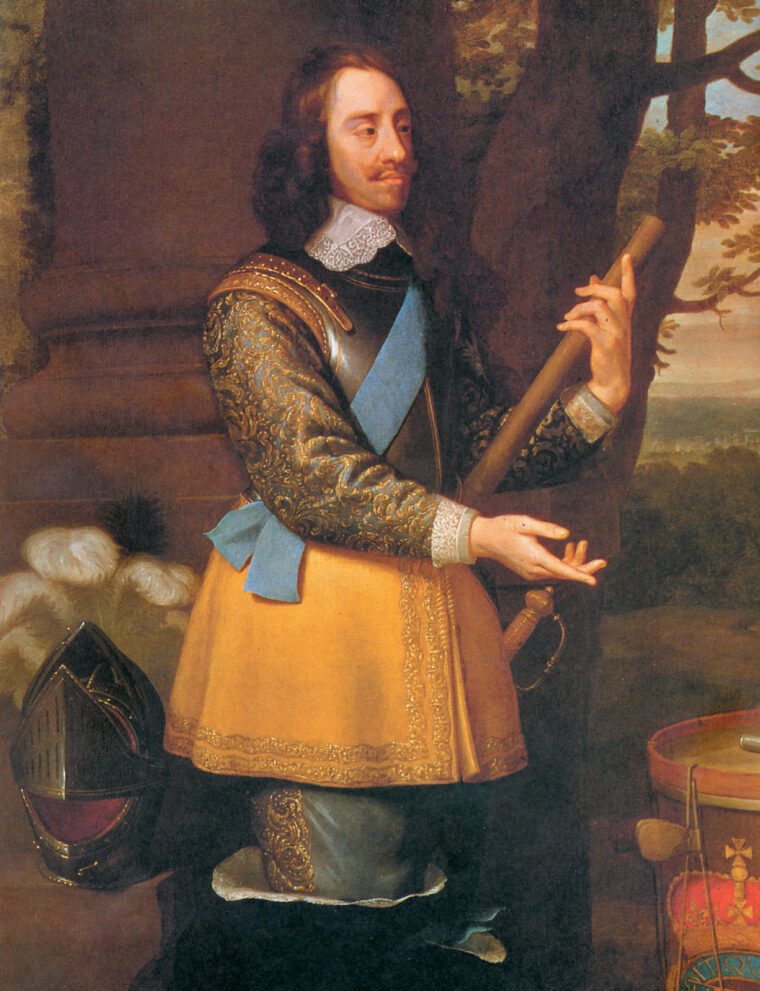
By the spring of 1645, the open warfare between King Charles I and his rebellious Parliament had dragged on for nearly three years, with no apparent end in sight. With the aid of their always fractious Scottish allies, Parliamentary armies had won control of England’s north country from the king and his Royalist supporters at the Battle of Marston Moor on July 2, 1644. Parliament’s vastly superior manpower and financial resources should have finished off the king by the end of the year. Instead, the Roundhead cause had been shaken by a series of surprising setbacks in the south. First, some 6,500 infantry under Robert Devereux, the third Earl of Essex, had surrendered to the Royalists at Lostwithiel, Cornwall, on September 2, 1644. Only 2,000 horsemen in the much-vaunted Parliamentary cavalry had escaped the debacle. Two months later, at the Second Battle of Newbury, the king again had eluded the rebels, who failed to crush his 10,000-man army with a Parliamentary force more than twice as large. As a result, the Cavaliers were still firmly entrenched in the southwestern part of the country, and their stubbornly held strongholds tied down thousands of troops that Parliament desperately needed to augment its armies in the field.
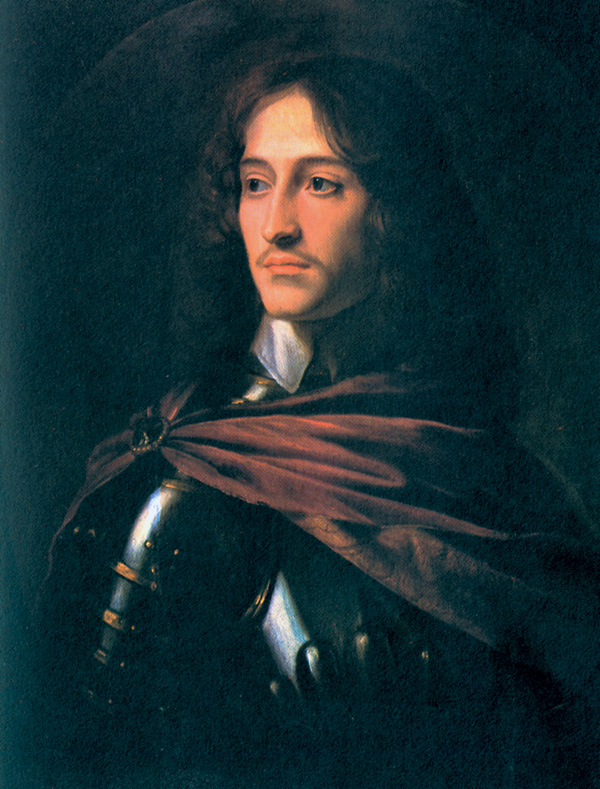
Despite his successes, the king’s situation was also dire. His last remaining power bases—in Wales, the West Midlands, and the southwest—were all open to enemy attack. To further complicate matters, the king’s advisers, spurred by intense dislike of one another and intent on gaining influence for themselves at the expense of their rivals, were constantly at odds over what military course the king should pursue. Charles had hoped to allay the constant bickering and lack of cooperation among his army commanders by appointing one man to act in his name as supreme commander of all royal forces. That man was his 24-year-old nephew, Prince Rupert of Germany. It was thought that the prince, despite his age the most accomplished soldier in the Royalist army, would be able to reorganize the king’s disparate loyalists into one cohesive fighting unit. The pattern Rupert used to reorder the king’s army was based on Parliament’s own New Model Army, just then being created in the first months of 1645 under the vigorous leadership of Sir Thomas Fairfax and his grim-faced cavalry commander, Oliver Cromwell.
Myriad Endemic Problems
Unfortunately for the Royalist cause, Rupert’s sophisticated scheme of consolidation and reform was opposed by many of the king’s closest friends and advisers, particularly Lord George Digby, the secretary of state, whose personal dislike of the prince far exceeded his desire to see the Royalist army streamlined into a more efficient fighting machine. The failure of the king to consistently support Rupert’s innovative ideas also hamstrung the prince’s attempts to fashion a more modern and effective army. Rupert’s hand was further weakened by the king’s inexplicable decision in March 1645 to set up a semi-independent Council of the West, under Charles’s inexperienced 14-year-old son, the Prince of Wales, to run military affairs in that part of the country.
Besides the personal animosities that fractured any strategic cooperation between the various Royalist military leaders, in 1645 the Cavalier army faced other endemic problems. Many regiments were understrength and overstaffed. Discipline was frayed as a result of continuous shortages of arms and food due to the shrinking Royalist resources as more and more of the country fell under Parliamentary control after the catastrophic defeat at Marston Moor. Worst of all was the inescapable fact that Charles did not have enough available manpower to wage an effective offensive or defensive war. Undecided on the best course of action, in April 1645 he directed his forces to concentrate at his wartime capital at Oxford. Both his nephew, Prince Rupert, and Lt. Gen. Lord George Goring, an experienced cavalry leader and commander of the Royalist military in the west, were directed to bring their troops together. The prince, with some 2,000 infantry and horsemen, and Goring, commanding another 2,000 cavalrymen, joined the king near the ancient university town on May 4. A council of war was convened immediately to plot the Royalists’ upcoming campaign.
Three Options for the King
Everyone at the meeting agreed that their cause, without massive foreign aid or substantial reinforcements from Ireland—both extremely unlikely occurrences—could not last more than another six months. In the eyes of the king’s military commanders, Charles had only three options. One, he could stand on the strategic defensive. This course was rejected since it would allow the enemy to take the initiative and bring overpowering resources to bear at the time and place of his choosing. Two, he could concentrate all his available strength and attack the New Model Army, which was known to be moving toward the West Country, before it could fully congregate.
This enterprising idea was shelved because the king feared that in order to bring enough men to bear against the Roundheads he would have to deplete the remaining areas under his control. Three, he could retake northern England. This option, supported by Prince Rupert, would require first raising the enemy siege of Chester, which had been held by the king’s men since the disaster at Marston Moor. A move east would then follow to attack the Scottish army under the Earl of Leven, who at that moment was besieging Carlisle. Rupert argued that the plan would work if Goring and his cavalry kept the New Model Army busy in the west, allowing Rupert enough time to defeat the Scots in the north. With Leven’s forces destroyed and the north country again free to provide recruits and supplies to the Royalist cause, Charles could turn south and meet the rebels in open battle with at least a fighting chance of success.
A Council Divided
The council was divided between Rupert’s plan and other members’ desire to immediately engage the New Model Army while it was still in the process of organizing. As a result, the king settled on an unfortunate compromise: Goring would return to the west with 3,000 cavalry and strike the New Model Army if and when an opportunity presented itself. The rest of the Royalist army would march north to relieve Chester. Goring’s departure left the king with few veteran cavalry of his own, forcing Rupert to replace them with ill-trained, undermanned squadrons bereft of any battle experience.
The main Royalist force, the Oxford Army, was a small affair when compared to the New Model Army. A veteran corps of about 1,500 infantry and 600 horsemen served at Oxford, along with a static garrison force of both horse and foot soldiers. Rupert and his brother Maurice mustered another 1,500 infantry and 500 cavalry, while Goring’s 2,000 well-trained and well-armed troopers added punch to the Royalist cause. In addition, there were 11 regiments of foot and an equal number of cavalry regiments and Life Guard units of regimental size. All these formations shared two basic characteristics: they were badly understrength and they were made up of experienced, steady, and determined men. The Royalist artillery train was small—eight sakers, two mortars, and six heavy siege pieces. With a total force of 6,000 cavalry and 5,000 infantry, this confident, veteran force represented a dangerous opponent to any enemy.
Leadership in the King’s Army
Leadership in the king’s army was another advantage. As overall commander of the army, King Charles was widely admired by his men. He had shared their hardships on campaign, and his optimistic attitude and pleasant, if distant, personality gave them heart. He never shied away from making the tough decisions once battle was joined. A better tactician than strategist, the king had proven himself both brave and stubborn in a fight. At his side, Prince Rupert was the ideal cavalier and had achieved an impressive record of success on the battlefield. He was a superior cavalry leader and the most experienced soldier in the king’s service. His sincere concern for the welfare of the men under him was backed by solid administrative ability. His strategic insights were usually correct.
The king’s infantry commander, Lord Jacob Astley, was an old soldier of considerable experience and service on the continent. He had been appointed to his current post in August 1642. Competent but unimaginative, Astley served the king’s cause with a steady hand. The commander of the Northern Horse (cavalry raised in the north of England) was the dour Sir Marmaduke Langdale, a fine leader of mounted forces. This dependable Yorkshireman had a gift for organization and was a prime mover in restoring the royal cavalry to combat effectiveness after the defeat at Marston Moor. A longtime professional soldier, he was a solid leader of men and a good tactician.
The “New Noddle”
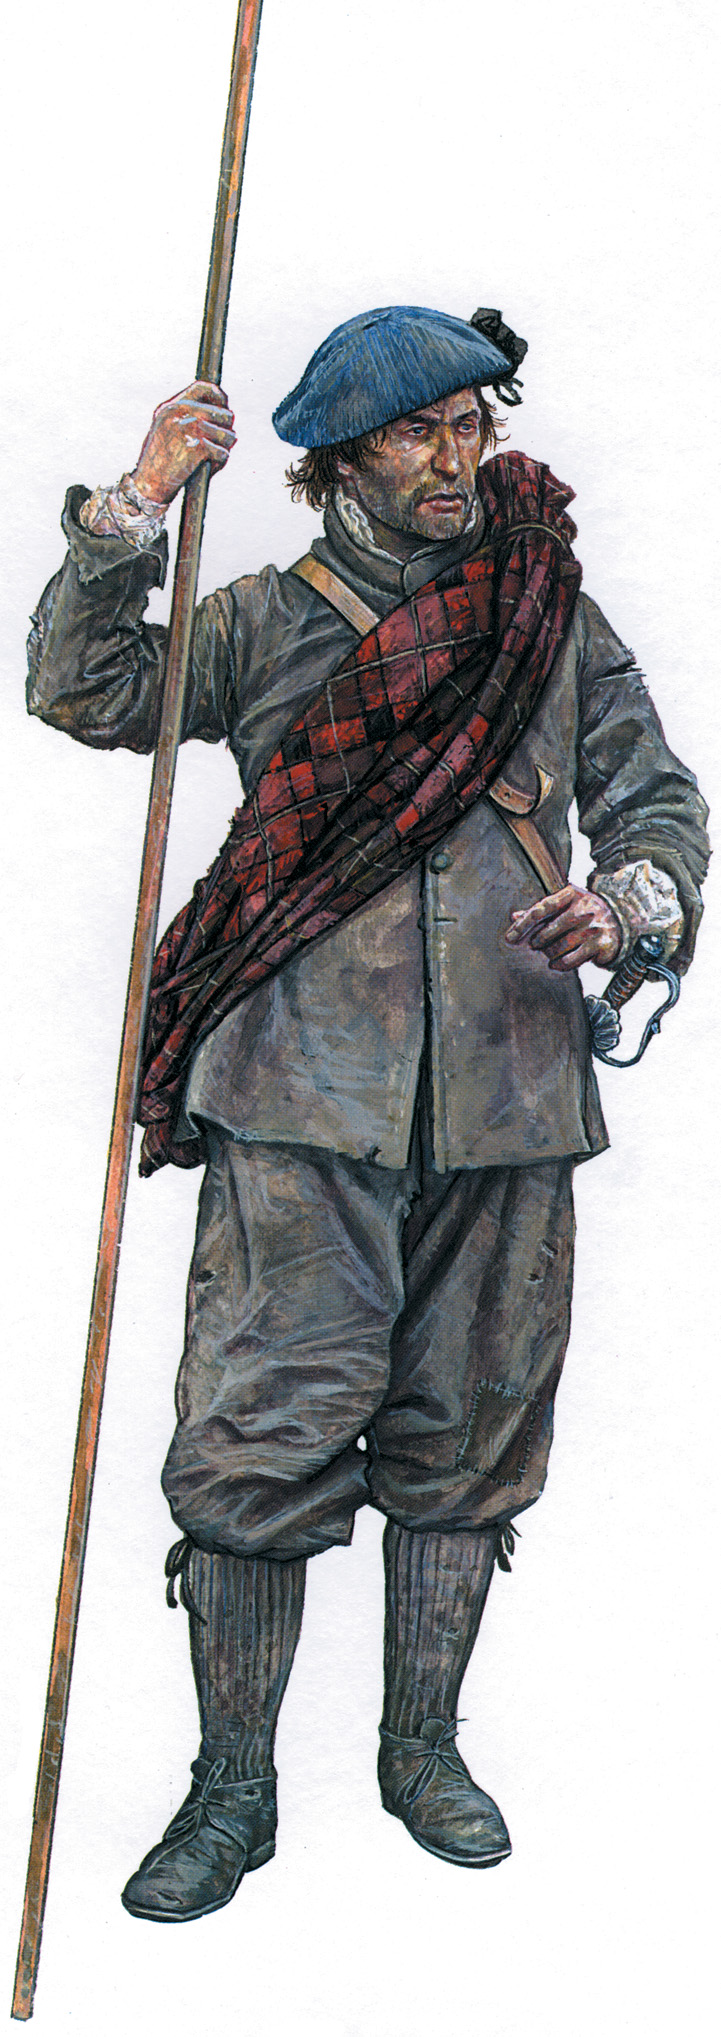
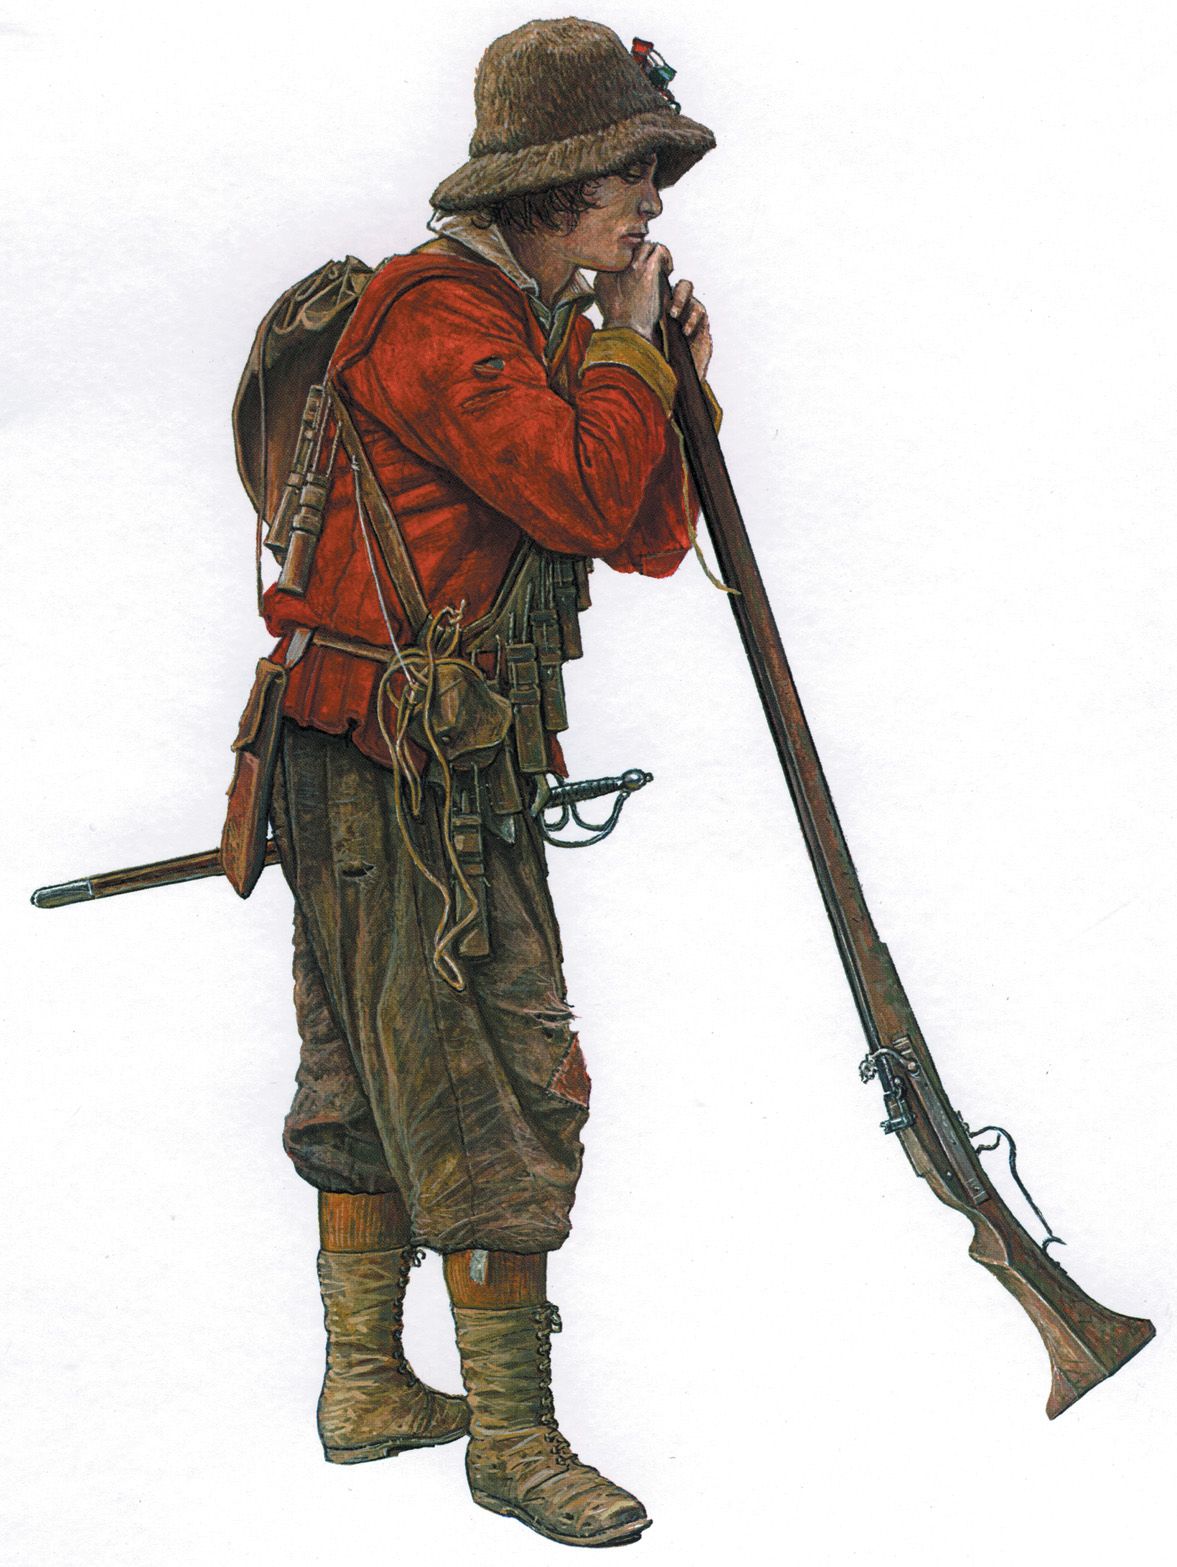
While Charles and his generals planned the upcoming campaign, his opponents struggled to pool their own vast resources into a formidable fighting force, one that could overthrow the monarch and win the war. Toward that end, Parliament had passed legislation in February authorizing “a New Model of the army” of 22,000 soldiers. This new strike force was to be formed by disbanding the old Parliamentary armies under Lord Essex, Lord Manchester, and General Sir William Waller, filling the ranks with volunteers and organizing them into 11 regiments of horse, 12 of foot, and one of dragoons. By April, the New Model Army was ready to take the field despite the fact that its infantry contingent still numbered only about 10,000 men.
The Royalists mocked the nascent Parliamentary force as the “New Noddle,” but the New Model Army actually had much going for it. Although its various infantry regiments brought with them different levels of experience and training, morale was high and discipline was rigidly—not to say religiously—maintained. Conscription was used to raise the necessary manpower, and anyone failing to report for duty within six days of being drafted was subject to execution. Lesser offenses such as blasphemy were punishable by a red-hot poker through the tongue. Unaffiliated young men were stopped frequently on London streets and hustled into troopships to be delivered, bound and kicking, to the army headquarters at Maidenhead. for its part, the cavalry was full-strength and well-armed, confident of its ability to match its Cavalier opponents. A strong artillery train of 56 field guns—mainly demi-culverins and sakers—marched with the army, along with a number of formidable siege guns, including cannon, demi-cannon, and 12-inch mortars to reduce fortified enemy positions.
Oliver Cromwell: Leader of the New Model Cavalry
The remodeled army was fortunate to have commanders of ability and experience to lead it. The commanding general of all Parliamentary forces, Sir Thomas Fairfax, had gained his first military training in the Low Countries and then had seen action in King Charles’s abortive campaigns against the Scots in the late 1630s. Serving under his father in the north of England for the first two years of the English Civil War, he had won minor victories at Wakefield and Nantwich. A good organizer and an even better battlefield tactician, “Black Tom” was both respected and loved by his officers and men.
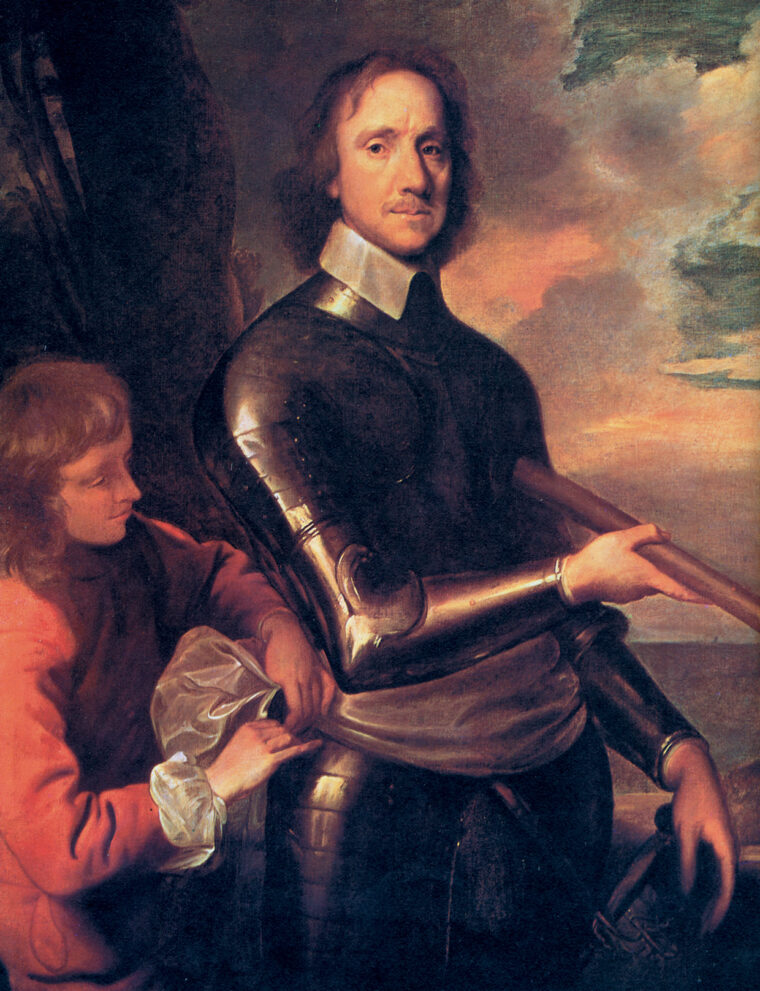
The leader of the New Model cavalry, Oliver Cromwell, continued the practice he had begun earlier in the war of providing his troopers with equal amounts of practical training and moral instruction. His reputation as a dynamic cavalry leader grew out of his successes in eastern England in 1643 and were confirmed by his performance at Marston Moor the following year. By virtue of being a lieutenant general, Cromwell was second-in-command of the army.
Sir Philip Skippon led the New Model infantry. A professional soldier most of his life, he too had served on the continent, commanded the London Trained Bands (private citizens originally mustered to maintain order and suppress riotous behavior inside the city), and headed the foot regiments of Lord Essex’s army during the first two years of the war. Blunt, brave, and efficient, Skippon was equally popular with members of all ranks.
First Steps Taken in April
The end of April saw the first moves in what would be the decisive campaign of the war. The Committee for Both Kingdoms, an executive body of English and Scottish nobles, generals, and politicians that ran Parliament and the war effort, ordered Fairfax to move into the West Country and relieve the town of Taunton, the only inland garrison still held by Parliament in that part of the country. At the same time, Cromwell, with a mixed force of cavalry and infantry, was to keep the king’s army in check at Oxford.
Responding to the enemy’s opening maneuvers, Charles directed Goring to leave sufficient forces to besiege Taunton and hurry east to rejoin him. On May 4, Goring reached Oxford after first brushing aside some of Cromwell’s cavalry outside the city.
Meanwhile, Fairfax sent 3,000 infantry and 1,000 horsemen to succor Taunton, while the bulk of the New Model Army reversed course and headed for Oxford. Reaching the Royalist stronghold on May 19, Fairfax was joined by Cromwell and his cavalry, and the Parliamentary forces began preparations to besiege the town.
Reformulating Charles’ Overall Strategy
They were too late. The king and his army already had left the wartime capital and headed northeast to Stow-on-the-Wold, which they reached on May 8. Two weeks later they arrived at Market Drayton, just west of the Trent River. There it was decided that the king and Rupert would proceed with the northern campaign, while Goring would take his cavalry and keep the New Model Army occupied in the west. The plan was based on the outdated belief that the enemy was still en route to the West Country to relieve Taunton. Once at Market Drayton, the king received the discouraging news that the siege of Chester had been abandoned by the Parliamentarians and that Taunton had been secured on May 11.
With the rationale behind the move north no longer relevant, Charles had to reformulate his overall strategy. Complaints soon arrived that Oxford was not prepared to withstand a lengthy siege, and the Royalists scrambled to find a way to draw the New Model Army away from their capital. A council of war decided that an answering attack on a city held by Parliament would do the trick. Leicester was chosen for the Royalist assault. Located some 60 miles north of Oxford and about the same distance east of the king’s present position, the town was reputed to hold a weak garrison and much accumulated wealth. Furthermore, the Scottish forces in the Midlands that might have challenged the king’s march north had recently moved back to their own county to counter the successes of the pro-Royalist Earl of Montrose. With the Scots gone from the region, Leicester fell to the king on May 31. A long day of frenzied looting then ensued, and some 140 carts rattled out of town with goods bound for Royalist bases at Newark, Lichfield, and Belvoir. Along with the rich bounty were 1,000 muskets and 500 barrels of gunpowder. Roundhead propaganda alleging that the king’s men had summarily executed hundreds of the town’s inhabitants was later disproved, although a Royalist officer, Captain Richard Symonds, conceded that “there was scarce a cottage left unplundered and no quarter given to any in the heat” of battle.
The fall of Leicester caused the Committee for Both Kingdoms to authorize Fairfax to act immediately and independently. Responding to his newfound freedom, Fairfax lifted the siege of Oxford and named the Royalist army as his prime objective. Charles, still fearing for his stronghold at Oxford, turned back south on June 5 and ordered Goring to rejoin him. But Goring, still intent on taking Taunton, did not respond to the king’s demand. He did offer the sovereign some unsolicited advice in a letter that never reached its intended reader. Goring wrote that Charles should “forbear any engagement and to be upon the defensive, upon the Trent River” until Goring arrived. Instead of reaching the king, Goring’s letter was delivered to Fairfax by a turncoat courier.
From June 7-11, the Oxford Army remained in Daventry, collecting supplies. The king, in good spirits, wrote to his exiled wife, Queen Henrietta Maria, in France that “my affairs were never in so fair and hopeful way.” Charles even found time to do a little hunting. Meanwhile, Fairfax gathered his forces at Northampton, 14 miles to the southeast. On the 12th, Parliamentary cavalry patrols discovered enemy outposts near Daventry. Moving closer to his opponent, Fairfax surveyed the Royalist position that evening. The next day, Cromwell arrived in camp with 700 additional cavalry. His welcome arrival, combined with the intelligence gleaned from the misdelivered letter that Charles would not have the benefit of Goring’s cavalry, determined Fairfax to strike as quickly as possible.
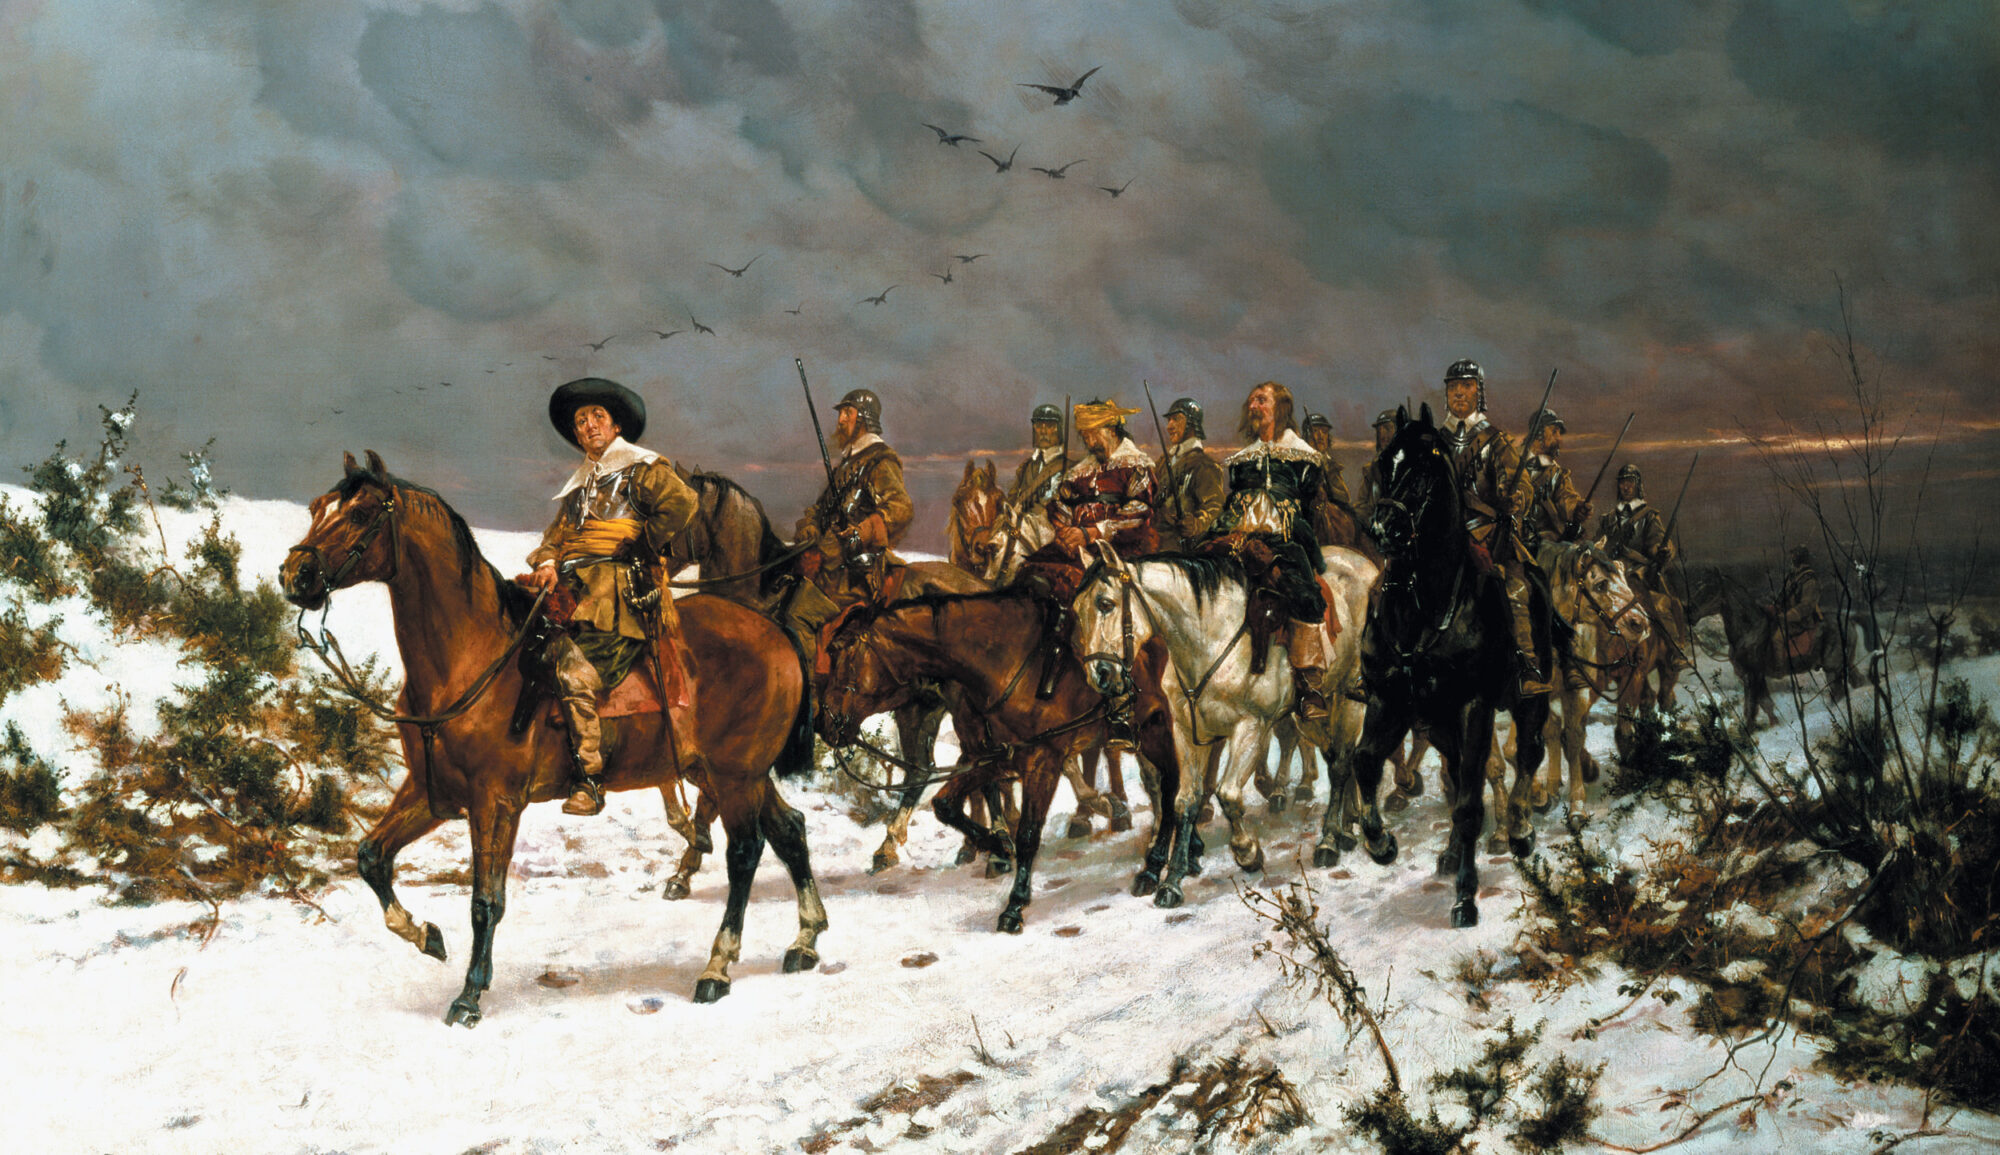
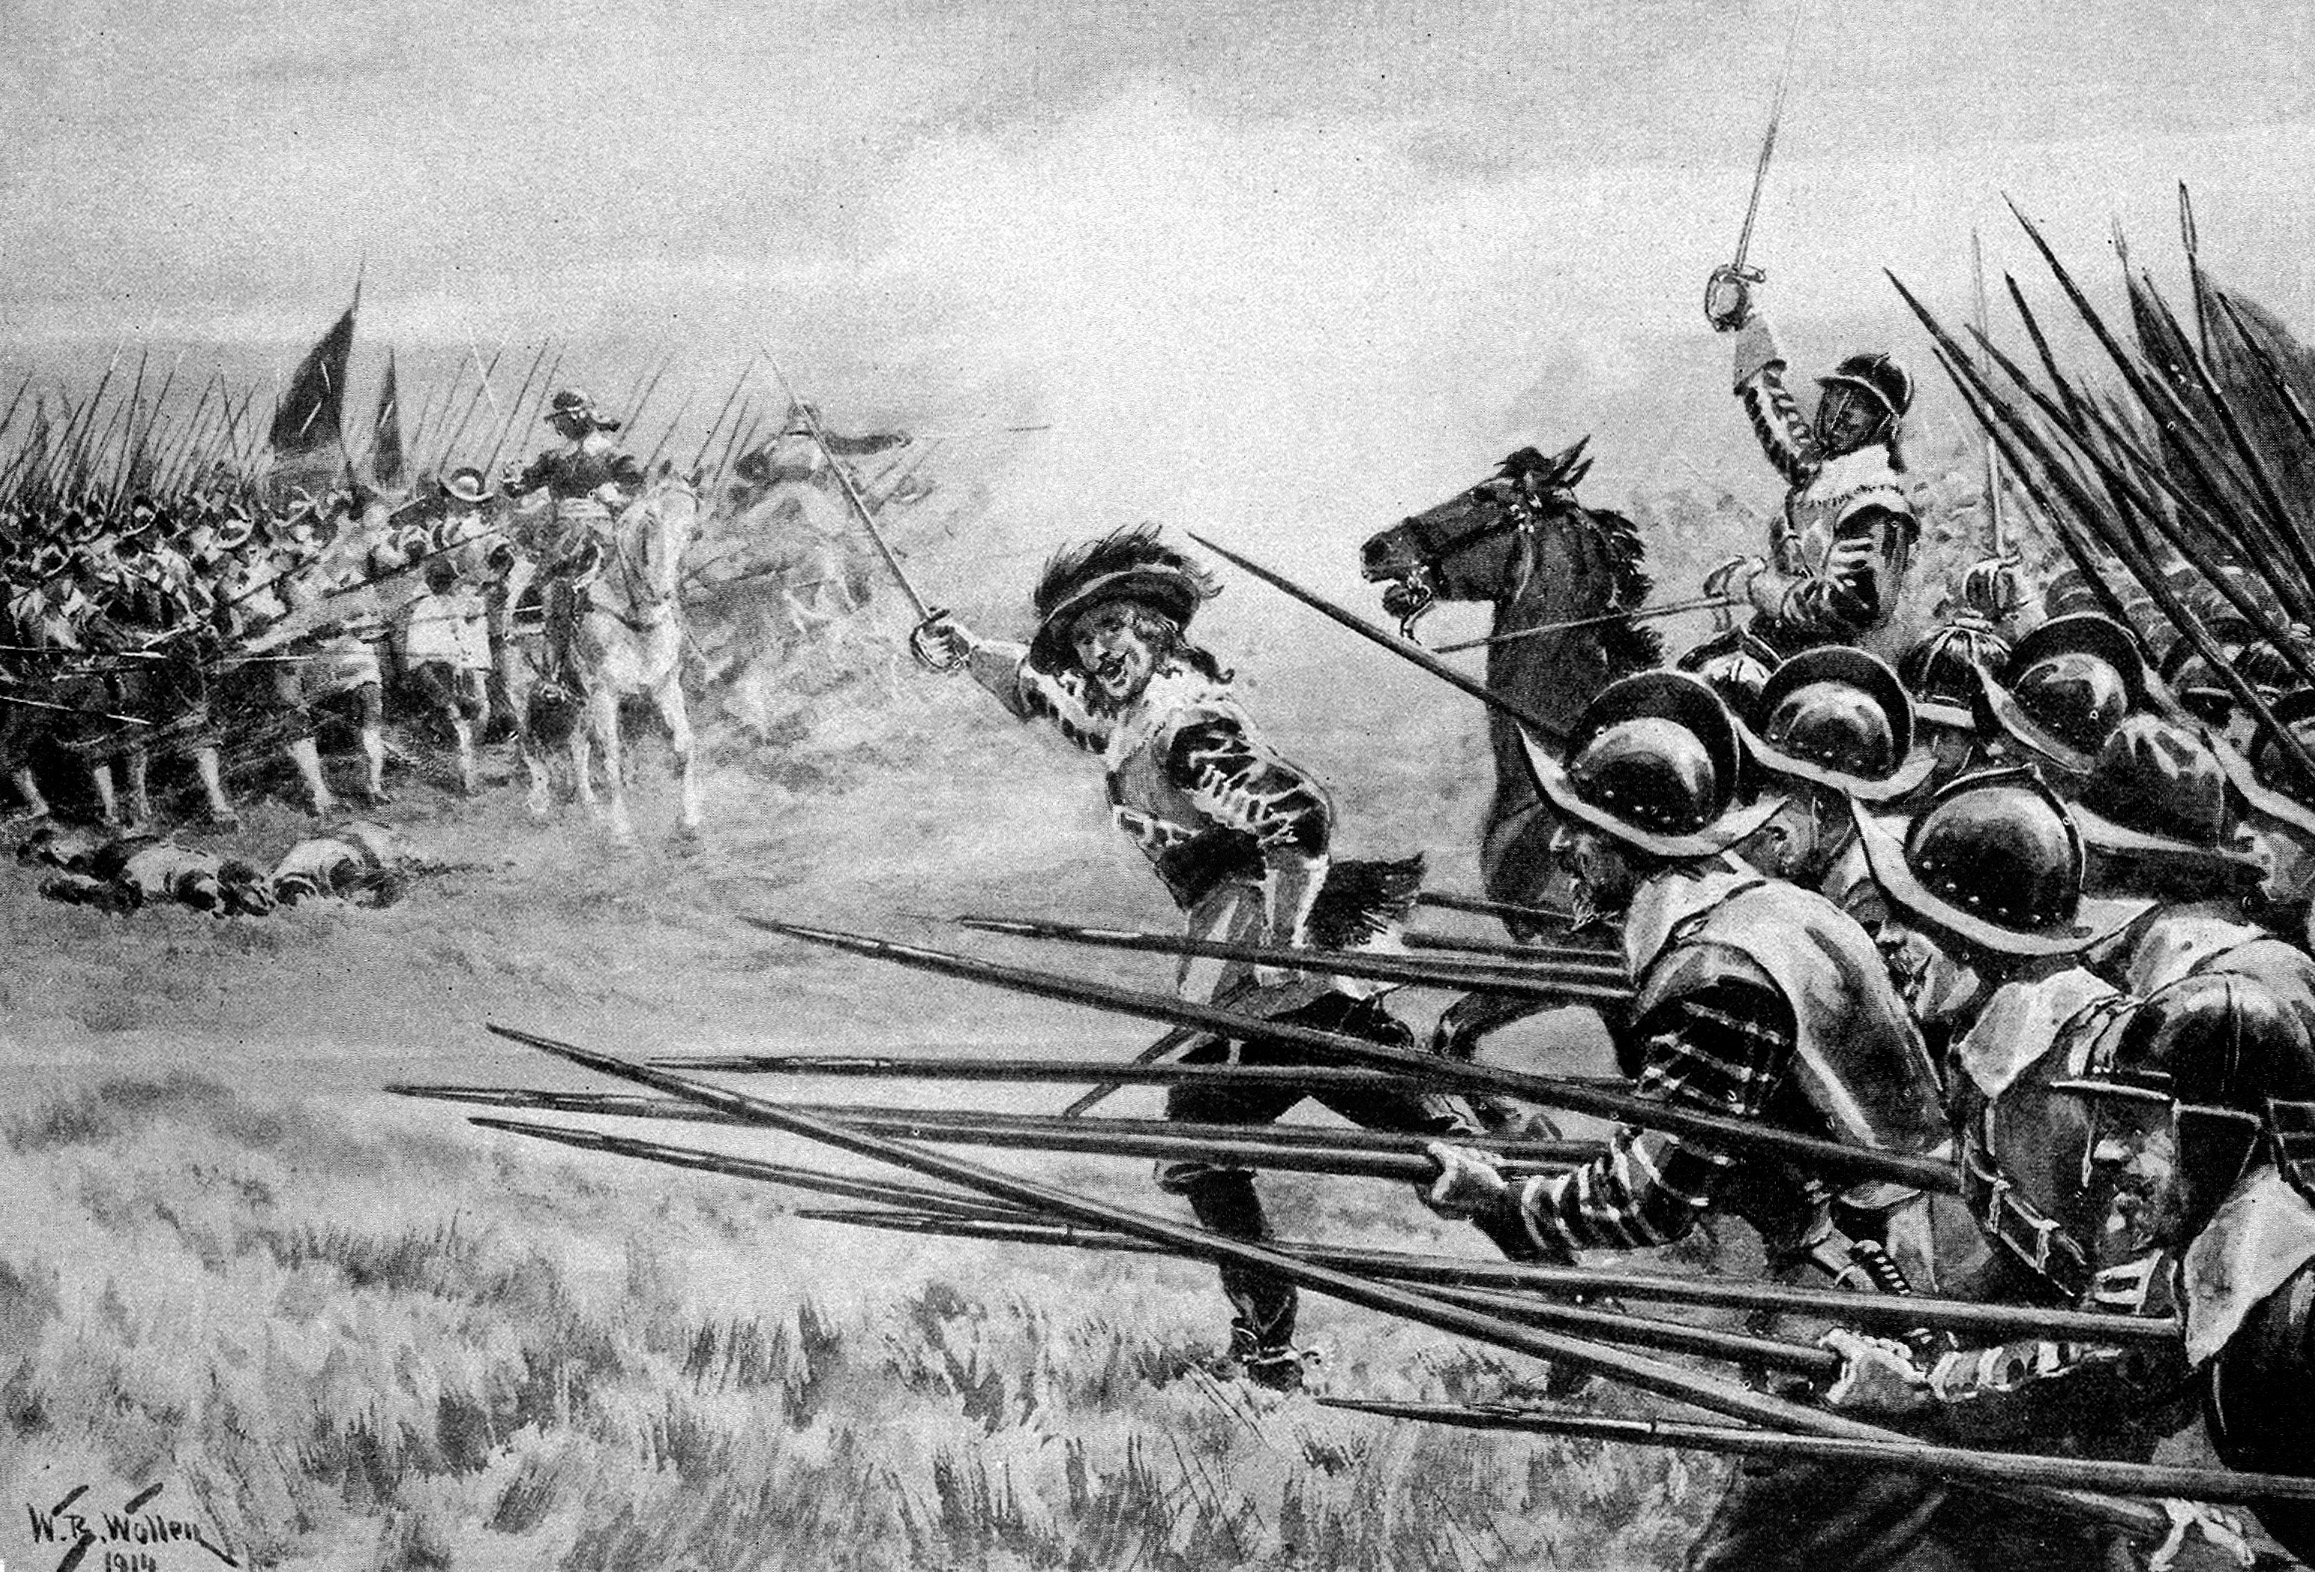
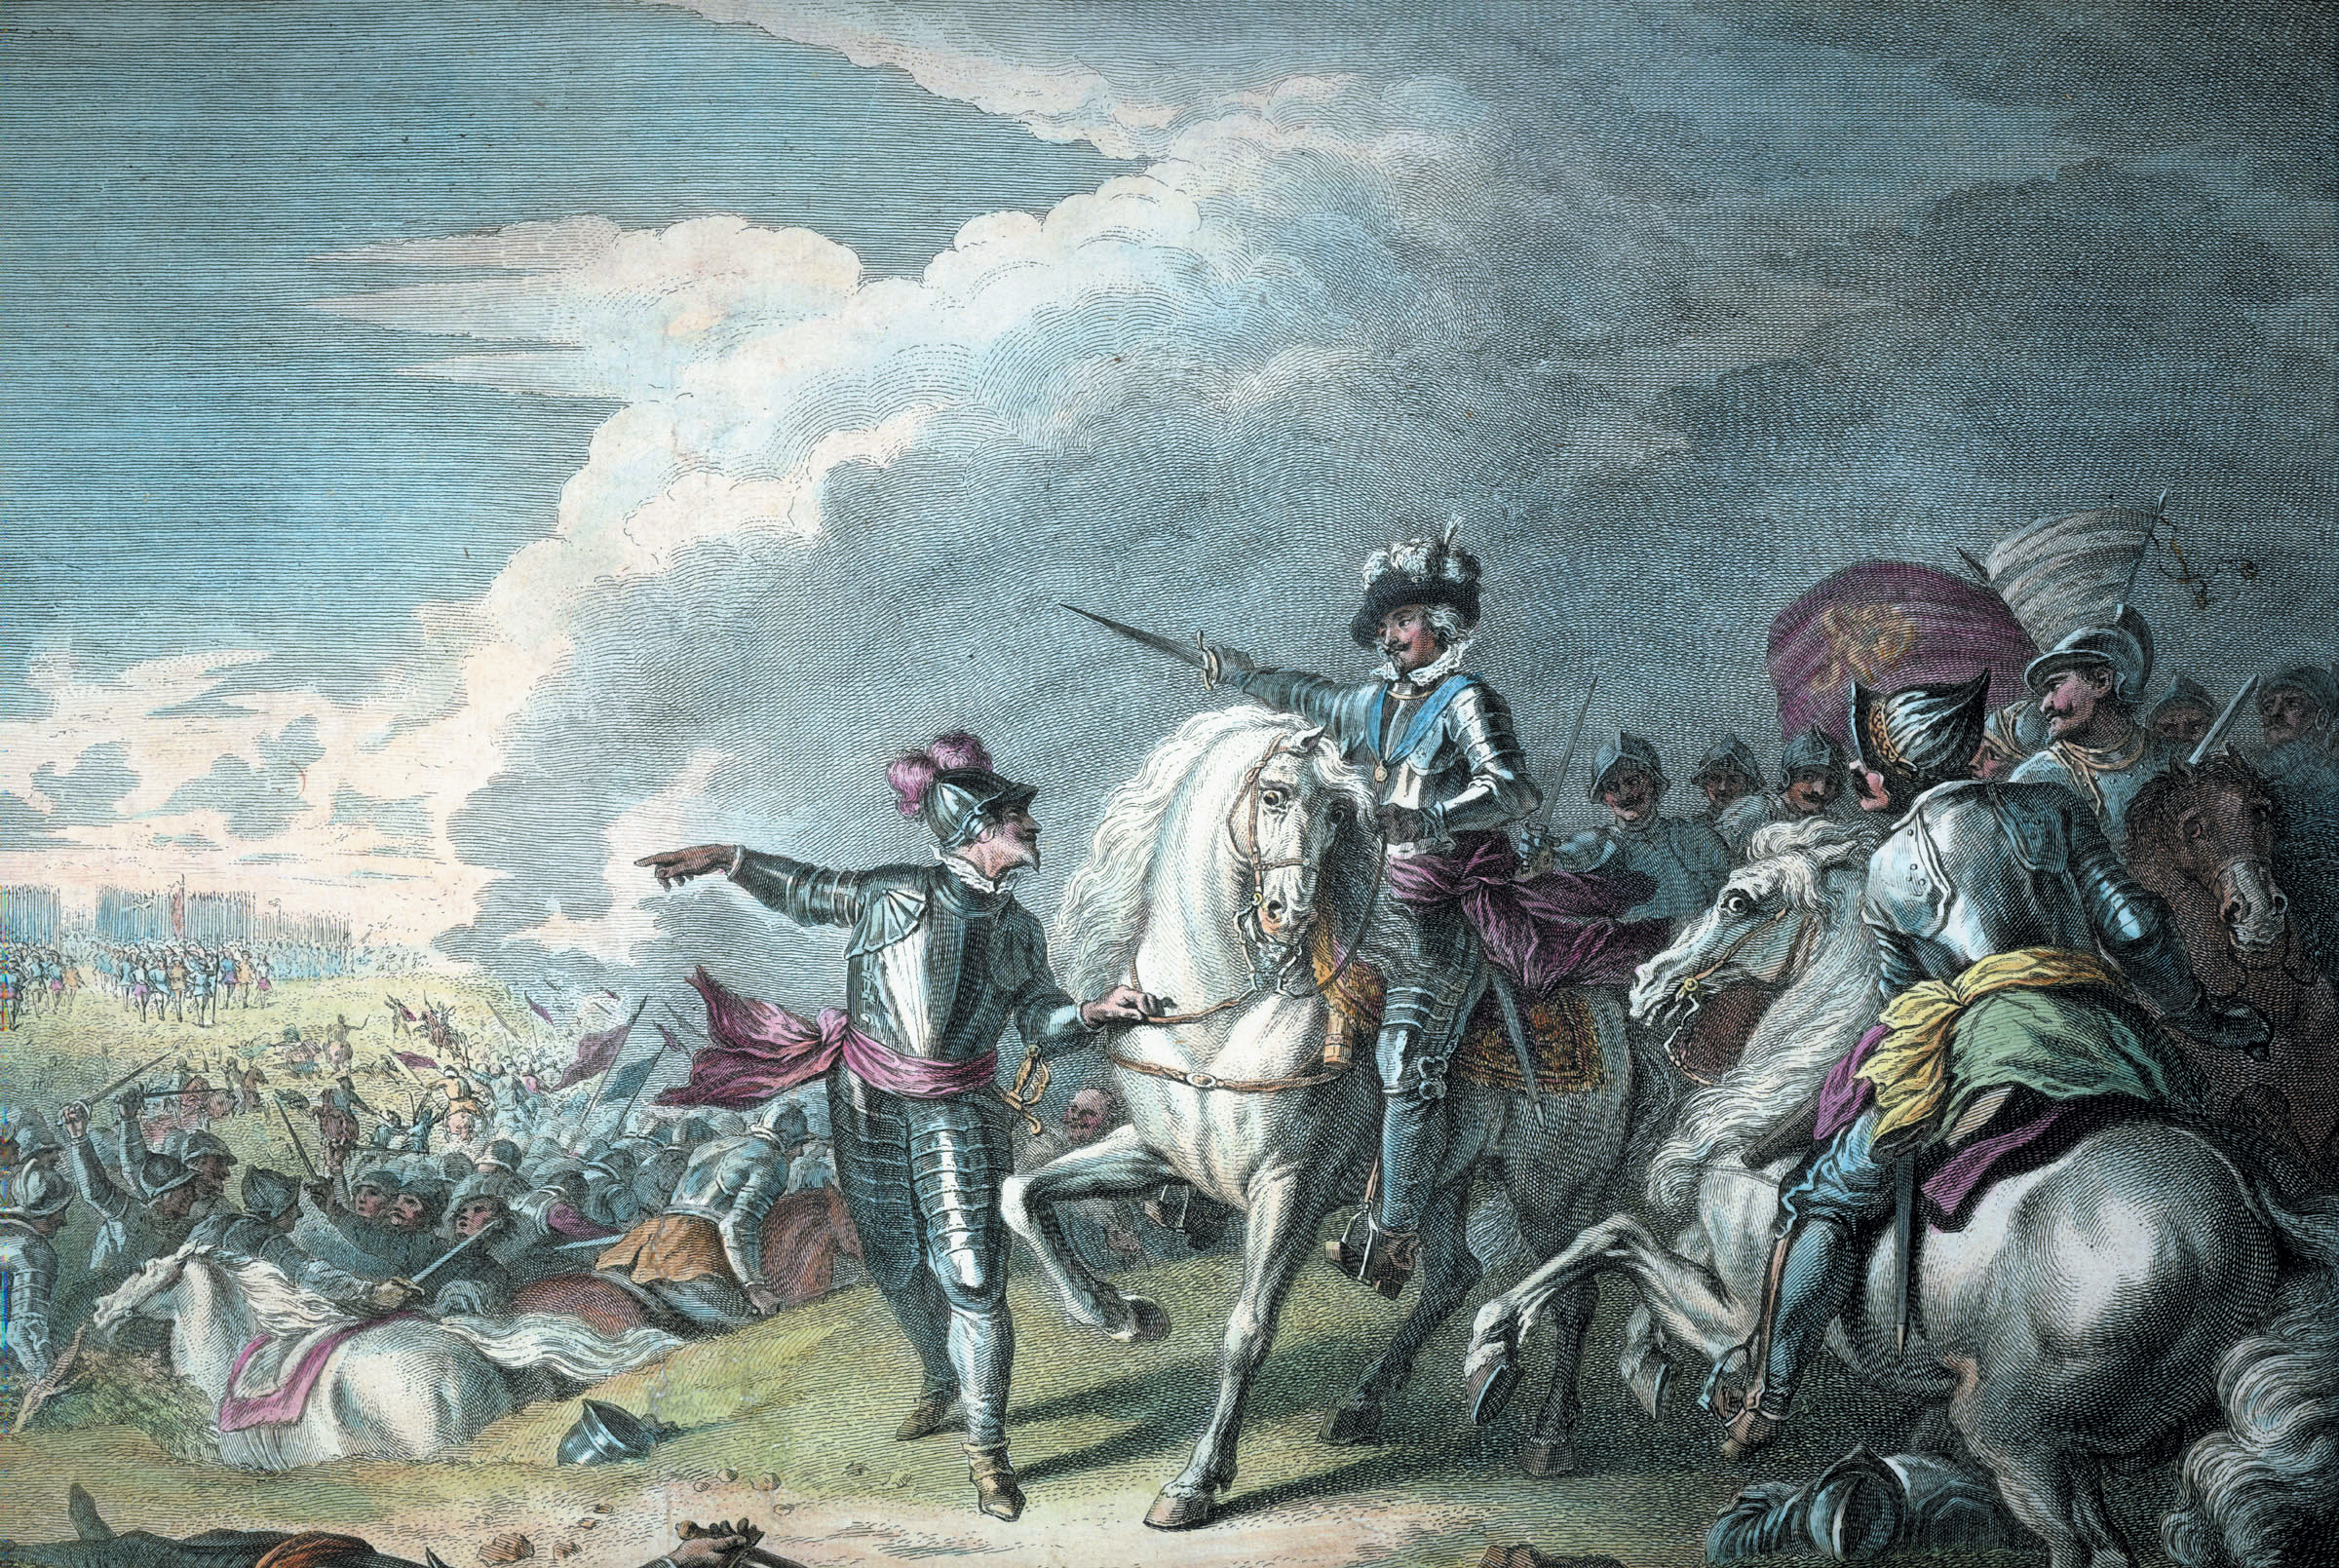
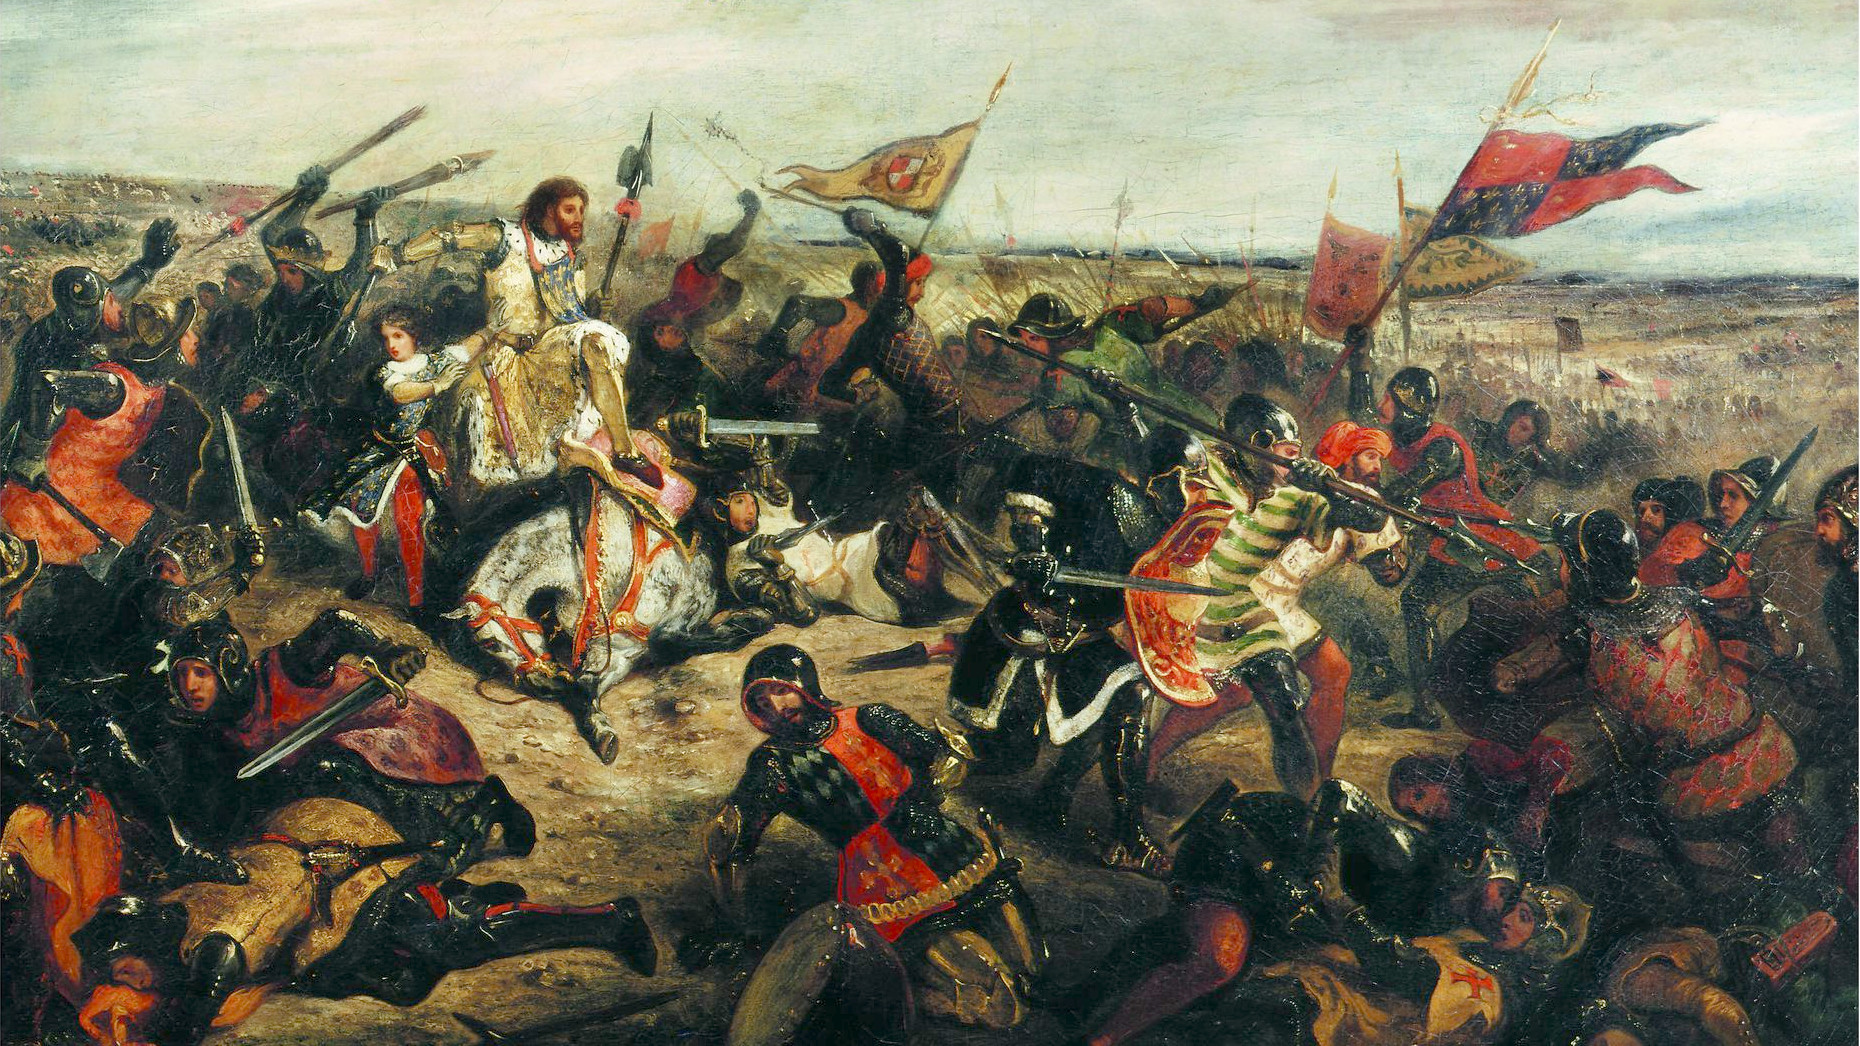
Realizing belatedly that the enemy was near and that he was badly outnumbered, Charles ordered a retreat on June 12. The king hoped to move north and gather reinforcements from Royalist garrisons in the region. The next day, pursuing New Model cavalry skirmished with the king’s rear guard at a small village called Naseby. Hearing of the fight at Naseby, the king called another council of war late that night. Over Rupert’s strong objections, the king elected to follow the advice of Lord Digby and others who argued that the king should stand and fight. Digby reasoned that the Royal army’s superior experience to that of the “New Noddle” would surely result in a great victory for Charles. “We shall have a battle of all for all,” Digby exclaimed excitedly. His words were more prophetic than he could have imagined.
The next day, June 14, the Royalist army assembled in a defensive stance facing south atop East Farndon Ridge, just north of Naseby. Fairfax, meanwhile, occupied another ridge four miles from the Royalist position. The field of action included a few small, cultivated enclosures, but was mostly made up of large open fields bounded by thick hedges. The area was virtually a moorland, boggy and full of undulating swales capable of concealing large bodies of men. To the northwest of Naseby was the 1,000-acre Turmore Field, also called Broad Moor, bounded on the west by Sulby Hedge and on the east by a large rabbit warren. The battlefield lay between two areas of higher ground—Mill Hill to the south and Dust Hill 1,000 yards farther north.
The Royalist position on East Farndon Ridge was well suited for defense by a smaller force. It was on rising ground running across the road to Market Harborough from Naseby. If Fairfax attempted a flanking attack from the west, he would expose himself to a similar attack from the high terrain in that direction. If he struck from the east, up the road from Kelmarsh to Market Harborough, the result would most likely be a full frontal assault by the enemy.
The king’s army, estimated at 3,300 infantry, 4,500 cavalry and 14 pieces of artillery, was drawn up on a front of some 2,500 yards, the foot soldiers stretched thin over half that distance. The infantry in the center, under Lord Astley, was organized in three brigades: Astley’s own brigade, Sir Henry Bard’s, and Colonel Sir George Lisle’s. Representing 24 regiments, the foot soldiers were organized in nine equal bodies, Astley’s brigade consisting of three divisions; Bard’s and Lisle’s of two divisions each. Three more divisions made up a second line of infantry. Colonel Thomas Howard’s cavalry brigade supported the Royalist footmen. His 880-man unit formed in three groups, one behind Astley’s center and the other two interspersed with the three divisions of infantry in the second line. On Rupert’s orders, 400 musketeers in groups of 50 were attached to the different cavalry commands on each wing of the army.
The cavalry formed on the army’s flanks in four brigades, the various regiments small in size but containing an equal number of squadrons. Prince Rupert personally commanded the right-wing cavalry, a force of 2,000 riders, with five squadrons in the first line and five in the second. Each line held about 1,000 troopers. Sir Marmaduke Langdale oversaw the left wing, also in two lines of about 1,600 troopers. Acting as a reserve were 800 men of the Newark Horse and 130 of the King’s Life Guard, along with two infantry regiments totaling 500 soldiers of the King’s Life Guard of Foot and Prince Rupert’s Regiment of Foot. The army’s artillery consisted of two mortars and 12 field pieces, including eight sakers. Two guns were held in reserve, six were placed in Astley’s first line and four in his second. The ordnance was employed in pairs.
Facing the king was the full brunt of the New Model Army, consisting of about 6,000 cavalry, 6,400 infantry, 1,000 dragoons, and nine artillery pieces. The cavalry, organized in 11 regiments, was deployed in two unbrigaded wings, the right headed by Oliver Cromwell, the left by Henry Ireton, Cromwell’s future son-in-law, who was also the army’s commissary general. Cromwell’s command was formed in three lines along a front about 800 yards wide. Ireton’s troopers formed two lines about 1,000 yards wide. The Parliamentary infantry regiments likewise were unbrigaded and drawn up in two lines, under the direction of Maj. Gen. Philip Skippon.
Four pairs of artillery guns were placed in intervals on the front line, while the remaining piece was posted near the center of the second line.
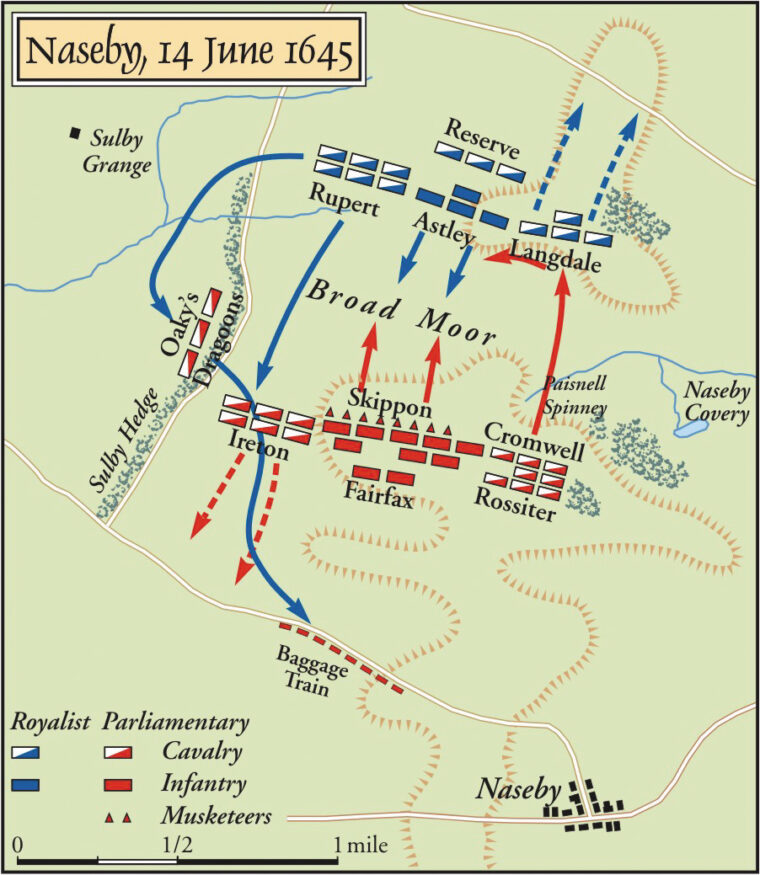
Fronting the rebel position was a group of 300 musketeers detailed from the line regiments. Dubbed with typical soldier humor the “Forlorn Hope,” they stood about 100 yards in advance of their waiting comrades.
At 9:30 am, Fairfax received word from Cromwell that he should move his army back a few hundred yards. “Let us, I beseech you, draw back to yonder hill which will encourage the enemy to charge us,” Cromwell advised. Not only would the movement encourage the Royalists to attack the Roundhead position, but it would also serve to hide the true position and strength of the New Model forces. Fairfax readily agreed and moved his main line back about 100 yards. At the same time, Cromwell ordered up Colonel John Okey’s 500 dragoons and placed them behind Sulby Hedge, at right angles to the Parliamentary line, where they could deliver a devastating musket fire into the flank of any advancing attackers.
As the New Model units began their retrograde movement, Prince Rupert arrived on the scene for a personal reconnaissance. Interpreting the tactical movement as a retreat, the prince thought he saw the opportunity to catch the enemy off balance by delivering a quick attack. He ordered the Royalists to abandon their strong position near Market Harborough and advance with all possible speed on the enemy.
The battle began in earnest about 10 am, when the king’s army made a general advance. As Fairfax’s men marched over the crest of Mill Hill to meet the king’s advance, his “Forlorn Hope” exchanged fire with the oncoming infantry and retreated back to the hill.
The Royalist army, especially Rupert’s cavalry, moved swiftly forward with determination, but stopped short after seeing Ireton’s cavalry descend Mill Hill. They then started moving once more and within two minutes crashed into Ireton’s horsemen, who were also coming on. Three of Ireton’s right-hand squadrons hit the enemy head-on and pushed them back.
After this stunning initial success, Ireton might have finished off Rupert’s first-line cavalry with a vigorous pursuit. Instead, he took his right-hand squadron and tried to strike the nearest Royalist infantry, the Duke of York’s, but succeeded only in getting himself unhorsed, wounded twice, and captured.
As its leader was being taken into custody by the enemy, the rest of the Roundhead cavalry pressed on and broke through the Royalist second line, only to be counterattacked immediately and driven back in confusion. Meanwhile, the Parliamentary cavalry on the left wing was also taking a drubbing. Although far outnumbered, the Life Guard regiments of Rupert and and his brother Maurice drove Colonel John Butler’s horsemen from the field, despite being sniped at by Okey’s dragoons on the Cavalier flank.
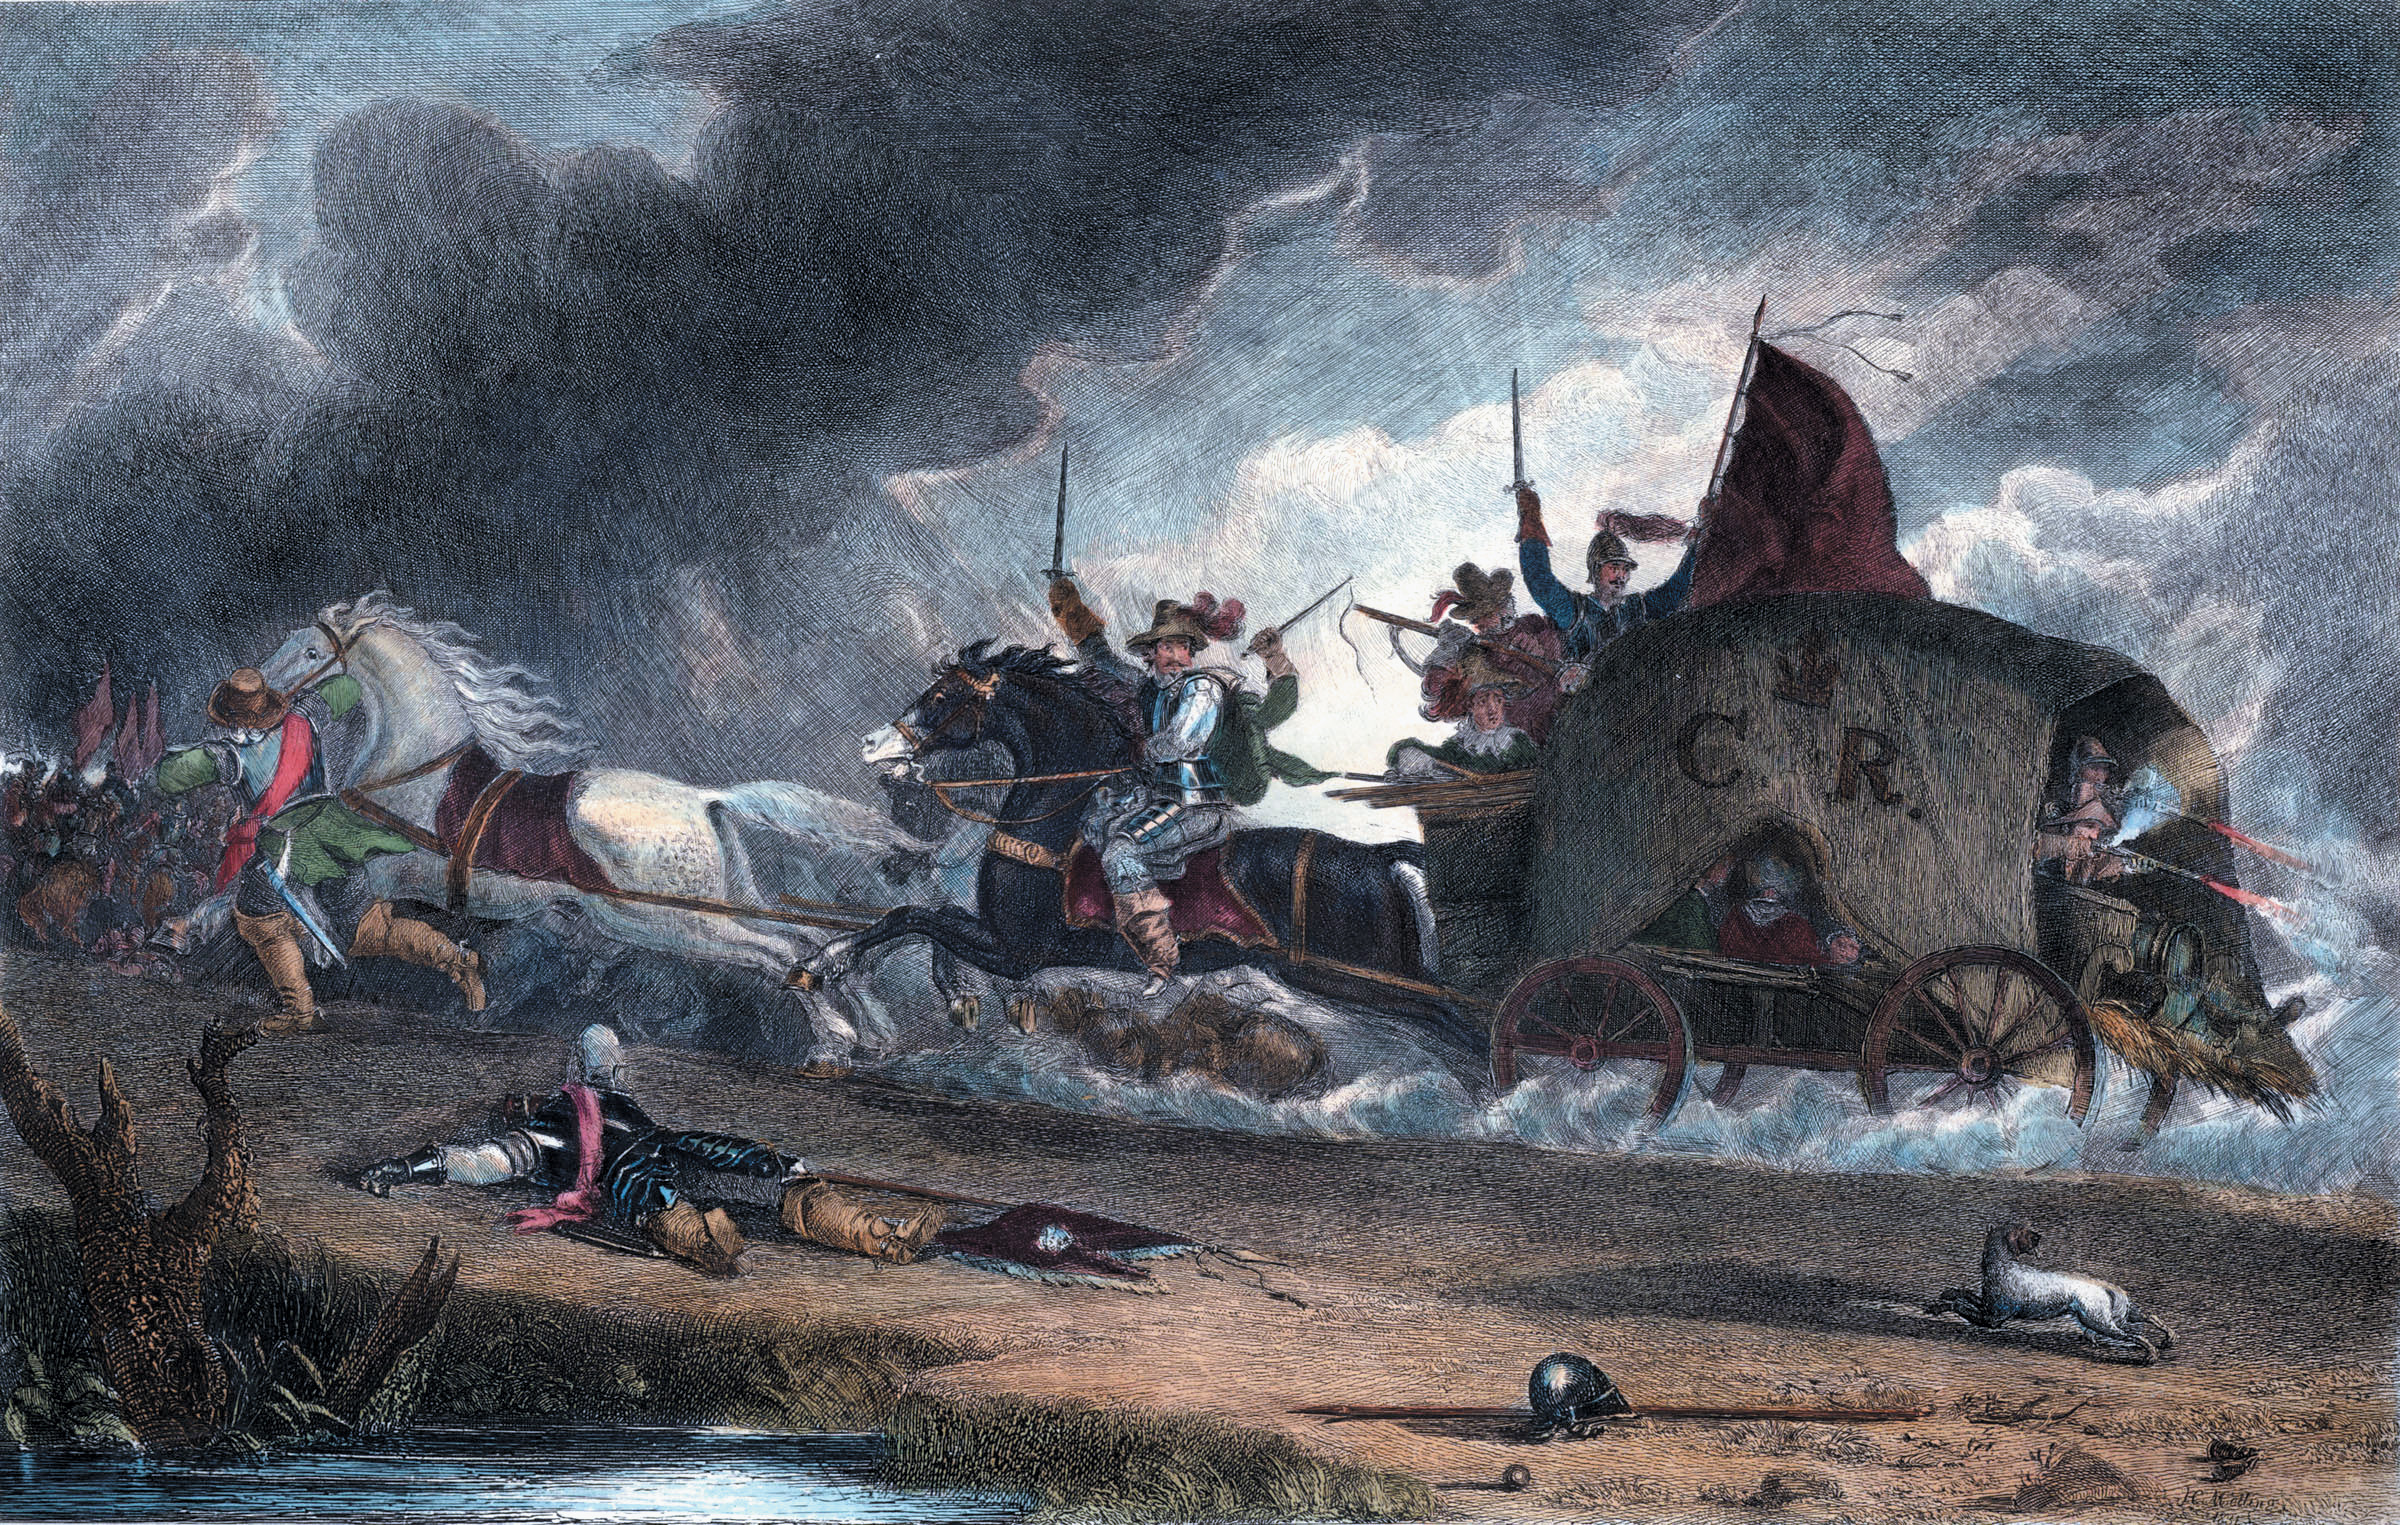
The remaining mounted forces on Rupert’s front continued to charge and countercharge—the prince himself leading many of the attacks—until the Royalist riders overthrew the rebel left. Following up his victory, the prince chased the defeated Roundhead cavalry almost to Naseby, nearly two miles from the battlefield. For the next half-hour he wasted valuable time trying unsuccessfully to capture the enemy baggage train. The battle was only 30 minutes old and the Cavaliers already had disposed of almost 3,000 enemy horsemen, but they had cancelled out their own advantage when Rupert rashly took himself out of the fight in a vainglorious scuffle over a baggage train.
As Ireton’s men fled the field, the Royalist infantry made good headway against the New Model footmen. The undulating ground hid both sides until the two lines came within musket shot of each other. Only one musket volley was delivered by each side before the combatants resorted to “push of pike and butt of musket.” The front line of the Parliament infantry (except for Fairfax’s Regiment, which was not engaged) was pressed backward. Skippon himself was badly wounded by a musketball to the stomach, but stayed on the field until the conclusion of the fight. The Duke of York’s regiment closed with the enemy, pressing it strongly.
As his first line of infantry fell back in disorder, Fairfax ordered his second line to mount an attack. Raging mad and bareheaded—his helmet had been knocked off in the close-hand fighting—Fairfax rallied his men with reckless courage, “more like an an angel than a man,” one soldier marveled later. Regiment after regiment joined the fray until the entire New Model infantry advanced to attack. Astley’s men put up a terrific defense, but greatly outnumbered, their left flank was now entirely exposed.
Meanwhile, on the Royalist left, Langdale had moved out at the same time as Rupert, leading his Northern Horse and some Newarkers. Oliver Cromwell, like Ireton before him, did not wait passively to be attacked, but sent his cousin, Colonel Edward Whalley, forward to strike the enemy and send them reeling back in disorder. Personally commanding his second line, Cromwell rallied to Whalley’s support. Laughing out loud in utter exhilaration, Cromwell charged through the rabbit warren and knocked the Royalist left to pieces. “I could not, riding alone about my business, but smile out to God in praise, in assurance of victory,” Cromwell recalled, “because God would, by things that are not, bring to naught things that are.” The Roundhead charge forced the king’s cavalry to fatally flee beyond supporting distance of their infantry.
With the Royalist infantry closely engaged with Fairfax’s men and their left still hanging in the air, Cromwell sent four cavalry regiments after Langdale’s routed force. He then launched the rest of his mounted command at the distracted enemy flank. At the same time, Okey mounted his dragoons and charged the right of the king’s infantry. Royalist resistance abruptly collapsed.
Watching the infantry’s overthrow from his position on Dust Hill, the king rallied his reserve (his mounted Life Guard and some of the Newark cavalry) and prepared to lead a charge on Cromwell. Just then, the Scottish Earl of Carnwarth raced up to the rattled monarch, grabbed hold of his bridle, and shouted, “Will you go upon your death?” The king hesitated. Someone called out, “March to your right hand!”—meaning, in the parlance of the day, every man for himself. The reserve took the message to heart and retreated about 500 yards. Seeing no friendly cavalry coming to their aid, the Royalist foot soldiers began breaking apart, some trying to escape, others begging for quarter.
By now Rupert had returned to the field and led his exhausted men to the Royalist left, where Langdale was attempting to rally what remained of his troopers. Despite the urging of both the prince and Langdale, the dispirited horsemen refused adamantly to renew the attack. As one onlooker, the king’s personal secretary, Sir Edward Walker, remembered later, “They having done their part, and not being in order, could never be brought to charge again.” Instead, they watched wordlessly as the infantry below them was destroyed, then rode away to cover the king’s retreat to Leicester and eventually the Welsh border.
The three-hour battle ended about 1 pm with the loss of all the king’s infantry and artillery. About 100 Royalist cavalry officers were casualties, and 900 horsemen were killed outright. At least 2,000 infantry were taken prisoner. Parliamentary killed and wounded amounted to 350 men, mostly from Ireton’s cavalry. The human cost of the king’s defeat was summed up by one eyewitness, who later recorded that “I saw a field so bestrewed with carcasses of horses and men as was most sad to behold.”
Not the biggest battle—or the last—of the English Civil War (the conflict would see a few more minor skirmishes, and the king himself would not give up until May 1646), Naseby nevertheless put an end to Charles’s hopes of ever ruling his nation again. The Parliamentary victory, helped immeasurably by the steadiness and resolve of Lord Fairfax and Oliver Cromwell, insured that the king would never again mount a realistic threat to the Roundhead cause. From Dust Hill at Naseby in June 1645, it was a slow, melancholy descent for Charles to the executioner’s black-draped chopping block at Whitehall on a cold January morning in 1649.

Join The Conversation
Comments
View All Comments